Crochet Jack-O-Lantern Pattern with Witch Hat
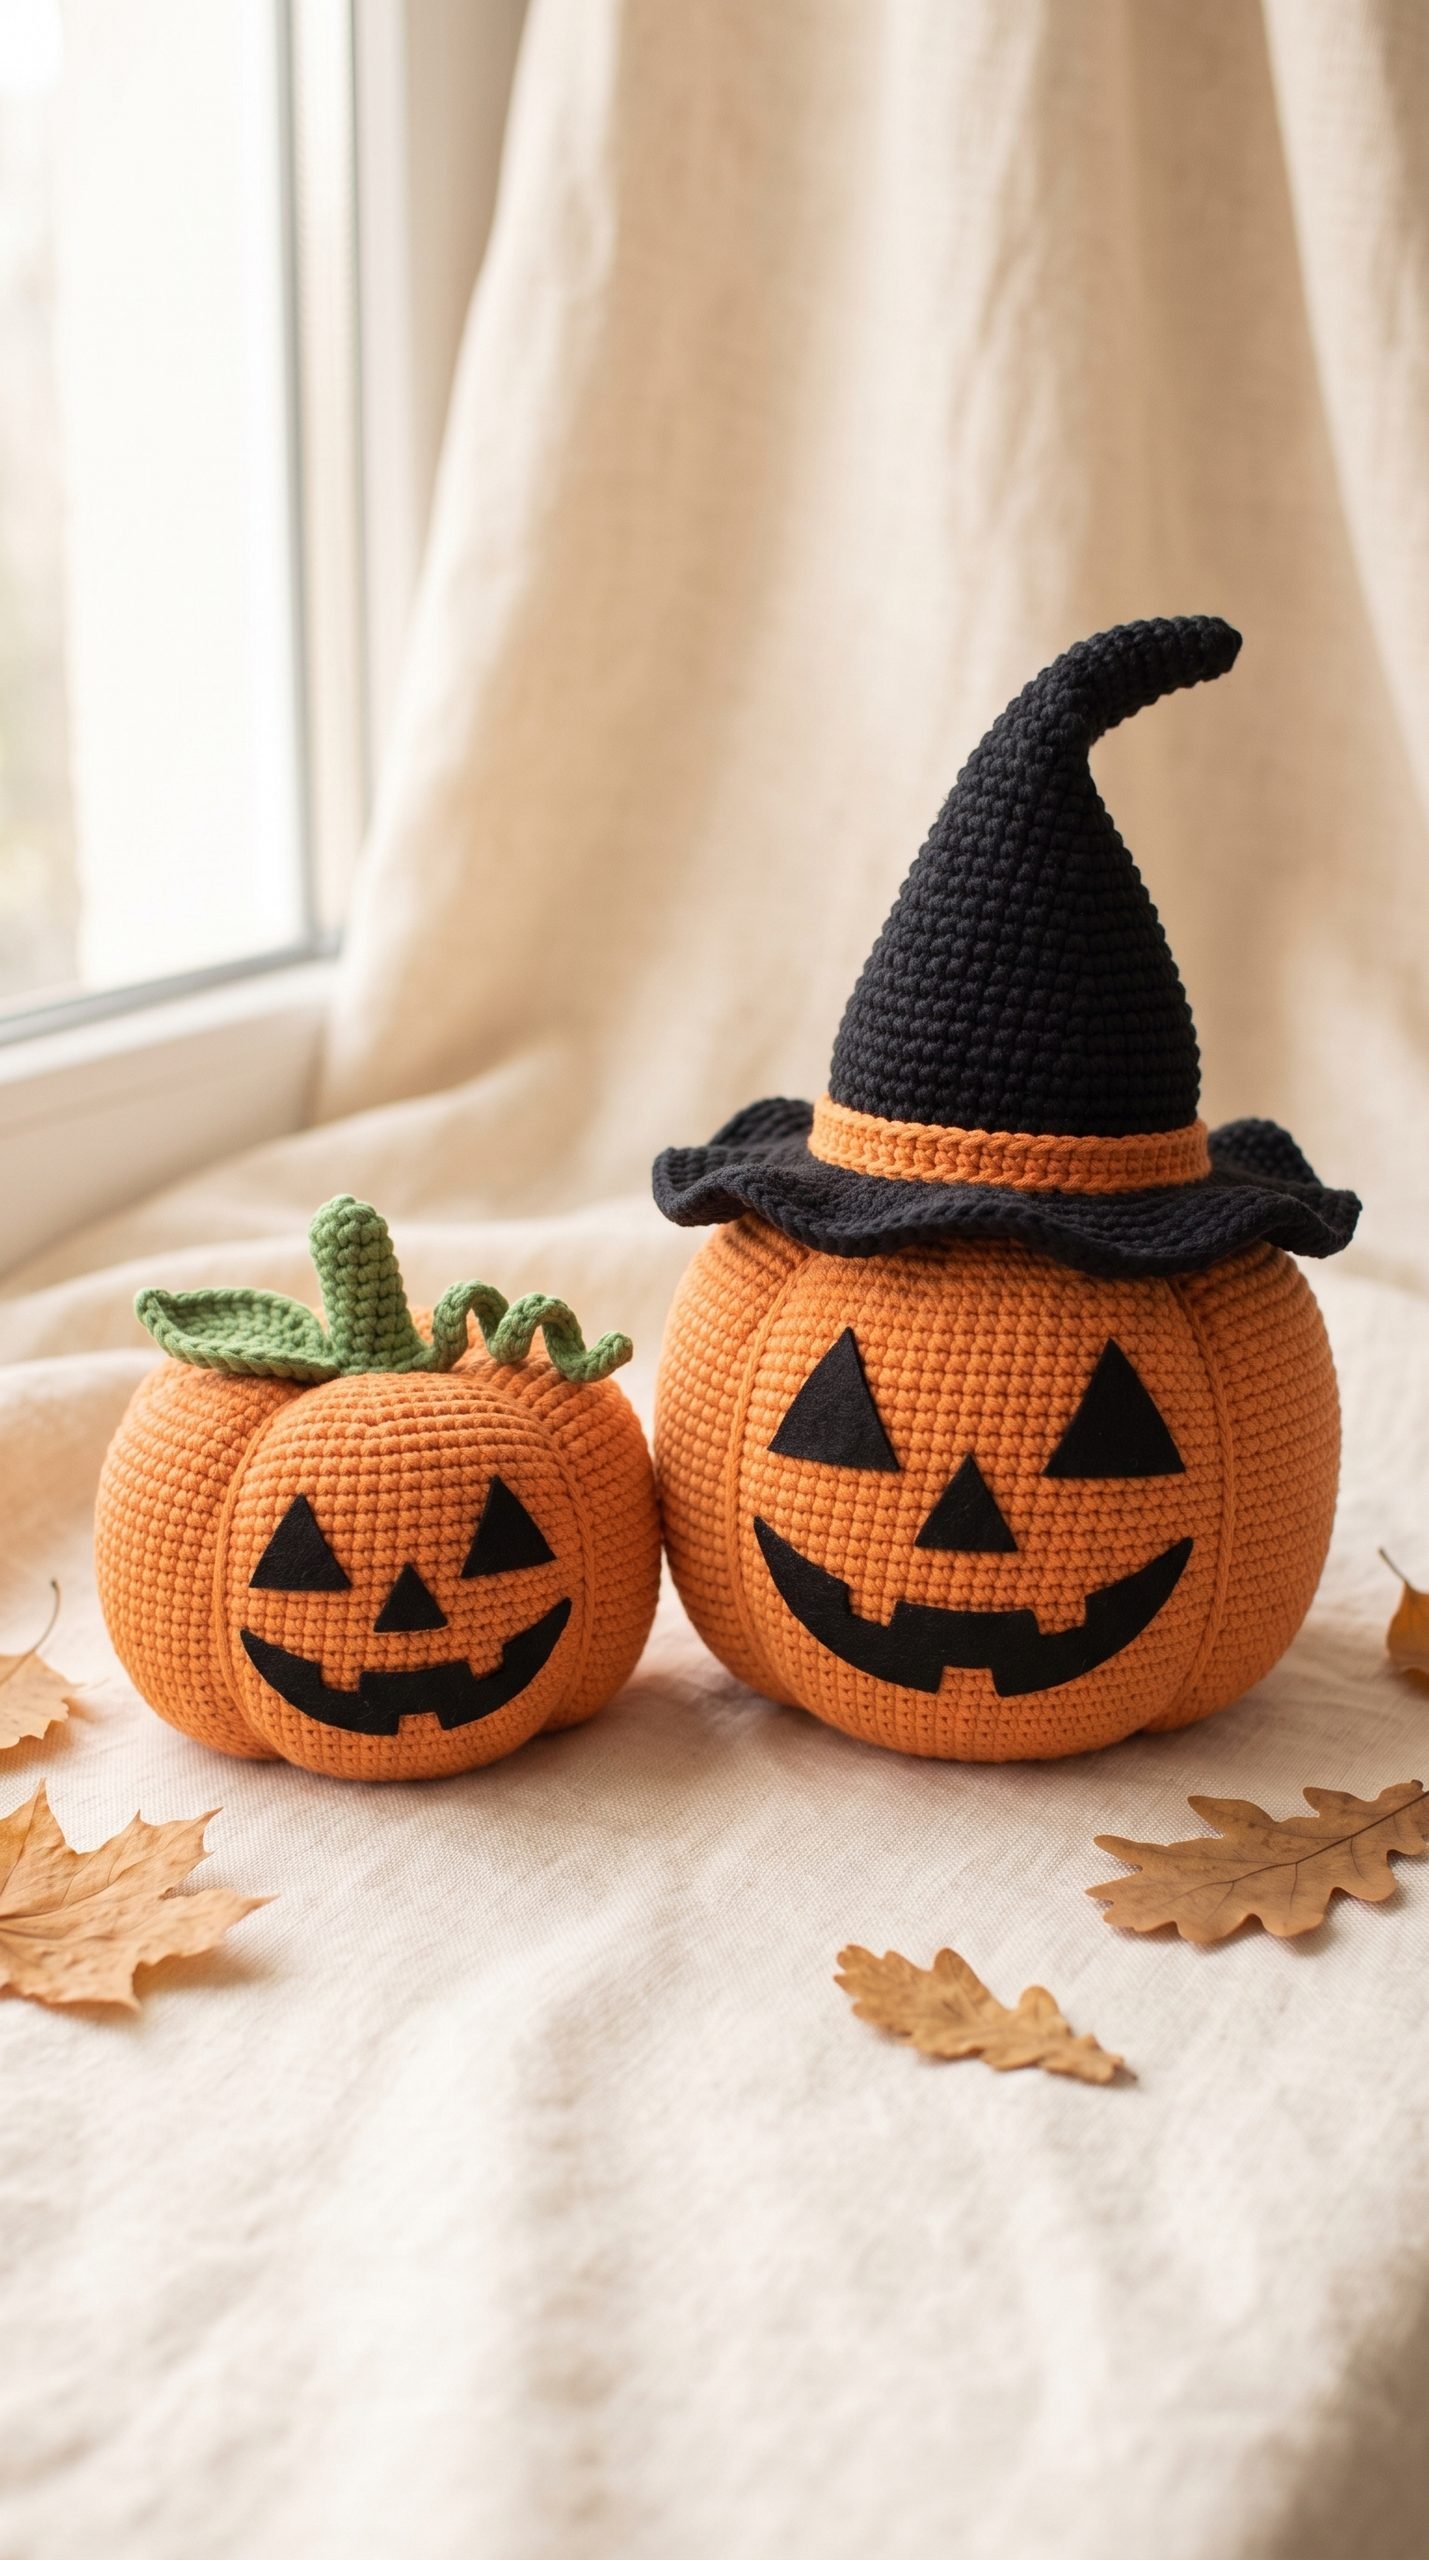
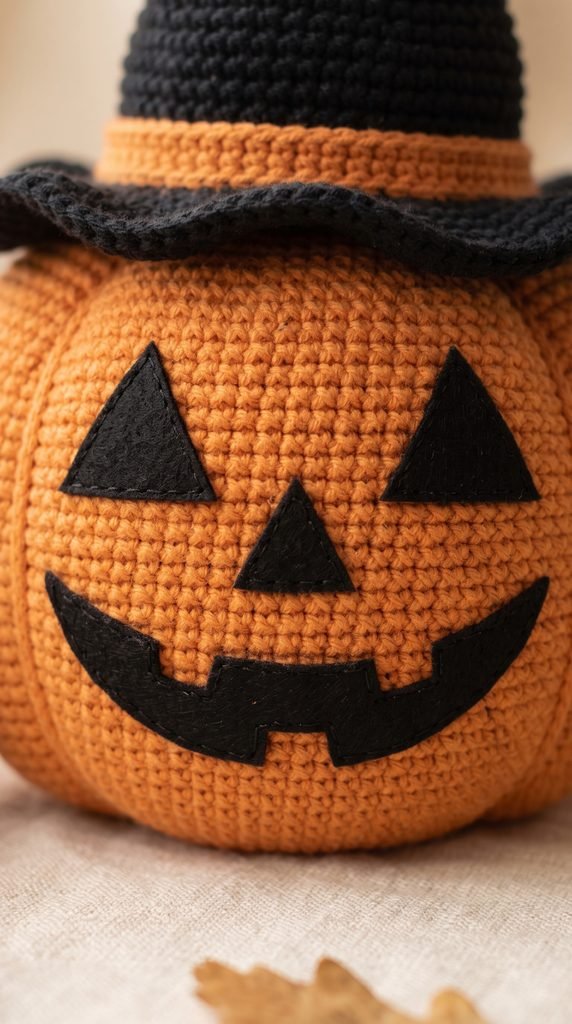
This crochet jack-o-lantern pattern makes a cheerful pair of Halloween decorations: a larger pumpkin wearing a floppy witch hat and a smaller pumpkin with a curled green vine.
Their orange bodies use simple amigurumi rounds. Sewn felt faces add the classic jack-o’-lantern look without complicated colorwork.
Make the larger pumpkin as a statement piece, or crochet both for a matching fall display. The basic bodies suit confident beginners, while the hat and finishing require a little more patience.

Project Details
- Skill Level: Confident beginner to intermediate
- Estimated Time: Approximately 4–6 hours for the large pumpkin and hat; 1½–2½ hours for the small pumpkin
- Finished Size: Large pumpkin approximately 4–5 inches wide; small pumpkin approximately 3–3½ inches wide
- Crochet Terminology: US terms
- Construction Method: Stuffed bodies worked in continuous rounds, with separate sewn-on accessories and felt faces
This written pattern has not been physically tested. Finished measurements, yarn quantities, and completion times are estimates.
Materials
For the complete pair, you will need:
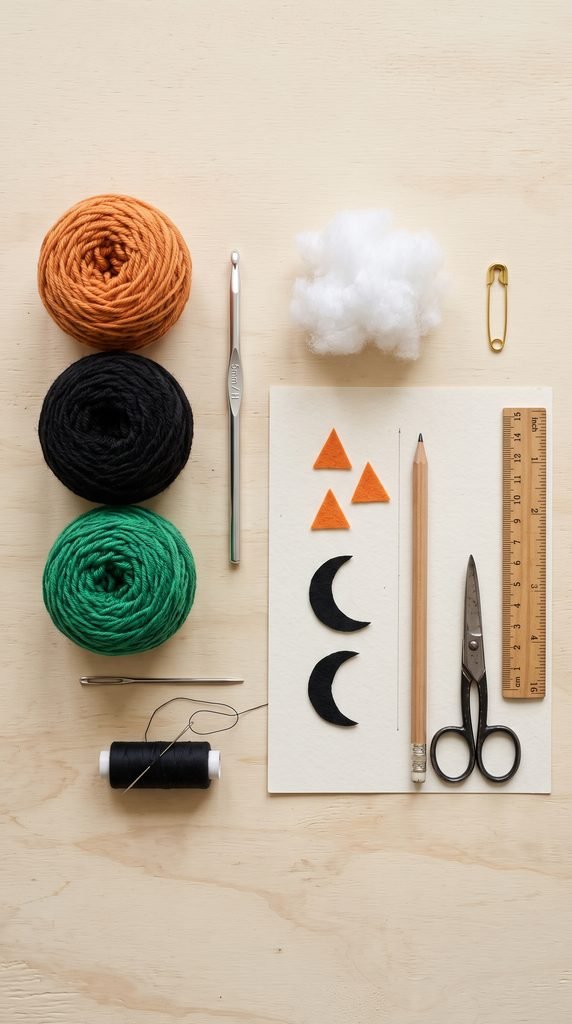
- Medium-weight orange, black, and green yarn
- 3.5 mm (E-4) crochet hook
- Polyester fiberfill
- Removable stitch marker
- Blunt yarn needle
- Sharp sewing needle
- Black sewing thread
- Black felt, approximately 4 × 6 inches
- Scissors
- Ruler or measuring tape
- Paper and pencil for face templates
The felt pieces are sewn on. No glue, wire, or plastic eyes are needed.
Hook Size
Use a 3.5 mm (E-4) crochet hook.
Your stitches should be close enough to hide the stuffing. If the fabric has noticeable gaps, try a smaller hook.
Keep the same hook size for the pumpkin bodies and accessories so their proportions remain consistent.
Yarn
Use category 4, medium/worsted yarn in smooth acrylic or a cotton blend.
For both pumpkins and their accessories, allow approximately:
- Orange: 170–220 yards
- Black: 70–100 yards
- Green: 8–12 yards
These estimates include sewing yarn and the orange hatband.
Choose a smooth yarn with clear stitch definition. Thick chenille will change the size and fit of the pieces and is not a direct substitute.
Abbreviations
This pattern uses US crochet terminology:
- ch = chain
- sc = single crochet
- sl st = slip stitch
- inc = increase; work 2 sc in the same stitch
- dec = single crochet decrease over 2 stitches
- FLO = front loop only
- st(s) = stitch(es)
Before You Start
Work in continuous rounds unless a joining instruction is given. Do not turn between rounds.
Place a stitch marker in the first stitch of each round and move it upward as you work.
Instructions inside brackets are repeated the stated number of times. Beginning chains and finishing slip stitches do not count as stitches.
Invisible decrease: Insert your hook under the front loop of the next stitch and then the front loop of the following stitch. Yarn over and pull through both front loops. Yarn over and pull through the two remaining loops.
Front loop only: Work under the top loop closest to you, leaving the other loop unused.
Gauge: Exact gauge is not essential for these decorations. Aim for dense, flexible fabric and consistent tension.
Leave a 6-inch starting tail for each chain-2 start. If a small center opening remains, use the tail to draw the surrounding stitches together and secure it before stuffing.
Crochet Jack-O-Lantern Pattern Instructions
Part 1 — Crochet the Large Pumpkin
Using orange yarn, ch 2.
Round 1: Work 6 sc into the second ch from the hook. 6 sts.
Round 2: Inc in each stitch around. 12 sts.
Round 3: Repeat [sc in the next stitch, inc] 6 times. 18 sts.
Round 4: Repeat [sc in the next 2 stitches, inc] 6 times. 24 sts.
Round 5: Repeat [sc in the next 3 stitches, inc] 6 times. 30 sts.
Round 6: Repeat [sc in the next 4 stitches, inc] 6 times. 36 sts.
Round 7: Repeat [sc in the next 5 stitches, inc] 6 times. 42 sts.
Round 8: Repeat [sc in the next 6 stitches, inc] 6 times. 48 sts.
Round 9: Repeat [sc in the next 7 stitches, inc] 6 times. 54 sts.
Round 10: Repeat [sc in the next 8 stitches, inc] 6 times. 60 sts.
Rounds 11–18: Sc in each stitch around. 60 sts per round.
Round 19: Repeat [sc in the next 8 stitches, dec] 6 times. 54 sts.
Round 20: Repeat [sc in the next 7 stitches, dec] 6 times. 48 sts.
Round 21: Repeat [sc in the next 6 stitches, dec] 6 times. 42 sts.
Round 22: Repeat [sc in the next 5 stitches, dec] 6 times. 36 sts.
Begin stuffing with small pieces of fiberfill.
Round 23: Repeat [sc in the next 4 stitches, dec] 6 times. 30 sts.
Round 24: Repeat [sc in the next 3 stitches, dec] 6 times. 24 sts.
Add more stuffing. Keep the pumpkin rounded but still slightly compressible.
Round 25: Repeat [sc in the next 2 stitches, dec] 6 times. 18 sts.
Round 26: Repeat [sc in the next stitch, dec] 6 times. 12 sts.
Round 27: Dec 6 times. 6 sts.
Fasten off, leaving a 12-inch tail.
Thread the tail through the front loops of the remaining six stitches. Pull closed, secure, and bury the tail.
The starting end is the bottom. The final closure is the top.
Part 2 — Shape the Base
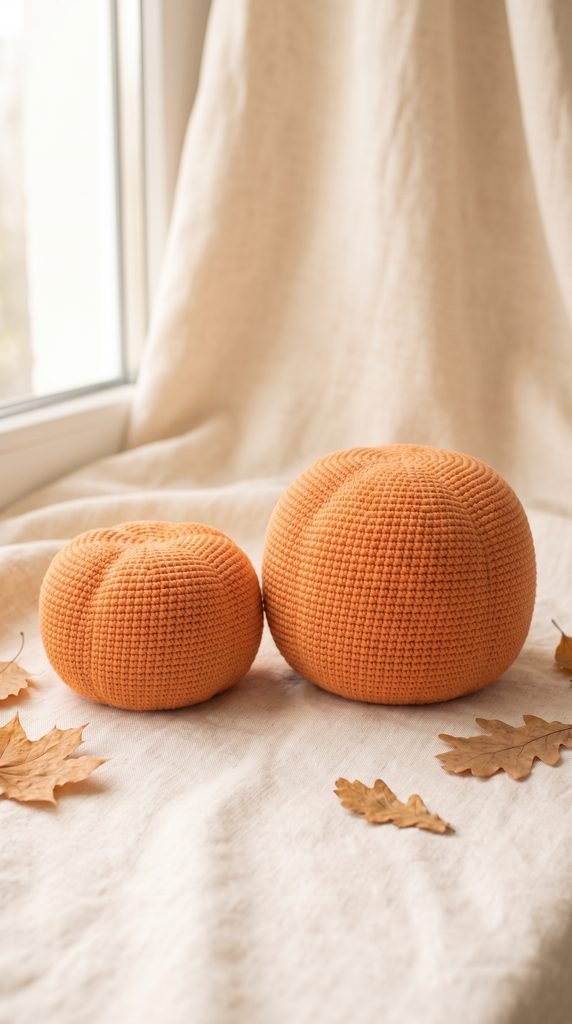
Gently press the pumpkin against a flat surface.
Move some stuffing away from the bottom center with your fingers to create a softly flattened base. Keep the front rounded for the face.
This design has a smooth body. No outside shaping strands are needed.
Part 3 — Crochet the Witch Hat
Using black yarn, ch 2.
Round 1: Work 6 sc into the second ch from the hook. 6 sts.
Round 2: Sc in each stitch around. 6 sts.
Round 3: Repeat [sc in the next stitch, inc] 3 times. 9 sts.
Round 4: Sc in each stitch around. 9 sts.
Round 5: Repeat [sc in the next 2 stitches, inc] 3 times. 12 sts.
Round 6: Sc in each stitch around. 12 sts.
Round 7: Repeat [sc in the next 3 stitches, inc] 3 times. 15 sts.
Round 8: Sc in each stitch around. 15 sts.
Round 9: Repeat [sc in the next 4 stitches, inc] 3 times. 18 sts.
Round 10: Sc in each stitch around. 18 sts.
Round 11: Repeat [sc in the next 5 stitches, inc] 3 times. 21 sts.
Round 12: Sc in each stitch around. 21 sts.
Round 13: Repeat [sc in the next 6 stitches, inc] 3 times. 24 sts.
Round 14: Sc in each stitch around. 24 sts.
Round 15: Repeat [sc in the next 3 stitches, inc] 6 times. 30 sts.
Round 16: Sc in each stitch around. 30 sts.
Round 17: Repeat [sc in the next 4 stitches, inc] 6 times. 36 sts.
Round 18: Sc in each stitch around. 36 sts.
Round 19: Repeat [sc in the next 5 stitches, inc] 6 times. 42 sts.
Round 20: Sc in each stitch around. 42 sts.
On the last stitch of Round 20, complete the final pull-through with orange yarn.
Part 4 — Add the Hatband and Brim
Rounds 21–22: Using orange yarn, sc in each stitch around. 42 sts per round.
On the last stitch of Round 22, complete the final pull-through with black yarn. Cut the orange yarn, leaving a tail for weaving in.
Round 23: Working in FLO, repeat [sc in the next 2 stitches, inc] 14 times. 56 sts.
Round 24: Working through both loops, repeat [sc in the next 3 stitches, inc] 14 times. 70 sts.
Round 25: Sc in each stitch around. 70 sts.
Sl st into the next stitch and fasten off.
Weave the color-change tails into the inside of the hat. Leave the hat unstuffed so its cone and brim can bend naturally.
Part 5 — Give the Hat a Floppy Tip
Bend the upper portion of the cone to one side.
If it will not hold the bend, use a short length of black yarn to make two small securing stitches between the inside of the bent tip and the adjacent cone fabric.
Keep these stitches on the underside of the bend. Secure and hide the yarn ends inside.
The hat does not need wire.
Part 6 — Crochet the Small Pumpkin
Using orange yarn, ch 2.
Round 1: Work 6 sc into the second ch from the hook. 6 sts.
Round 2: Inc in each stitch around. 12 sts.
Round 3: Repeat [sc in the next stitch, inc] 6 times. 18 sts.
Round 4: Repeat [sc in the next 2 stitches, inc] 6 times. 24 sts.
Round 5: Repeat [sc in the next 3 stitches, inc] 6 times. 30 sts.
Round 6: Repeat [sc in the next 4 stitches, inc] 6 times. 36 sts.
Round 7: Repeat [sc in the next 5 stitches, inc] 6 times. 42 sts.
Rounds 8–13: Sc in each stitch around. 42 sts per round.
Round 14: Repeat [sc in the next 5 stitches, dec] 6 times. 36 sts.
Round 15: Repeat [sc in the next 4 stitches, dec] 6 times. 30 sts.
Begin stuffing.
Round 16: Repeat [sc in the next 3 stitches, dec] 6 times. 24 sts.
Round 17: Repeat [sc in the next 2 stitches, dec] 6 times. 18 sts.
Adjust the stuffing before the opening becomes too small.
Round 18: Repeat [sc in the next stitch, dec] 6 times. 12 sts.
Round 19: Dec 6 times. 6 sts.
Fasten off, leaving an 8-inch tail. Thread it through the front loops of the remaining stitches, pull closed, secure, and bury the tail.
Shape the base gently so the pumpkin sits upright.
Part 7 — Make the Green Stem
Using green yarn, ch 2.
Round 1: Work 6 sc into the second ch from the hook. 6 sts.
Rounds 2–5: Sc in each stitch around. 6 sts per round.
Sl st into the next stitch and fasten off, leaving a 12-inch tail.
Keep the stem unstuffed. Sew its open end to the top center of the small pumpkin.
Secure the yarn and bury the tail.
Part 8 — Add a Curled Vine
Using green yarn, ch 13.
Work 2 sc into the second ch from the hook and each remaining chain. 24 sts.
Fasten off, leaving a 12-inch tail.
Gently wrap the strip around a finger to encourage the curl. Sew one end beside the stem with several small stitches.
Leave the rest of the vine free.
Part 9 — Make the Felt Faces

Choose the front of each pumpkin. For the larger one, position the hat temporarily before deciding where the eyes should sit.
Start with paper templates so you can adjust the face without wasting felt.
Large pumpkin:
- Two triangular eyes, approximately ¾ inch wide and ¾ inch tall
- One triangular nose, approximately ½ inch wide and ½ inch tall
- One curved mouth, approximately 2 inches wide and ¾ inch tall
Small pumpkin:
- Two triangular eyes, approximately ½ inch wide and ½ inch tall
- One triangular nose, approximately ⅜ inch wide and ⅜ inch tall
- One curved mouth, approximately 1¼ inches wide and ½ inch tall
Treat these as starting dimensions. Adjust them to your actual pumpkins.
For the mouth, draw a wide upward-curving crescent. Cut one small rectangular notch down from its upper edge to create the appearance of an orange tooth. Add a second notch from the lower edge if desired.
Keep a continuous strip of felt between the notches so the mouth remains one piece.
Hold the paper shapes against the pumpkin and adjust the spacing. When satisfied, trace them onto black felt and cut them out.
Part 10 — Sew the Faces
Use black sewing thread and a sharp sewing needle.
- Position the eyes, leaving enough space for the nose between and below them.
- Sew around each eye with small stitches close to its edge.
- Attach the nose in the same way.
- Position the mouth below the nose and sew around its entire outline, including the tooth notches.
Catch the orange crochet fabric without pulling it into deep dimples.
Secure each thread end beneath a felt piece or within the crochet fabric. Trim any visible excess thread.
Part 11 — Attach the Witch Hat
Place the hat on the large pumpkin at a slight angle. Keep the brim above the eyes.
Using black yarn, sew the base of the cone to the pumpkin just inside the brim.
Work around the attachment with small stitches through both fabrics. Leave the outer brim free so it can curve and wave.
Check that the hat is secure, then fasten off and bury the yarn ends.
Finishing
Inspect all felt edges and accessory attachments. Add small stitches wherever an edge lifts away from the crochet fabric.
Adjust the stuffing with your fingers, flatten the bases, and shape the hat brim.
Weave in any remaining ends.
Wet blocking is unnecessary for the stuffed pumpkins. Follow the yarn and felt care instructions when cleaning; spot cleaning may be the simplest option.
Finished Size
Approximate measurements are:
- Large pumpkin body: 4–5 inches wide and 3½–4½ inches tall
- Large pumpkin with hat: Approximately 7–9 inches tall, depending on the bend
- Small pumpkin body: 3–3½ inches wide and 2½–3 inches tall
- Small pumpkin stem: Approximately ¾–1 inch tall
Your yarn, tension, stuffing, and shaping will affect the final dimensions.
Tips and Customization
- Use burnt orange yarn for a softer autumn palette.
- Try a purple hatband instead of orange.
- Give the pumpkins different expressions by changing the eye angles or mouth shape.
- Skip the faces for decorations that work throughout the fall season.
- Use the same yarn and hook for both pumpkins to keep their sizes proportional.
- Make paper face templates first, especially if your finished dimensions differ from the estimates.
These pumpkins are decorative items, not lanterns. Do not place candles or heating elements inside or beneath them.
Keep small sewn-on pieces away from babies and young children.
Looking for Your Next Crochet Project?
Love making little Halloween characters? Explore Cute Stitch Studio’s premium crochet patterns for more cute seasonal decorations, cozy projects, and thoughtful handmade gifts.
Shop Crochet Patterns
Related Articles
For a small embellishment project, try our easy crochet heart pattern for beginners.