

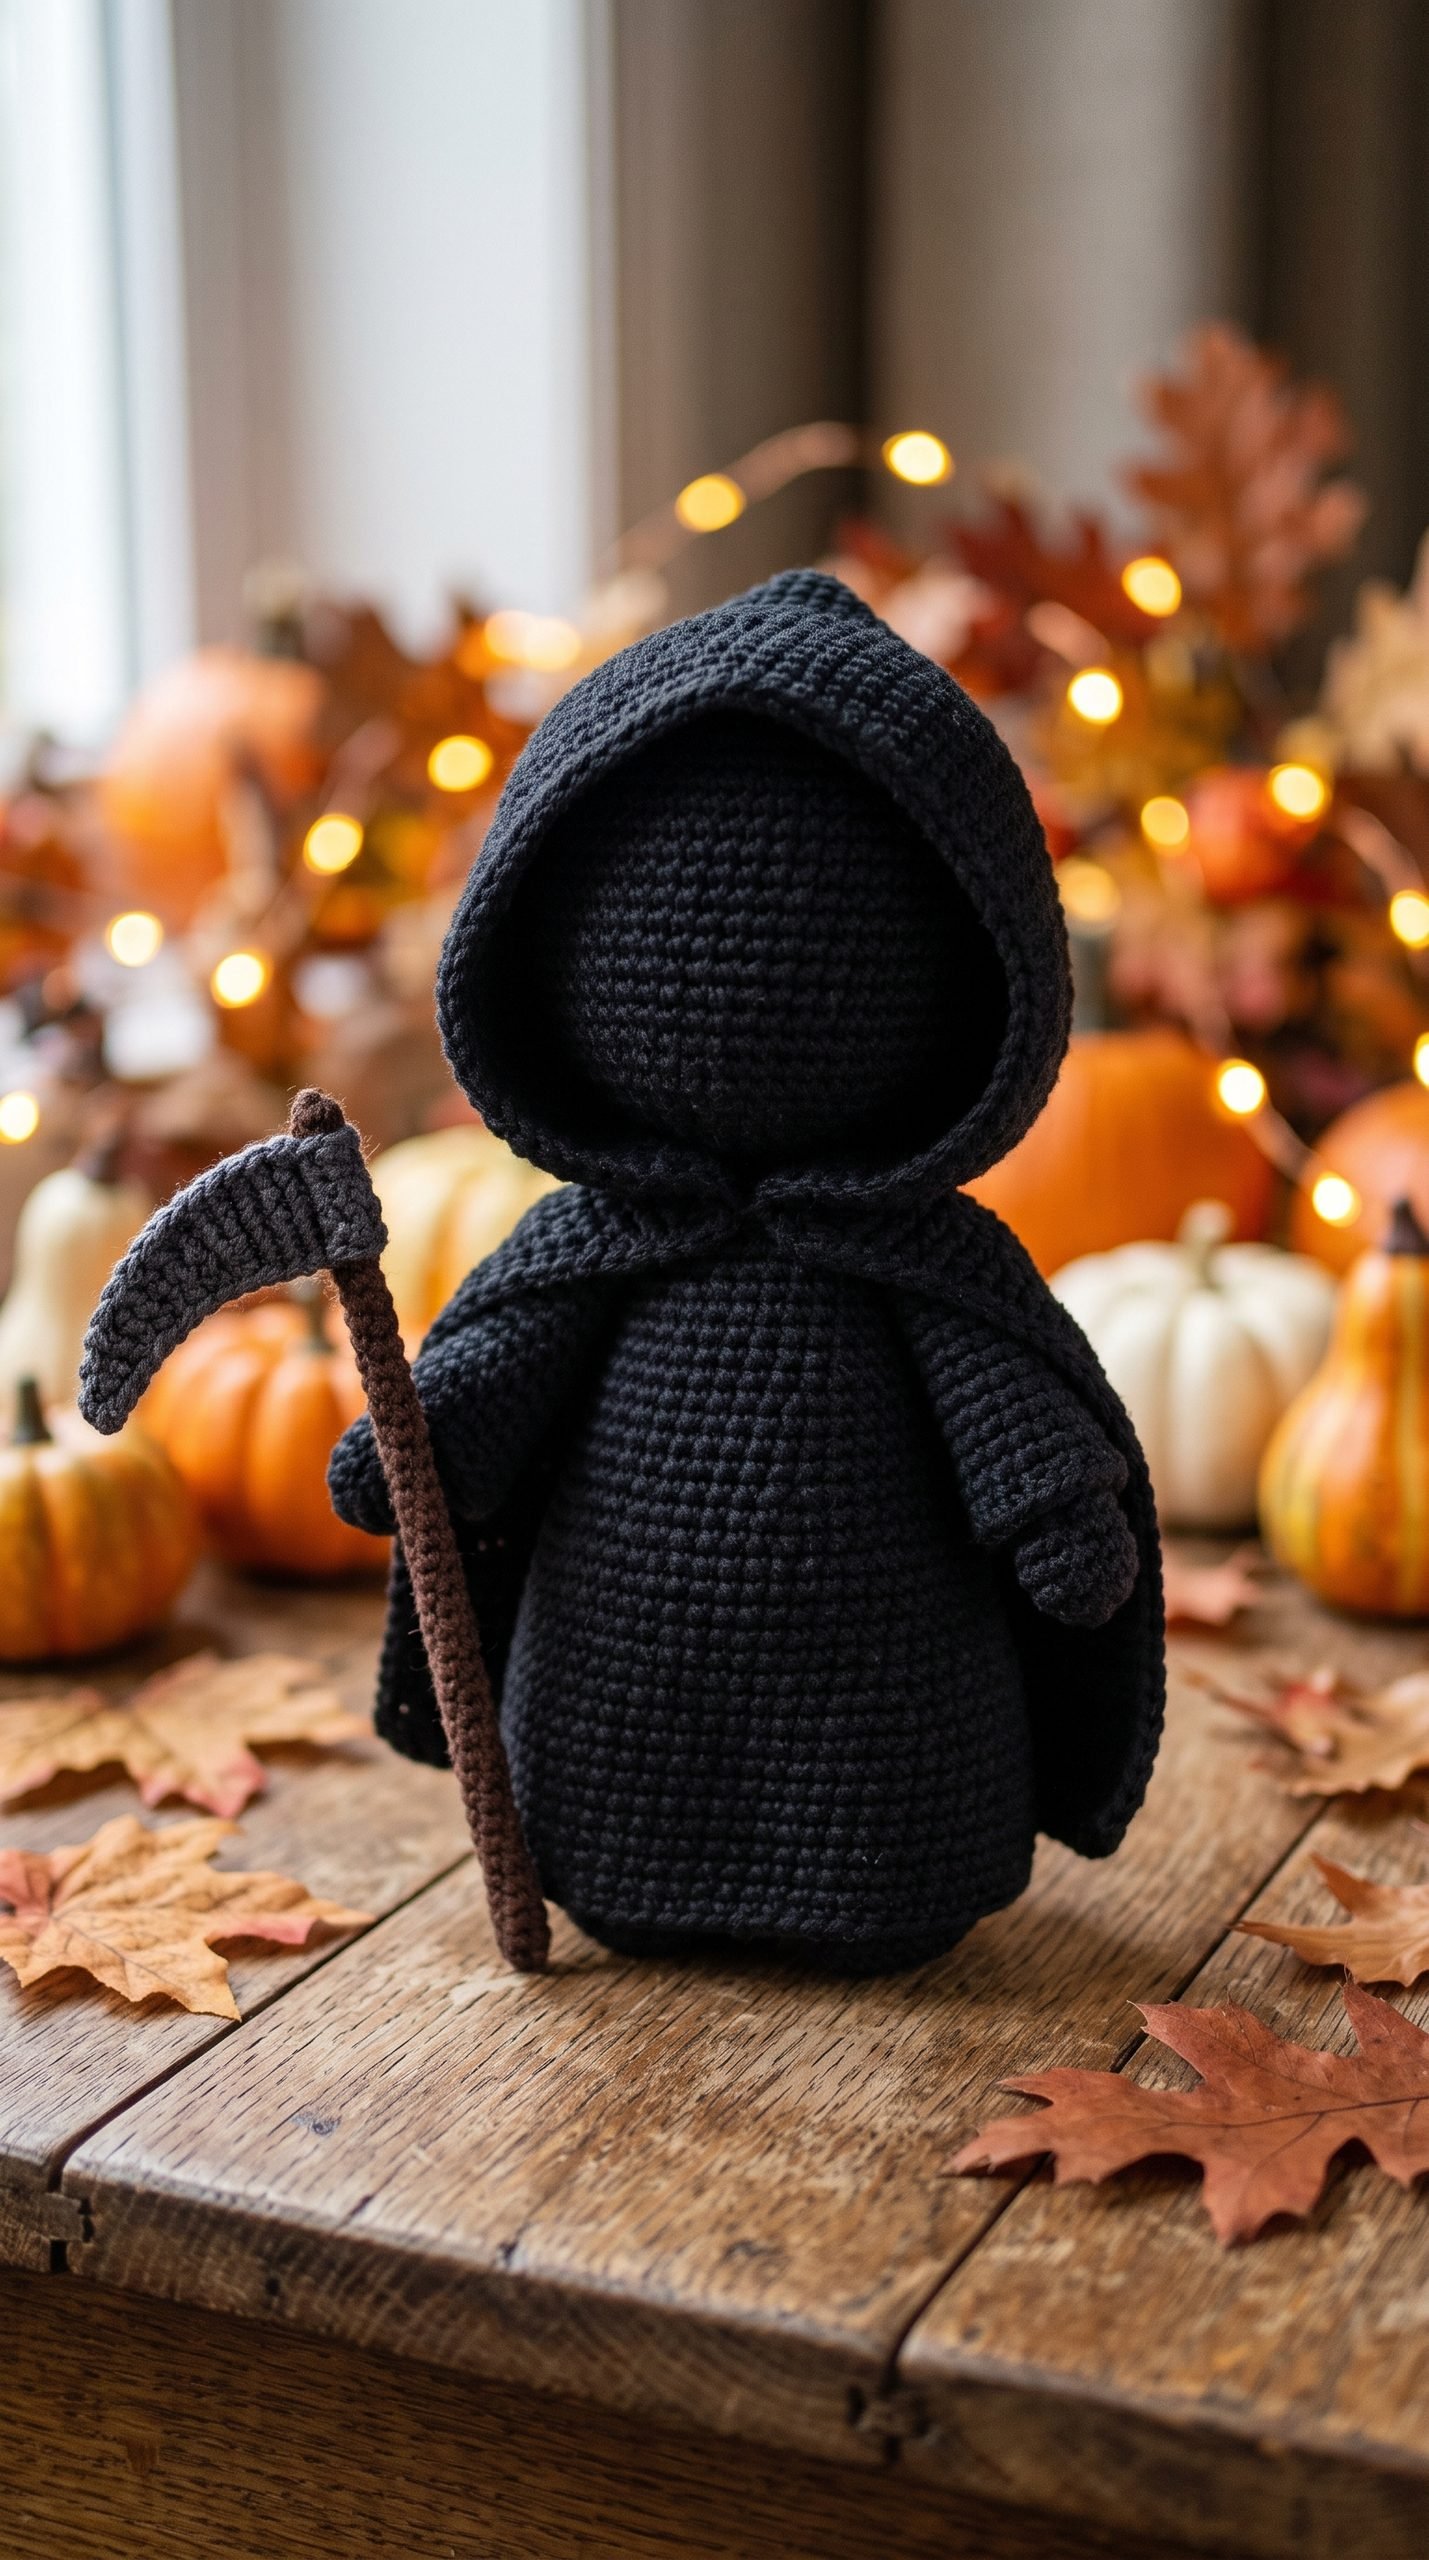
Free Crochet Grim Reaper Pattern for Halloween
Looking for a spooky but cute Halloween project? This crochet Grim Reaper pattern creates a small hooded amigurumi figure with a dark robe, oversized hood, flowing cape, and a soft crochet scythe.
The design is intentionally simple and faceless, giving it a mysterious Halloween look without making the finished project overly scary. It is a fun choice for advanced beginners who are comfortable with working in rounds, simple increases and decreases, stuffing, and sewing crochet pieces together.

Project Details
- Skill Level: Advanced Beginner
- Estimated Time: 4–6 hours
- Finished Size: Approximately 8–9 inches tall
- Crochet Terminology: US terms
- Construction: Body, head, hood, arms, cape, and scythe are crocheted separately and assembled.
Materials
- Worsted weight #4 yarn in black
- Small amount of dark gray yarn for the scythe blade
- Small amount of brown, charcoal, or black yarn for the scythe handle
- 3.5 mm crochet hook
- Polyester fiberfill stuffing
- Yarn needle
- Scissors
- Stitch marker
- Straight pins for assembly, optional

Hook Size
Use a 3.5 mm (E/4) crochet hook.
Your stitches should be firm enough that the stuffing does not show through the finished amigurumi.
Yarn
Use worsted weight #4 yarn.
Acrylic yarn works especially well because it keeps the project lightweight while still giving the robe and hood enough structure.
Approximate yarn quantities:
- Black: 120–150 yards
- Dark gray: 15–20 yards
- Brown or charcoal: 15–20 yards
Abbreviations
- MR = magic ring
- ch = chain
- sc = single crochet
- hdc = half double crochet
- dc = double crochet
- sl st = slip stitch
- st(s) = stitch(es)
- inc = increase, work 2 sc in the same stitch
- dec = invisible single crochet decrease
Before You Start / Pattern Notes
The body, head, and arms are worked in continuous spiral rounds unless otherwise stated.
Use a stitch marker to mark the first stitch of each round.
Gauge is not critical, but your stitches should be tight and even.
The hood is intentionally larger than the head so it creates a deep shadow around the face.
The scythe in this pattern is crocheted entirely from yarn, making it lightweight and suitable for decorative use.
Free Crochet Grim Reaper Pattern

Part 1 — Grim Reaper Body
Using black yarn:
Round 1: 6 sc into MR. (6 sts)
Round 2: Inc in each st around. (12 sts)
Round 3: *Sc in next st, inc.* Repeat around. (18 sts)
Round 4: *Sc in next 2 sts, inc.* Repeat around. (24 sts)
Round 5: *Sc in next 3 sts, inc.* Repeat around. (30 sts)
Rounds 6–14: Sc in each st around. (30 sts)
Round 15: *Sc in next 3 sts, dec.* Repeat around. (24 sts)
Rounds 16–17: Sc around. (24 sts)
Round 18: *Sc in next 2 sts, dec.* Repeat around. (18 sts)
Begin stuffing the body firmly.
Rounds 19–20: Sc around. (18 sts)
Finish stuffing.
Fasten off, leaving a long tail for sewing the head to the body.
Part 2 — Head
Using black yarn:
Round 1: 6 sc into MR. (6 sts)
Round 2: Inc around. (12 sts)
Round 3: *Sc in next st, inc.* Repeat around. (18 sts)
Round 4: *Sc in next 2 sts, inc.* Repeat around. (24 sts)
Rounds 5–9: Sc around. (24 sts)
Round 10: *Sc in next 2 sts, dec.* Repeat around. (18 sts)
Begin stuffing.
Round 11: *Sc in next st, dec.* Repeat around. (12 sts)
Finish stuffing.
Round 12: Dec around. (6 sts)
Fasten off and close.
The face remains plain and black. The deep hood will create the mysterious faceless look.
Part 3 — Arms and Sleeves
Make 2 using black yarn.
Round 1: 6 sc into MR. (6 sts)
Round 2: Inc around. (12 sts)
Rounds 3–7: Sc around. (12 sts)
Add a very small amount of stuffing to the lower half.
Round 8: *Sc in next st, dec.* Repeat around. (8 sts)
Flatten the opening and crochet or sew it closed.
Fasten off, leaving a long sewing tail.
Part 4 — Oversized Hood
Using black yarn:
Round 1: 6 sc into MR. (6 sts)
Round 2: Inc around. (12 sts)
Round 3: *Sc, inc.* Repeat around. (18 sts)
Round 4: *Sc 2, inc.* Repeat around. (24 sts)
Round 5: *Sc 3, inc.* Repeat around. (30 sts)
Round 6: *Sc 4, inc.* Repeat around. (36 sts)
Rounds 7–9: Sc around. (36 sts)
Now begin working back and forth to create the open front.
Row 10: Sc in next 26 sts. Leave the remaining 10 sts unworked. Turn.
Rows 11–15: Ch 1, sc across 26 sts. Turn.
Fasten off, leaving a long sewing tail.
Place the hood over the head. The unworked section forms the face opening.
The lower rows should fall loosely around the neck and shoulders.

Part 5 — Cape
Using black yarn, ch 15.
Row 1: Starting in the second chain from the hook, sc across. (14 sts)
Row 2: Ch 1, inc, sc in next 12 sts, inc. (16 sts)
Row 3: Ch 1, sc across. (16 sts)
Row 4: Ch 1, inc, sc in next 14 sts, inc. (18 sts)
Row 5: Ch 1, sc across. (18 sts)
Row 6: Ch 1, inc, sc in next 16 sts, inc. (20 sts)
Rows 7–12: Ch 1, sc across. (20 sts)
Fasten off, leaving a long sewing tail.
The cape should flare slightly toward the bottom.
Part 6 — Crochet Scythe Handle
Using brown, charcoal, or black yarn:
Round 1: 6 sc into MR. (6 sts)
Rounds 2–28: Sc around. (6 sts)
Stuff very lightly with small yarn scraps as you work.
Do not overstuff or the handle will become too thick.
Fasten off and close the end.
Part 7 — Crochet Scythe Blade
Using dark gray yarn, ch 16.
Row 1: Starting in the second chain from the hook, sc across. (15 sts)
Row 2: Ch 1, sl st in next 2 sts, sc in next 7 sts, hdc in next 4 sts, dc in next 2 sts.
Fasten off, leaving a long tail.
Gently curve the blade with your fingers.
Sew the wider end of the blade securely near the top of the crochet handle.
Assembly
Sew the head securely to the top of the body.
Place the hood over the head with the opening centered toward the front.
Use small hidden stitches to secure the hood around the back of the head and shoulders.
Sew each arm to the side of the upper body, angling one slightly forward so it can hold the scythe.
Position the cape behind the figure and sew the narrow top edge across the upper back, just below the hood.
Allow the wider lower portion of the cape to hang freely.
Place the crochet scythe beside one arm. Use black yarn to make several small hidden stitches around the sleeve and handle so the Reaper appears to be holding it.
Check that the figure can stand or sit securely before weaving in the final tails.
Finishing
Weave in all remaining yarn ends securely.
Adjust the hood so the opening creates a deep shadow around the head.
Shape the cape gently with your fingers.
Straighten the scythe handle and curve the blade slightly upward.
If the body does not sit flat, gently massage the stuffing toward the bottom until the base becomes more stable.
Blocking is not normally needed for the stuffed pieces.
Finished Size
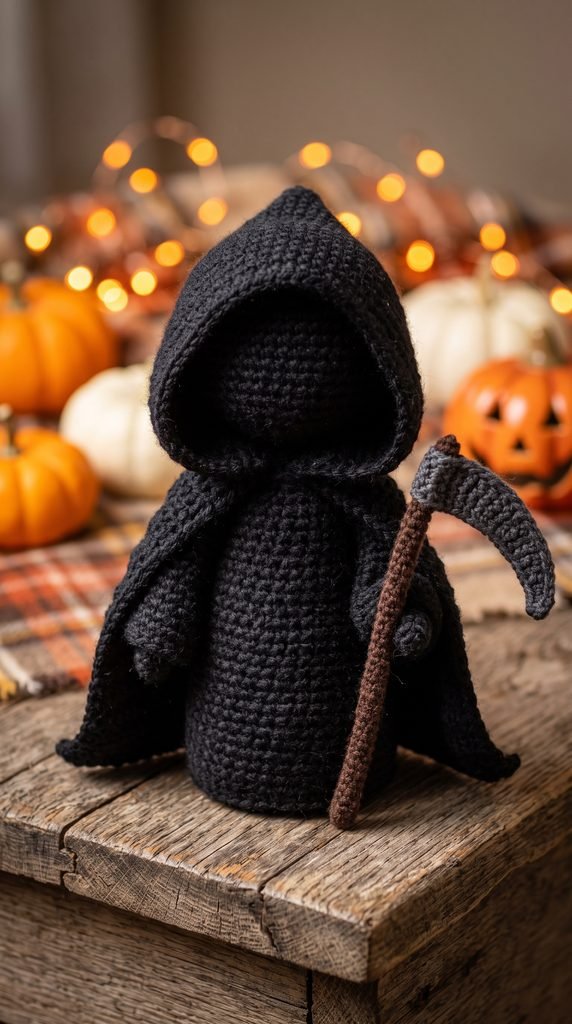
Using worsted weight #4 yarn and a 3.5 mm hook, the finished Grim Reaper should measure approximately:
- Height: 8–9 inches (20–23 cm)
- Body Width: Approximately 4 inches (10 cm)
- Scythe Length: Approximately 8–9 inches (20–23 cm)
Finished measurements may vary depending on yarn, tension, stuffing, and assembly.
Tips and Customization Ideas
Try Charcoal Instead of Black
A dark charcoal gray robe makes the stitch texture easier to see while keeping the spooky Halloween look.
Add a Purple Cape
Use dark purple yarn for the cape to give your Grim Reaper a more playful fantasy style.
Make a Mini Version
Use DK weight yarn and a smaller hook to create a smaller amigurumi for shelf decor or a Halloween display.
Add a Tiny Pumpkin
Place a miniature crochet pumpkin beside the finished Reaper to create a cute Halloween scene.
Create a Hanging Ornament
Make the project with lightweight yarn and add a secure hanging loop to the top of the hood for seasonal decor.
Keep It Faceless
The simple shadowed face gives the project its mysterious character, so no embroidered facial features are required.
How to Display Your Crochet Grim Reaper
This little Halloween amigurumi looks fun on a mantel, bookshelf, tiered tray, entryway table, craft room shelf, or Halloween party display.
It can also be paired with crochet pumpkins, ghosts, bats, or spooky flowers for a complete handmade Halloween collection.
Looking for Your Next Crochet Project?
Love this spooky project? Explore Cute Stitch Studio‘s premium crochet patterns for more cute, cozy, seasonal, and gift-worthy handmade ideas.


