

Pumpkin Dog Sweater Crochet Pattern for Halloween
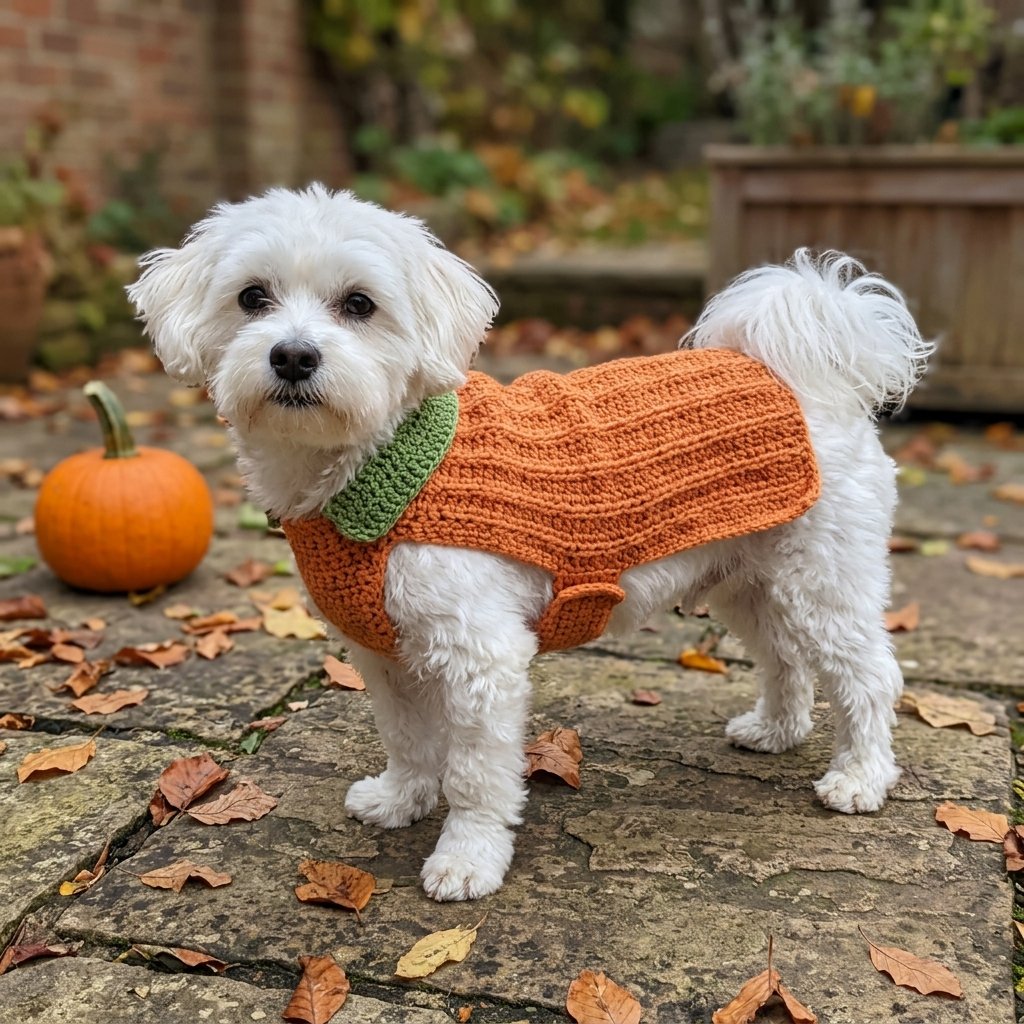
This pumpkin dog sweater crochet pattern combines an orange ribbed back with a leafy green collar for a sweet fall outfit. It is a cute project for a Halloween photo, an autumn gathering, or a handmade gift for a dog-loving friend.
The design is a lightweight sweater vest with an open underside. A short front bridge and a separate belly band hold the back panel in place, leaving room for the front legs.
You will use basic crochet stitches, simple seams, and your dog’s measurements. It is a good project for confident beginners who are ready to try an adjustable garment.
Project Details
- Skill Level: Confident beginner
- Estimated Time: Approximately 4–6 hours for the sample size
- Sample Back Panel: Approximately 8 inches wide and 10 inches long
- Sample Neck Opening: Approximately 12½ inches around before adding the collar
- Sample Body Circumference at the Belly Band: Approximately 18 inches
- Crochet Terminology: US terms
- Construction: Ribbed rectangular back, front bridge, belly band, and a collar worked around the neck opening
This original pattern has not been physically tested. Measurements, yarn quantities, and working time are estimates. Check the fit as you work.
The sample measurements describe the garment, not a guaranteed breed or weight range.
Materials
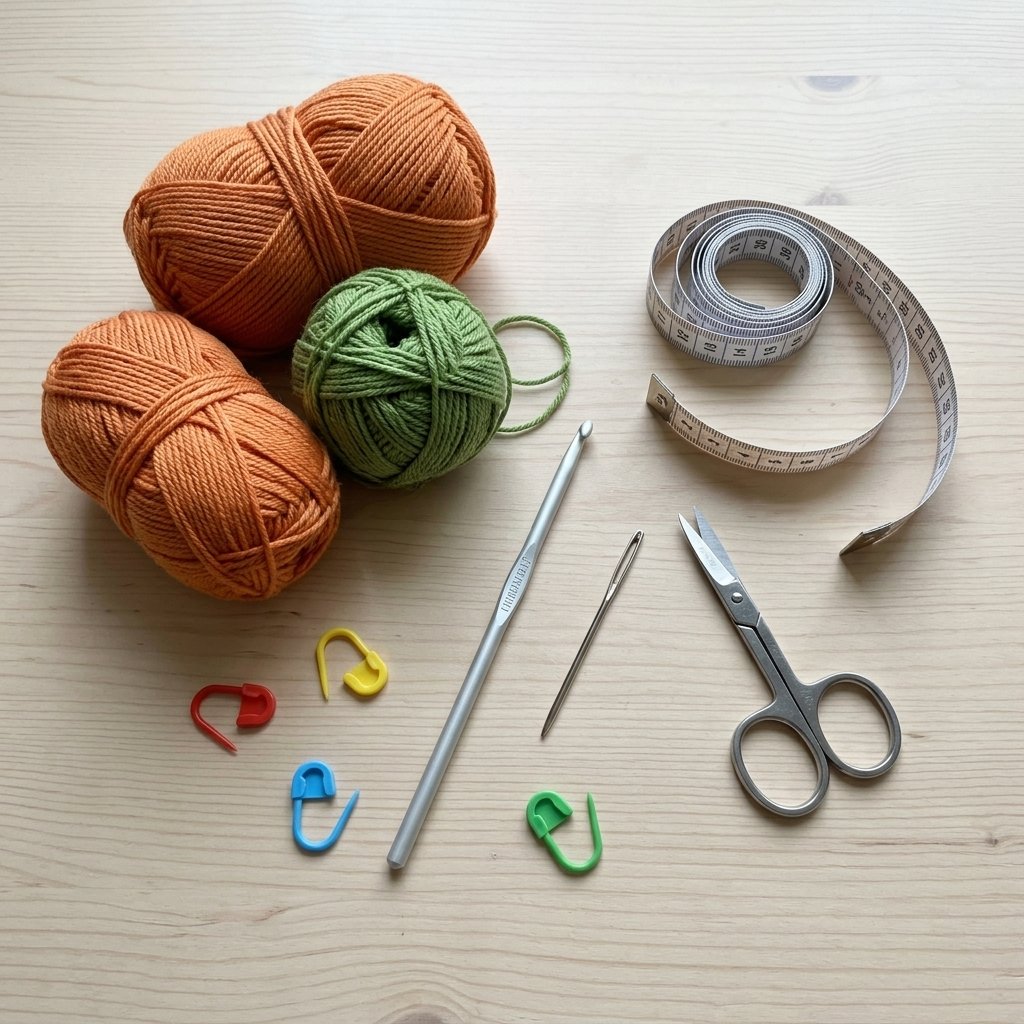
- Medium-weight yarn in pumpkin orange and leaf green
- 4.5 mm crochet hook, or the size needed for gauge
- Yarn needle
- Scissors
- Flexible measuring tape
- Four removable stitch markers
No buttons, cords, or stuffing are required.
Hook Size
Start with a 4.5 mm crochet hook.
Choose a hook that produces flexible fabric with clearly defined stitches. The back should drape over your dog rather than feel stiff.
Use your gauge swatches to check the size before starting.
Yarn
Use medium-weight yarn, category 4, in a smooth, washable acrylic or soft cotton-acrylic blend.
For the sample size, allow approximately:
- Pumpkin orange: 180–230 yards
- Leaf green: 25–40 yards
Larger or longer versions will require more yarn.
Choose orange for the back, front bridge, and belly band. Use green for the collar.
A smooth yarn makes the ribbing easier to see and helps you check the seams.
Abbreviations
- ch: chain
- sc: single crochet
- hdc: half double crochet
- BLO: back loop only
- sl st: slip stitch
- st(s): stitch(es)
Before You Start
Gauge
Use these as starting targets:
- Ribbed back: 14 hdc stitches and 16 rows = approximately 4 inches, worked in BLO
- Bridge and belly band: 16 sc stitches and 18 rows = approximately 4 inches
Measure your swatches relaxed, without stretching, after washing and drying them according to the yarn label.
Because this garment is assembled from measured pieces, the finished dimensions matter more than matching a particular number of rows.
How the Ribbing Works
Each row of the back runs from the neck toward the tail.
You will add rows sideways until the panel is wide enough. Working into the back loops creates raised lines that run along the dog’s back, suggesting the ridges of a pumpkin.
The back loop is the loop farther away from you along the top of the stitch.
Turning Chains
The ch 2 at the start of an hdc row does not count as a stitch.
The ch 1 at the start of an sc row does not count as a stitch.
Work the first stitch into the first stitch of the previous row.
Take These Measurements First
Measure your dog while standing comfortably.
1. Back length
Measure from the base of the neck toward the tail. Stop where you want the garment to end, leaving the tail free.
2. Back coverage width
Drape the measuring tape from one side of the body, over the back, to the other side. Follow the area you want the orange panel to cover.
This is not the full chest circumference. The panel should end along the sides, leaving the underside open.
3. Neck opening
Measure loosely around the base of the neck. Also check the widest part of the head.
The finished opening must pass over the head easily and sit comfortably at the neck.
4. Body circumference at the belly band
Measure around the body where the band will sit, behind the front legs. Add approximately 1–2 inches for a relaxed fit, then confirm the fit on your dog.
5. Belly band position
Measure along the back from the neck edge to a point safely behind the front legs. The band should not press into the armpits or interfere with toileting.
Write down your measurements before crocheting.
Sample Measurements Used Below
The written stitch counts create a starting example with:
- Back panel: 8 inches wide × 10 inches long
- Front bridge: 4½ inches long × approximately ⅞ inch deep
- Neck opening before the collar: approximately 12½ inches around
- Belly band: 10 inches long × approximately 1⅓ inches wide
- Body circumference at the band: approximately 18 inches
These dimensions assume edge-to-edge seams with no overlap.
If they do not suit your dog, use the measurement instructions alongside each section.
Pumpkin Dog Sweater Crochet Pattern: Step-by-Step Instructions
Part 1 — Crochet the Ribbed Back
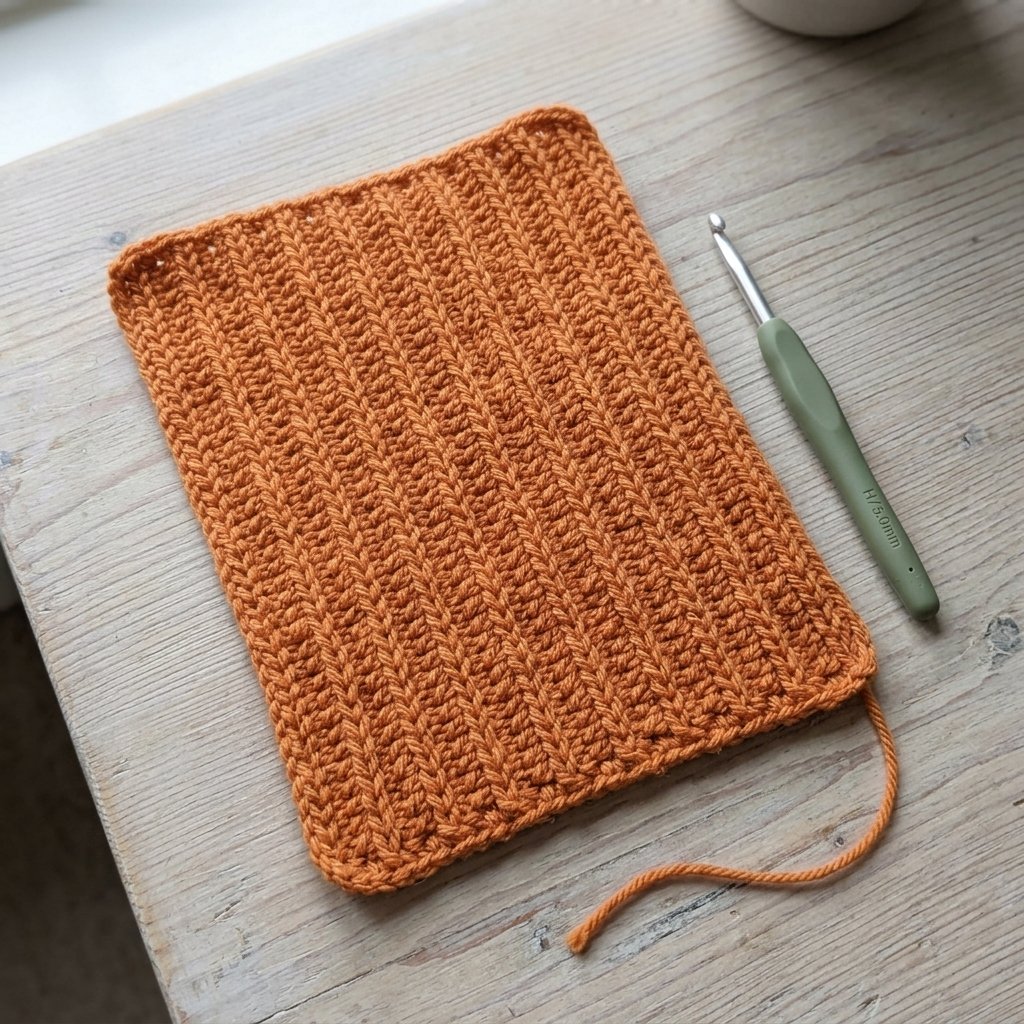
With orange yarn, ch 37.
Row 1: Hdc in the third chain from the hook and in each remaining chain. (35 sts)
Ch 2 and turn.
Row 2: Working in BLO, hdc in each st across. (35 sts)
Ch 2 and turn.
Rows 3–32: Repeat Row 2. (35 sts per row)
At the target gauge, the panel should measure approximately 10 inches along the stitches and 8 inches across the rows.
After the final row, fasten off.
Adjusting the Back Length
To calculate your stitch count, multiply your desired back length in inches by your measured hdc stitches per inch.
Round to the nearest whole stitch, then add 2 chains for the starting chain.
For example, at 3½ stitches per inch:
10 inches × 3½ = 35 stitches.
Start with 37 chains to produce 35 hdc stitches.
Adjusting the Back Width
Continue adding rows until the relaxed panel matches your measured back coverage width.
Lay the panel over your dog’s back before making the other pieces. The sides should hang comfortably without extending under the body.
Mark one short edge as the neck edge. The opposite short edge will sit toward the tail.
Part 2 — Make the Front Bridge
The front bridge connects the two corners of the neck edge. Together, the bridge and the back panel’s neck edge form the opening for the head.
For the sample:
8-inch back neck edge + 4½-inch bridge = 12½-inch opening.
With orange yarn, ch 19.
Row 1: Sc in the second chain from the hook and in each remaining chain. (18 sts)
Ch 1 and turn.
Rows 2–4: Sc in each st across. (18 sts per row)
Ch 1 and turn between rows.
Fasten off after Row 4, leaving a sewing tail approximately 12 inches long. Leave a similar tail at the starting end.
The bridge should measure approximately 4½ inches long and ⅞ inch deep.
Adjusting the Bridge Length
Subtract the width of the back panel’s neck edge from your desired neck opening circumference.
The result is the required bridge length.
Use your sc stitch gauge to calculate the number of stitches. Add 1 chain to that number for the foundation chain.
If the back neck edge is already as wide as your intended opening circumference, narrow the back panel before continuing.
Part 3 — Attach the Front Bridge
Lay the back panel flat with the neck edge at the top.
- Place one short end of the bridge against the top of one long side edge of the back panel.
- Align the bridge’s upper edge with the neck corner.
- Sew that short end to approximately ⅞ inch of the panel’s side edge, working downward from the corner.
- Attach the other short end to the opposite neck corner in the same way.
Use edge-to-edge seams. Do not overlap the pieces.
You now have a closed opening bounded by the back panel’s neck edge and the bridge’s upper edge. The bridge itself lies across the upper chest when worn.
Before adding the collar, check that this opening passes comfortably over your dog’s head.
If it does not, remove one bridge seam and replace the bridge with a longer one.
Part 4 — Add the Green Collar
Join green yarn at one of the bridge seams along the neck opening.
Collar Round 1: Ch 1. Work sc evenly around the entire neck opening. Join with a sl st to the first sc.
For the sample, aim for approximately 50 sc total:
- Approximately 32 sc across the back panel’s neck edge
- 18 sc along the upper edge of the bridge
Across the back neck edge, this is approximately one sc per row end.
For a customized size, distribute enough stitches to keep the opening relaxed and smooth. Record your count.
Collar Rounds 2–4: Ch 1, sc in each st around, and join with a sl st to the first sc. (50 sts per round for the sample)
Do not turn between rounds.
Fasten off after Round 4.
The collar should be approximately ¾–1 inch tall.
Check the opening again. If the collar makes it too tight, undo it and work a looser first round with additional evenly distributed stitches. Keep that revised count in the following rounds.
Part 5 — Crochet the Belly Band
The belly band connects the sides of the back panel behind the front legs.
Calculate its length as follows:
Desired body circumference, including ease − back panel width = belly band length
For the sample:
18 inches − 8 inches = 10 inches.
With orange yarn, ch 41.
Row 1: Sc in the second chain from the hook and in each remaining chain. (40 sts)
Ch 1 and turn.
Rows 2–6: Sc in each st across. (40 sts per row)
Ch 1 and turn between rows.
Fasten off after Row 6. Leave approximately 12 inches of yarn at each end for sewing.
The band should measure approximately 10 inches long and 1⅓ inches wide.
For a different length, multiply the required band length by your sc stitches per inch. Add 1 chain for the foundation chain.
Part 6 — Position and Attach the Belly Band
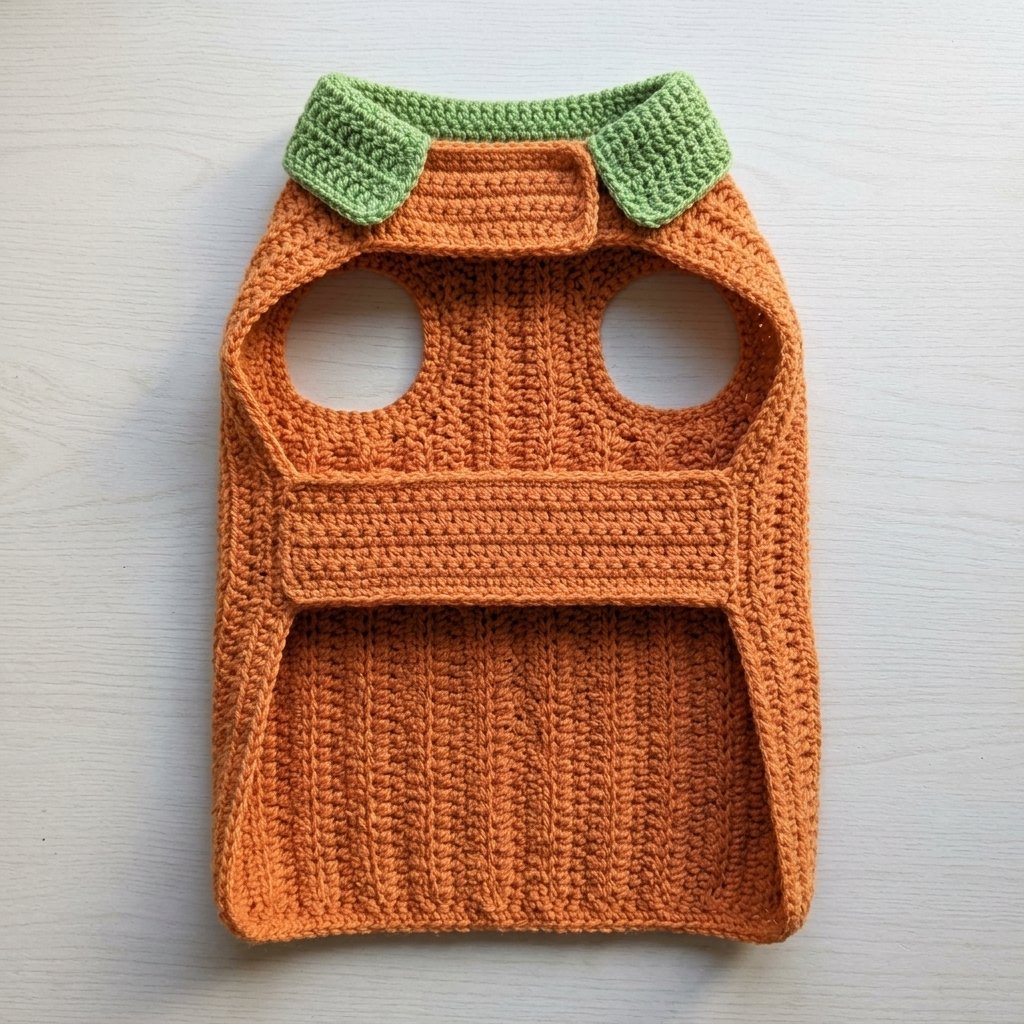
Lay the back panel flat with the neck edge at the top.
For the sample, mark a point 4 inches below the neck edge on each long side. These marks indicate the front edge of the belly band.
Use your dog’s measurements to adjust this position. The whole band must sit behind the front legs.
- Place one short end of the belly band against the first side edge.
- Align its front edge with the marker.
- Sew the short end to the panel, working toward the tail across the band’s full width.
- Repeat on the other side, checking that the band is not twisted.
The two side gaps between the front bridge and the belly band provide space for the front legs.
With the sample measurements, each gap is approximately 3 inches long along the side of the panel. Check that your dog has enough room to move freely.
Part 7 — Check the Fit
Guide your dog’s head through the collar, then gently guide one front paw at a time through the side openings. Do not force a leg into position.
Check that:
- The collar passes over the head easily.
- The front bridge rests comfortably across the upper chest.
- The belly band sits behind the front legs.
- The back panel stays centered.
- The garment leaves the tail and toileting area clear.
- Your dog can stand, sit, and walk without the fabric pulling.
If the belly band is tight, replace it with a longer band. If it hangs loosely and the outfit shifts, shorten it.
If the band presses toward the front legs, move both attachment points slightly toward the tail, keeping the underside clear.
Finishing
Weave in the Ends
Weave yarn tails securely through the inside of the fabric, changing direction before trimming.
Check the bridge and belly band seams carefully. They should be smooth, with no dangling loops.
Wash and Shape
Follow your yarn’s care instructions.
Lay the garment flat to dry and gently arrange the back panel into a rectangle. Avoid stretching the collar or belly band.
Check the fit again after washing.
Wearing the Outfit
Introduce the sweater briefly and supervise your dog while it is worn. Remove it if your dog seems uncomfortable or too warm.
This is a costume garment, not a harness. Attach a leash to your dog’s usual walking equipment.
Finished Size
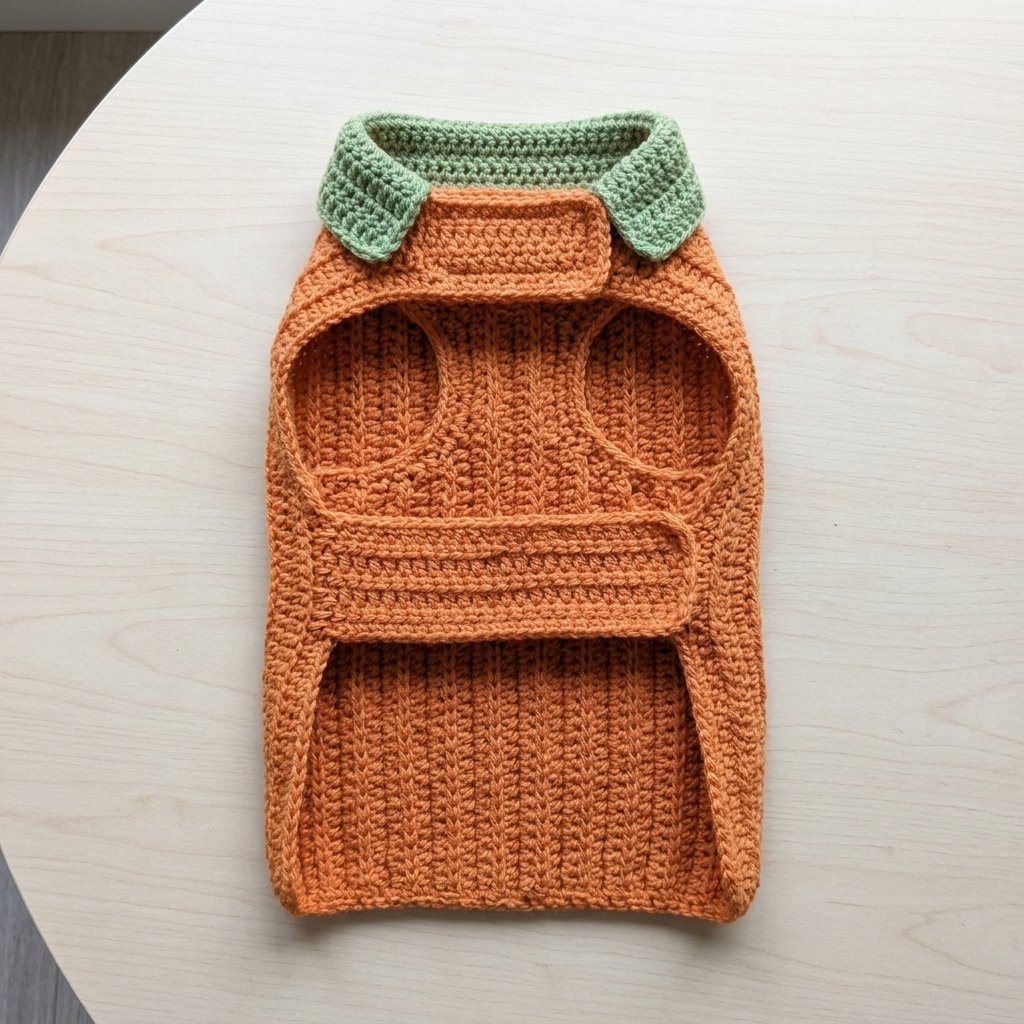
The sample garment measures approximately:
- Back length: 10 inches (25.5 cm)
- Back width: 8 inches (20 cm)
- Neck opening: 12½ inches (32 cm) around before the collar; confirm the finished opening
- Body circumference at the belly band: 18 inches (46 cm)
- Collar height: ¾–1 inch (2–2.5 cm)
- Belly band width: 1⅓ inches (3.5 cm)
Use your dog’s measurements to choose the final dimensions. Breed names and body weight alone do not determine fit.
Tips & Customization
Choose Your Pumpkin Color
Bright orange creates a classic Halloween look. Rust, terracotta, or pale peach gives the outfit a softer autumn style.
Keep the Pumpkin Ridges Visible
Use a smooth yarn and work the back panel in BLO as instructed. Fluffy yarn can hide the ribbed texture.
Make It Longer or Shorter
Change the starting stitch count of the back panel to adjust its neck-to-tail length.
Adding more rows changes the width, not the length.
Keep Decorations Simple
The orange ribbing and green collar provide the pumpkin effect without additional accessories.
For a coordinated photo, make a separate crochet pumpkin decoration and place it beside your dog, out of reach.
Make a Thoughtful Gift
Ask for the dog’s measurements before starting. Include a small care note with the finished outfit.
You can also decorate the gift packaging with an easy crochet heart.
Looking for Your Next Crochet Project?
Love making cute seasonal pieces? Explore Cute Stitch Studio’s premium crochet patterns for more cozy projects, thoughtful gifts, and handmade Halloween ideas.


