Free Crochet Baby Star Cocoon Pattern – Cute Newborn Photo Prop
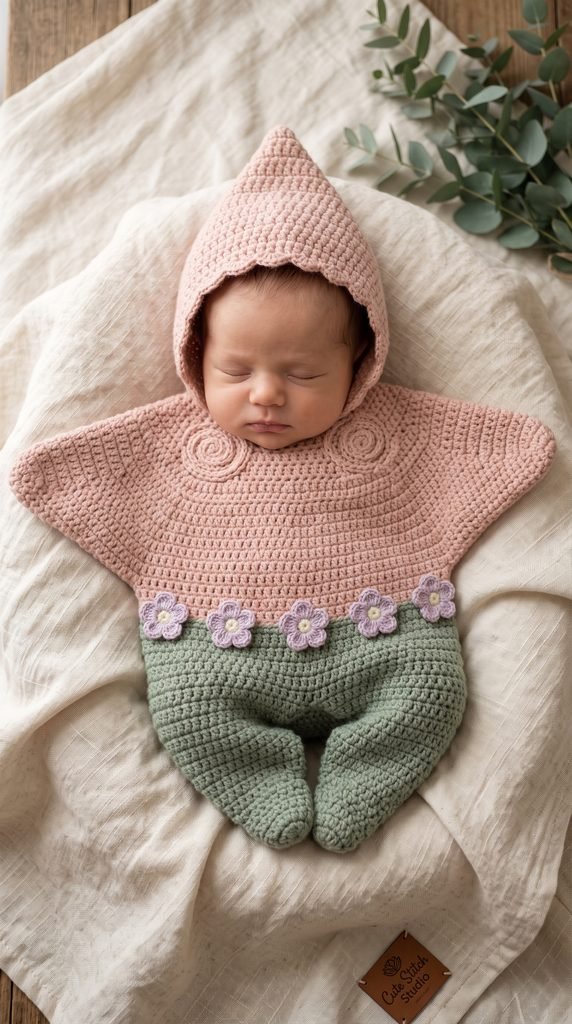
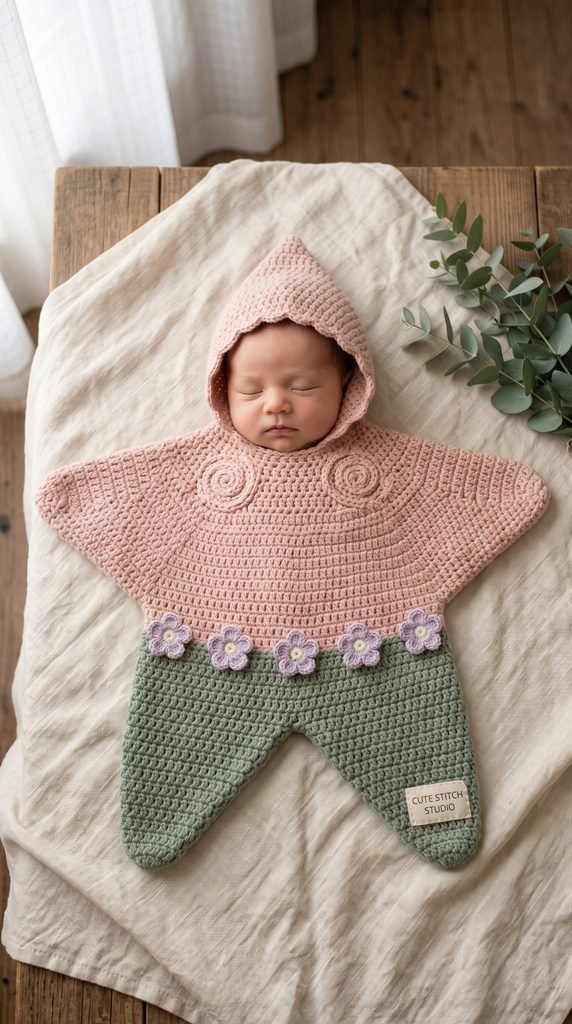
Looking for an extra-cute handmade project for newborn photos? This crochet baby star cocoon pattern creates a soft star-shaped costume with a pointed hood, cozy arm and leg points, and sweet floral details.
The design uses a soft blush pink body with sage green lower points and lavender crochet flowers, but you can easily customize the colors for your own baby gift or photography style.
This project is best for confident beginners who are comfortable with single crochet, half double crochet, increasing, decreasing, working in rows, and sewing crochet pieces together.
Safety Note: This design is intended only as a supervised costume or photography prop. It is not sleepwear, a sleep sack, or a car-seat garment. Always keep the baby fully supervised while the prop is being used.
Project Details
- Skill Level: Confident Beginner
- Estimated Time: 6–8 hours
- Suggested Size: Newborn to approximately 3 months
- Finished Length: Approximately 20–22 inches from shoulder area to lower points
- Finished Width: Approximately 22–24 inches across the arm points
- Crochet Terminology: US terms
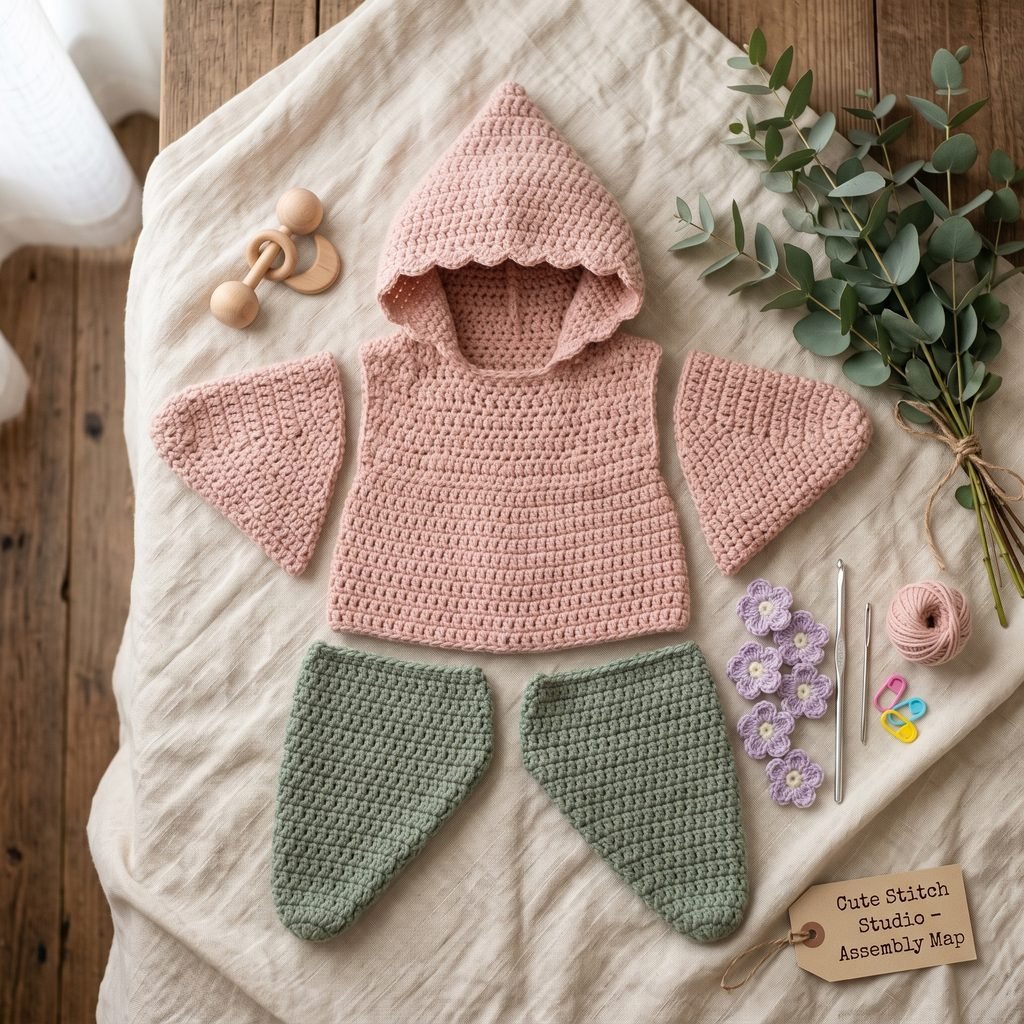
- Construction: Central body panels, four tapered star points, and hood are crocheted separately and sewn together.
Materials

- DK weight #3 yarn in blush pink
- DK weight #3 yarn in sage or light olive green
- Small amount of lavender yarn
- 4 mm (G/6) crochet hook
- Yarn needle
- Scissors
- Stitch markers
- Flexible measuring tape
Hook Size
Use a 4 mm (G/6) crochet hook.
The fabric should feel soft and flexible rather than stiff. If your crochet tension is very tight, try a 4.5 mm hook.
Yarn
Use DK weight #3 yarn.
A soft acrylic, cotton-acrylic blend, or baby yarn works well for this project. Choose yarn that feels smooth against sensitive skin.
Approximate yarn quantities:
- Blush pink: 300–350 yards
- Sage green: 100–130 yards
- Lavender: 20–30 yards
Abbreviations
- ch = chain
- sc = single crochet
- hdc = half double crochet
- dc = double crochet
- sl st = slip stitch
- st(s) = stitch(es)
- inc = increase
- dec = decrease
- BLO = back loop only
Before You Start / Pattern Notes
This project is made from separate flat crochet pieces that are sewn together at the end.
The front body panel stays solid, while the back uses two overlapping panels so the baby can be placed into the costume without buttons or other small detachable closures.
The arm and leg points are intentionally roomy and softly tapered.
Always measure the finished pieces before assembly. Babies vary greatly in size, so this project should never feel tight around the chest, neck, arms, or legs.
Do not add cords, beads, hard decorations, or loose buttons.
Free Crochet Baby Star Cocoon Pattern
Part 1 — Front Body Panel
Using blush pink yarn:
Row 1: Ch 31. Starting in the 2nd chain from the hook, hdc across. Turn. (30 sts)
Rows 2–22: Ch 1, hdc across. Turn. (30 sts)
Fasten off.
The panel should measure approximately 9–10 inches wide and 10–11 inches tall.
Shape the Upper Body
Rejoin blush pink yarn at one upper corner.
Row 23: Ch 1, dec, hdc across to last 2 sts, dec. Turn. (28 sts)
Row 24: Ch 1, hdc across. Turn. (28 sts)
Row 25: Dec, hdc across to final 2 sts, dec. Turn. (26 sts)
Row 26: Hdc across. Turn. (26 sts)
Row 27: Dec, hdc across to last 2 sts, dec. (24 sts)
Fasten off.
Part 2 — Back Panels
Make 2 in blush pink.
Row 1: Ch 20. Starting in the 2nd chain from the hook, hdc across. Turn. (19 sts)
Rows 2–22: Ch 1, hdc across. Turn. (19 sts)
At the upper edge, decrease one stitch at the outer side every second row for 5 rows to create a gentle shoulder slope.
Fasten off.
When assembled, the two back panels should overlap by approximately 2 inches in the center.
This creates an opening for dressing without requiring buttons.
Part 3 — Arm Points
Make 2 using blush pink yarn.
Row 1: Ch 19. Starting in the 2nd chain from the hook, hdc across. Turn. (18 sts)
Row 2: Ch 1, hdc across. Turn. (18 sts)
Row 3: Dec, hdc 14, dec. Turn. (16 sts)
Row 4: Hdc across. Turn. (16 sts)
Row 5: Dec, hdc 12, dec. Turn. (14 sts)
Row 6: Hdc across. Turn. (14 sts)
Row 7: Dec, hdc 10, dec. Turn. (12 sts)
Row 8: Hdc across. Turn. (12 sts)
Continue alternating one decrease row and one plain row until 4 stitches remain.
Work one final row of 4 hdc.
Fasten off, leaving a long tail for sewing.
The finished arm point should measure approximately 7–8 inches from base to tip.
Part 4 — Leg Points
Make 2.
Begin with sage green yarn.
Row 1: Ch 21. Starting in the 2nd chain from the hook, hdc across. Turn. (20 sts)
Rows 2–4: Ch 1, hdc across. Turn. (20 sts)
Row 5: Dec, hdc 16, dec. Turn. (18 sts)
Row 6: Hdc across. Turn. (18 sts)
Row 7: Dec, hdc 14, dec. Turn. (16 sts)
Row 8: Hdc across. Turn. (16 sts)
Continue alternating decrease and plain rows until 4 stitches remain.
Work one final row of 4 hdc.
Fasten off.
Each leg point should measure approximately 8–9 inches from base to tip.
Part 5 — Pointed Hood
Using blush pink yarn:
Row 1: Ch 41. Starting in the 2nd chain from the hook, hdc across. Turn. (40 sts)
Rows 2–12: Ch 1, hdc across. Turn. (40 sts)
Fold the rectangle in half so the short sides meet.
Beginning at the top back edge, seam approximately 4 inches downward.
This creates the pointed back of the hood.
Shape the Hood Point
At the top corner, fold the fabric inward slightly before finishing the seam.
This helps create a soft pointed shape instead of a square hood.
Leave the front edge completely open.
Hood Edging
Join blush pink yarn at the lower front edge.
Work one round of sc evenly around the entire face opening.
Join with sl st and fasten off.
The hood should sit loosely around the head and should never pull tightly around the neck or face.
Part 6 — Decorative Crochet Flowers
Make 5–7 using lavender yarn.
Round 1: Work 5 sc into a magic ring. Join with sl st.
For each petal, work:
Ch 2, 2 dc in the same stitch, ch 2, sl st in the same stitch.
Repeat in each of the 5 stitches.
Fasten off, leaving a sewing tail.
Sew the flowers flat to the green leg sections.
Do not add beads, buttons, or separate flower centers.
How to Assemble the Baby Star Cocoon
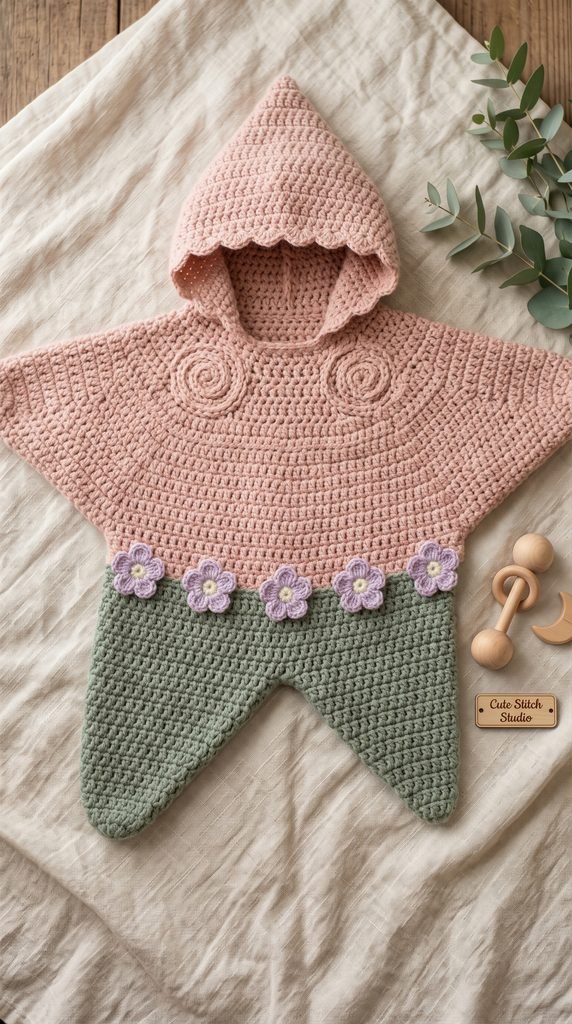
Lay the front body panel flat.
Position one arm point on each upper side of the body panel.
Sew the wide base of each arm point securely to the body.
Position the two green leg points along the lower edge, leaving a small V-shaped space between them.
Sew the leg points firmly to the lower body.
Place the two back panels over the front construction with wrong sides facing each other.
Sew around the outside edges, including the edges of the arm and leg points.
Leave the center back overlap open.
Do not sew the overlapping back edges together.
Attach the hood to the upper back neckline, centering the hood seam with the center back.
Use small secure stitches and check that the neckline remains loose and flexible.
Optional Decorative Front Spiral
To create a simple decorative texture on the front, crochet a long chain in blush pink.
Ch approximately 70–80.
Fasten off, leaving a long sewing tail.
Arrange the chain into a loose spiral at the center of the front body panel.
Sew it flat using small hidden stitches.
Keep the decoration soft and fully attached with no loose loops.
Finishing
Weave in every yarn end securely.
Check all seams carefully, especially around the hood, arm points, leg points, and flowers.
Gently flatten and shape the star points with your hands.
Steam blocking is generally unnecessary. If needed, lightly dampen the flat pieces before final assembly and allow them to dry completely.
Before use, check that there are no loose yarn ends, detachable decorations, or tight areas around the baby’s neck or limbs.
Finished Size
The finished newborn-size crochet star cocoon measures approximately:
- Overall Length: 20–22 inches (51–56 cm)
- Width Across Arm Points: 22–24 inches (56–61 cm)
- Main Body Width: Approximately 9–10 inches (23–25 cm)
Measurements can vary depending on yarn, hook size, tension, and assembly.
Tips and Customization Ideas
Create a Neutral Baby Version
Try cream, oatmeal, soft beige, and sage for a gentle gender-neutral palette.
Use Pastel Colors
Lavender, baby blue, mint, peach, or dusty rose all work beautifully for newborn photography.
Skip the Flowers
For a simpler design, leave the green leg sections plain or add embroidered stars instead.
Create a Sea-Star Theme
Use coral, sand, seafoam green, and cream for a coastal-inspired version.
Add Subtle Texture
Work every third row through the back loop only to create gentle ribbing without making the fabric too thick.
Make It as a Handmade Gift
This project can make a memorable baby-shower gift when presented clearly as a supervised costume or photography prop.
Important Baby Safety Reminder
This crochet star is designed as a supervised photo prop and costume only.
Do not use it for sleeping, naps, overnight use, car seats, strollers, or any situation where the baby is unattended.
Keep the face and airway completely uncovered at all times and stop using the prop if the baby becomes uncomfortable.
Looking for Your Next Crochet Project?
Love this sweet baby project? Explore Cute Stitch Studio’s premium crochet patterns for more adorable baby crochet, cozy handmade gifts, and beginner-friendly projects.