Baby Hooded Crochet Cardigan Pattern – Free Easy Baby Jacket
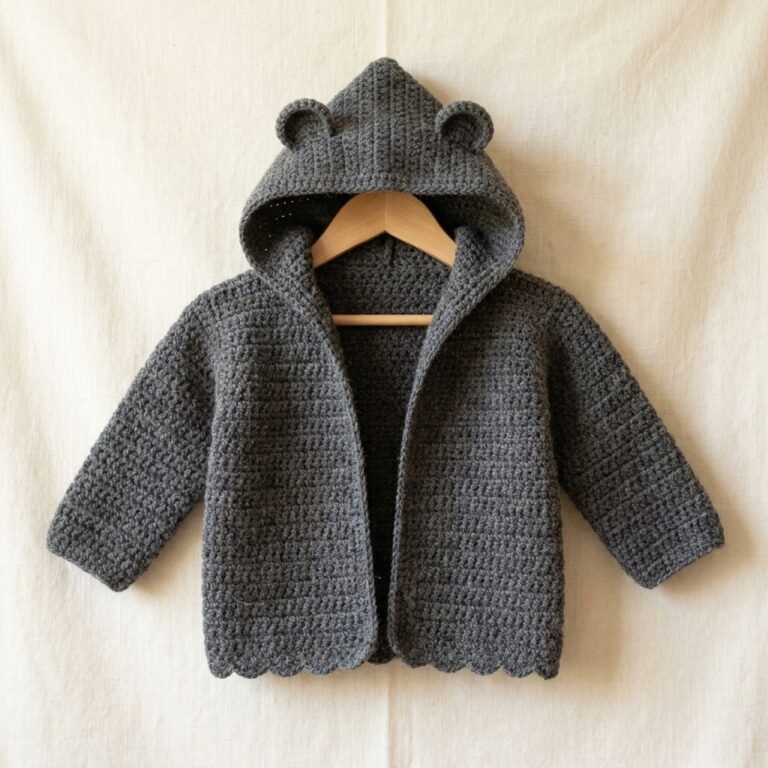
If you are looking for a sweet and practical handmade baby project, this baby hooded crochet cardigan pattern is a lovely choice. It creates a cozy hooded cardigan with a simple textured stitch pattern, comfy sleeves, and a button-up front.
This cardigan is designed to be beginner-friendly and wearable for everyday use. The hood adds extra warmth, while the classic shape makes it easy to layer over baby bodysuits, leggings, or little dresses.
The pattern includes multiple baby sizes and uses simple stitches throughout, making it a great project for gifting, baby showers, and handmade wardrobes.
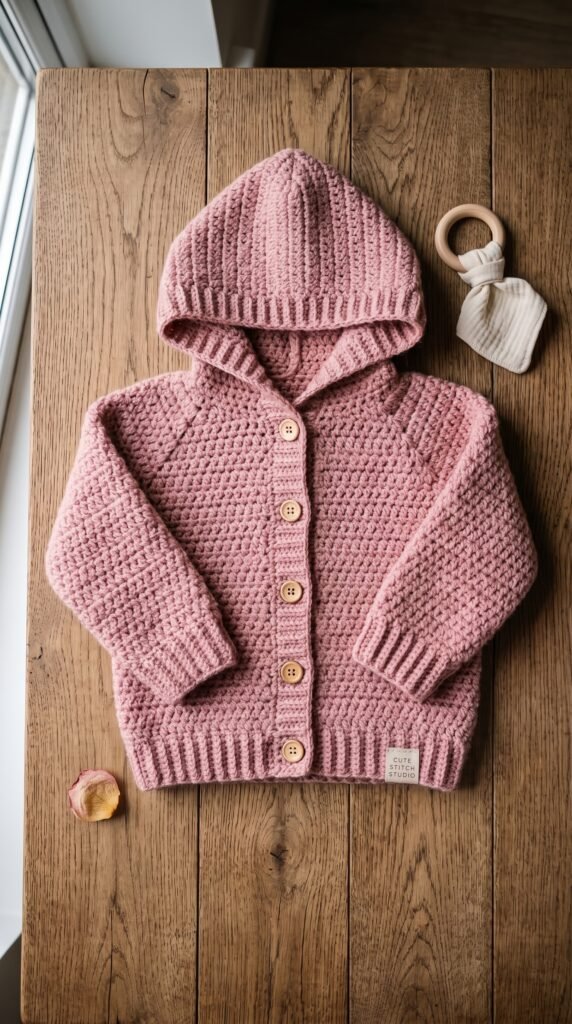
Table of Contents
Project Details
- Skill Level: Confident Beginner
- Estimated Time: 6–10 hours depending on size
- Sizes: 0–3 months, 3–6 months, 6–12 months, 12–18 months, 18–24 months
- Crochet Terminology: US terms
- Construction: The cardigan is worked in separate flat pieces for the back, two fronts, sleeves, and hood, then assembled and finished with a front band.
Finished Size
| Size | Finished Chest | Finished Length |
|---|---|---|
| 0–3 Months | 18 in (46 cm) | 10 in (25.5 cm) |
| 3–6 Months | 19 in (48 cm) | 11 in (28 cm) |
| 6–12 Months | 20.5 in (52 cm) | 12 in (30.5 cm) |
| 12–18 Months | 22 in (56 cm) | 13 in (33 cm) |
| 18–24 Months | 23.5 in (60 cm) | 14 in (35.5 cm) |
Choose the size based on the baby’s chest measurement and desired layering ease.
Materials
- DK weight #3 yarn
- 5 mm (H/8) crochet hook
- Yarn needle
- Scissors
- Stitch markers
- 4–5 small wooden or plastic buttons
- Measuring tape

Hook Size
Use a 5 mm (H/8) crochet hook.
If your stitches are too tight, move up to a 5.5 mm hook. If your fabric feels too loose or open, try a 4.5 mm hook.
Yarn
Use DK weight #3 yarn.
A soft baby acrylic, cotton blend, or washable wool blend works well for this cardigan. Choose a yarn that feels gentle on baby skin and is easy to care for.
Approximate yarn requirements:
- 0–3 Months: 350–400 yards
- 3–6 Months: 400–450 yards
- 6–12 Months: 450–525 yards
- 12–18 Months: 525–600 yards
- 18–24 Months: 600–700 yards
Suggested colors include dusty pink, baby blue, cream, sage, oatmeal, lavender, or soft mustard.
Gauge
14 hdc = 4 inches
10 rows = 4 inches
Take time to make a gauge swatch before starting, especially for a fitted baby garment.
Abbreviations
- ch = chain
- sc = single crochet
- hdc = half double crochet
- sl st = slip stitch
- st(s) = stitch(es)
- inc = increase
- dec = decrease
- BLO = back loop only
Before You Start / Pattern Notes
The cardigan is worked in rows and seamed together.
The main body uses half double crochet for a soft, slightly textured fabric.
The lower hem, cuffs, and front band are finished with simple ribbing worked in the back loop only.
Chain 2 at the beginning of a half double crochet row does not count as a stitch.
Numbers are written in this order throughout the pattern:
0–3M (3–6M, 6–12M, 12–18M, 18–24M)
Free Baby Hooded Crochet Cardigan Pattern
Part 1 — Back Panel
Ch 31 (33, 35, 37, 39).
Row 1: Hdc in the 3rd ch from hook and in each ch across. Turn. 29 (31, 33, 35, 37) sts
Rows 2–20 (22, 24, 26, 28): Ch 2, hdc across. Turn.
At the end of these rows, the back panel should measure approximately 10 (11, 12, 13, 14) inches tall.
Shape the Armholes
Next Row: Ch 2, hdc dec over first 2 sts, hdc across to last 2 sts, hdc dec over last 2 sts. Turn.
Next 3 Rows: Repeat the same shaping row. You will decrease by 2 stitches on each row.
You should now have 21 (23, 25, 27, 29) sts.
Next 8 (9, 10, 11, 12) Rows: Ch 2, hdc across. Turn.
Shape the Neckline
Next Row: Work 6 (7, 8, 9, 10) hdc, turn.
Next Row: Ch 2, hdc dec, hdc across. Turn.
Next 1 (1, 2, 2, 2) Rows: Hdc across.
Fasten off.
Skip the center 9 sts for the neckline. Rejoin yarn on the opposite side and repeat for the second shoulder.
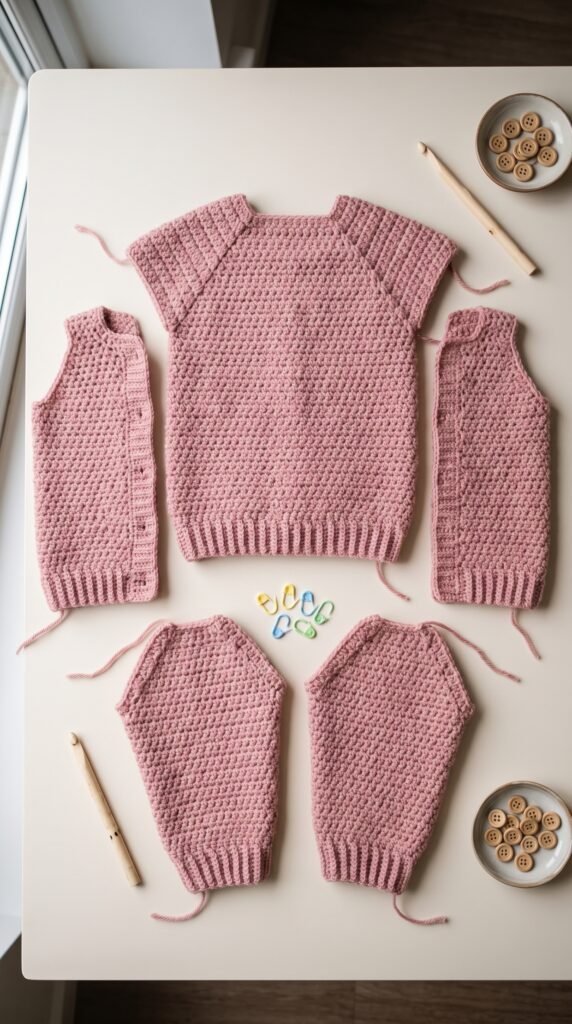
Part 2 — Left Front
Ch 16 (17, 18, 19, 20).
Row 1: Hdc in the 3rd ch from hook and in each ch across. Turn. 14 (15, 16, 17, 18) sts
Rows 2–20 (22, 24, 26, 28): Ch 2, hdc across. Turn.
Shape the Armhole
Next Row: Ch 2, hdc dec over first 2 sts, hdc across. Turn.
Next 3 Rows: Repeat the shaping row. You will now have 10 (11, 12, 13, 14) sts.
Next 5 (6, 7, 8, 9) Rows: Hdc across.
Shape the Front Neck
Next Row: Ch 2, hdc across to last 2 sts, hdc dec over last 2 sts. Turn.
Next 2 (2, 3, 3, 3) Rows: Repeat the neckline shaping row.
Fasten off.
Part 3 — Right Front
Work the same as the Left Front, reversing the shaping.
For the armhole shaping, decrease at the end of the row.
For the neckline shaping, decrease at the beginning of the row.
Part 4 — Sleeves (Make 2)
Ch 23 (25, 27, 29, 31).
Row 1: Hdc in the 3rd ch from hook and in each ch across. Turn. 21 (23, 25, 27, 29) sts
Rows 2–6: Ch 2, hdc across. Turn.
Row 7: Ch 2, 2 hdc in first st, hdc across to last st, 2 hdc in last st. Turn.
Rows 8–11: Hdc across.
Repeat the increase row every 5th row until you have:
- 0–3M: 27 sts
- 3–6M: 29 sts
- 6–12M: 31 sts
- 12–18M: 33 sts
- 18–24M: 35 sts
Continue even until sleeve measures approximately:
- 0–3M: 7 in (18 cm)
- 3–6M: 8 in (20 cm)
- 6–12M: 9 in (23 cm)
- 12–18M: 10 in (25.5 cm)
- 18–24M: 11 in (28 cm)
Fasten off.
Part 5 — Hood
Sew the front panels to the back at the shoulders.
Now work the hood directly from the neckline.
With the right side facing, join yarn at one front neckline edge and work hdc evenly around the entire neckline.
You should have approximately 29 (31, 33, 35, 37) stitches around the neckline.
Row 1: Ch 2, hdc across. Turn.
Rows 2–16 (17, 18, 19, 20): Ch 2, hdc across. Turn.
Fold the hood in half so the final row edges meet.
Sew or slip stitch the top seam closed.
Turn right side out.
Part 6 — Assemble the Cardigan
Sew the sleeves to the armholes.
Fold the cardigan and sleeves, then sew the side seams and sleeve seams in one continuous line on each side.
Weave in any loose ends before adding the front band.
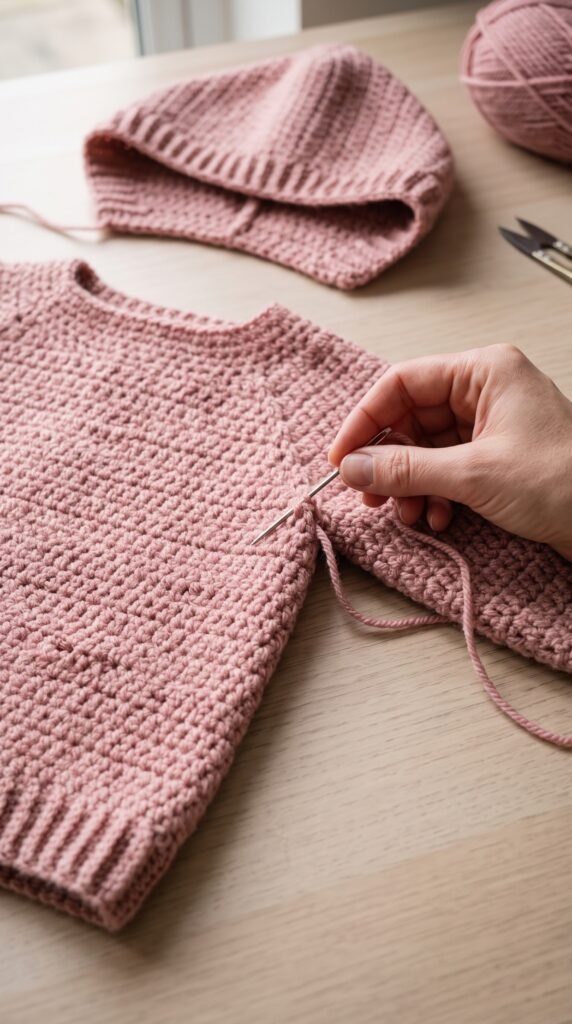
Part 7 — Front Band and Button Band
Join yarn at the lower edge of one front panel.
Work sc evenly up the front edge, around the hood opening, and back down the opposite front edge.
Turn.
Rows 2–4: Ch 1, sc BLO across. Turn.
This creates a soft ribbed front band.
Buttonholes
On the buttonhole side, mark 4 (4, 5, 5, 5) evenly spaced button placements.
Buttonhole Row: Work sc to marker, ch 1, skip 1 st, continue in sc. Repeat at each marker.
On the next row, work 1 sc into each ch-1 space.
Sew the buttons onto the opposite front band.
Part 8 — Sleeve and Bottom Ribbing
Join yarn at one sleeve cuff and work 1 round of sc evenly around.
Then work 3 rounds of sc BLO.
Fasten off.
Repeat for the second sleeve.
Join yarn at the bottom hem and work 1 row of sc across.
Then work 3 rows of sc BLO across for the lower ribbed hem.
Fasten off.
Finishing
Weave in all remaining yarn ends securely.
Check that the hood seam sits neatly at the top of the head.
Make sure the sleeve seams are smooth and comfortable.
Attach the buttons firmly and recheck each buttonhole opening.
Light blocking can help even out the panels and soften the finished fabric. Follow your yarn label care instructions.
As with all baby garments, regularly check buttons for security before use.

Finished Size
- 0–3 Months: 18-inch chest, 10-inch length
- 3–6 Months: 19-inch chest, 11-inch length
- 6–12 Months: 20.5-inch chest, 12-inch length
- 12–18 Months: 22-inch chest, 13-inch length
- 18–24 Months: 23.5-inch chest, 14-inch length
Always choose the size based on the baby’s measurements and desired layering ease.
Tips and Customization Ideas
Make It Without a Hood
If you prefer a classic cardigan, skip the hood and finish the neckline with a simple ribbed collar instead.
Use Wooden Buttons
Natural wooden buttons add a cozy handmade look to this simple baby jacket.
Try Soft Neutral Colors
Cream, oatmeal, sage, dusty rose, or pale blue all work beautifully for a timeless baby cardigan.
Add Small Pockets
You can sew tiny patch pockets onto the fronts for an extra-cute detail.
Make a Matching Set
Pair the cardigan with baby booties or a baby beanie for a thoughtful handmade gift set.
Care Tips
Choose a machine-washable yarn if the cardigan will be used often.
Wash gently according to the yarn label and lay flat to dry when possible to help the cardigan keep its shape.
For standard crochet terminology and yarn guidance, see the Craft Yarn Council standards.
Looking for Your Next Crochet Project?
Love this baby wearable? Explore Cute Stitch Studio’s premium crochet patterns for more cozy, gift-worthy, and beginner-friendly handmade ideas.
You May Also Like
Easy Crochet Baby Booties Pattern
Future internal link opportunity.
Cute Crochet Baby Hat Pattern
Future internal link opportunity.
Beginner Crochet Baby Sweater Pattern
Future internal link opportunity.