Baby Bear Hooded Cardigan Crochet Pattern in 3 Cozy Sizes
This free baby bear hooded cardigan crochet pattern makes a sweet little layer with long sleeves, a roomy hood, and two rounded bear ears. A gently scalloped hem adds a soft finishing detail to the simple open-front shape.
The cardigan is worked in separate, easy-to-follow pieces using half double crochet. You will sew the shoulders, attach the sleeves, close the side seams, and then crochet the hood directly onto the neckline.
This original Cute Stitch Studio version takes inspiration from a dark hooded bear cardigan while using simpler stitches and edging. Choose charcoal for the same cozy mood, or make the stitches easier to see with oatmeal, cream, or pale gray.
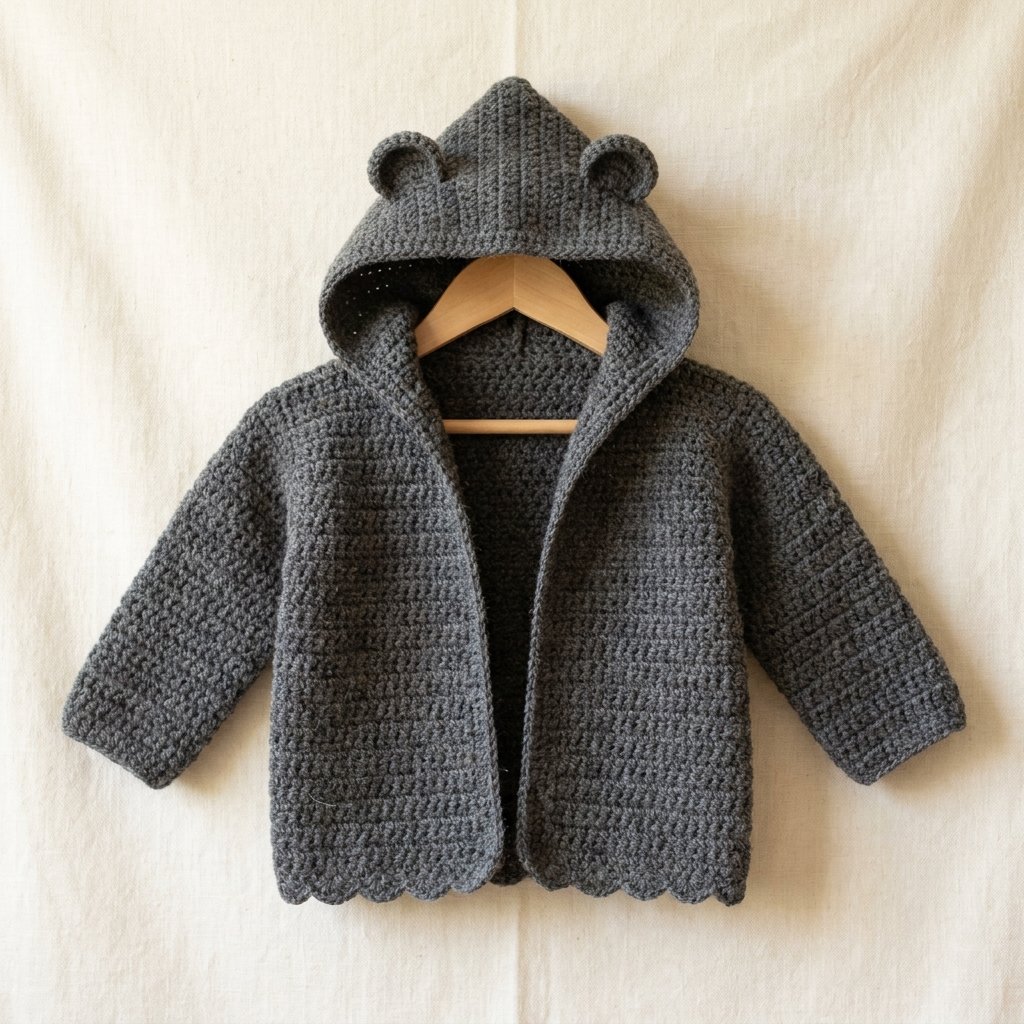
Table of Contents
Baby Bear Hooded Cardigan Crochet Pattern In 3 Cozy Sizes Instructions
Project Details
- Skill level: Adventurous beginner.
- Estimated time: Approximately 10–16 hours, depending on size and experience.
- Sizes: Three baby sizes, selected by chest measurement.
- Finished chest: Approximately 20, 22, or 24 inches (51, 56, or 61 cm), excluding front edging.
- Crochet terminology: US terms.
- Construction: Back and front panels, two tapered sleeves, an attached hood, and two separately crocheted ears.
- Closure: Open front, without buttons or ties.
This is an original pattern draft that has not been physically tested. Measurements and yarn quantities are estimates based on the stated gauge. Check each piece before assembly.
Choose the Right Size
Measure around the baby’s chest over a light layer of clothing. Choose a finished chest approximately 2–4 inches (5–10 cm) larger than that measurement for a comfortable layering fit.
Age ranges are approximate starting points. Chest measurement and desired garment length are more useful than age alone.
| Measurement | Size A | Size B | Size C |
|---|---|---|---|
| Approximate age guide | 0–3 months | 3–6 months | 6–12 months |
| Suggested body chest | 16–18 inches (41–46 cm) | 18–20 inches (46–51 cm) | 20–22 inches (51–56 cm) |
| Finished garment chest | 20 inches (51 cm) | 22 inches (56 cm) | 24 inches (61 cm) |
| Shoulder-to-hem length before edging | 10 inches (25.5 cm) | 11 inches (28 cm) | 12 inches (30.5 cm) |
| Sleeve length before cuff edging | 6 inches (15 cm) | 7 inches (18 cm) | 8 inches (20 cm) |
| Back panel width | 10 inches (25.5 cm) | 11 inches (28 cm) | 12 inches (30.5 cm) |
The sleeves begin at a dropped shoulder, so the listed sleeve length is measured from the sleeve’s upper edge rather than from the base of the neck.
Materials for the Baby Bear Hooded Cardigan Crochet Pattern
- Category 3 light/DK-weight yarn in your chosen color.
- 4 mm crochet hook, or the size needed to match gauge.
- Yarn needle.
- Scissors.
- Measuring tape.
- Removable stitch markers for marking shoulders, armholes, and sleeve centers.
No stuffing, buttons, cords, or separate fasteners are used in this version.

Hook Size
Start with a 4 mm crochet hook. Choose the hook that gives the stated half double crochet gauge after washing and drying your swatch.
If you have too many stitches within 4 inches, try a larger hook. If you have too few, try a smaller hook.
Yarn
Choose a soft, smooth category 3 light/DK-weight yarn. An easy-care acrylic or washable wool blend is a practical option for a garment that may need frequent washing.
| Size | Estimated Yarn |
|---|---|
| A | 550–650 yards (503–594 m) |
| B | 650–750 yards (594–686 m) |
| C | 750–900 yards (686–823 m) |
These estimates include the hood, ears, and edging. Allow extra if you lengthen the body or sleeves.
Charcoal gives the baby bear hooded cardigan crochet pattern a classic look. Lighter yarn makes stitch counting and seaming easier, especially for your first garment.
Gauge
16 hdc and 12 rows = 4 inches (10 cm), measured over a washed and dried swatch without stretching.
Make a swatch larger than 4 inches square and measure the middle section. Both stitch gauge and row gauge matter: stitch gauge controls the chest width, while row gauge controls body, sleeve, and hood length.
The ears are worked in single crochet. Their exact gauge is less important, but both ears should match in size.
Abbreviations
- ch: chain.
- sc: single crochet.
- hdc: half double crochet.
- hdc2tog: half double crochet two stitches together.
- dc: double crochet.
- sl st: slip stitch.
- st / sts: stitch / stitches.
- inc: work 2 sc into the same stitch, used for the ears.
Half double crochet: Yarn over, insert the hook, yarn over and pull up a loop. Yarn over and pull through all three loops.
Hdc2tog: Yarn over, insert the hook into the next stitch and pull up a loop. Yarn over, insert the hook into the following stitch and pull up a loop. Yarn over and pull through all five loops. Two stitches become one.
Before You Start
- Instructions are written for Size A, with Sizes B and C in parentheses: A (B, C).
- Choose your size before starting and follow it throughout.
- The beginning ch 2 does not count as a stitch.
- Work the first hdc into the first stitch of the row.
- Turn after every body, sleeve, and hood row.
- Work through both top loops unless instructed otherwise.
- The body panels are worked from hem to shoulder.
- The sleeves are worked from the upper arm down to the wrist.
This cardigan has a straight neckline beneath the hood and relaxed dropped shoulders. The two front panels meet at the center before edging; the narrow front bands add a little extra coverage.
Baby Bear Hooded Cardigan Crochet Pattern: Body Pieces
Part 1 — Back Panel
Ch 42 (46, 50).
Row 1: Hdc in the third ch from the hook and in each remaining ch. Turn. [40 (44, 48) sts]
Row 2: Ch 2, hdc in each st across. Turn. [40 (44, 48) sts]
Rows 3–30 (33, 36): Repeat Row 2.
The panel should measure approximately 10 (11, 12) inches wide and the same amount in height. Fasten off, leaving a sewing tail.
Part 2 — Front Panels: Make Two
Ch 22 (24, 26).
Row 1: Hdc in the third ch from the hook and in each remaining ch. Turn. [20 (22, 24) sts]
Row 2: Ch 2, hdc in each st across. Turn. [20 (22, 24) sts]
Rows 3–30 (33, 36): Repeat Row 2.
Fasten off. Make the second front exactly the same size. Lay both fronts beside the back and check that all three pieces have matching heights.
Part 3 — Join the Shoulders
Lay the back flat with the two fronts on top. Align each front’s outside edge with the corresponding side of the back. The front opening runs down the middle.
At each shoulder, sew the outermost 10 (12, 14) stitches of the front to the corresponding stitches of the back.
This leaves:
- 20 unsewn stitches across the center back neckline.
- 10 unsewn stitches at the neck edge of each front.
- 40 neckline stitches total for every size.
Use small stitches through matching loops, keeping the seams flexible. Do not sew the neckline closed.
Sleeves and Body Assembly
Part 4 — Crochet the Sleeves: Make Two
Ch 30 (32, 34).
Row 1: Hdc in the third ch from the hook and each remaining ch. Turn. [28 (30, 32) sts]
Rows 2–3: Ch 2, hdc across. Turn.
Row 4: Ch 2, hdc2tog, hdc across until two stitches remain, hdc2tog. Turn. [26 (28, 30) sts]
Rows 5–7: Ch 2, hdc across. Turn.
Row 8: Repeat the decrease instructions from Row 4. [24 (26, 28) sts]
Rows 9–11: Ch 2, hdc across. Turn.
Row 12: Repeat the decrease row. [22 (24, 26) sts]
Rows 13–15: Ch 2, hdc across. Turn.
Row 16: Repeat the decrease row. [20 (22, 24) sts]
Rows 17–18 (21, 24): Ch 2, hdc across. Turn. Keep the stitch count unchanged.
Fasten off. The sleeves should measure approximately 6 (7, 8) inches long before cuff edging. Make two matching sleeves.
Part 5 — Attach the Sleeves
Open the joined body flat, with the shoulder seams running across the top.
On each side of the body, count down 10 (11, 12) rows from the shoulder seam on both the front and back. Mark these points as the bottom of the sleeve attachment.
Find the midpoint of a sleeve’s wide starting edge. Align that midpoint with the shoulder seam, then align the two sleeve corners with the marked points.
Sew the wide sleeve edge evenly to the row ends between the markers. Ease the fabric gently; do not pull the body edge to match each sleeve stitch one for one.
Repeat for the second sleeve.

Part 6 — Close the Underarm and Side Seams
Fold the cardigan at the shoulder seams with the inside facing outward.
Starting at a wrist, sew the sleeve edges together up to the underarm. Continue down the body side to the hem. Match rows as you sew and keep the seam flat.
Repeat on the other side. Turn the cardigan right side out and check that the sleeves hang evenly.
Part 7 — Finish the Cuffs
Join yarn at the underarm seam of one cuff.
Cuff Round 1: Ch 1, sc evenly into the final sleeve-row stitches around. Join to the first sc. [20 (22, 24) sts]
Cuff Round 2: Ch 1, sc around. Join and fasten off. [20 (22, 24) sts]
Repeat on the other sleeve. Keep these rounds loose enough that the cuff does not tighten sharply at the wrist.
Hood and Bear Ears
Part 8 — Crochet the Hood
With the outside facing you, join yarn at one front neckline corner. Work across the 10 front-neck stitches, the 20 back-neck stitches, and the 10 opposite front-neck stitches.
Hood Row 1, Size A: Ch 2, hdc in each neckline stitch. Turn. (40 sts)
Hood Row 1, Size B: Ch 2, repeat (hdc in the next 9 stitches, 2 hdc in the next stitch) four times. Turn. (44 sts)
Hood Row 1, Size C: Ch 2, repeat (hdc in the next 4 stitches, 2 hdc in the next stitch) eight times. Turn. (48 sts)
Do not add stitches into the shoulder seams; work only into the 40 unsewn neckline stitches.
Hood Row 2: Ch 2, hdc across. Turn. [40 (44, 48) sts]
Hood Rows 3–22 (24, 26): Repeat Row 2.
The hood should measure approximately 7⅓ (8, 8⅔) inches from the neckline to its upper edge.
Fasten off, leaving a long sewing tail. Fold the hood in half so its two front edges meet. Sew the final row together in matching pairs: 20 (22, 24) pairs total.
This seam runs from the top front of the hood toward the back. Keep the seam on the inside.
Part 9 — Bear Ears: Make Two
Ch 2. Work the ears in continuous rounds without joining. Mark the first stitch of each round.
Round 1: Work 6 sc into the second ch from the hook. (6 sts)
Round 2: Inc in each st around. (12 sts)
Round 3: Repeat (sc in the next st, inc in the next st) six times. (18 sts)
Round 4: Repeat (sc in the next 2 sts, inc in the next st) six times. (24 sts)
Rounds 5–6: Sc in each st around. (24 sts)
Do not stuff. Flatten the ear so the opening has 12 stitches on each side.
Closing Row: Ch 1, work 12 sc through both layers, pairing the front and back stitches. Fasten off with a long sewing tail.
Make a second matching ear. The ears should be approximately 1½–2 inches (4–5 cm) wide, depending on your single crochet tension.
Part 10 — Attach the Ears
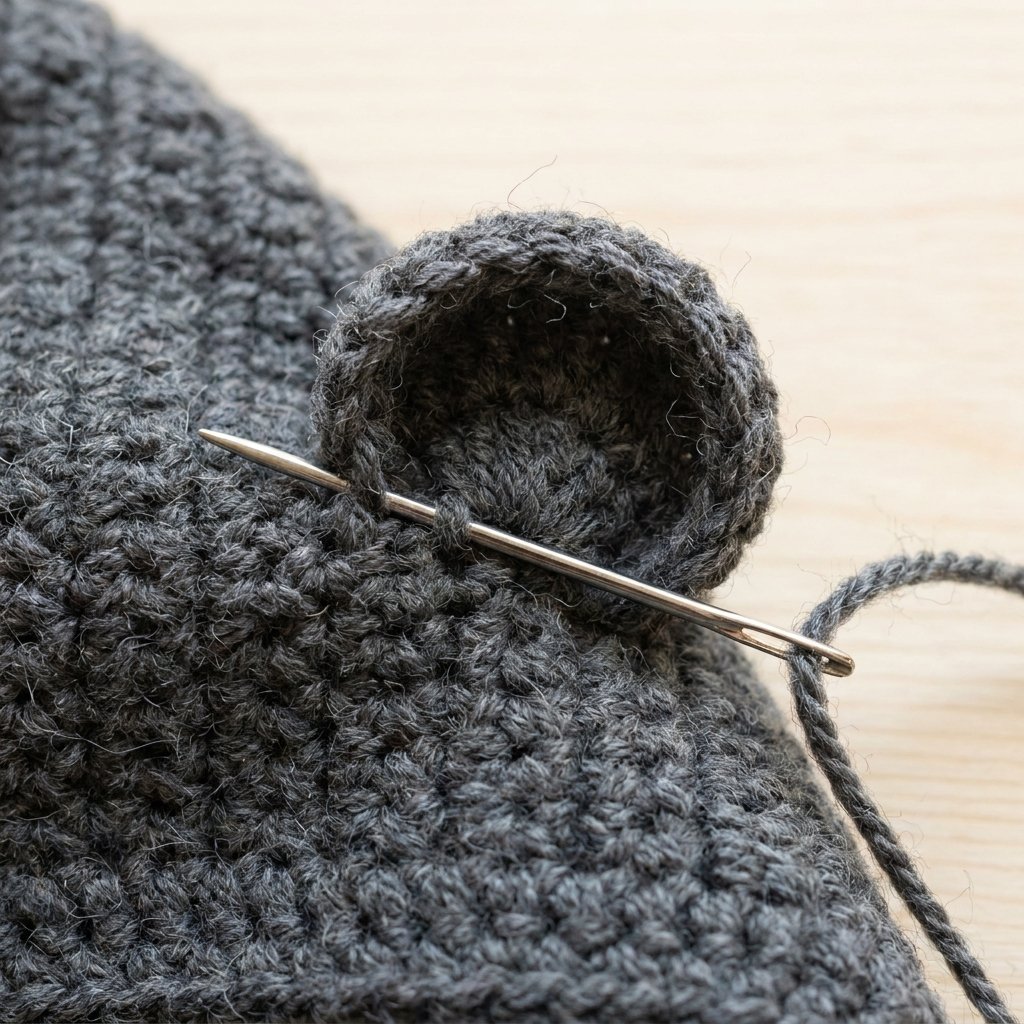
Position one ear on each side of the hood’s top seam, approximately 1½–2 inches behind the face opening.
Check the placement from the front before sewing. Keep the ears evenly spaced and angled slightly outward.
Sew each flattened base firmly to the hood, making several passes through the closing row and the hood fabric. Secure the ends inside the hood without leaving loose loops.
Front Edging and Scalloped Hem
Part 11 — Edge the Front Opening
Join yarn at a lower front corner with the outside facing you.
Edging Row 1: Ch 1, sc evenly up the front, around the hood opening, and down the opposite front. As a starting guide, place approximately 3 sc across every 2 hdc row ends. Turn.
Edging Row 2: Ch 1, sc in each stitch across the same opening. Fasten off.
Adjust the first row locally if the edge ripples or draws inward. Work a few fewer stitches if it flares, or a few more if it puckers.
Part 12 — Add the Scalloped Hem
Join yarn at the original foundation-chain corner of one front panel, just inside the front edging.
Hem Row 1: Ch 1, work one sc into each foundation-chain position across the first front, the back, and the second front. Do not add stitches into the side seams or front bands. Turn. [80 (88, 96) sts]
Hem Row 2: Ch 1. Repeat (sl st in the next st, skip 1 st, work 5 dc in the next st, skip 1 st) across. Fasten off.
You will have 20 (22, 24) scallops. Secure the final tail neatly to the adjacent front edging so the last scallop sits smoothly.
Finishing
Weave in all ends on the inside, changing direction to help secure them. Check the shoulders, underarms, hood seam, and ear attachments.
Wash or dampen the cardigan according to the yarn label. Gently arrange it to the intended measurements and lay it flat to dry.
Shape the hem scallops with your fingers. Do not stretch the hood or sleeves to force a size change.
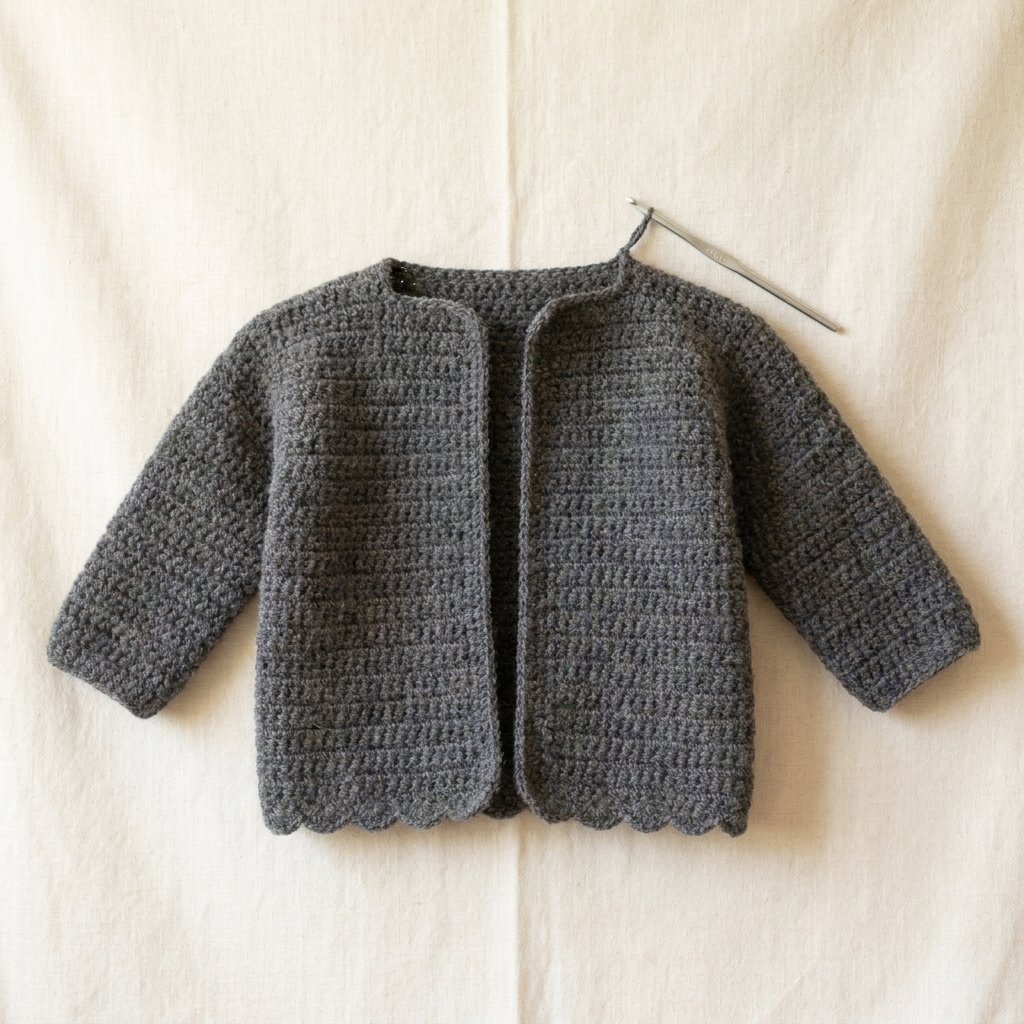
Finished Size
The finished chest is approximately 20 (22, 24) inches, or 51 (56, 61) cm, excluding the narrow front bands.
The body measures approximately 10 (11, 12) inches from shoulder to the original hem. The scalloped edging adds roughly ½–¾ inch (1–2 cm).
The sleeves measure approximately 6 (7, 8) inches before the two cuff rounds. Compare these dimensions with a well-fitting garment before finishing.
Tips and Customization
Keep the Bear Details Simple
Two unstuffed ears are enough to give this baby bear hooded cardigan crochet pattern its character. The hood does not need a face, beads, or hanging decorations.
Adjust the Body Length
Add or remove the same number of rows from the back and both fronts. At the stated gauge, three rows change the length by approximately 1 inch (2.5 cm).
Keep the sleeve attachment measured down from the shoulders, not upward from the hem.
Adjust Sleeve Length Carefully
For longer sleeves, add plain rows after Row 16. For shorter sleeves, check the required length before finishing the taper; simply removing early rows would also change the shaping.
Try a Softer Color Palette
Make an oatmeal cardigan with matching ears for a teddy-bear look, or use dusty blue, sage, or pale pink. Keep the yarn weight consistent if you change colors.
Baby Wear and Care Notes
This hooded cardigan is intended as a supervised outer layer. Remove it for sleep and keep the hood clear of the baby’s face.
Do not add neck ties or loose cords. Check the sewn ears regularly and repair any loose attachment before the garment is worn again.
The written design uses no buttons. If you later add a closure, treat that as a separate modification and check both its attachment and placement carefully.
Frequently Asked Questions
Is this baby bear hooded cardigan crochet pattern suitable for beginners?
It is best for beginners who already know basic crochet stitches and can keep an even stitch count. The body uses simple rectangles, but sleeve shaping and assembly require attention.
Does the cardigan have buttons?
No. It is an open-front cardigan with a narrow border. The design does not require a fastening.
Can I use thicker yarn?
Thicker yarn changes the measurements substantially. To use the stitch counts as written, choose yarn and a hook that match the stated gauge.
How do I choose between two sizes?
Compare the finished chest with the baby’s actual chest and consider the intended layering room. Also check the body and sleeve lengths rather than choosing by age alone.
Why does my hood look pointed?
A rectangular hood folded and seamed across the top naturally creates a soft point at the back. Gentle shaping can soften it, but it is part of this simple construction.
Save this baby bear hooded cardigan crochet pattern to your baby crochet board for your next cozy handmade project.
Looking for Your Next Crochet Project?
Love this project? Explore Cute Stitch Studio’s premium crochet patterns for more cute, cozy, gift-worthy, and beginner-friendly handmade ideas.