Crochet Raccoon Amigurumi Pattern: A Sweet Woodland Friend
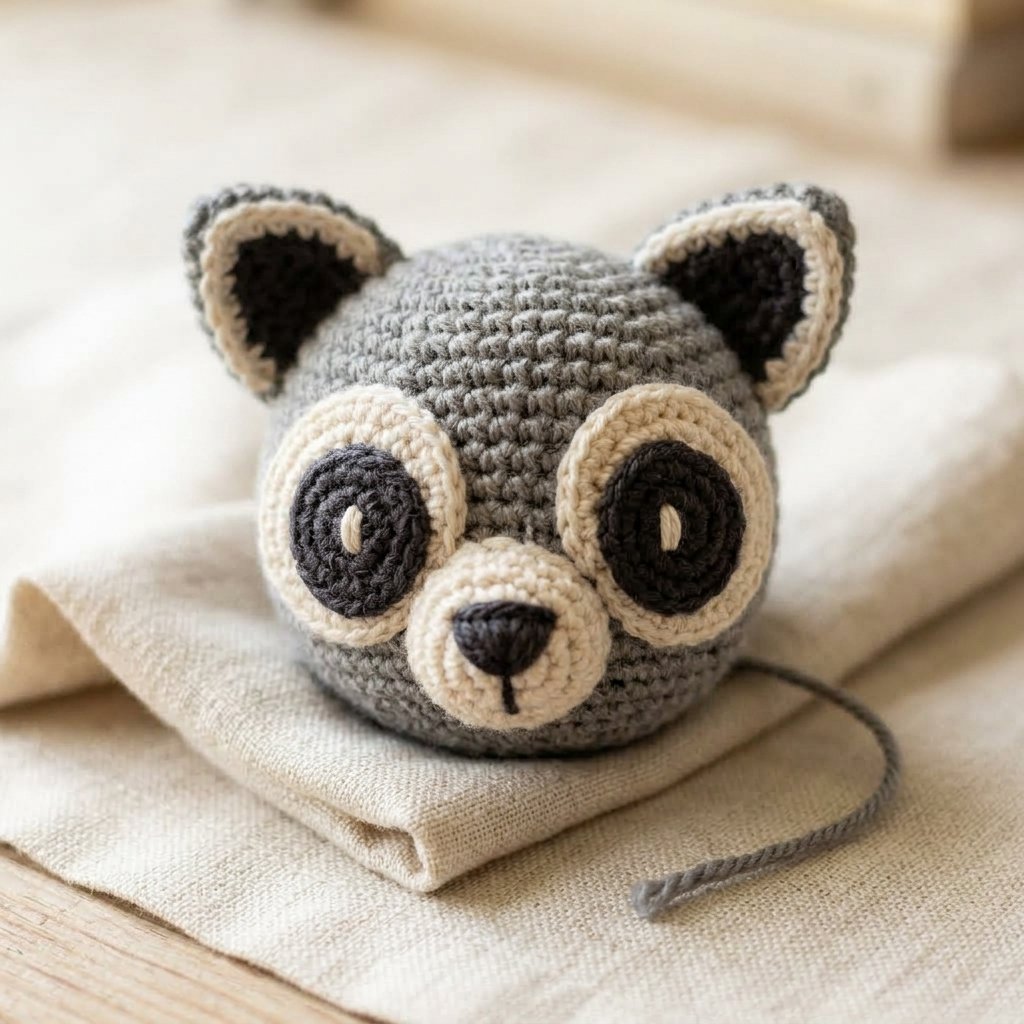
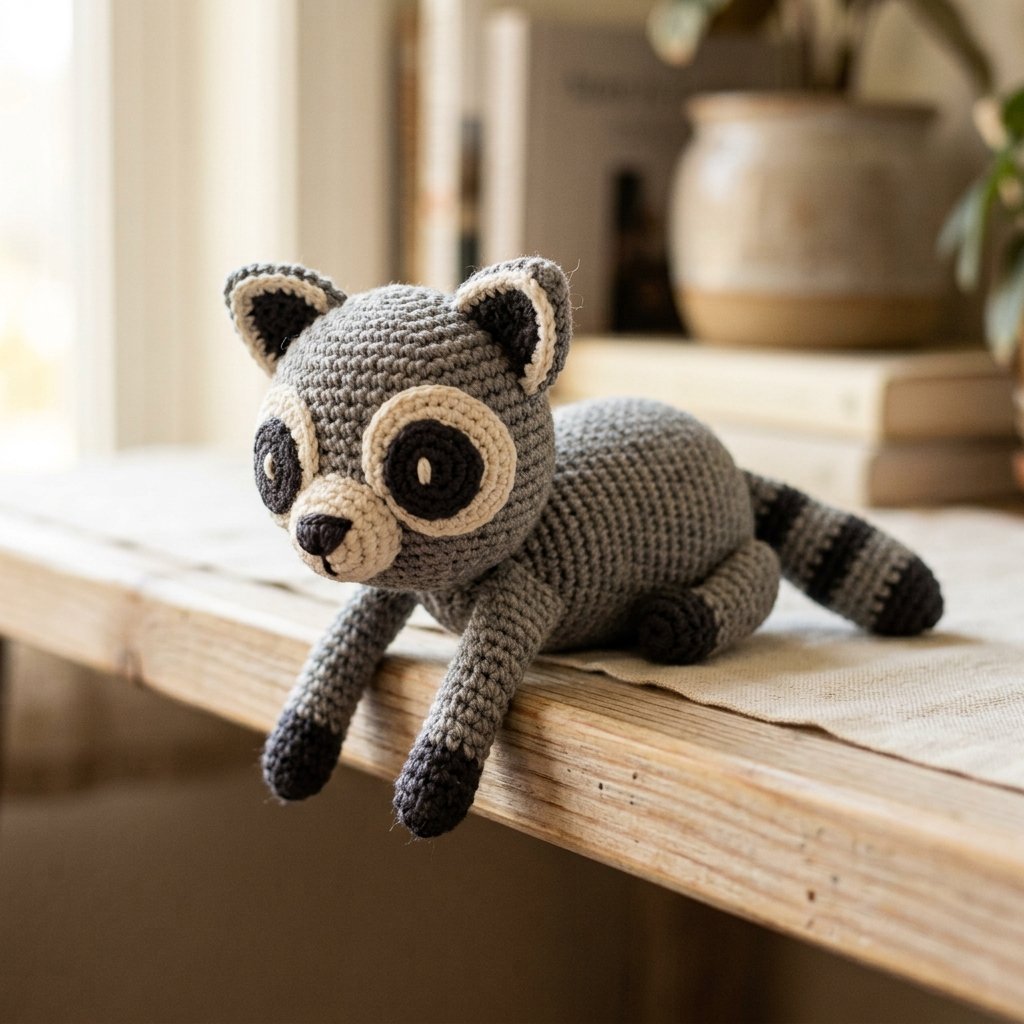
This crochet raccoon amigurumi pattern creates a little woodland character with a rounded gray body, dark paws, a cream-trimmed face, and a striped tail. Its long, soft legs give it a relaxed pose that looks especially cute sitting on a shelf.
Make one for a raccoon-loving friend, add it to a woodland animal collection, or tuck it into a handmade gift box. The facial details are embroidered, and the individual pieces use simple single crochet stitches.
This original Cute Stitch Studio version is an adventurous beginner project. The crocheting is straightforward, while the small pieces and facial assembly reward a little patience.
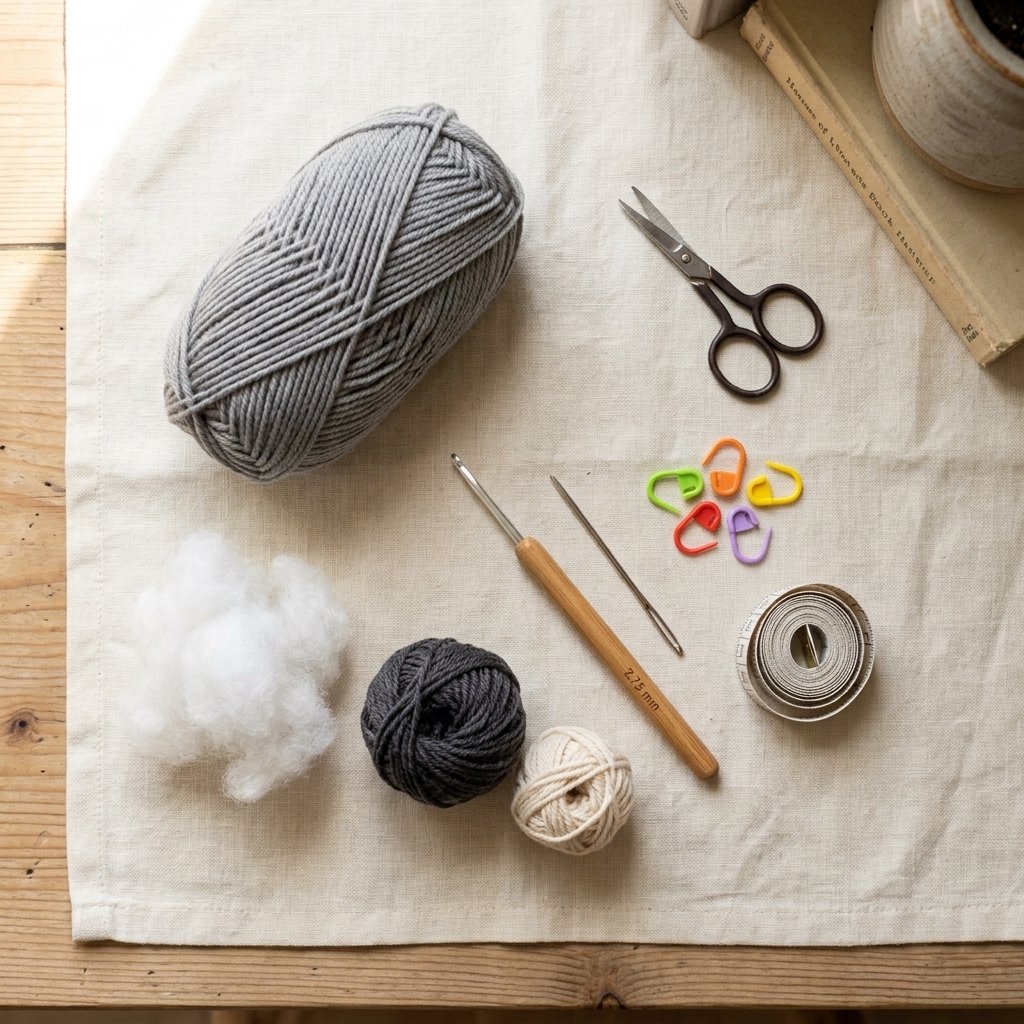
Table of Contents
Crochet Raccoon Amigurumi Pattern: A Sweet Woodland Friend Instructions
Project Details
- Skill level: Adventurous beginner.
- Estimated time: Approximately 6–8 hours, depending on experience.
- Finished size: Approximately 5 inches (12.7 cm) from nose to rump, excluding the tail.
- Tail length: Approximately 2.5–3 inches (6.4–7.6 cm).
- Crochet terminology: US terms.
- Construction: Separate stuffed body and head, four lightly stuffed legs, a striped tail, and sewn facial pieces.
This pattern has not been physically tested. Measurements and yarn amounts are estimates. Check the proportions as you work and position all pieces before sewing them permanently.
Materials
- DK-weight yarn: approximately 100–120 yards of medium gray.
- DK-weight yarn: approximately 35–45 yards of charcoal or black.
- DK-weight yarn: approximately 15–20 yards of cream.
- 2.75 mm crochet hook, or a size that produces firm fabric.
- Polyester fiberfill, approximately 20–30 grams.
- Yarn needle.
- Scissors.
- Four removable stitch markers.
- Measuring tape.
The cream and charcoal yarn also supply the embroidered facial details. No plastic eyes, wire, glue, or separate nose fitting is required.
Hook Size
Use a 2.75 mm crochet hook as a starting point.
If stuffing shows between the stitches, try a smaller hook. If the fabric feels excessively stiff or the stitches are difficult to work, try a slightly larger hook. Use the same hook for every piece.
Yarn
Choose DK-weight yarn, category 3, in three colors: medium gray, charcoal, and cream.
Smooth cotton or a cotton-acrylic blend makes the small stitches easier to see. Use the same yarn range or closely matched thicknesses for all three colors so the facial pieces and paws stay in proportion.
For your first raccoon, avoid fuzzy yarn that hides the stitches. A lighter charcoal is also easier to work with than a very deep black.
Gauge and Finished Proportions
Approximate gauge: 24 single crochet stitches and 28 rounds measure 4 inches (10 cm).
Exact gauge is less important than firm, even fabric because this is not a fitted item. However, changing the yarn or hook changes the finished size and yardage.
The body should be longer than it is wide. The head is slightly smaller than the body’s widest section, and the four legs remain soft enough to hang naturally.
Abbreviations
- ch: chain.
- sc: single crochet.
- sl st: slip stitch.
- st(s): stitch(es).
- inc: work 2 single crochet stitches in the same stitch.
- dec: invisible single crochet decrease over the next 2 stitches.
Before You Start
- Work rounded pieces in continuous spirals. Do not join or turn unless instructed.
- Mark the first stitch of each round and move the marker as you work.
- Numbers at the end of rounds show the total stitch count.
- Instructions in parentheses are repeated the stated number of times.
- For flat ear rows, the turning chain does not count as a stitch.
- Leave approximately 12 inches of yarn for sewing when instructed to leave a long tail.
- Stuff gradually in small amounts rather than pushing in one large ball of filling.
Starting With a Magic Ring
Make a yarn loop, insert the hook through it, and pull up a loop of working yarn. Chain 1 to secure it, then work the required single crochet stitches into the ring. Pull the starting tail to close the center.
If you prefer, chain 2 and work the first round into the second chain from the hook. Secure the center firmly when weaving in the starting tail.
Working an Invisible Decrease
Insert the hook under the front loop of the next stitch, then under the front loop of the following stitch. Yarn over and pull through both front loops. Yarn over again and pull through the two loops remaining on the hook.
Changing Colors
On the final stitch before a color change, complete the last yarn-over with the new color. Begin the next round in that color.
For the tail stripes, keep all color changes along the same underside. Cut the old color with a short tail and secure the ends inside without pulling the fabric tight.
Crochet Raccoon Amigurumi Pattern: Step-by-Step Instructions
Part 1 — Body
Use gray yarn. Begin at the rear of the body.
Round 1: Work 6 sc in a magic ring. 6 sts.
Round 2: Inc in every st. 12 sts.
Round 3: (Sc in the next st, inc) 6 times. 18 sts.
Round 4: (Sc in the next 2 sts, inc) 6 times. 24 sts.
Round 5: (Sc in the next 3 sts, inc) 6 times. 30 sts.
Round 6: (Sc in the next 4 sts, inc) 6 times. 36 sts.
Round 7: (Sc in the next 5 sts, inc) 6 times. 42 sts.
Rounds 8–16: Sc in every st. 42 sts in each round.
Round 17: (Sc in the next 5 sts, dec) 6 times. 36 sts.
Round 18: (Sc in the next 4 sts, dec) 6 times. 30 sts.
Round 19: (Sc in the next 3 sts, dec) 6 times. 24 sts.
Begin stuffing. Fill the rounded rear and middle evenly, then add smaller pieces toward the narrowing front.
Round 20: (Sc in the next 2 sts, dec) 6 times. 18 sts.
Round 21: (Sc in the next st, dec) 6 times. 12 sts.
Add the final stuffing. The body should hold its shape without stretching the stitches apart.
Round 22: Dec 6 times. 6 sts.
Fasten off. Thread the tail through the front loops of the remaining six stitches, pull closed, and weave in the end.
Place a marker near the closed end to identify the front. The magic-ring end will hold the tail.

Part 2 — Head
Use gray yarn. The magic-ring end will become the front of the face.
Round 1: Work 6 sc in a magic ring. 6 sts.
Round 2: Inc in every st. 12 sts.
Round 3: (Sc in the next st, inc) 6 times. 18 sts.
Round 4: (Sc in the next 2 sts, inc) 6 times. 24 sts.
Round 5: (Sc in the next 3 sts, inc) 6 times. 30 sts.
Round 6: (Sc in the next 4 sts, inc) 6 times. 36 sts.
Rounds 7–11: Sc in every st. 36 sts in each round.
Round 12: (Sc in the next 4 sts, dec) 6 times. 30 sts.
Round 13: (Sc in the next 3 sts, dec) 6 times. 24 sts.
Begin stuffing the head evenly.
Round 14: (Sc in the next 2 sts, dec) 6 times. 18 sts.
Round 15: (Sc in the next st, dec) 6 times. 12 sts.
Add a little more stuffing, keeping the face smooth.
Round 16: Dec 6 times. 6 sts.
Fasten off and close the remaining opening as for the body. Leave a long tail for attaching the head.
Part 3 — Four Legs
Make four identical legs. Begin with charcoal yarn at the paw.
Round 1: Work 6 sc in a magic ring. 6 sts.
Round 2: Inc in every st. 12 sts.
Rounds 3–4: Sc in every st. 12 sts in each round.
Change to gray at the end of Round 4.
Rounds 5–10: Sc in every st. 12 sts in each round.
Put a small amount of stuffing in the paw and lower leg. Leave the top three rounds unstuffed so the limb can bend.
Flatten the opening so that six stitches on one side line up with six stitches on the other. Work 6 sc through both layers to close the top.
Fasten off, leaving a long sewing tail. These are simple rounded paws; no separate toes are needed.
Part 4 — Striped Tail
Begin with charcoal yarn at the tip.
Round 1: Work 6 sc in a magic ring. 6 sts.
Round 2: (Sc in the next st, inc) 3 times. 9 sts.
Round 3: (Sc in the next 2 sts, inc) 3 times. 12 sts.
For Rounds 4–18, work 12 sc in every round using the following colors:
| Rounds | Color | Stitch count |
|---|---|---|
| 4–6 | Gray | 12 each round |
| 7–9 | Charcoal | 12 each round |
| 10–12 | Gray | 12 each round |
| 13–15 | Charcoal | 12 each round |
| 16–18 | Gray | 12 each round |
Add a thin layer of stuffing as the tail grows. Keep it flexible, and leave the final two rounds unstuffed.
Flatten the opening and work 6 sc through both layers to close it. Fasten off with a long sewing tail.
Part 5 — Cream Eye Backings
Make two with cream yarn. These flat circles create a light outline behind the dark face patches.
Round 1: Work 6 sc in a magic ring. 6 sts.
Round 2: Inc in every st. 12 sts.
Round 3: (Sc in the next st, inc) 6 times. 18 sts.
Sl st in the next st and fasten off, leaving a long tail. The joining slip stitch does not count as an additional stitch.
Part 6 — Dark Face Patches
Make two with charcoal yarn.
Round 1: Work 6 sc in a magic ring. 6 sts.
Round 2: Inc in every st. 12 sts.
Sl st in the next st and fasten off with a long sewing tail.
Center one dark patch on each cream backing. Sew around the dark edge with small stitches, keeping the cream border visible.
With cream yarn, embroider a tiny closed oval on each dark patch, approximately one crochet stitch wide and two stitches high. Use short backstitches to make the outline. These embroidered eye details replace plastic eyes.
Secure and weave in the embroidery ends on the back of each layered piece.
Part 7 — Muzzle
Use cream yarn. Begin at the nose end.
Round 1: Work 6 sc in a magic ring. 6 sts.
Round 2: Inc in every st. 12 sts.
Rounds 3–4: Sc in every st. 12 sts in each round.
Fasten off with a long sewing tail. Leave the back open.
Using charcoal yarn, embroider a small filled triangle over the magic-ring center. Make the top approximately two stitches wide, with the point facing downward. Add one short vertical stitch beneath it if desired.
Secure the embroidery inside the muzzle, then add a small amount of stuffing. Keep the muzzle softly rounded rather than firm.
Part 8 — Ears
Make two flat ears with gray yarn. Chain 6.
Row 1: Sc in the second chain from the hook and each remaining chain. 5 sts.
Row 2: Ch 1, turn. Sc across. 5 sts.
Row 3: Ch 1, turn. Dec, sc in the next st, dec. 3 sts.
Row 4: Ch 1, turn. Insert the hook into each of the next 3 sts in turn, pulling up a loop in each. Yarn over and pull through all 4 loops on the hook. 1 st.
Fasten off gray.
Join cream at one bottom corner. Work 1 sc into each of the three row ends leading toward the tip, 3 sc into the tip stitch, then 1 sc into each of the three row ends down the other side. 9 edging sts.
Leave the five-stitch foundation edge unworked. Fasten off with a long tail for sewing.
With charcoal yarn, add two or three short stitches in the center of each gray ear to suggest a darker inner ear. Keep the cream edging visible.
Assembly
Arrange the Face
Use the head’s magic-ring center as the center of the face. Place the two layered eye patches side by side just above it, with their inner edges nearly touching.
Use removable markers or temporary yarn tacking stitches to hold them in position. Check that both embroidered eyes sit at the same height.
Sew around each cream backing with small stitches. Place the muzzle centrally below the eyes, covering the head’s magic ring and slightly overlapping the lower inner edges of the eye backings.
Sew around the muzzle’s open edge. Add a final tiny pinch of stuffing before closing the seam if needed.
Attach the Ears
Position the ears on the top left and top right of the head, approximately around Head Rounds 6–8. The unworked foundation edges sit against the head.
Curve each ear base gently before sewing it down. Secure both corners as well as the middle so the ears stay upright.

Join the Head and Body
Lay the body horizontally with the marked front end facing you. Place the head against that end, slightly below the body’s top line, with the muzzle pointing forward.
The back of the head should overlap the tapered front of the body. Use the long head tail to sew a broad attachment area approximately 1 inch (2.5 cm) across, catching several stitches on both pieces.
Make a second pass around the attachment area. A wide seam supports the head better than a few stitches at one point.
Attach the Four Legs
Choose the underside of the body opposite its smooth rounded back.
Place the front legs symmetrically on either side of the underside, near Body Rounds 16–18. Place the rear legs near Rounds 6–8. Keep the left and right attachments evenly spaced.
Sew each flattened six-stitch leg opening securely to the body. The dark paws should point downward, and the lightly stuffed legs should be able to drape.
This raccoon is designed to sit or rest against a support. Its soft legs are not intended to hold it in a rigid standing pose.
Attach the Tail
Sew the flattened tail base to the lower rear of the body, just below the body’s starting magic ring. Place the stripe-change line on the underside.
Let the tail extend backward or curve it gently alongside the body. For a permanent side curve, add two discreet gray tacking stitches where the tail touches the rump.
Finishing
Check every attachment with a gentle tug. Reinforce loose stitches at the head, ears, legs, tail, and face patches.
Thread each remaining yarn tail through several stitches, reverse direction, and pass through a few more stitches before trimming. Avoid leaving long loose strands on the surface.
Massage the body and head lightly to distribute the stuffing. Shape the muzzle with your fingers and compare the eyes from the front before making any final adjustments.
Blocking is not necessary. If cleaning is needed, follow the yarn and stuffing care instructions and let the raccoon dry completely.
Finished Size
Your raccoon should measure approximately 5 inches (12.7 cm) from nose to rump, excluding its 2.5–3-inch tail (6.4–7.6 cm).
Its displayed height is approximately 3.5–4 inches (8.9–10.2 cm), depending on how the soft legs are positioned. Yarn, tension, stuffing, and head placement affect these measurements.
Tips and Customization
- Use softer contrast: Medium gray, dark gray, and ivory create a gentler woodland palette.
- Try sleepy eyes: Replace each embroidered oval with a small cream curved line.
- Keep the paws simple: The rounded dark tips give plenty of character without adding tiny separate toes.
- Change the tail pose: Leave it loose for a relaxed look or tack it beside the body for a compact display.
- Make a miniature: Finer yarn and a smaller hook reduce the overall size, but the small pieces become more challenging to handle.
- Personalize the packaging: Add the recipient’s name to a gift tag instead of attaching extra decorations to the raccoon.
Display and Gifting Notes
This version is a small stuffed raccoon without a hanging attachment. It works well as a shelf companion or a gift for an older child or adult who enjoys woodland animals.
Embroidered eyes avoid separate plastic eye fittings, but all sewn pieces still need secure attachment. Inspect seams regularly and remove the item from use if a piece loosens or stuffing becomes accessible.
Frequently Asked Questions
Is this crochet raccoon amigurumi pattern beginner-friendly?
It is suitable for an adventurous beginner who can work single crochet and count rounds. The layered face and small ears need careful sewing, so take those sections slowly.
Can I use worsted-weight yarn?
Yes, using a hook that creates firm fabric. The raccoon will be larger and need more yarn and stuffing. Use the same yarn weight for all colors, and do not rely on the listed finished measurements.
Do I need safety eyes?
No. The pattern uses small embroidered cream eyes on dark crochet patches. This keeps the face entirely yarn-based.
Why does the tail have a small step at each color change?
Continuous rounds form a spiral, so stripe changes do not align perfectly like joined horizontal rings. Keeping all changes underneath makes the step less noticeable.
Why does my raccoon fall forward?
The head may be attached too far forward or the body may need more support in its resting pose. Set the raccoon against its rear legs and tail. Before final assembly, check the head position with temporary tacking stitches.
Can this become a bag charm?
This pattern does not include hanging hardware or a reinforced attachment. For a bag charm, make a smaller version and plan a securely reinforced hanging point suitable for its finished weight before closing the body.
Save This Woodland Crochet Project
Save this pattern to your amigurumi or handmade gift board on Pinterest so you can find it when you are ready to make your own little raccoon.
Looking for Your Next Crochet Project?
Love this project? Explore Cute Stitch Studio’s premium crochet patterns for more cute, cozy, gift-worthy, and beginner-friendly handmade ideas.