Crochet Baby Bear Romper Pattern with a Hood
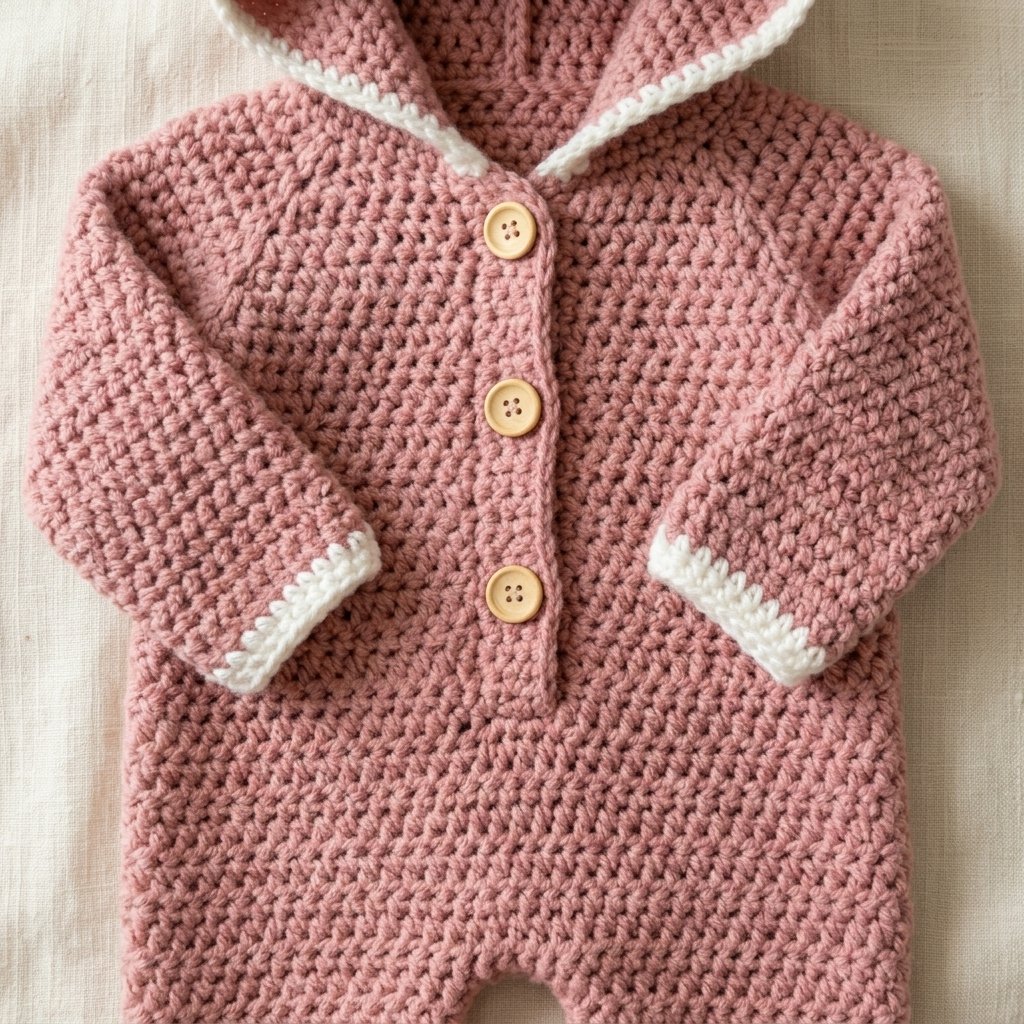
This crochet baby bear romper pattern creates a sweet one-piece outfit with a roomy hood, two rounded ears, long sleeves, and separate legs. Dusty pink yarn, white cuffs, and three wooden buttons give it a soft teddy bear look.
The romper is worked from the neckline down. You will shape the shoulders, separate the sleeves, crochet the body, and divide the lower section into two legs. The hood and ears are added afterward.
This original Cute Stitch Studio design is an intermediate project with beginner-friendly explanations. It uses a single crochet layer without a fabric lining, and the feet remain open.

Table of Contents
Crochet Baby Bear Romper Pattern With A Hood Instructions
Project Details
- Skill level: Intermediate.
- Estimated time: Approximately 12–18 hours.
- Size: One baby size, selected by measurements.
- Finished chest: Approximately 22–23 inches (56–58 cm), depending on button-band overlap.
- Neckline-to-crotch length: Approximately 10 inches (25.4 cm).
- Leg length from crotch: Approximately 6 inches (15.2 cm), including the narrow ankle edging.
- Crochet terminology: US terms.
- Construction: Top-down raglan body, sleeves and legs worked in rounds, and a separately shaped hood worked directly onto the neckline.
This original pattern has not been physically tested. Measurements and yarn quantities are estimates. Confirm the shoulder fit, diaper room, sleeve length, and leg length with a sample before treating the pattern as a validated baby size.
Sizing and Fit
Measure the baby over a light clothing layer and diaper. Do not choose a size by age alone.
| Measurement | Pattern target |
|---|---|
| Suggested body chest | Approximately 18–19 inches (46–48 cm) |
| Finished romper chest | Approximately 22–23 inches (56–58 cm) |
| Neckline to underarm | Approximately 4 inches (10 cm) |
| Neckline to crotch | Approximately 10 inches (25.4 cm) |
| Sleeve length from underarm | Approximately 4.5–5 inches (11.4–12.7 cm) |
| Leg length from crotch | Approximately 6 inches (15.2 cm) |
The extra chest room allows for layering and movement. Torso length matters just as much: the crotch should not pull upward when the baby bends their legs.
Compare these measurements with a comfortable existing outfit. Length adjustments are explained below; substantially different widths require a separately graded pattern.
Materials
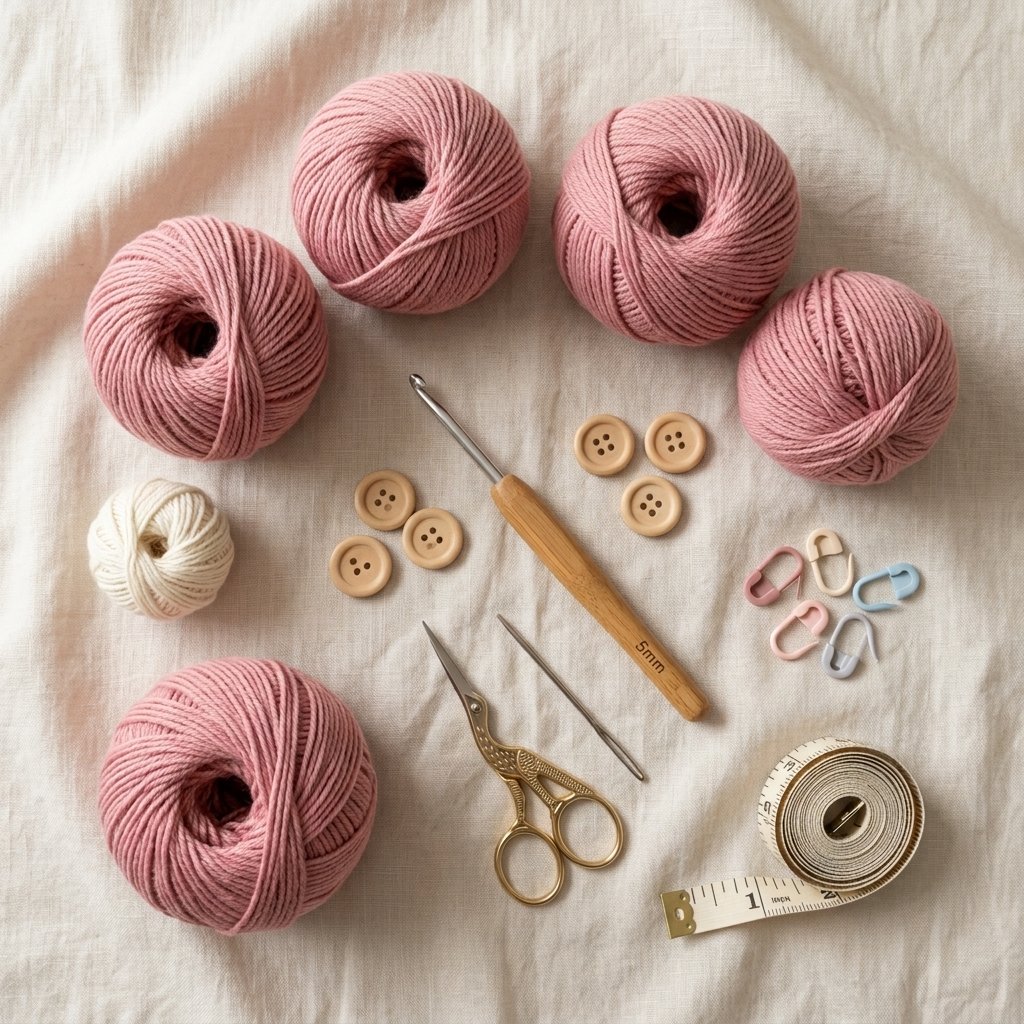
- Approximately 650–800 yards of dusty pink worsted-weight yarn.
- Approximately 50–70 yards of white worsted-weight yarn for the cuffs and hood edging.
- 5 mm crochet hook, or the size needed to obtain gauge.
- Three smooth buttons approximately 0.75 inch (19 mm) across.
- Yarn needle.
- Scissors.
- Six removable stitch markers.
- Measuring tape.
No lining, stuffing, drawstrings, or separate foot pieces are needed.
Hook Size
Start with a 5 mm crochet hook.
Use a larger hook if your washed swatch has too many stitches per inch, or a smaller hook if it has too few. The fabric should bend easily and feel comfortable against a clothing layer.
Yarn
Choose worsted-weight yarn, category 4, with a smooth surface and washing instructions suitable for the recipient.
A soft acrylic or cotton-acrylic blend is a practical starting point. Use pink and white yarns of similar thickness so the cuffs do not become unexpectedly tight or bulky.
Oatmeal with cream cuffs, pale blue with white, or warm beige also suits the bear theme.
Gauge
14 half double crochet stitches and 10 rows = 4 inches (10 cm), measured after washing and drying flat.
Single crochet edging is approximately 14 stitches and 16 rows per 4 inches.
For a swatch, chain 22. Half double crochet in the third chain from the hook and across for 20 stitches. Work at least 14 rows, chaining 2 and turning between rows. The turning chain does not count as a stitch.
Wash and dry the swatch, then measure its center without stretching.
Abbreviations
- ch: chain.
- sc: single crochet.
- hdc: half double crochet.
- sl st: slip stitch.
- st(s): stitch(es).
- hdc2tog: half double crochet 2 stitches together.
Before You Start
- Beginning chains do not count as stitches.
- Work the yoke, body, and hood flat, turning after each row.
- Work sleeves and legs in joined rounds without turning.
- Join rounds with a slip stitch into the first actual stitch.
- The four marked raglan stitches shape the shoulders.
- Work through both loops throughout.
- Count stitches after every shaping row or round.
How to Work hdc2tog
Yarn over, insert the hook into the next stitch, and pull up a loop. Yarn over, insert the hook into the following stitch, and pull up another loop. Yarn over and pull through all five loops on the hook.
Crochet Baby Bear Romper Pattern: Step-by-Step
Part 1 — Neckline and Yoke
With pink yarn, chain 40.
Row 1: Hdc in the third chain from the hook and each remaining chain. 38 sts.
Count from the beginning of the completed row and mark stitches 7, 12, 27, and 32.
The layout is: 6 front stitches, 1 marked stitch, 4 sleeve stitches, 1 marked stitch, 14 back stitches, 1 marked stitch, 4 sleeve stitches, 1 marked stitch, and 6 front stitches.
Row 2: Ch 2, turn. Hdc in every unmarked stitch. Work 3 hdc in each marked stitch, moving the marker into the middle stitch of each three-stitch group. 46 sts.
Rows 3–9: Repeat Row 2. Each row adds 8 stitches.
| Yoke row | Total stitches |
|---|---|
| 1 | 38 |
| 2 | 46 |
| 3 | 54 |
| 4 | 62 |
| 5 | 70 |
| 6 | 78 |
| 7 | 86 |
| 8 | 94 |
| 9 | 102 |
Row 10: Ch 2, turn. Hdc in every stitch, including the marked stitches. Move the markers into their corresponding new stitches. 102 sts.
The sections between the four markers now contain 14 front stitches, 20 sleeve stitches, 30 back stitches, 20 sleeve stitches, and 14 front stitches.
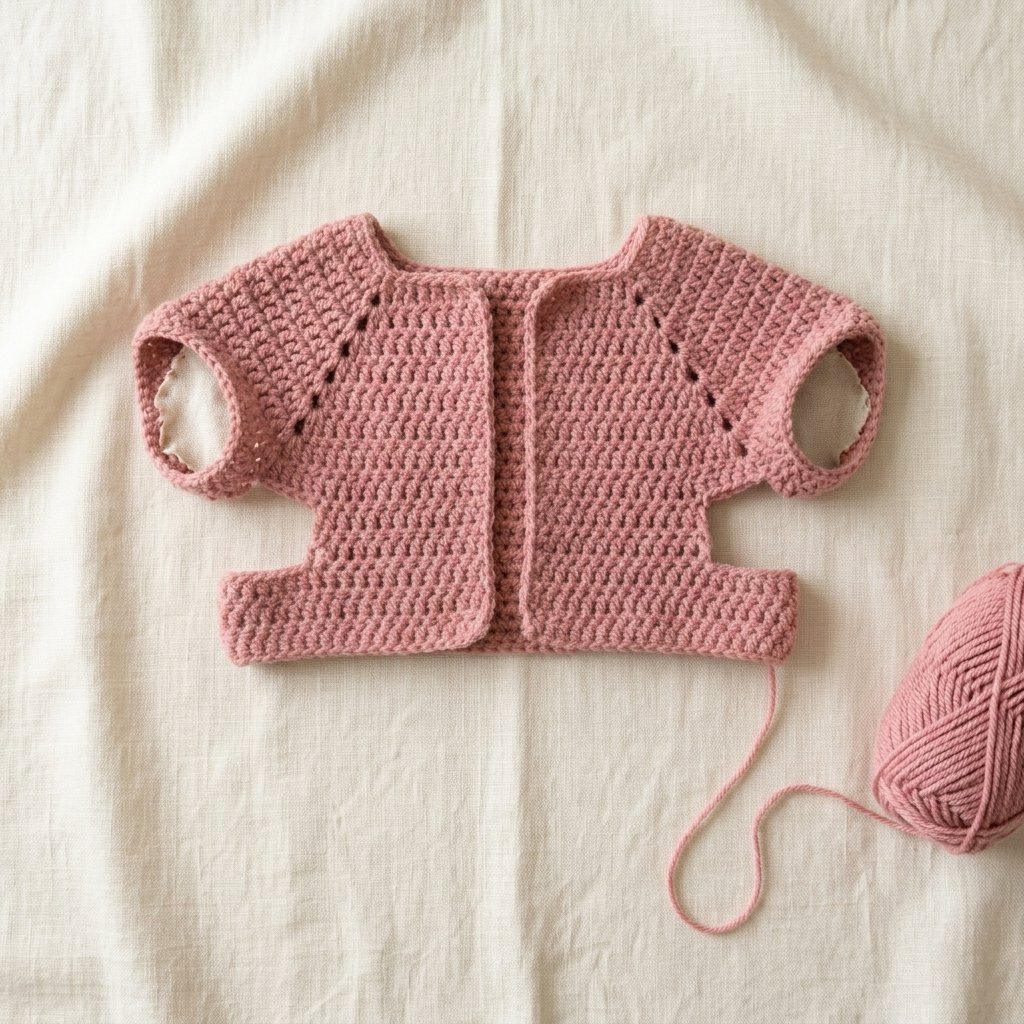
The yoke should measure approximately 4 inches deep. Check its width and shoulder coverage before separating the sleeves.
Part 2 — Separate the Sleeves
Restart the row count for the body.
Body Row 1: Ch 2, turn. Hdc across the first 14 front stitches and into the first marked stitch: 15 hdc.
Ch 8, skip the next 20 sleeve stitches, then hdc into the second marked stitch, across the next 30 back stitches, and into the third marked stitch: 32 hdc.
Ch 8, skip the next 20 sleeve stitches, then hdc into the fourth marked stitch and across the final 14 front stitches: 15 hdc.
You have 62 hdc plus 16 chains = 78 body positions. Each sleeve opening contains 20 skipped stitches and an eight-chain underarm bridge.
Remove the raglan markers.
Part 3 — Body
Body Row 2: Ch 2, turn. Hdc in every stitch and in each underarm chain. 78 sts.
Body Rows 3–15: Ch 2, turn. Hdc in every stitch. 78 sts in each row.
The front remains open. At gauge, the distance from the starting neckline to the lower edge is approximately 10 inches.
Check the torso length against the intended wearer or a well-fitting outfit before dividing the legs. Add plain body rows if more diaper depth is needed; each row adds approximately 0.4 inch.
Fasten off.
Part 4 — Divide the Legs
Lay the body flat with the front edges together. The final body row contains 78 stitches running from one front edge, around the back, to the other front edge.
Count and mark two groups of 39 stitches. The division between them is at the center back.
First Leg, Round 1: Join pink yarn in the first stitch at one front edge. Ch 2, then hdc in the first 39 stitches. Ch 3 and join with a sl st to the first hdc. 39 hdc plus 3 chains = 42 positions.
The three-chain bridge connects the center back to the center front and forms the crotch.
Second Leg, Round 1: Join pink yarn in the first of the remaining 39 body stitches. Ch 2 and hdc across all 39 stitches. Work 1 hdc into the unused underside of each of the three crotch chains. Join to the first hdc. 42 sts.
Complete both legs using the following instructions. On the first leg’s next round, treat each chain as one stitch position.
Part 5 — Leg Shaping
Begin every round with ch 2 and join to the first hdc.
Round 2: Hdc2tog, hdc in the next 17 sts, hdc2tog, hdc in the last 21 sts. 40 sts.
Round 3: Hdc in every st. 40 sts.
Round 4: Hdc2tog, hdc in the next 16 sts, hdc2tog, hdc in the last 20 sts. 38 sts.
Round 5: Hdc in every st. 38 sts.
Round 6: Hdc2tog, hdc in the next 15 sts, hdc2tog, hdc in the last 19 sts. 36 sts.
Round 7: Hdc in every st. 36 sts.
Round 8: Hdc2tog, hdc in the next 14 sts, hdc2tog, hdc in the last 18 sts. 34 sts.
Round 9: Hdc in every st. 34 sts.
Round 10: Hdc2tog, hdc in the next 13 sts, hdc2tog, hdc in the last 17 sts. 32 sts.
Round 11: Hdc in every st. 32 sts.
Round 12: Hdc2tog, hdc in the next 12 sts, hdc2tog, hdc in the last 16 sts. 30 sts.
Rounds 13–14: Hdc in every st. 30 sts in each round.
Ankle Rounds 1–2: With pink yarn, ch 1 and sc in every stitch. Join. 30 sts.
Fasten off. The feet remain open. Repeat for the other leg.
For a longer leg, add plain hdc rounds after Round 14 and before the ankle edging. Make both legs the same length.
Part 6 — Sleeves
Join pink yarn at the center of an underarm chain bridge.
Round 1: Ch 2. Work 1 hdc into each of the eight underarm chains and each of the 20 skipped sleeve stitches. Join. 28 sts.
Close any small corner gaps later with a few sewing stitches rather than adding uncounted sleeve stitches.
Round 2: Hdc around. 28 sts.
Round 3: Hdc2tog, hdc in the next 10 sts, hdc2tog, hdc in the last 14 sts. 26 sts.
Rounds 4–5: Hdc around. 26 sts.
Round 6: Hdc2tog, hdc in the next 9 sts, hdc2tog, hdc in the last 13 sts. 24 sts.
Rounds 7–8: Hdc around. 24 sts.
Round 9: Hdc2tog, hdc in the next 8 sts, hdc2tog, hdc in the last 12 sts. 22 sts.
Round 10: Hdc around. 22 sts.
Change to white yarn.
Cuff Rounds 1–3: Ch 1, sc in every st, and join. 22 sts.
Fasten off. Repeat for the second sleeve.
Part 7 — Hood
With the outside facing you, join pink yarn at one end of the starting neckline.
Hood Row 1: Ch 2. Work 1 hdc into the unused underside of each foundation chain corresponding to a yoke stitch. Do not work into the two original turning chains. 38 sts.
Row 2: Ch 2, turn. Repeat (hdc in the next st, 2 hdc in the next st) 18 times, then hdc in the last 2 sts. 56 sts.
Rows 3–18: Ch 2, turn. Hdc in every st. 56 sts.
Fasten off with a long sewing tail.
Fold the hood vertically in half with the outside surfaces together. Match the first 28 stitches of its final row with the remaining 28 stitches. Sew the paired stitches together to form the top seam.
Turn the hood right side out. Check its height and face opening before adding the ears.
With white yarn, work one row of sc around the hood’s face opening, starting at one neckline corner and ending at the other. Begin with approximately 2 sc per hdc row end, adjusting slightly if the edging pulls or waves.
Part 8 — Bear Ears
Make two with pink yarn. Chain 2.
Round 1: Work 6 sc in the second chain from the hook. 6 sts.
Round 2: Work 2 sc in every st. 12 sts.
Round 3: Repeat (sc in the next st, 2 sc in the next st) 6 times. 18 sts.
Round 4: Sc in every st. 18 sts.
Flatten without stuffing. Work 9 sc through both layers to close the base. Fasten off with a long sewing tail.
Position the ears symmetrically near the upper front of the hood, approximately 1.5–2 inches behind the face edging. Sew across each entire base and reinforce both ends.

Part 9 — Front Button Bands
Use pink yarn. The standard front edge has 25 hdc row ends: 10 yoke rows and 15 body rows.
First Band, Row 1: Join yarn at the lower end of one front opening. Ch 1 and work 2 sc into each row end up to the neckline. 50 sts.
Rows 2–3: Ch 1, turn. Sc across. 50 sts.
Fasten off.
Buttonhole Band, Row 1: Work 50 sc along the other front edge in the same way.
Row 2: Ch 1, turn. Sc in the first 4 sts, ch 2 and skip 2 sts, sc in the next 17 sts, ch 2 and skip 2 sts, sc in the next 17 sts, ch 2 and skip 2 sts, sc in the last 6 sts. 44 sc and three ch-2 spaces.
Row 3: Ch 1, turn. Sc in every sc and work 2 sc into each ch-2 space. 50 sts.
Test a button through a hole before fastening off. Adjust the hole size if your yarn or button requires it.
If you added body rows, pick up two additional stitches per added row and redistribute three buttonholes evenly along the longer band.
Overlap the bands with the buttonhole band on top. Sew the buttons beneath the holes. Tack the bottom 0.5 inch of the overlapped bands together at the crotch so the opening has a secure lower end.
Finishing
Close small gaps at the underarms and crotch with matching yarn. Keep these stitches flexible and avoid bulky knots.
Weave in all ends on the inside. Check the hood seam, ear attachments, button bands, and sleeve joins.
Wash and dry according to the yarn label. Lay the romper flat, arrange the sleeves and legs evenly, and allow it to dry fully.
Finished Measurements
The romper targets a finished chest of approximately 22–23 inches (56–58 cm), with approximately 10 inches (25.4 cm) from neckline to crotch.
Each leg measures approximately 6 inches (15.2 cm) from the crotch, including edging. Each sleeve measures approximately 4.5–5 inches (11.4–12.7 cm) from the underarm, including the white cuff.
The hood measures approximately 7.2 inches (18.3 cm) tall before edging. Confirm the face opening on the finished garment.
Tips and Customization
- Add torso length: Add plain body rows before dividing the legs. Recalculate the front-band pickups.
- Adjust sleeves: Add or remove plain rounds before the white cuffs while keeping both sleeves identical.
- Adjust legs: Add plain rounds after the decreases for extra length.
- Change the colors: Try oatmeal and cream for a classic teddy bear outfit.
- Keep the ears light: Leave them unstuffed so they do not weigh down the hood.
- Label gifts: Include actual finished measurements and washing instructions.
Baby Use and Care
This hooded outfit is intended for supervised, awake wear or photography. It is not a sleep garment.
Keep the hood clear of the face and check that the neckline, cuffs, and crotch allow comfortable movement. Check the buttons and ears before each use and repair any loose attachment.
Do not use this bulky outfit beneath a car-seat harness. Choose an appropriate fitted clothing layer for travel instead.
Frequently Asked Questions
Is this crochet baby bear romper pattern a beginner project?
The stitches are straightforward, but raglan shaping, leg division, and garment fitting make it an intermediate project. Read through the construction before starting.
Does the romper have closed feet?
No. Both legs end in open ankle cuffs. Socks or separate booties can be worn with it.
Is the hood lined?
No. This version has a single crochet-fabric layer and a narrow white crochet edging.
Can I use chenille yarn?
Only if it matches the gauge and creates a suitable flexible fabric. Many chenille yarns are much thicker and would change the garment dimensions significantly.
Does the crotch open for diaper changes?
No. The three-button opening runs down the front to the crotch, but the leg and crotch joins are sewn or crocheted closed.
Can I make a larger size by using a larger hook?
That changes every measurement unpredictably and may produce fabric that is too loose. Use a separately graded size for a substantially larger baby.
Save This Little Bear Outfit
Save this pattern to your baby crochet or handmade gift board on Pinterest so you can find it when you are ready to make a matching bear-inspired outfit.
Looking for Your Next Crochet Project?
Love this project? Explore Cute Stitch Studio’s premium crochet patterns for more cute, cozy, gift-worthy, and beginner-friendly handmade ideas.