Crochet Cat Ear Hooded Cape Pattern for Halloween
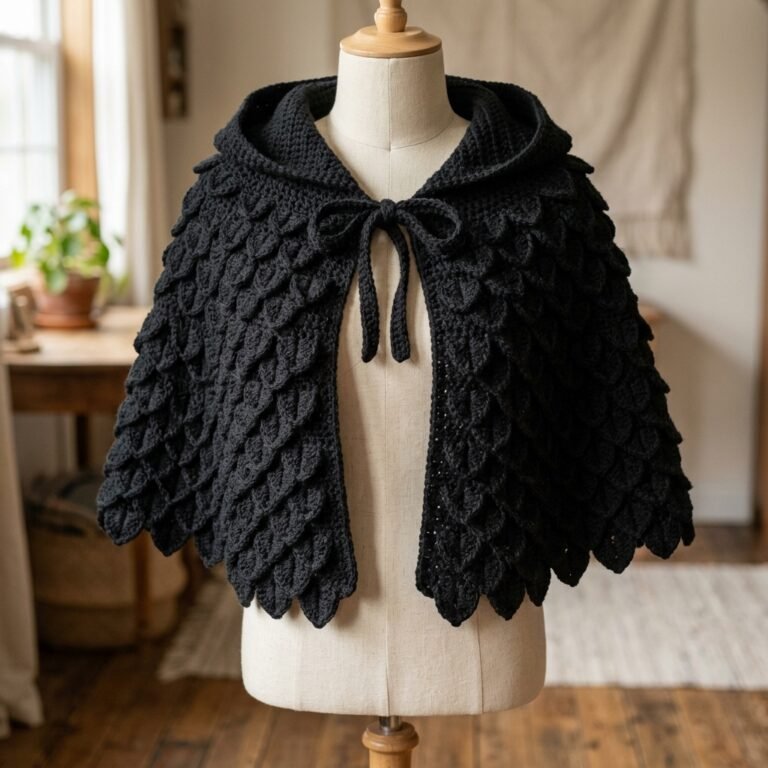
This crochet cat ear hooded cape pattern brings together a burgundy cape, pointed black-and-orange ears, pumpkin-tipped ties, and a scalloped Halloween border. A little witch-cat pocket-style applique gives the front its playful personality.
The cape body uses double crochet for a manageable construction. The hood is worked directly onto the neckline, then folded and seamed. Separate ears and decorations are added after the main garment is finished.
This original Cute Stitch Studio version preserves the woodland-witch look with crochet ears, pumpkins, and a cat applique. Small bats, stars, and a crescent moon are cut from felt and sewn on to keep those details approachable.
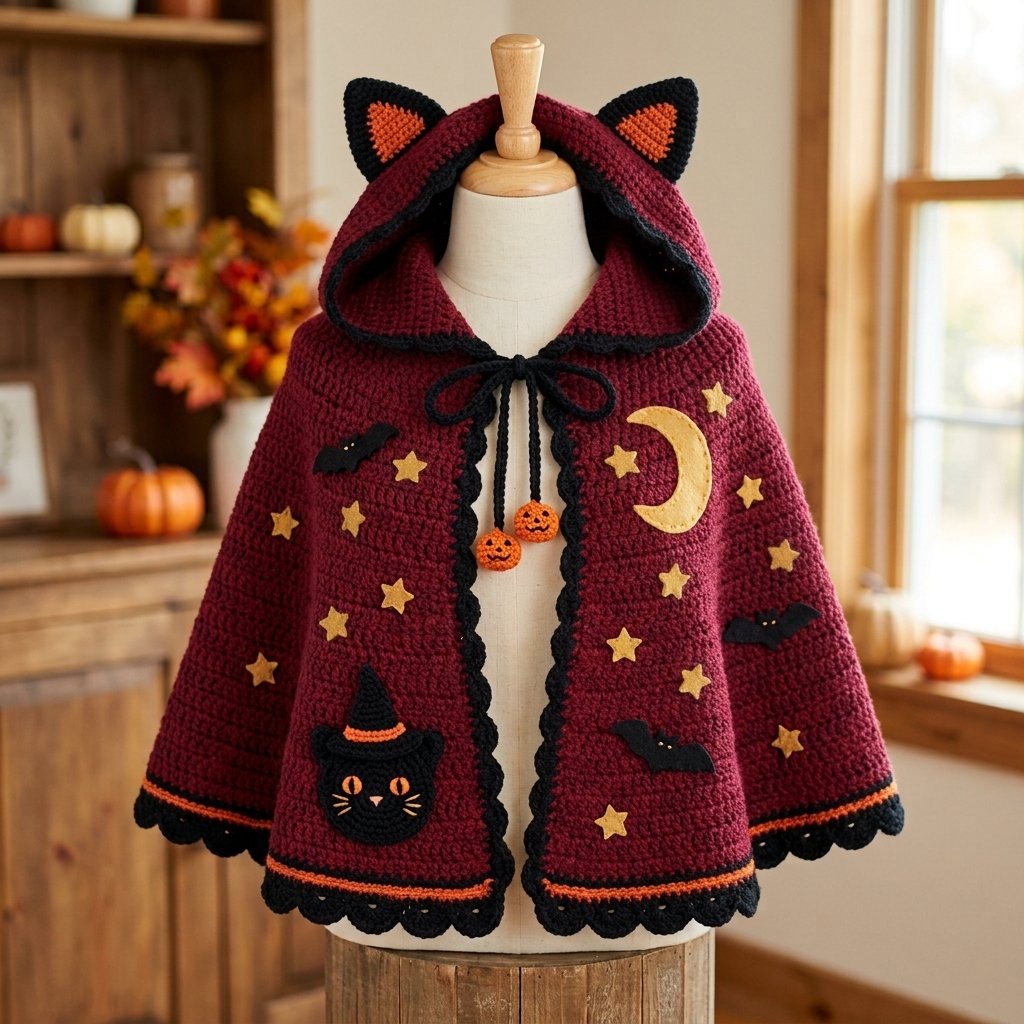
Table of Contents
Crochet Cat Ear Hooded Cape Pattern For Halloween Instructions
Project Details
- Skill level: Intermediate overall; the cape body is suitable for confident beginners.
- Estimated time: Approximately 20–30 hours, including decorations.
- Sizes: Two adult sizes, A and B.
- Finished length: Approximately 20–21 inches for A and 22–23 inches for B, including the border.
- Terminology: US crochet terms.
- Construction: Top-down cape in rows, attached seamed hood, separate ears and appliques.
- Closure: Two crochet ties with small pumpkin ends.
This original pattern has not been physically tested. Stitch counts have been reviewed, but fit, drape, yarn quantities, and decoration placement need sample verification.
Sizing
Choose by measurements rather than clothing labels. This is an open-front adult cape without fitted armholes.
| Measurement | Size A | Size B |
|---|---|---|
| Suggested body bust | 30–40 inches | 42–50 inches |
| Neckline edge before trim | 18 inches | 20 inches |
| Main body length before border | 18.25 inches | 20.5 inches |
| Lower-edge sweep before border | 58 inches | 64 inches |
| Hood height before trim | 12 inches | 13 inches |
| Folded hood depth | 9 inches | 10 inches |
The lower-edge sweep describes the full fabric width along the hem. It is not a fitted chest measurement.
Check the cape over the clothing you intend to wear underneath before adding the border and decorations.
Materials
- Worsted-weight burgundy yarn: approximately 950–1,150 yards for A or 1,150–1,400 yards for B.
- Matching-weight black yarn: approximately 250–350 yards.
- Matching-weight orange yarn: approximately 70–100 yards.
- Small amounts of green, gold, cream, and pink yarn for decorative stitching.
- 5 mm crochet hook for the cape, hood, border, and ties.
- 3.5 mm crochet hook for ears, pumpkins, and the cat applique.
- Tapestry needle.
- Sewing needle and thread matching the felt colors.
- Soft black felt, approximately 8 by 10 inches.
- Soft gold felt, approximately 6 by 8 inches.
- A small amount of polyester stuffing for two tiny pumpkins.
- Scissors and measuring tape.
- Six removable stitch markers.
- Paper and pencil for felt templates.

Hook Size
Use a 5 mm hook for the garment and a 3.5 mm hook for the smaller decorative pieces.
The main fabric should drape comfortably. The ears and pumpkins need a denser fabric so the ears hold their outline and stuffing does not show.
Yarn
Choose worsted-weight, category 4 yarn in a soft acrylic or wool-acrylic blend. Use similar yarn thicknesses for all crochet colors.
Burgundy gives the cape its rich background. Black outlines the hood and hem, orange adds a narrow border stripe, and gold highlights the moon and stars.
Yardage is estimated. Allow extra yarn if you increase the length or add more decorations.
Gauge
Main fabric: 12 dc and 7 rows = 4 inches, measured after washing and drying according to the yarn label.
Decorative pieces: Exact gauge is less important, but the single crochet fabric should be compact. The cat face is intended to measure approximately 3–3.5 inches across.
Make a generous double crochet swatch. If it has too many stitches per inch, try a larger hook; if it has too few, try a smaller hook.
Abbreviations
- ch: chain
- sc: single crochet
- dc: double crochet
- sl st: slip stitch
- st(s): stitch(es)
- inc: work 2 sc in the same stitch
- dec: single crochet two stitches together
Decrease: Insert the hook into the next stitch and pull up a loop, then repeat in the following stitch. Yarn over and pull through all three loops.
Before You Start
- Instructions are written as A (B).
- Beginning ch 2 on double crochet rows does not count as a stitch.
- Beginning ch 1 on single crochet rows does not count as a stitch.
- The cape and hood are worked flat, turning after each row.
- The cape is divided into six equal sections for shaping.
- Each cape increase row adds 12 stitches overall.
- The pumpkins use continuous rounds; all other small pieces have their construction stated below.
- Decorations are sewn on after the cape is shaped and dry.
Crochet Cat Ear Hooded Cape Pattern Instructions
Part 1 — Burgundy Cape Body
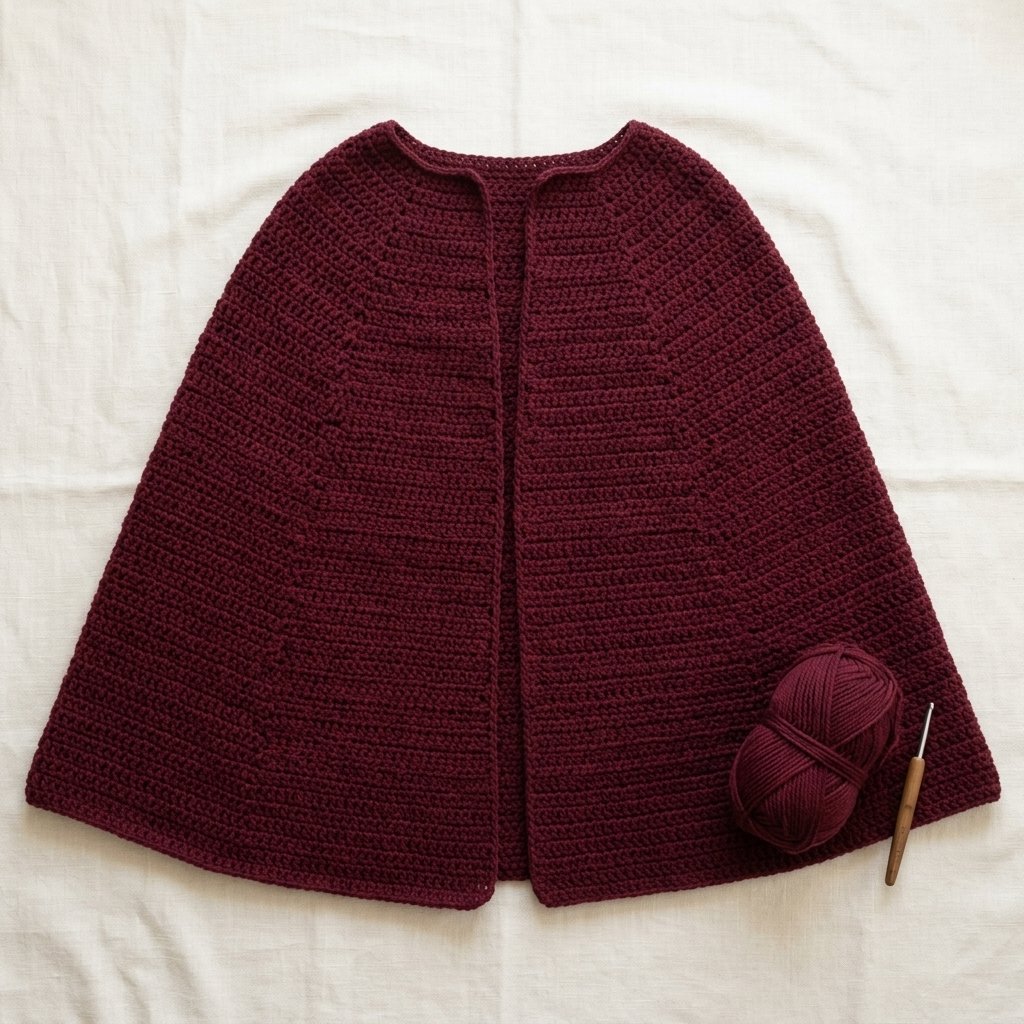
With the 5 mm hook and burgundy, ch 56 (62).
Row 1: Dc in the third ch from the hook and every remaining ch. Turn. 54 (60) dc.
Divide the row into six equal sections of 9 (10) stitches. Mark the final stitch of each section.
Plain row: Ch 2. Dc in each stitch across. Turn.
Increase row: Ch 2. In each section, work 2 dc in its first stitch, 1 dc in every middle stitch, and 2 dc in its last stitch. Repeat across all six sections, then turn.
Each section gains two stitches. Reposition the markers after each row to maintain six equal sections.
Rows 2–10: Work increase rows on Rows 2, 4, 6, 8, and 10. Work plain rows on Rows 3, 5, 7, and 9.
Rows 11–30: Work increase rows on Rows 14, 18, 22, 26, and 30. All other rows are plain.
| After Row | Size A | Size B |
|---|---|---|
| 1 | 54 | 60 |
| 2 | 66 | 72 |
| 4 | 78 | 84 |
| 6 | 90 | 96 |
| 8 | 102 | 108 |
| 10 | 114 | 120 |
| 14 | 126 | 132 |
| 18 | 138 | 144 |
| 22 | 150 | 156 |
| 26 | 162 | 168 |
| 30 | 174 | 180 |
Size A: Work Rows 31–32 plain. Finish with 174 dc.
Size B: Work Rows 31–33 plain. Increase on Row 34 to 192 dc. Work Rows 35–36 plain.
Fasten off. Remove the markers and check the fit across the shoulders.

Part 2 — Hood
With the outside facing you, join burgundy at one neckline corner. Work into the unused underside loops of the original foundation chain.
Hood Row 1: Ch 2. Dc opposite each original cape stitch. Turn. 54 (60) dc.
Hood Rows 2–21 (23): Ch 2. Dc in each stitch across. Turn.
Fasten off with a long sewing tail.
Fold the hood in half with its outer surfaces facing inward. Align the two halves of the final row and sew across 27 (30) stitch pairs.
Secure the seam and turn the hood right side out. The hood has a softly pointed back seam, with the separate cat ears added later.
Part 3 — Scalloped Hem
Use the 5 mm hook. Work these border rows across the hem only.
Hem Row 1, black, Size A: Ch 1. Repeat [sc in the next 28 stitches, inc] 6 times. Turn. (180 sc)
Hem Row 1, black, Size B: Ch 1. Sc in every stitch across. Turn. (192 sc)
Hem Row 2, black: Ch 1. Repeat the following sequence across:
[Sc in the next 2 stitches, skip 2 stitches, work 9 dc in the next stitch, skip 2 stitches, sc in the next 5 stitches.]
Each repeat uses 12 stitches from the previous row and creates 16 stitches. Work 15 (16) repeats, producing 15 (16) scallops and 240 (256) stitches. Turn.
Hem Row 3, orange: Change to orange. Ch 1. Sc in each stitch across, following the scallop outlines. Turn. 240 (256) sc.
Hem Row 4, black: Change to black. Ch 1. Sc in each stitch across. 240 (256) sc.
Fasten off. Keep the edging relaxed so the scallops retain their curved shape.
Part 4 — Front and Hood Edging
Join black at one lower front corner.
Edging Row 1: Ch 1. Work sc evenly up the front, around the hood opening, and down the other front edge. Start with approximately 2 sc in each double crochet row end.
Along the short hem-border ends, place stitches evenly so there are no gaps. Turn at the opposite lower corner.
Edging Row 2: Ch 1. Sc in every stitch back along the same route. Fasten off.
If the edge ripples, reduce the number of stitches in that section. If it pulls inward, add a few evenly spaced stitches.
Part 5 — Cat Ears
Use the 3.5 mm hook. Make four black triangles and two smaller orange triangles.
Triangle Row 1: Ch 2. Sc in the second ch from the hook. Turn. (1 sc)
Row 2: Ch 1. Inc in the stitch. Turn. (2 sc)
Row 3: Ch 1. Inc in the first stitch, sc in the remaining stitch. Turn. (3 sc)
Following rows: Ch 1. Inc in the first stitch, then sc in each remaining stitch. Turn. Each row adds one stitch.
- Black triangles: Continue through Row 10. Finish with 10 sc.
- Orange triangles: Continue through Row 6. Finish with 6 sc.
Sew one orange triangle to the front of one black triangle, centering it with black visible around the edges. Repeat for the other ear front.
Place a plain black triangle behind each decorated triangle. Join the layers with black sc around both sloping sides and the base, working approximately one stitch per row end and 3 sc at the point. Do not stuff.
Position the ears on opposite sides of the hood’s top seam, slightly behind the face opening. Sew each entire base firmly to the hood, then tack the lower side corners to help the ears stand.
Check symmetry before securing the final tails.
Part 6 — Pumpkin-Tipped Ties
With black and the 5 mm hook, make a chain approximately 14 inches long. Sl st in the second chain from the hook and in every remaining chain. Fasten off with a long sewing tail.
Make a second matching tie. Sew one end of each tie securely to a front neckline corner.
Use the 3.5 mm hook and orange to make two pumpkins.
Pumpkin Round 1: Ch 2. Work 6 sc in the second ch from the hook. Continue in a spiral. (6 sts)
Round 2: Inc in each stitch. (12 sts)
Round 3: Repeat [sc, inc] 6 times. (18 sts)
Rounds 4–5: Sc in each stitch around. (18 sts)
Round 6: Repeat [sc, dec] 6 times. (12 sts)
Add a small amount of stuffing.
Round 7: Dec 6 times. (6 sts)
Fasten off with a long tail. Thread the tail through the front loops of the remaining stitches and pull closed.
To create shallow pumpkin grooves, pass the yarn through the center from top to bottom, bring it around the outside, and repeat in four evenly spaced positions. Tighten gently, then secure.
With green, ch 4 and sl st back along the three chains. Fasten off and sew this short stem to the pumpkin top.
Embroider two tiny black triangular eyes and a short smile. Sew a pumpkin to the free end of each tie, anchoring the cord to several stitches at the pumpkin top.
Tie a loose bow at the neckline. The bow should rest comfortably rather than tighten around the neck.
Part 7 — Witch-Cat Applique
Use black and the 3.5 mm hook. Work a flat circle in joined rounds.
Round 1: Ch 2. Work 6 sc in the second ch from the hook. Sl st into the first sc. (6 sts)
Round 2: Ch 1. Inc in every stitch. Join. (12 sts)
Round 3: Ch 1. Repeat [sc, inc] 6 times. Join. (18 sts)
Round 4: Ch 1. Repeat [sc in next 2 stitches, inc] 6 times. Join. (24 sts)
Round 5: Ch 1. Repeat [sc in next 3 stitches, inc] 6 times. Join. (30 sts)
Round 6: Ch 1. Repeat [sc in next 4 stitches, inc] 6 times. Join. (36 sts)
Round 7: Ch 1. Repeat [sc in next 5 stitches, inc] 6 times. Join. (42 sts)
Fasten off with a sewing tail.
Make two small black triangles using the ear instructions through Row 4. Sew their bases behind the top left and right edges of the circle.
Embroider two gold oval eyes with short black vertical pupils, a tiny pink nose, and cream whiskers. Secure every embroidery end on the back.
Witch hat: Make one black triangle using the ear instructions through Row 10.
Hat brim: Ch 15. Sc in the second chain from the hook and across. Turn. (14 sc) Ch 1 and work a second row of 14 sc. Fasten off.
Sew the triangle’s wide base to the center of the brim. Embroider an orange band above the brim and a small gold rectangle for the buckle.
Arrange the hat above the cat face with a slight tilt. Sew the completed cat and hat to one front panel, stitching around all outer edges. This is a flat applique, not a pocket.
Part 8 — Moon, Stars, and Bats
Make paper templates before cutting the felt.
- Moon: Draw a circle approximately 3 inches across. Draw a smaller offset circle inside it and cut away that section to form a crescent. Cut one from gold felt.
- Stars: Draw a simple five-point star approximately 0.75–1 inch across. Cut five gold stars.
- Bats: Draw a small central body with two pointed ears and two outstretched wings, approximately 3–3.5 inches across overall. Give each wing a curved upper edge and three shallow scallops along its lower edge. Cut three from black felt.
Place the moon on the front panel opposite the cat. Arrange the bats and stars around the remaining space, keeping them clear of the border and ties.
Sew around every felt edge with small matching stitches. Add a few stitches through the center of larger pieces so they stay flat against the cape.
Finishing
Weave in all yarn tails, reversing direction before trimming. Check the hood seam, ear bases, tie attachments, pumpkins, and applique edges.
Shape the cape before adding felt whenever possible. If the completed garment needs cleaning, follow the care requirements of both the yarn and felt, then dry flat.
This version is designed as an adult costume accessory. Its long ties and small decorative elements are not intended for a baby or toddler garment.

Finished Size
The finished cape is approximately 20–21 inches long for A or 22–23 inches for B (51–53 cm or 56–58 cm), including the scalloped border.
The hood measures approximately 12 (13) inches high and 9 (10) inches deep.
Measure the actual finished garment after shaping. The shell border and fabric drape can change the final dimensions slightly.
Tips and Customization
Make a Simpler Cape
Keep the ears, pumpkin ties, and scalloped border, and omit the front appliques. The main construction stays the same.
Adjust the Length
Add plain double crochet rows after completing your size. At the stated gauge, approximately 3–4 rows add 2 inches. Keep the final stitch count unchanged so the border instructions still fit.
Change the Color Palette
Try plum with black trim, forest green with gold details, or an all-black cape with orange ear centers.
Keep the Ears Upright
Use compact stitches and sew the entire base firmly. If the ears fold, add a small tack at each lower side corner rather than inserting wire.
Frequently Asked Questions
Can a beginner make this cape?
The body and hood use straightforward stitches. The full decorated version is intermediate because it includes small pieces, shaping, embroidery, and assembly.
Are all the decorations crocheted?
The ears, pumpkins, and witch-cat applique are crocheted. This version uses sewn felt for the moon, stars, and bats.
Does the cat applique work as a pocket?
No. It is sewn around its full edge as a decorative patch.
Why is the scalloped border curling?
Check the shell stitch counts and keep the orange and final black rows relaxed. Tight edging can pull the shell tips inward.
Can I make this for a child?
The supplied sizing and closure are for adults. A child’s version needs separately calculated dimensions and an age-appropriate closure rather than simply changing hook size.
Save This Pattern for Later
Save this crochet cat ear hooded cape pattern to your Halloween crochet or handmade costume board on Pinterest. Make the main garment first, then enjoy adding the little details one at a time.
Looking for Your Next Crochet Project?
Love this project? Explore Cute Stitch Studio’s premium crochet patterns for more cute, cozy, gift-worthy, and beginner-friendly handmade ideas.