

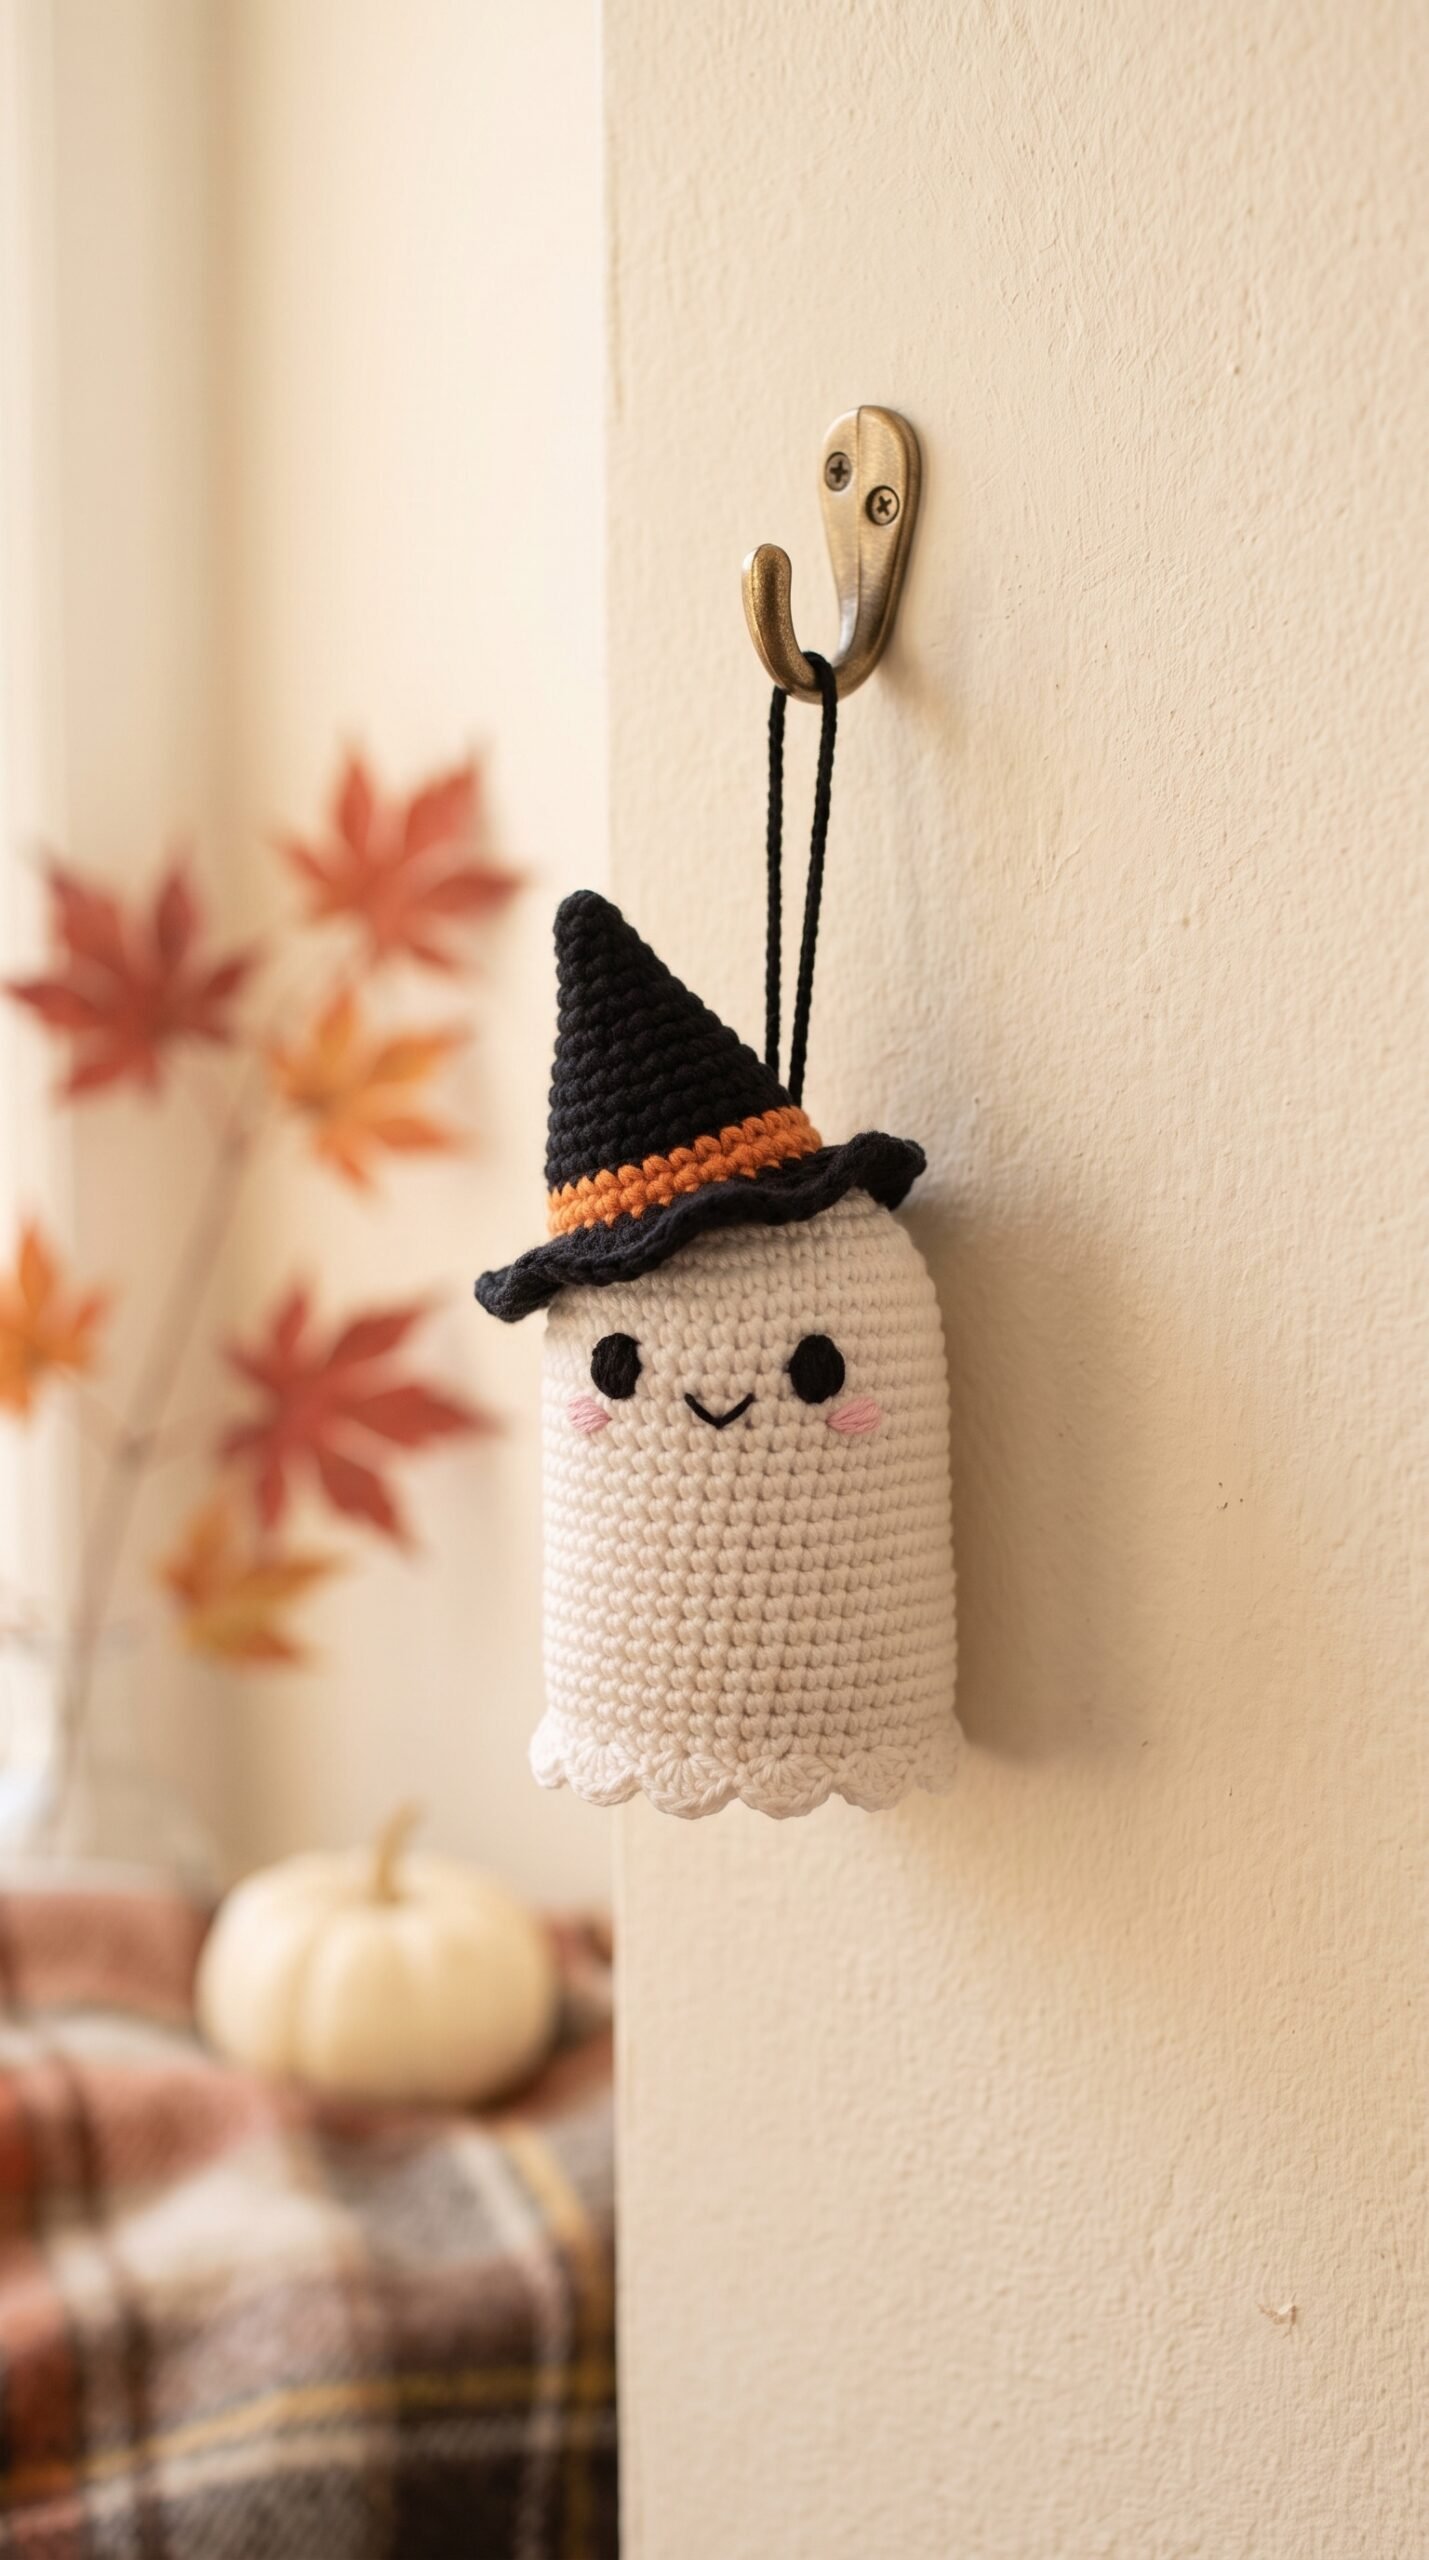
Crochet Ghost Ornament Pattern With a Cute Witch Hat
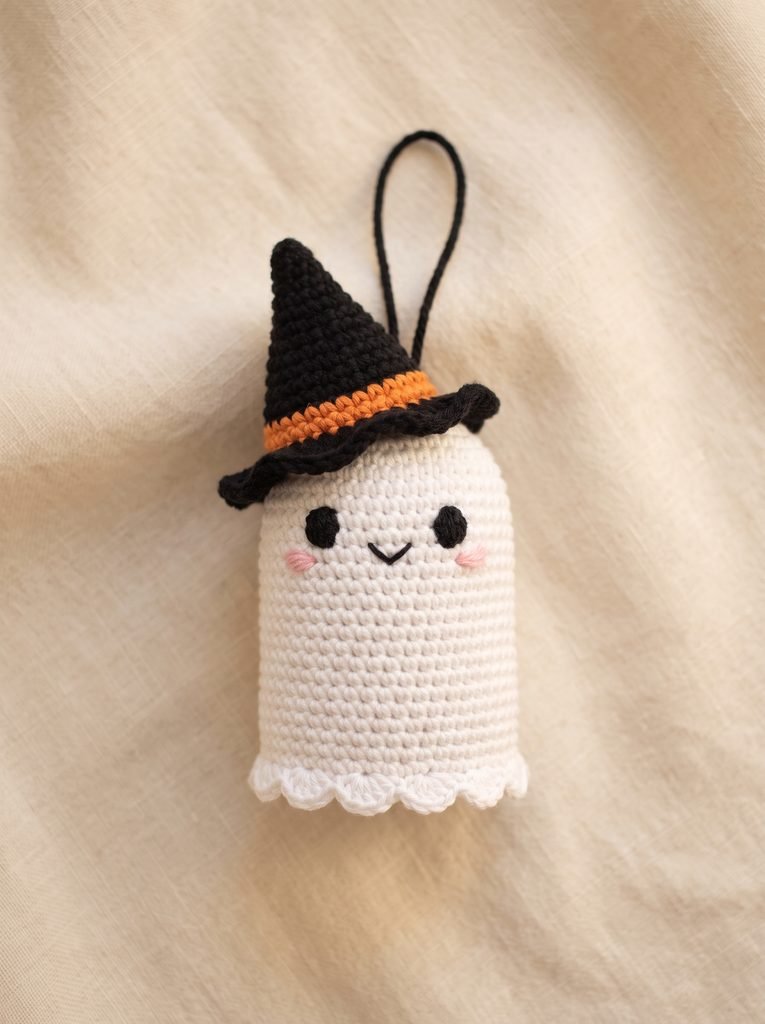
This crochet ghost ornament pattern makes a little Halloween friend with a soft white body, a ruffled hem, and a pointed witch hat. An orange hatband adds a cheerful pop of color, while an embroidered face gives your ghost its own personality.
Hang it from a decorative hook, add it to an indoor Halloween display, or give it as a small handmade gift. This project suits confident beginners who are comfortable with single crochet, increases, and simple sewing.
Project Details
- Skill Level: Confident beginner
- Estimated Time: Approximately 3–5 hours
- Finished Size: Approximately 4–5 inches tall, including the hat but excluding the hanging loop
- Crochet Terminology: US terms
- Construction Method: Stuffed ghost body with a separate flat base, separate witch hat, and attached hanging loop
The ornament in this pattern has an embroidered face and no handheld accessories.
Materials
You will need:
- White, black, and orange yarn
- A small amount of pink yarn for optional cheeks
- 3 mm crochet hook
- Polyester fiberfill
- Removable stitch marker
- Blunt yarn needle
- Scissors
- Ruler or measuring tape
No plastic eyes, wire, or glue are required.
Hook Size
Use a 3 mm crochet hook.
Choose a hook that produces close stitches with your yarn. The stuffing should not show through the fabric.
If your stitches have large gaps, try a smaller hook. Your finished ornament will also become smaller.
Yarn
Use category 3, light/DK yarn in a smooth cotton or cotton-acrylic blend.
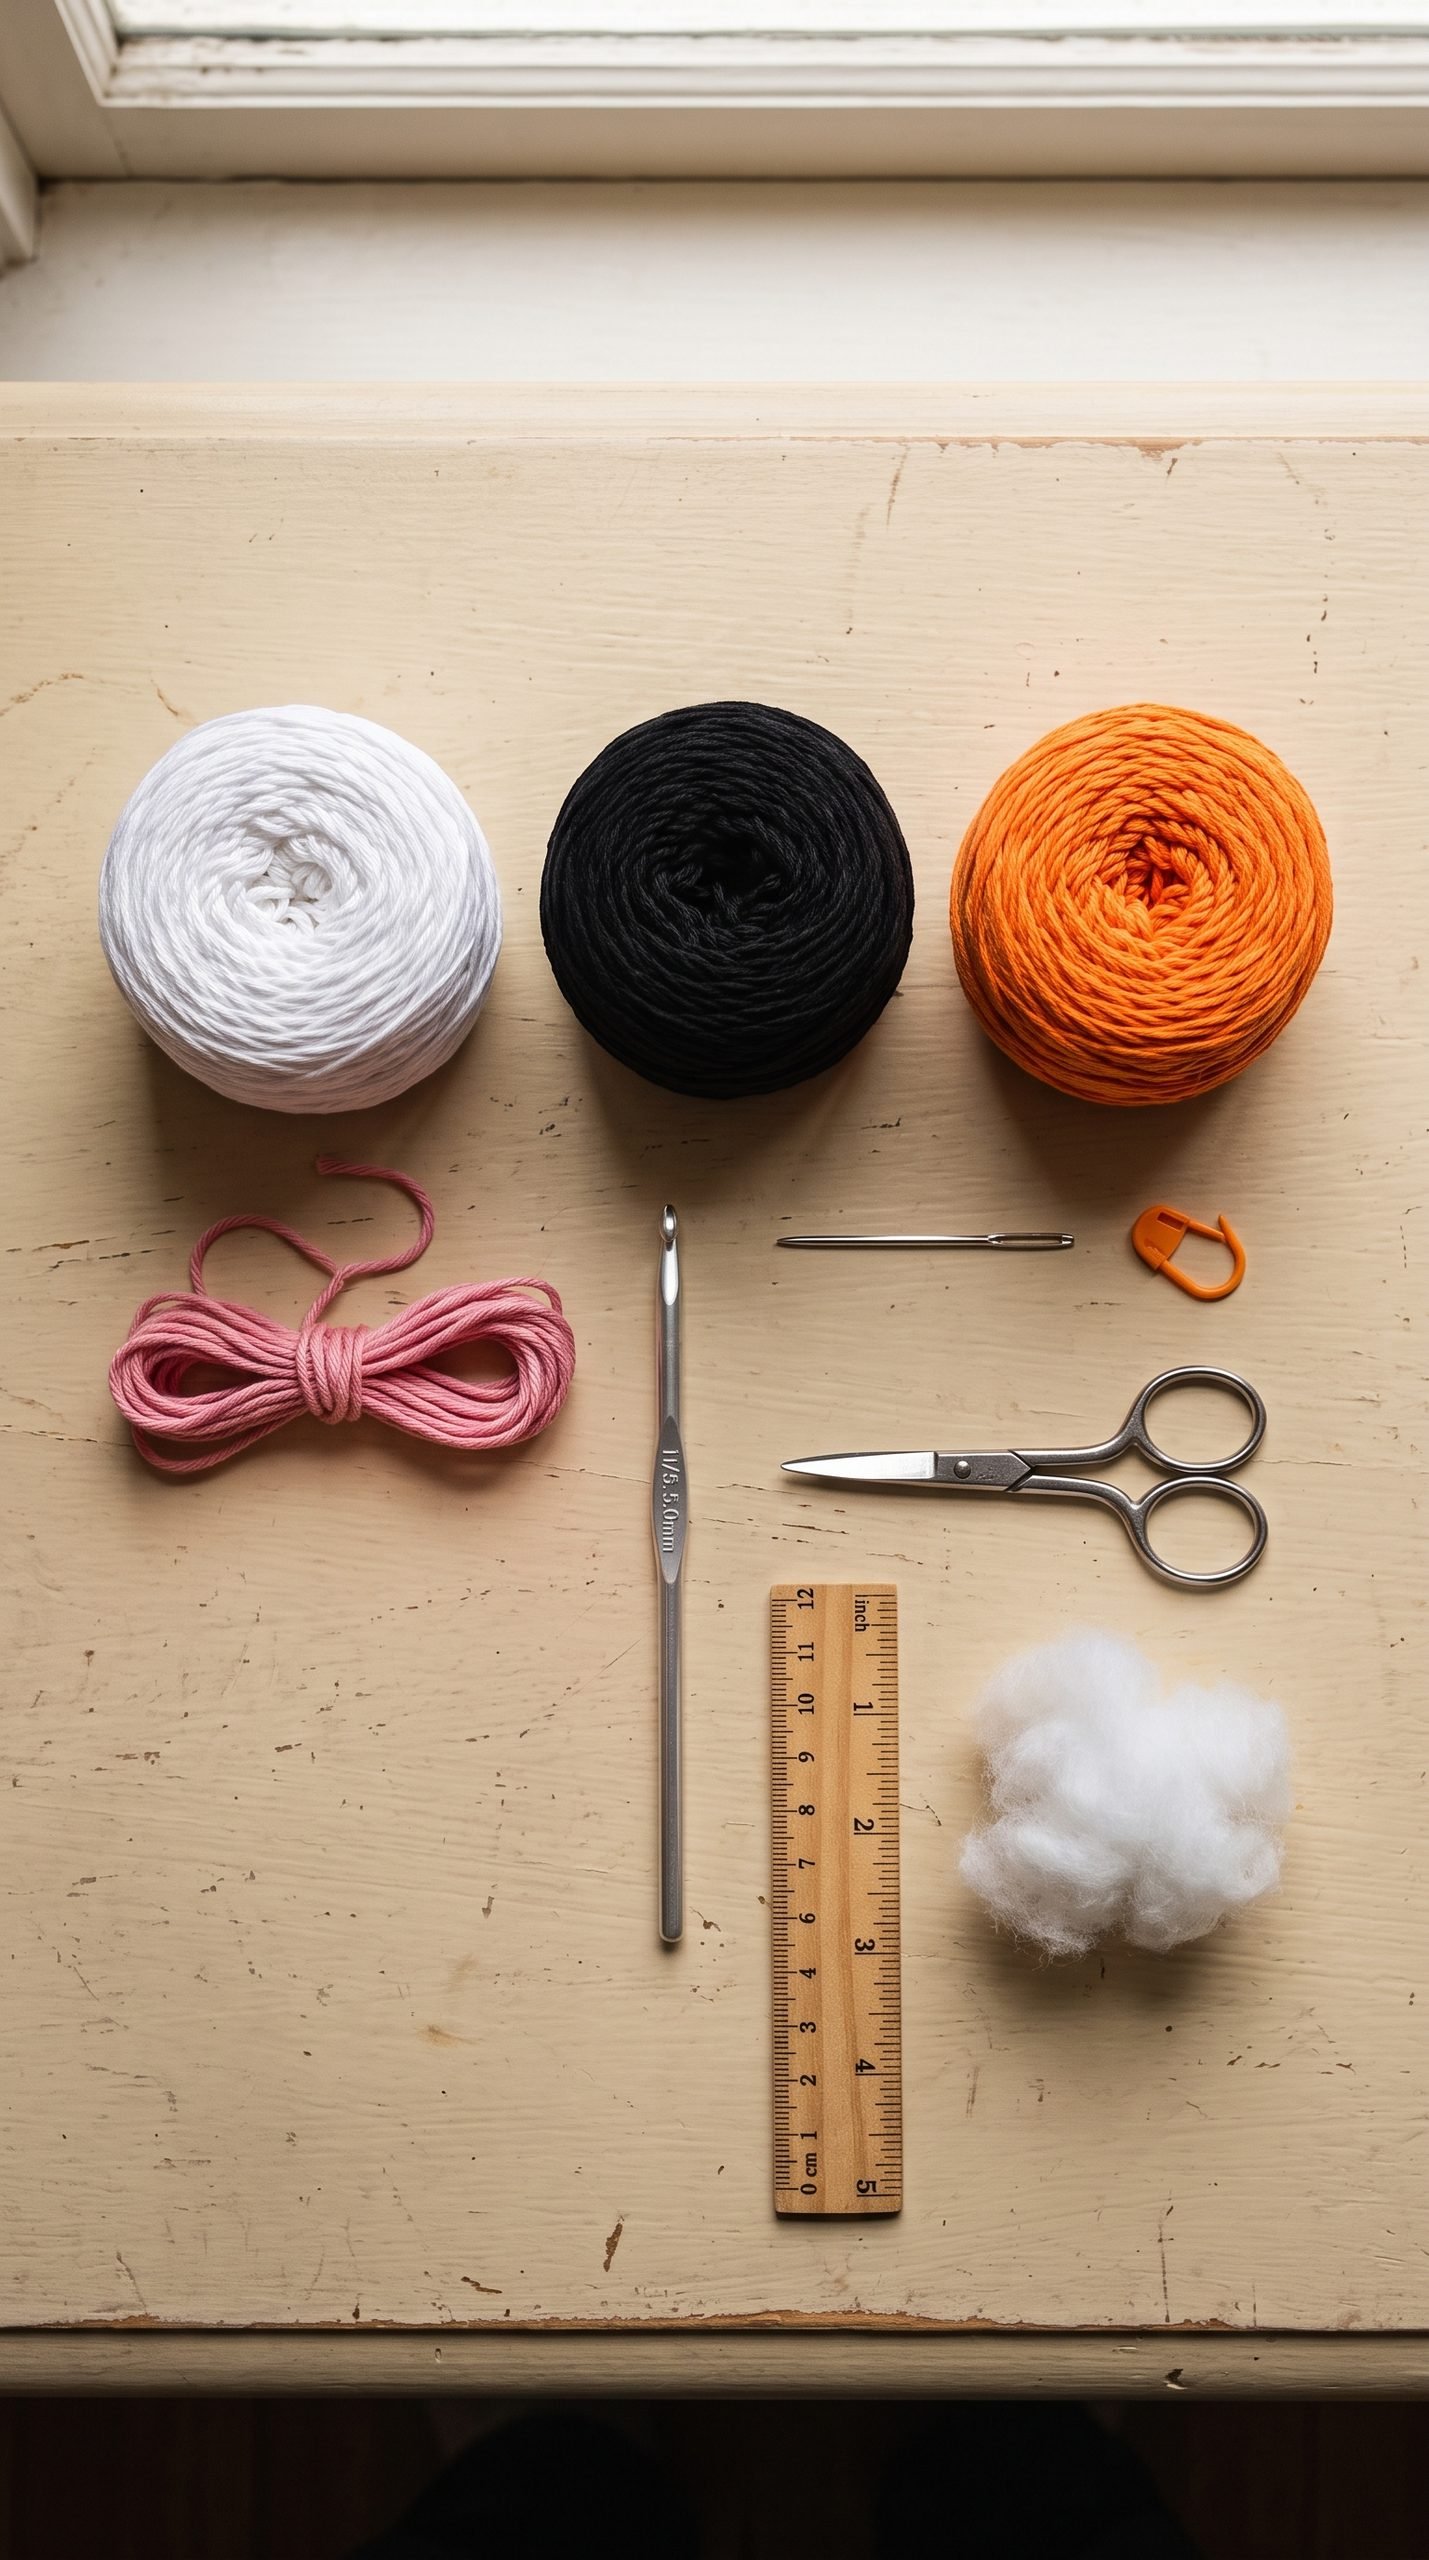
Allow approximately:
- 55–70 yards of white
- 35–45 yards of black
- 5–8 yards of orange
- 1 yard of pink, optional
These estimates include yarn for assembly and embroidery.
Smooth yarn makes stitches easier to count than chenille or fuzzy yarn. Use the same yarn weight for the body, base, and hat.
Abbreviations
This pattern uses US crochet terminology:
- ch = chain
- sc = single crochet
- dc = double crochet
- sl st = slip stitch
- inc = increase; work 2 sc into the same stitch
- FLO = front loop only
- st(s) = stitch(es)
Before You Start
The ghost body, base, and hat are worked in continuous rounds unless a joining instruction is given. Do not turn or join after every round.
Place a stitch marker in the first stitch of each round and move it up as you work.
Instructions inside brackets are repeated the stated number of times. Stitch counts appear at the end of each round.
Front loop only: Work under the top loop closest to you, leaving the other loop unworked. The unused loops below the ghost’s ruffle will hold its base.
Gauge: Exact gauge is not essential, but the fabric must be dense enough to contain the stuffing. Use the same tension for the body and base so their edges match.
This written pattern has not been physically tested. Time, yarn quantities, and finished measurements are estimates.
Crochet Ghost Ornament Pattern Instructions
Part 1 — Crochet the Ghost Body
Using white yarn, leave an 8-inch starting tail.
Foundation: Ch 2.
Round 1: Work 6 sc into the second ch from the hook. 6 sts.
Round 2: Inc in each stitch around. 12 sts.
Round 3: Repeat [sc in the next stitch, inc in the next stitch] 6 times. 18 sts.
Round 4: Repeat [sc in the next 2 stitches, inc in the next stitch] 6 times. 24 sts.
Round 5: Repeat [sc in the next 3 stitches, inc in the next stitch] 6 times. 30 sts.
Round 6: Repeat [sc in the next 4 stitches, inc in the next stitch] 6 times. 36 sts.
Rounds 7–17: Sc in every stitch around. 36 sts per round.
You now have a rounded top with an open lower edge.
If a small hole remains at the starting chain, thread the starting tail through the surrounding stitches on the inside and gently draw it closed. Secure and weave in that tail.
Part 2 — Add the Ruffled Hem
The next round is worked into the front loops only of Round 17.
Round 18: Repeat the following sequence 12 times:
- Sl st in the front loop of the next stitch.
- Work 3 dc into the front loop of the next stitch.
- Sl st in the front loop of the next stitch.
Each repeat uses three stitches from Round 17.
You should have 12 small scallops, containing 36 dc and 24 slip stitches altogether.
Fasten off and weave in the finishing tail.
Leave the unused back loops of Round 17 accessible inside the hem. You will sew the base to these loops.
Part 3 — Make the Bottom Base
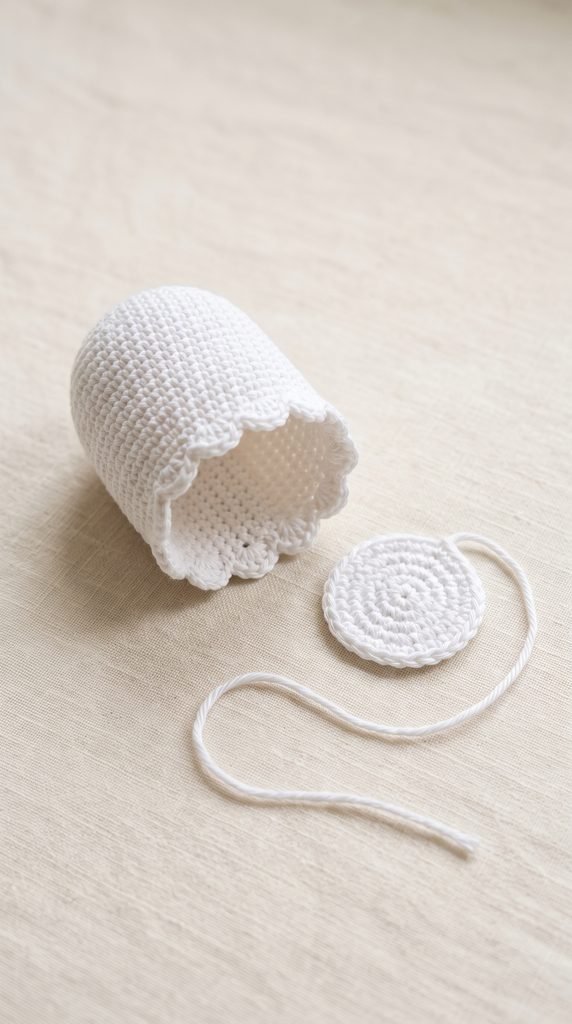
Using white yarn, ch 2.
Round 1: Work 6 sc into the second ch from the hook. 6 sts.
Round 2: Inc in each stitch around. 12 sts.
Round 3: Repeat [sc in the next stitch, inc in the next stitch] 6 times. 18 sts.
Round 4: Repeat [sc in the next 2 stitches, inc in the next stitch] 6 times. 24 sts.
Round 5: Repeat [sc in the next 3 stitches, inc in the next stitch] 6 times. 30 sts.
Round 6: Repeat [sc in the next 4 stitches, inc in the next stitch] 6 times. 36 sts.
Sl st into the next stitch to finish. This joining stitch does not count as an additional stitch.
Fasten off, leaving approximately 24 inches of yarn for sewing.
Close any small center opening with the starting tail, then secure and weave it in.
Part 4 — Embroider the Face
Choose the front of the ghost before adding stuffing.
Position the eyes around Rounds 8–10, with approximately five stitches between them.
Using black yarn:
- Secure the yarn on the inside of the body, leaving a short tail to weave in.
- Make a short vertical stitch spanning about one round for the first eye.
- Repeat along the same path once or twice to thicken it.
- Carry the yarn loosely on the inside to the second eye position.
- Make a matching eye at the same height.
For the mouth, make a small V with two diagonal stitches centered below the eyes, around Rounds 11–12.
Keep the stitches relaxed so the face does not pucker.
If desired, add one or two short pink stitches below the outer side of each eye for cheeks.
Secure all embroidery ends on the inside before stuffing.
Part 5 — Stuff and Close the Ghost
Add small pieces of fiberfill through the bottom opening.
Fill the rounded top first, then the sides. Keep the lower part slightly softer so the base does not bulge.
Place the base inside the opening, behind the ruffled hem.
Using its long sewing tail:
- Pass through both top loops of one base stitch.
- Pass through the corresponding unused back loop of Body Round 17.
- Continue around, matching one base stitch to one body loop.
There are 36 stitches on the base and 36 unused body loops.
When approximately eight stitches remain open, adjust the stuffing. The ghost should feel softly filled without gaps showing between stitches.
Finish sewing, secure the yarn, and bury the tail inside.
Part 6 — Crochet the Witch Hat
Start with black yarn.
Foundation: Ch 2.
Round 1: Work 6 sc into the second ch from the hook. 6 sts.
Round 2: Sc in each stitch around. 6 sts.
Round 3: Repeat [sc in the next stitch, inc in the next stitch] 3 times. 9 sts.
Round 4: Sc in each stitch around. 9 sts.
Round 5: Repeat [sc in the next 2 stitches, inc in the next stitch] 3 times. 12 sts.
Round 6: Sc in each stitch around. 12 sts.
Round 7: Repeat [sc in the next 3 stitches, inc in the next stitch] 3 times. 15 sts.
Round 8: Repeat [sc in the next 4 stitches, inc in the next stitch] 3 times. 18 sts.
Round 9: Repeat [sc in the next 2 stitches, inc in the next stitch] 6 times. 24 sts.
Round 10: Repeat [sc in the next 3 stitches, inc in the next stitch] 6 times. 30 sts.
Round 11: Repeat [sc in the next 4 stitches, inc in the next stitch] 6 times. 36 sts.
Part 7 — Add the Orange Hatband
On the final stitch of Round 11, complete the last pull-through with orange yarn.
Rounds 12–13: Sc in each stitch around using orange. 36 sts per round.
On the final stitch of Round 13, complete the last pull-through with black yarn.
Cut the orange yarn, leaving a tail long enough to weave in.
Part 8 — Crochet the Hat Brim
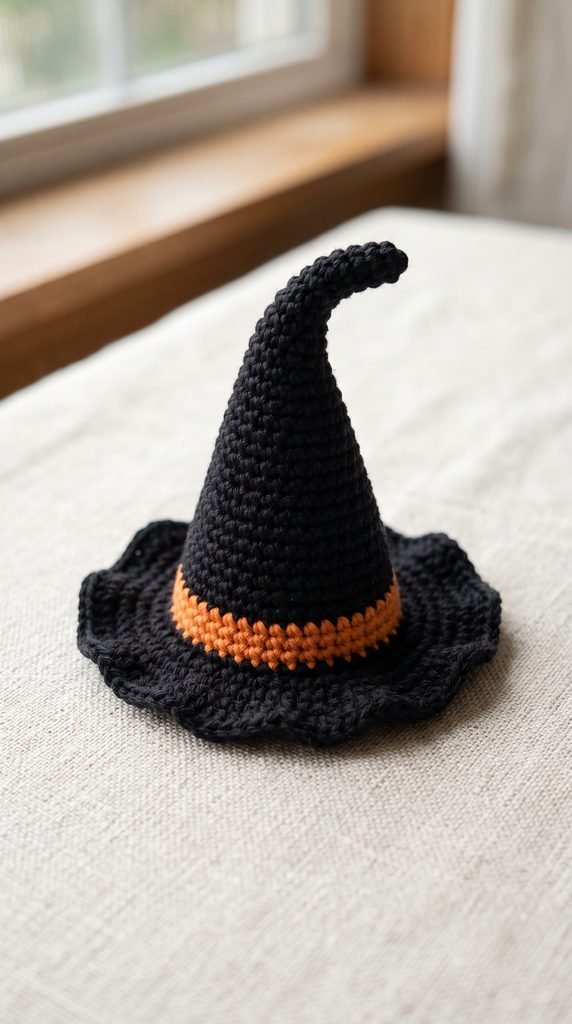
Round 14: Working in FLO, repeat [sc in the next 2 stitches, inc in the next stitch] 12 times. 48 sts.
Round 15: Working through both loops, repeat [sc in the next 3 stitches, inc in the next stitch] 12 times. 60 sts.
Round 16: Sc in every stitch around. 60 sts.
Sl st into the next stitch and fasten off.
Weave all color-change tails into the inside of the hat. Leave the hat unstuffed.
Shape the brim gently with your fingers. A little natural waviness suits the witch-hat look.
Part 9 — Attach the Hat
Place the hat on the ghost, keeping the orange band above the eyes.
Use a separate 24-inch length of black yarn to sew around the base of the cone, just inside the brim.
Catch the hat fabric and a small amount of the white body fabric with each stitch. Keep the stitches under the brim where possible.
Sew around the hat’s base until it is secure. The outer brim should remain free.
Fasten off and bury the yarn ends.
Part 10 — Add the Hanging Loop
Cut approximately 18 inches of black yarn.
- Thread it through several sturdy stitches on the back of the ghost’s head, just beneath the hat.
- Leave two equal lengths extending upward.
- Tie the ends together securely to form a loop.
- Adjust the loop to approximately 3 inches long when held upright.
- Move the knot toward the back and trim only the excess yarn beyond the knot.
The loop should be anchored to the ghost’s body, not only to the hat brim.
Lift the ornament gently over a soft surface to check the attachment before hanging it.
Finishing
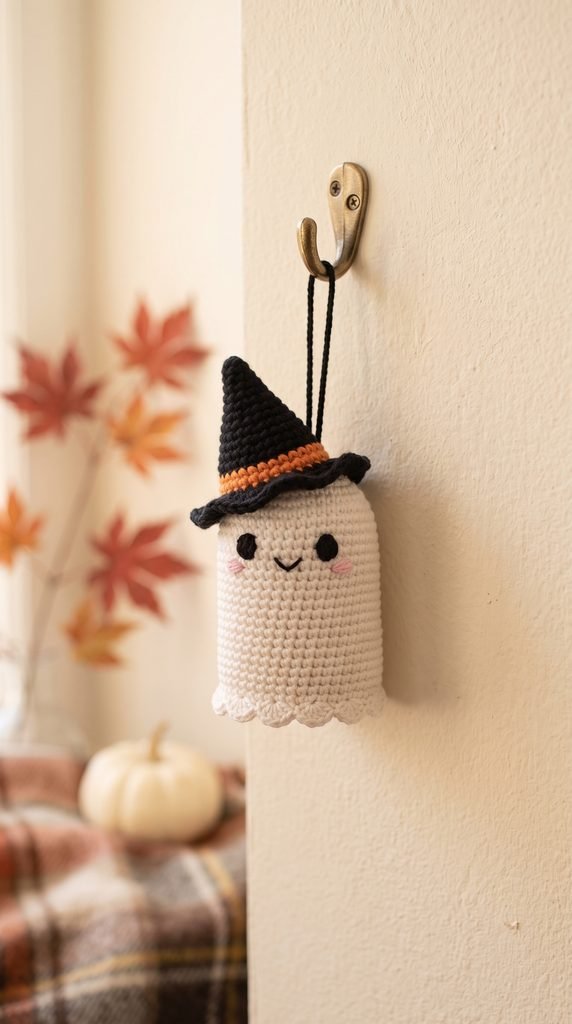
Check that the hat, hanging loop, and base are securely attached.
Massage the stuffing gently to even out the body. Arrange the scallops so they fall around the base.
Smooth the brim and pinch the tip of the hat slightly to give it a playful bend.
No wet blocking is necessary for the stuffed ghost. Follow the yarn label’s care instructions and reshape by hand when needed.
Finished Size
The finished ornament is estimated to measure:
- Height: 4–5 inches (10–13 cm), including the hat
- Body width: Approximately 2–2½ inches (5–6.5 cm)
- Hat brim width: Approximately 3–3½ inches (7.5–9 cm)
- Hanging loop: Approximately 3 inches (7.5 cm) when held upright
Size varies with yarn, hook, tension, and stuffing.
Tips and Customization
- Use a purple hatband for a softer Halloween color combination.
- Choose ivory instead of bright white for a vintage-inspired ghost.
- Skip the pink cheeks for a simpler face.
- Make the eyes slightly curved with two short stitches for a sleepy expression.
- Keep the same yarn and hook when making a matching set.
- Use the ghost as an indoor ornament or gift decoration.
If you display it in a parked car, remove it before driving so it cannot obstruct your view.
This ornament is a decorative item, not a baby toy. Keep its hanging loop away from young children.
Looking for Your Next Crochet Project?
Love this little Halloween ghost? Explore Cute Stitch Studio’s premium crochet patterns for more cute seasonal decorations, cozy projects, and thoughtful handmade gifts.
Shop Crochet Patterns
Related Articles
For another small project, try our easy crochet heart pattern for beginners.


