Free Crochet Baby Star Poncho Pattern for Halloween
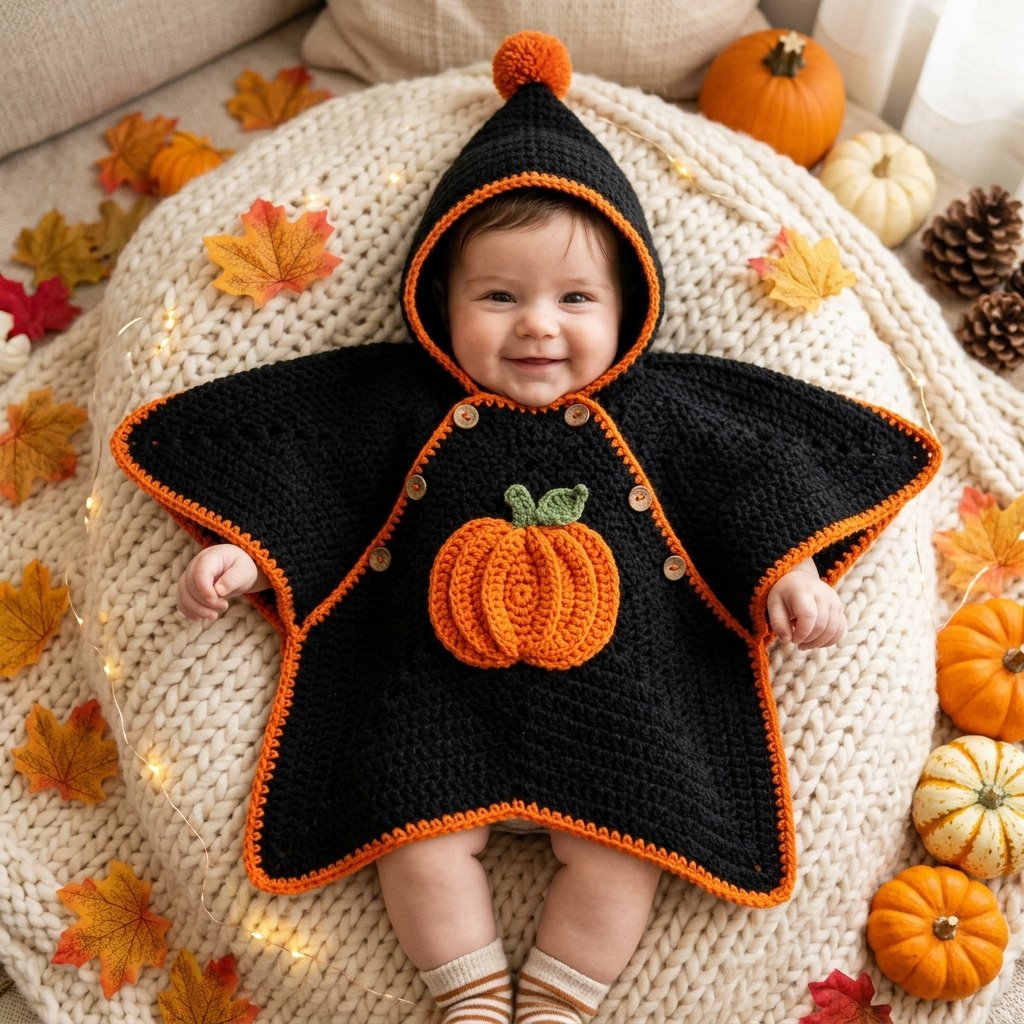
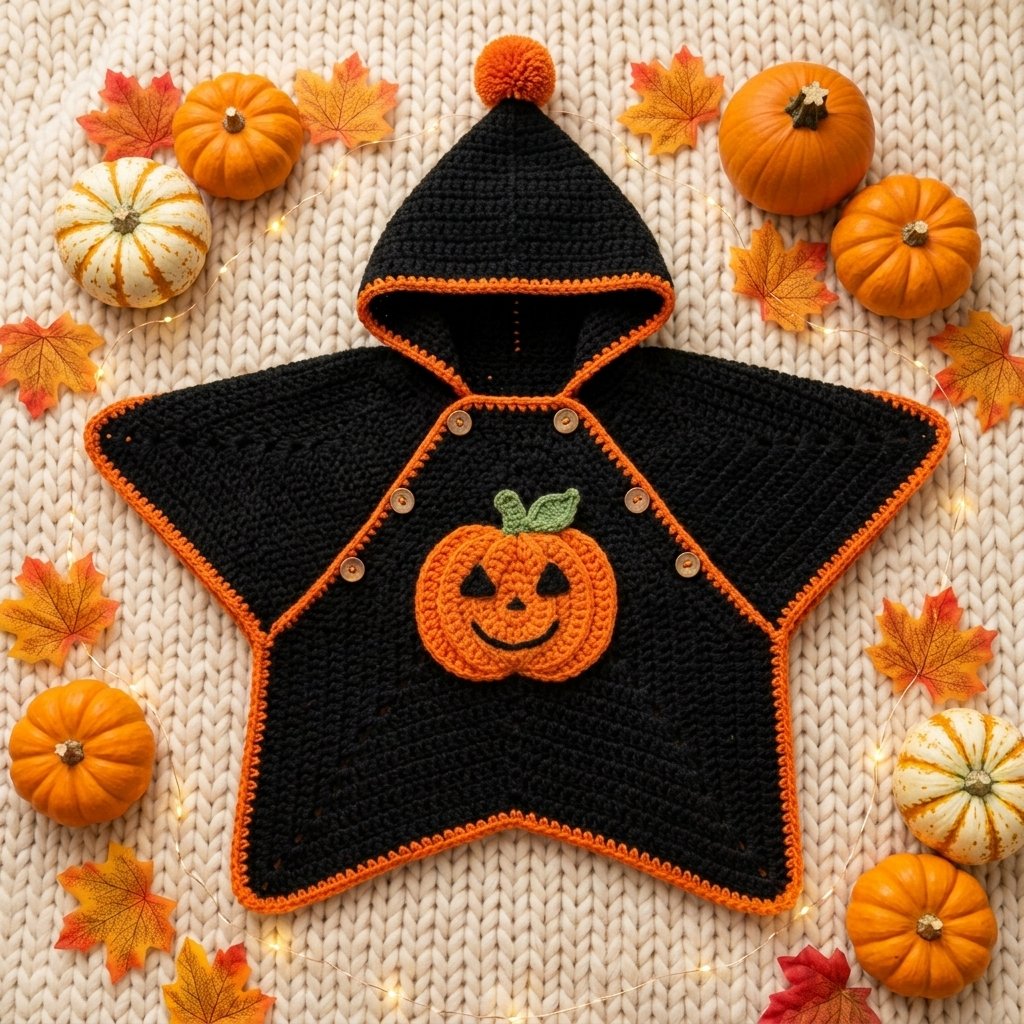
If you love cozy seasonal crochet, this free crochet baby star poncho pattern is a fun project for fall and Halloween. The finished design features a hooded star-shaped cover with bright orange trim and a cute pumpkin applique on the front.
This project is made for newborn photo styling, fall baby announcements, and festive handmade gifts. The shape looks adorable in pictures, and the simple stitch pattern makes it approachable for adventurous beginners.
Important: This item is intended as a supervised photo prop or costume only. It is not sleepwear and should not be used for naps, overnight sleep, car-seat use, or any unattended situation.
Project Details
- Skill Level: Advanced beginner
- Estimated Time: 5–7 hours
- Finished Size: Approximately 26 inches (66 cm) wide from side point to side point and 24 inches (61 cm) from hood tip to lower edge
- Crochet Terminology: US terms
- Construction Method: Flat center panel with separate triangular star points, a sewn hood, pumpkin applique, edging, and button closure
Materials
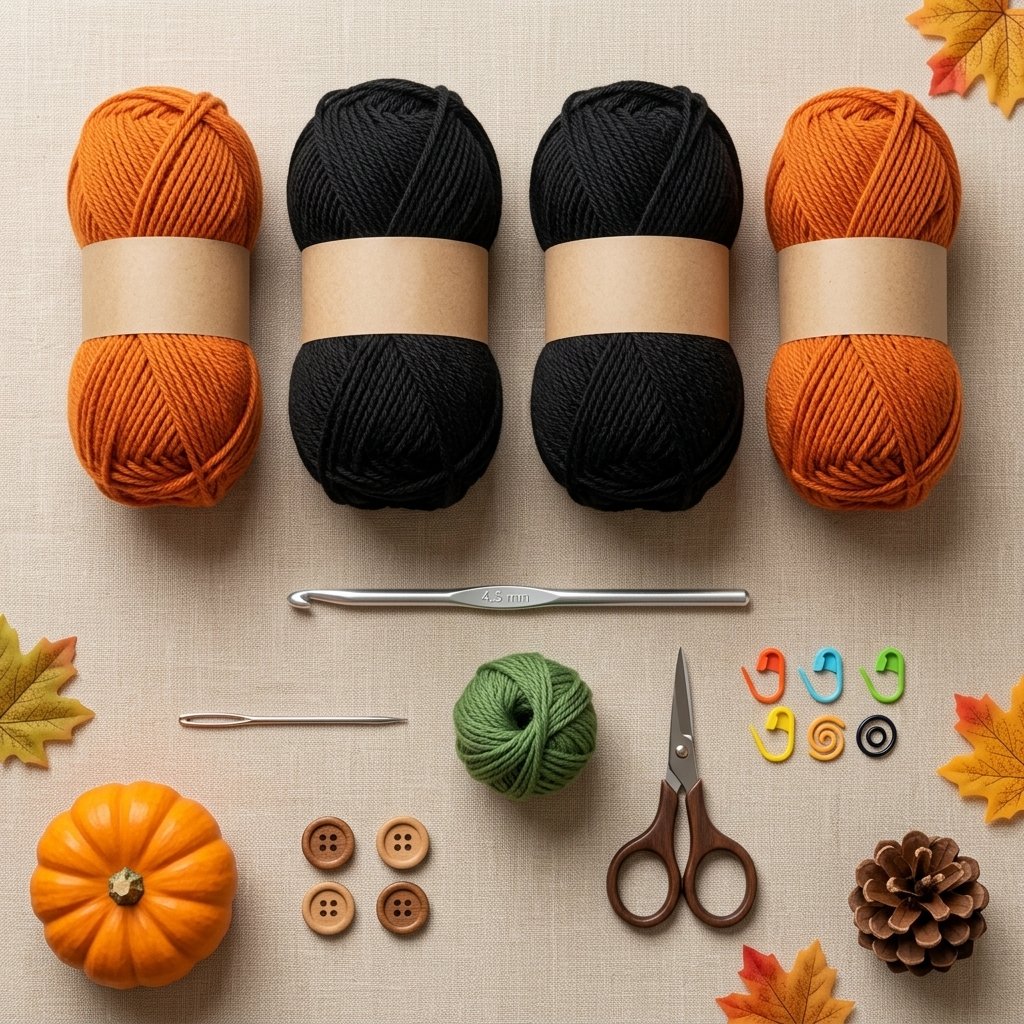
- Worsted weight yarn in black, approximately 450–500 yards
- Worsted weight yarn in orange, approximately 80–100 yards
- Small amount of green worsted weight yarn for the stem
- 4.5 mm crochet hook
- 4 buttons, about 3/4 inch (2 cm)
- Yarn needle
- Scissors
- Stitch markers (optional)
- Black yarn for embroidered pumpkin face details
- Optional: small snap fasteners if you prefer a more secure front closure for photo styling
Hook Size
Use a 4.5 mm hook for the main project. If your fabric feels too loose, go down to a 4 mm hook for a firmer texture. If your stitches are very tight, go up to a 5 mm hook to keep the fabric soft and flexible.
Yarn
- Weight: Worsted weight / category 4
- Approximate Quantity: 530–600 yards total
- Recommended Fiber: Soft acrylic, cotton blend, or other baby-friendly yarn with good stitch definition
- Suggested Colors: Black for the main body, orange for trim and pumpkin, green for the stem
- Alternative Color Ideas: Cream and rust, purple and black, gray and orange, or forest green and pumpkin orange
Abbreviations
- ch = chain
- sc = single crochet
- sl st = slip stitch
- st(s) = stitch(es)
- inc = increase (2 sc in the same stitch)
- dec = decrease
- RS = right side
- WS = wrong side
Before You Start / Pattern Notes
- Gauge is not critical, but a fabric that feels soft and slightly dense works best for this project.
- A swatch of 14 sc x 16 rows = 4 inches (10 cm) with the 4.5 mm hook is a good guideline.
- The poncho is worked mostly in rows.
- The star shape is created by sewing separate triangles to a center panel.
- The hood is worked as a rectangle, folded, and seamed.
- The front closure is decorative and lightly functional for supervised photo styling only.
- Always make sure buttons and embellishments are sewn on securely.
Step-by-Step Crochet Instructions
Part 1 — Center Body Panel
With black yarn, ch 31.
Row 1: Sc in 2nd ch from hook and in each ch across. (30 sts)
Rows 2–24: Ch 1, turn, sc in each st across. (30 sts)
Fasten off.
This rectangle forms the center of the star poncho.
Part 2 — Side Wing Triangles (Make 2)
With black yarn, ch 2.
Row 1: Work 2 sc in the 2nd ch from hook. (2 sts)
Row 2: Ch 1, turn, 2 sc in first st, sc in next st, 2 sc in last st. (4 sts)
Row 3: Ch 1, turn, 2 sc in first st, sc across to last st, 2 sc in last st. (6 sts)
Rows 4–12: Repeat Row 3. Add 1 stitch at each end of every row. At the end of Row 12, you will have 24 sts.
Fasten off, leaving a long tail for sewing.
These two triangles create the left and right star points.
Part 3 — Lower Point Triangles (Make 2)
With black yarn, ch 2.
Row 1: Work 2 sc in the 2nd ch from hook. (2 sts)
Row 2: Ch 1, turn, 2 sc in first st, sc in next st, 2 sc in last st. (4 sts)
Row 3: Ch 1, turn, 2 sc in first st, sc across to last st, 2 sc in last st. (6 sts)
Rows 4–14: Repeat Row 3. Add 1 stitch at each end of every row. At the end of Row 14, you will have 28 sts.
Fasten off, leaving a long tail for sewing.
These two triangles create the lower star points.
Part 4 — Hood
With black yarn, ch 25.
Row 1: Sc in 2nd ch from hook and in each ch across. (24 sts)
Rows 2–18: Ch 1, turn, sc in each st across. (24 sts)
Fasten off, leaving a long tail.
Fold the hood piece in half so it measures approximately 12 sts wide by 18 rows tall. Sew one short side together to form the top seam of the hood. Turn RS out.
Part 5 — Pumpkin Applique
With orange yarn, ch 16.
Row 1: Sc in 2nd ch from hook and in each ch across. (15 sts)
Rows 2–11: Ch 1, turn, sc in each st across. (15 sts)
Fasten off, leaving a long tail.
Thread the yarn tail through the stitches along one short end and pull gently to gather. Repeat on the opposite short end. Lightly gather both ends so the rectangle rounds into a pumpkin shape. Sew the sides closed if needed and flatten gently.
To create pumpkin ridges, use orange yarn and make 4 evenly spaced vertical running stitches from top to bottom, pulling very lightly so the shape forms soft sections.
Part 6 — Pumpkin Stem
With green yarn, ch 6.
Row 1: Sc in 2nd ch from hook and in each ch across. (5 sts)
Rows 2–4: Ch 1, turn, sc in each st across. (5 sts)
Fasten off, leaving a tail. Sew the stem to the top center of the pumpkin.
Part 7 — Pumpkin Face Details
Using black yarn and a yarn needle, embroider two triangle eyes, one small triangle nose, and a smiling jack-o’-lantern mouth on the pumpkin applique.
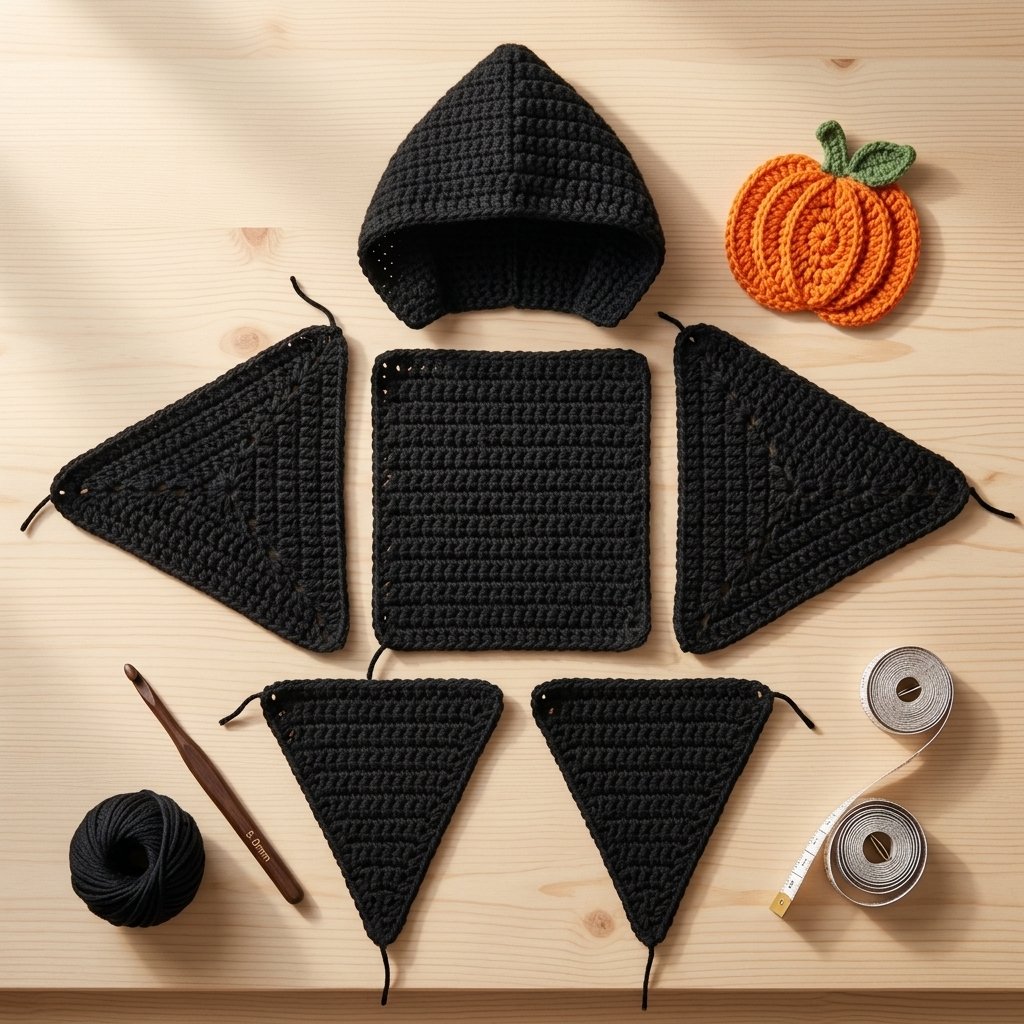
Assembly
Lay the center body panel flat with the RS facing up.
- Sew one long side of a side wing triangle to the upper left side of the center panel, with the point facing outward.
- Sew the second side wing triangle to the upper right side of the center panel in the same way.
- Sew one lower point triangle to the lower left section of the center panel.
- Sew the second lower point triangle to the lower right section of the center panel.
- Leave a small center dip at the bottom between the lower triangles if you want a more star-like silhouette.
Center the hood along the top edge of the body panel and sew it in place.
Position the pumpkin applique in the center front of the poncho and sew it down securely.
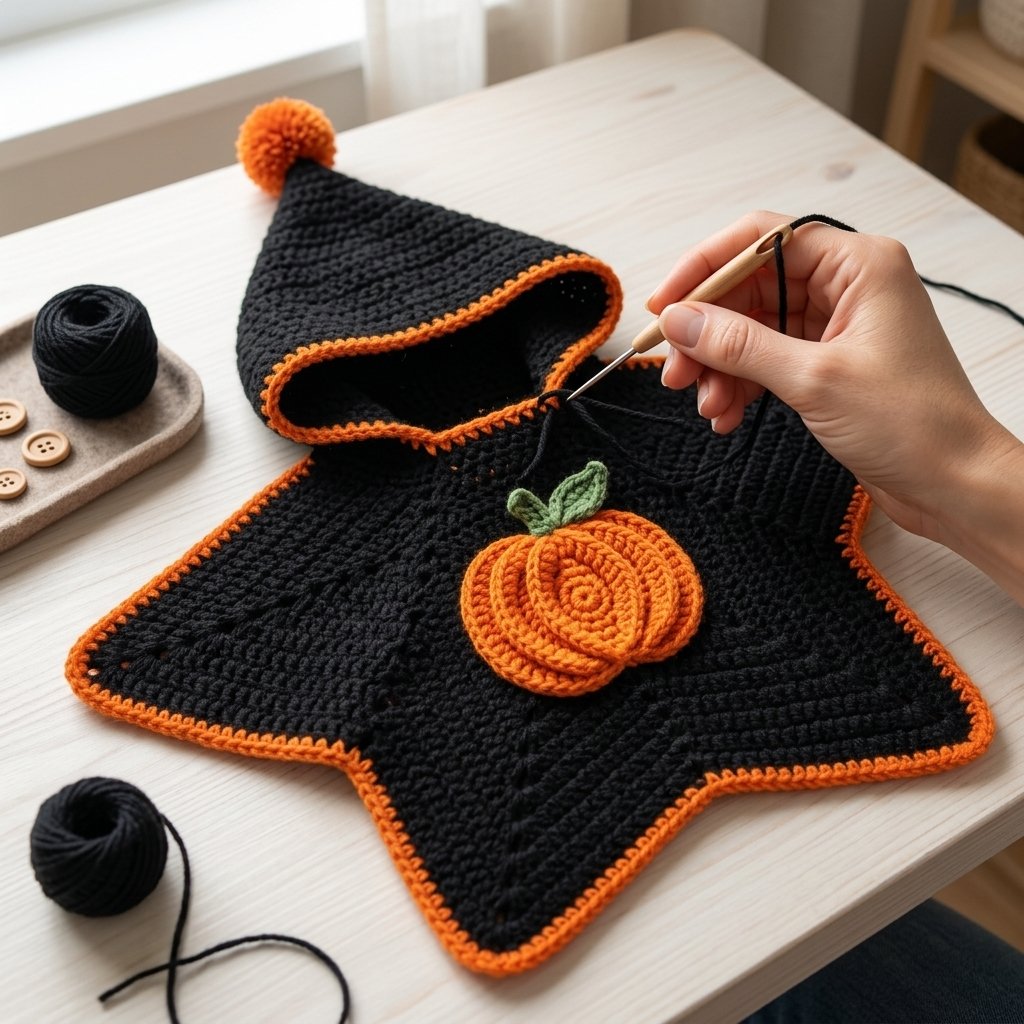
Edging
Join orange yarn at any outer edge.
Round 1: Work sc evenly all the way around the entire outer edge of the poncho, hood opening, and star points. Place 3 sc in each point tip and 2 sc around sharper corners if needed to help the edging lie flat.
Join with a sl st and fasten off.
Button Band and Front Closure
On the upper right front edge, choose the area where the hood and front panel overlap naturally.
Button Loop Row: With orange yarn, work 20–24 sc evenly along the edge. Ch 1, turn.
Next Row: Sc 2, ch 2, skip 2 sts, sc 4; repeat from * to * three more times to make 4 button loops. Adjust spacing if needed. Fasten off.
On the opposite overlapping edge, work one plain row of sc in orange to neaten the edge. Sew 4 buttons securely to match the loops.
If desired, sew a small hidden snap underneath the top overlap for a cleaner photo-prop closure.
Pom-Pom
Make one small orange pom-pom and attach it securely to the top point of the hood.
Finishing
Weave in all ends carefully. Check that all seams are secure and that the pumpkin applique lies flat. Double-check the buttons and pom-pom attachment before use. Lightly shape the star points by hand.
If needed, steam very lightly from a distance or block gently to smooth the edges. Do not overstretch the points.
Finished Size
- Width: Approximately 26 inches (66 cm) from side point to side point
- Length: Approximately 24 inches (61 cm) from hood tip to lower edge
- Hood Height: Approximately 8 inches (20 cm)
Tips & Customization
- Use dark purple instead of black for a softer Halloween look.
- Swap the pumpkin applique for a ghost, bat, or candy corn motif.
- Make a slightly larger version by adding 4 more rows to the center panel and 2 more rows to each triangle.
- For a simpler finish, skip the buttons and use a decorative overlap only.
- If making this for a baby shower gift, include a matching pumpkin beanie or booties.
Looking for Your Next Crochet Project?
Love this project? Explore Cute Stitch Studio’s premium crochet patterns for more cute, cozy, seasonal, and gift-worthy handmade ideas.