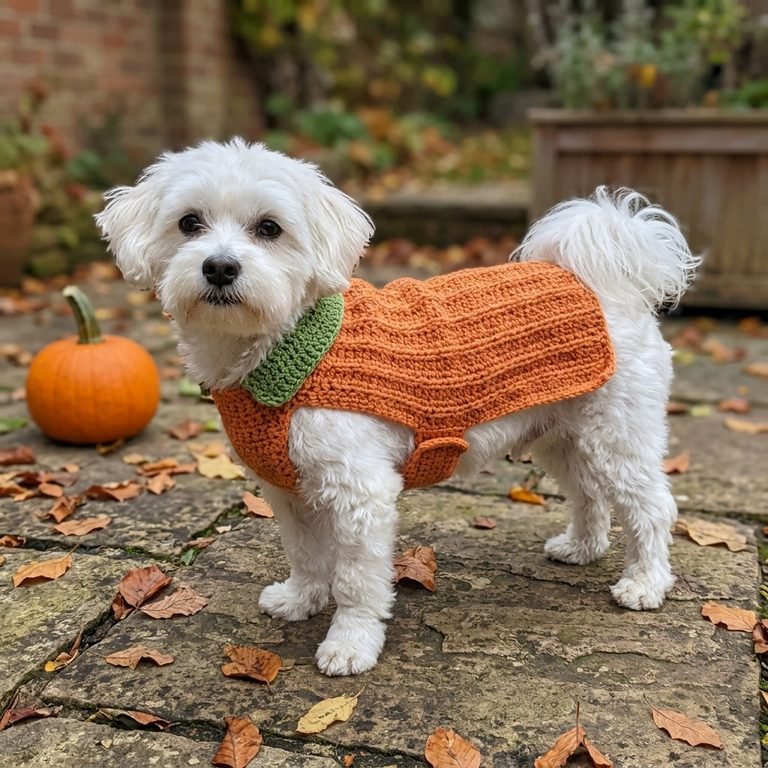
Crochet Fox Hood Pattern with Ears and Cozy Cowl
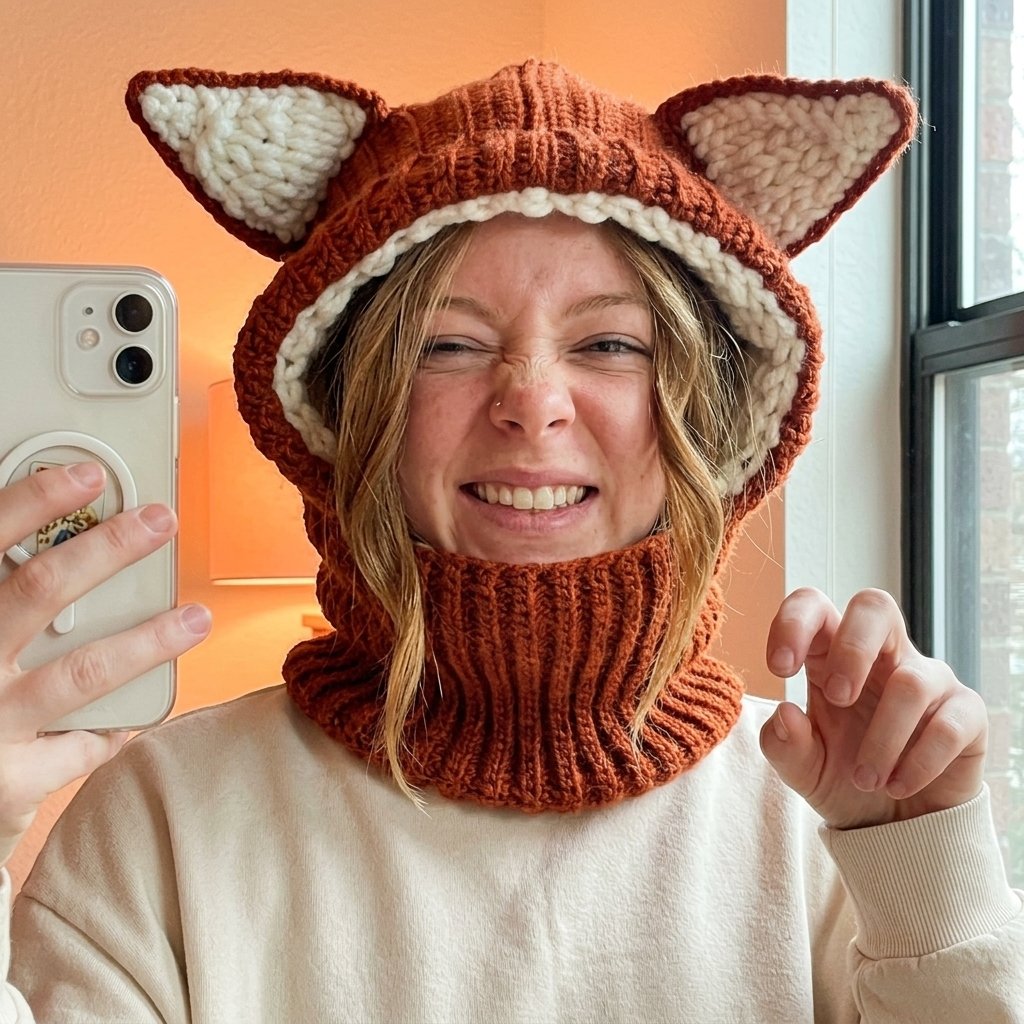
This crochet fox hood pattern combines a rust-colored hood, soft cream edging, and a ribbed cowl for a cozy woodland accessory. Two pointed ears give it a playful fox look without adding complicated colorwork.
The hood begins as a rectangle, while the cowl is made separately in stretchy ribbed rows. Sew the pieces together, add the ears, and you have an accessory for cool-weather walks, autumn outfits, or a simple woodland costume.
This is a confident-beginner project with basic sewing. Because it is wearable, checking your gauge and trying on the pieces are important parts of the pattern.
Project Details
- Skill Level: Confident beginner
- Estimated Time: Approximately 8–12 hours
- Size: Adult starting size for a head circumference of approximately 21–23 inches
- Crochet Terminology: US terms
- Construction Method: Rectangular hood with a top seam, separate ribbed cowl, and layered ears
- Fit: Relaxed hood with a comfortable pull-over neckline
This written pattern has not been physically tested. Gauge targets, yarn quantities, and finished measurements are planning estimates. Confirm the fit as you work.
Materials
You will need:
- Category 4 yarn in rust and cream
- 5 mm (H-8) crochet hook
- Blunt yarn needle
- Scissors
- Flexible measuring tape
- Four removable stitch markers
Choose yarn that feels comfortable against your neck and forehead.
Hook Size
Start with a 5 mm (H-8) crochet hook.
Adjust your hook size to reach the fabric and measurements described below. A larger hook generally produces a looser fabric; a smaller hook produces a denser fabric.
Measure your swatches before choosing the hook for the full project.
Yarn
Use category 4, medium/worsted yarn.
A soft wool-acrylic blend gives warmth with some resilience. Smooth acrylic is another option if you prefer a wool-free accessory.
For the adult starting size, allow approximately:
- Rust: 450–600 yards
- Cream: 40–60 yards
Keep extra yarn available if you increase the hood depth or cowl height.
Use the same yarn weight for both colors. Avoid combining a thick cream yarn with a much thinner rust yarn, which can distort the edging and ears.
Abbreviations
This pattern uses US crochet terminology:
- ch = chain
- sc = single crochet
- hdc = half double crochet
- sl st = slip stitch
- BLO = back loop only
- inc = increase; work 2 sc into the same stitch
- st(s) = stitch(es)
Before You Start
Check Your Gauge
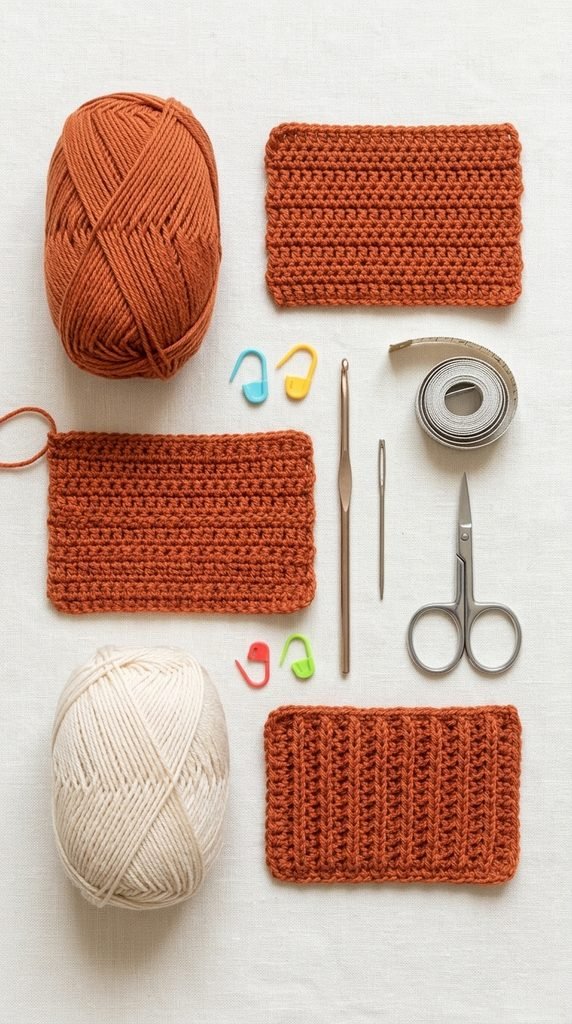
Make two swatches large enough to measure the center without including the edges.
Hood planning gauge:
12 hdc and 9 rows = approximately 4 inches, measured flat.
Cowl planning gauge:
14 sc and 16 rows in BLO = approximately 4 inches, measured relaxed.
Wash or dampen the swatches according to the yarn label, let them dry, and measure again.
The two stitch patterns behave differently. Do not assume that matching the hood gauge automatically gives you the cowl gauge.
Target Measurements
Before assembly, aim for:
- Hood rectangle: 24 inches wide × 12 inches tall
- Cowl strip: 24 inches long × approximately 4–4½ inches tall
The hood rectangle’s width wraps from one side of the face, around the back of the head, to the other side.
The cowl’s long edge becomes its circumference. It must pass comfortably over your head.
Stitch Notes
Beginning chains do not count as stitches.
Work into the first stitch after turning, and do not work into the turning chain at the opposite end.
For BLO, insert your hook under only the top loop farther away from you.
The stated stitch and row counts assume the planning gauges above. Follow the target measurements if your gauge differs.
Crochet Fox Hood Pattern Instructions
Part 1 — Crochet the Hood Rectangle
Using rust yarn, ch 73.
Row 1: Hdc in the second ch from the hook and every remaining ch. Turn. 72 sts.
Row 2: Ch 1. Hdc through both loops of each stitch across. Turn. 72 sts.
Rows 3–27: Repeat Row 2. 72 sts in every row.
Measure the rectangle without stretching it.
At the planning gauge, it should measure approximately 24 inches wide and 12 inches tall.
If the height is short, add more rows. If it is too tall, remove rows before fastening off.
If the width is incorrect, adjust the foundation stitch count and remake the rectangle before continuing. Use an even number of stitches so the top folds into matching halves.
Fasten off, leaving approximately 30 inches of yarn for the top seam.
Part 2 — Sew the Hood’s Top Seam
Lay the rectangle flat with the foundation chain at the bottom and the final row at the top.
Bring the left and right side edges together by folding the rectangle in half across its width.
You now have a folded piece approximately 12 inches wide and 12 inches tall.
- The fold will sit at the back of the head.
- The two side edges will frame the face.
- The two halves of the final row form the top seam.
Using the long tail, sew the top edges together through all 36 matched stitch pairs.
Keep the seam secure but flexible. Do not pull it into a tight ridge.
Weave in the remaining tail and turn the hood so the seam is on the inside.
Try it on. Check that it covers the back of your head and that the front edges frame your face without blocking your vision.
Part 3 — Add the Cream Face Border
Keep the hood right side out.
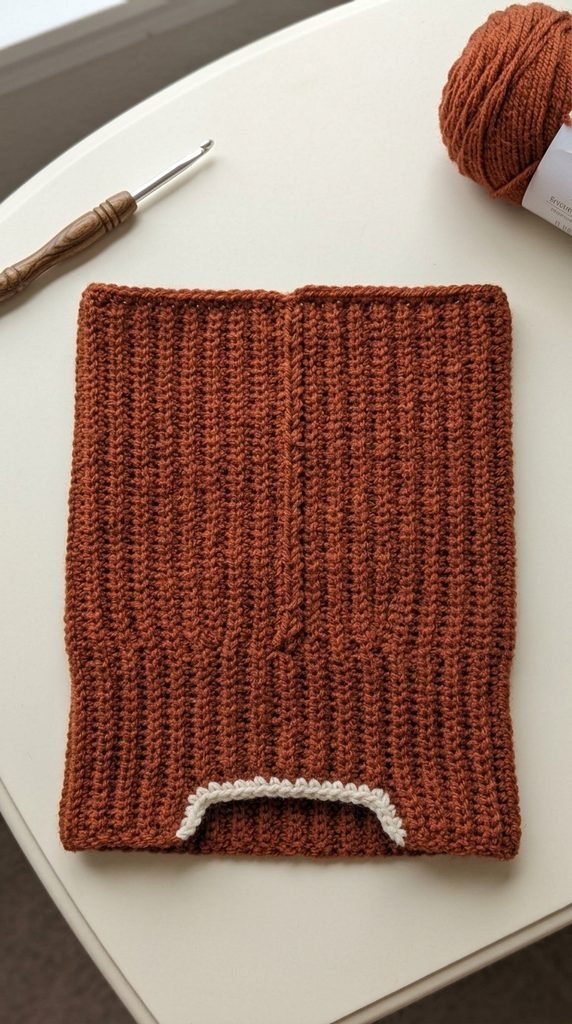
Join cream yarn at the lower corner of one front edge. Work upward toward the top seam, then down the other front edge.
For the sample’s 27 rows on each side, there are 54 row ends around the face opening.
Border Row: Ch 1. Repeat the following along the opening:
- Work 1 sc into the next row end.
- Work 2 sc into the following row end.
Repeat this pair 27 times. 81 sc total.
Work into sturdy edge loops rather than loose spaces.
Do not add extra stitches into the top seam itself. Continue from the last row end on the first side to the first row end on the second side.
Fasten off and weave in the ends.
If you changed the hood’s row count, continue the same alternating placement along your actual row ends. The border should lie smoothly; loosen tight stitches or redistribute them if it gathers the opening.
Part 4 — Crochet the Ribbed Cowl
Using rust yarn, ch 16.
Row 1: Sc in the second ch from the hook and each remaining ch. Turn. 15 sts.
Row 2: Ch 1. Sc in BLO of each stitch across. Turn. 15 sts.
Rows 3–96: Repeat Row 2. 15 sts in every row.
At the planning gauge, the strip should measure approximately:
- Length: 24 inches along the row-end edge
- Height: 4–4½ inches along the 15-stitch edge
Measure the strip relaxed.
Add or remove rows if necessary so its long edge matches the hood’s 24-inch lower edge.
Before sewing, hold the short ends together and check that the resulting ring passes comfortably over your head. Do not force a tight opening.
Fasten off, leaving an 18-inch sewing tail.
Part 5 — Close the Cowl Ring
Bring the first and last rows together, matching their 15 stitch positions.
Sew through the matched pairs to create a ring. Keep the seam flexible and avoid gathering the ribbing.
Secure the yarn and weave in the tail.
Try the ring on again. It should feel comfortable around your neck and slide over your head easily.
Part 6 — Attach the Cowl to the Hood
Lay the hood and cowl right side out.
Position the cowl seam at the center back, aligned with the hood’s back fold.
The hood’s two lower front corners meet at the front of the cowl, beneath the chin.
Mark four matching points:
- Center back
- Center front
- Left side
- Right side
For the stated counts, each quarter of the hood’s lower edge contains 18 foundation stitches. Each quarter of the cowl’s upper edge contains 24 row ends.
Use a separate length of rust yarn to sew the edges together.
Distribute the stitches evenly between markers. The counts differ, so do not force a one-to-one match. Catch sturdy loops along both edges while keeping their measured lengths aligned.
Work all the way around the neckline. Secure and weave in the yarn.
Try on the joined hood before adding the ears.
Part 7 — Crochet the Outer Ears
Make two using rust yarn.
Foundation: Ch 3.
Row 1: Sc in the second ch from the hook and the next ch. Turn. 2 sts.
Row 2: Ch 1. Inc in each stitch. Turn. 4 sts.
Row 3: Ch 1. Inc in the first stitch, sc in the next 2 stitches, inc in the last stitch. Turn. 6 sts.
Row 4: Ch 1. Sc in each stitch across. Turn. 6 sts.
Row 5: Ch 1. Inc in the first stitch, sc in the next 4 stitches, inc in the last stitch. Turn. 8 sts.
Row 6: Ch 1. Sc in each stitch across. Turn. 8 sts.
Row 7: Ch 1. Inc in the first stitch, sc in the next 6 stitches, inc in the last stitch. Turn. 10 sts.
Row 8: Ch 1. Sc in each stitch across. Turn. 10 sts.
Row 9: Ch 1. Inc in the first stitch, sc in the next 8 stitches, inc in the last stitch. 12 sts.
Fasten off, leaving a 20-inch sewing tail.
The narrow starting end is the ear tip. The final 12-stitch row is its base.
Part 8 — Crochet the Inner Ears
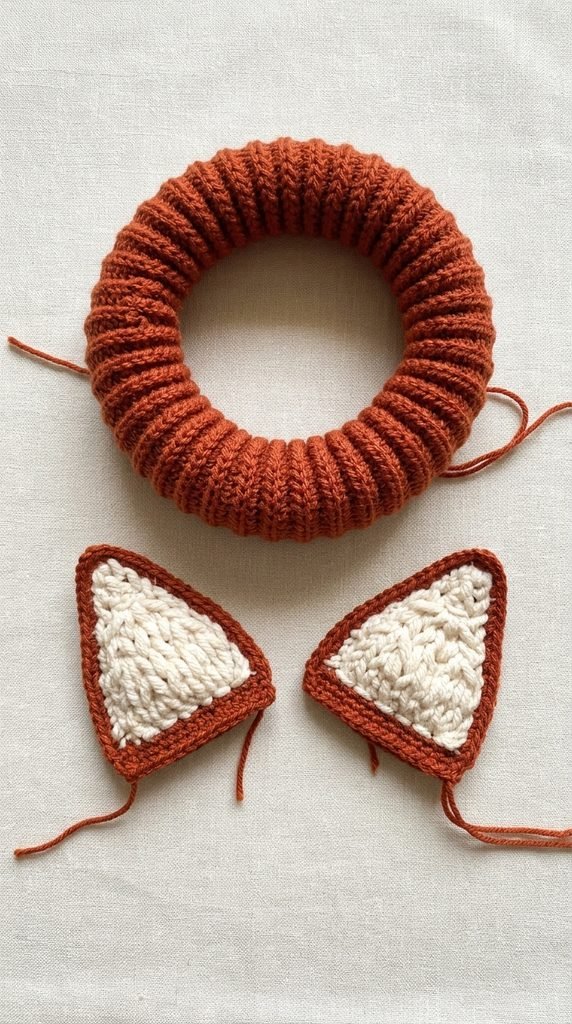
Make two using cream yarn.
Foundation: Ch 3.
Row 1: Sc in the second ch from the hook and the next ch. Turn. 2 sts.
Row 2: Ch 1. Inc in each stitch. Turn. 4 sts.
Row 3: Ch 1. Sc in each stitch across. Turn. 4 sts.
Row 4: Ch 1. Inc in the first stitch, sc in the next 2 stitches, inc in the last stitch. Turn. 6 sts.
Row 5: Ch 1. Sc in each stitch across. Turn. 6 sts.
Row 6: Ch 1. Inc in the first stitch, sc in the next 4 stitches, inc in the last stitch. 8 sts.
Fasten off, leaving a 16-inch tail.
Center each cream piece on a rust ear, keeping the narrow tips pointed in the same direction.
Leave a visible rust border around the cream section. Sew around the cream piece with small stitches, then secure and hide the tail.
Part 9 — Shape and Attach the Ears
Fold the two lower corners of each layered ear slightly toward the center. Overlap them by about ¼ inch and secure with a few stitches.
This gives the ear a shallow cup shape.
Try on the hood and use removable markers to choose the ear positions. Place one on each side of the top seam, approximately 2–3 inches apart, with the cream sections facing forward.
Remove the hood before sewing.
Sew each ear’s full base to the hood. Add a second securing pass through the base, keeping the stitches beneath the ear where possible.
Check that both ears sit at similar angles. Their firmness will depend on your yarn; a soft, slightly floppy result is normal.
Secure all tails and weave them into the matching rust fabric.
Finishing
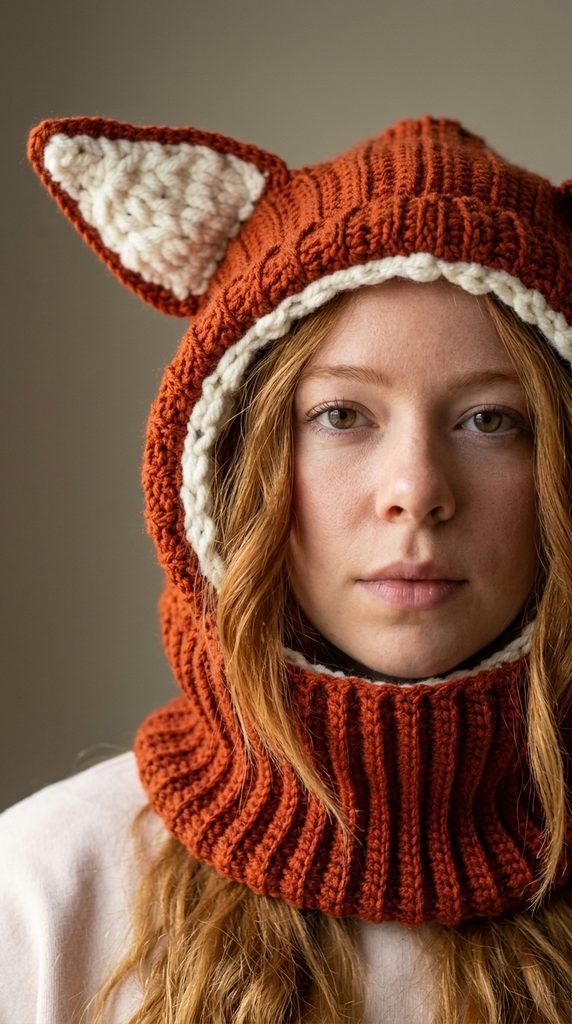
Check the top seam, cowl join, and ear attachments.
Weave in all remaining yarn ends, changing direction before trimming them.
Wash or lightly dampen the finished hood according to the yarn label. Lay it flat, shape the face opening and ribbing gently, and let it dry completely.
Do not hang the wet hood, which may stretch the fabric.
Try it on again after drying and confirm that the neckline feels comfortable and the face border stays clear of your eyes.
Finished Size
At the planning gauges, the adult version has approximately:
- Hood depth: 12 inches from the face edge to the back fold
- Hood height: 12 inches before the cowl
- Cowl circumference: 24 inches, relaxed
- Cowl height: 4–4½ inches
The cream border adds a small amount to the face edge.
These are construction measurements, not a guaranteed fit. Check them against your own head and preferred coverage.
Tips and Customization
- Use burnt orange and cream for a classic fox look.
- Try gray and white for a woodland wolf-inspired version.
- Make the cowl taller by adding foundation chains; keep its finished circumference matched to the hood.
- For a deeper hood, increase the rectangle’s width and increase the cowl length by the same amount.
- For more crown-to-neck coverage, add hood rows before sewing the top.
- Keep the ears lightweight so they do not pull the hood forward.
- Avoid tight edging around the face; comfortable movement matters more than an exact border count.
For another small decorative project, try our easy crochet heart pattern for beginners.
Looking for Your Next Crochet Project?
Love cozy woodland makes? Explore Cute Stitch Studio’s premium crochet patterns for more cute accessories, animal-inspired projects, and thoughtful handmade gifts.