Halloween Pumpkin Mug Rug Crochet Pattern
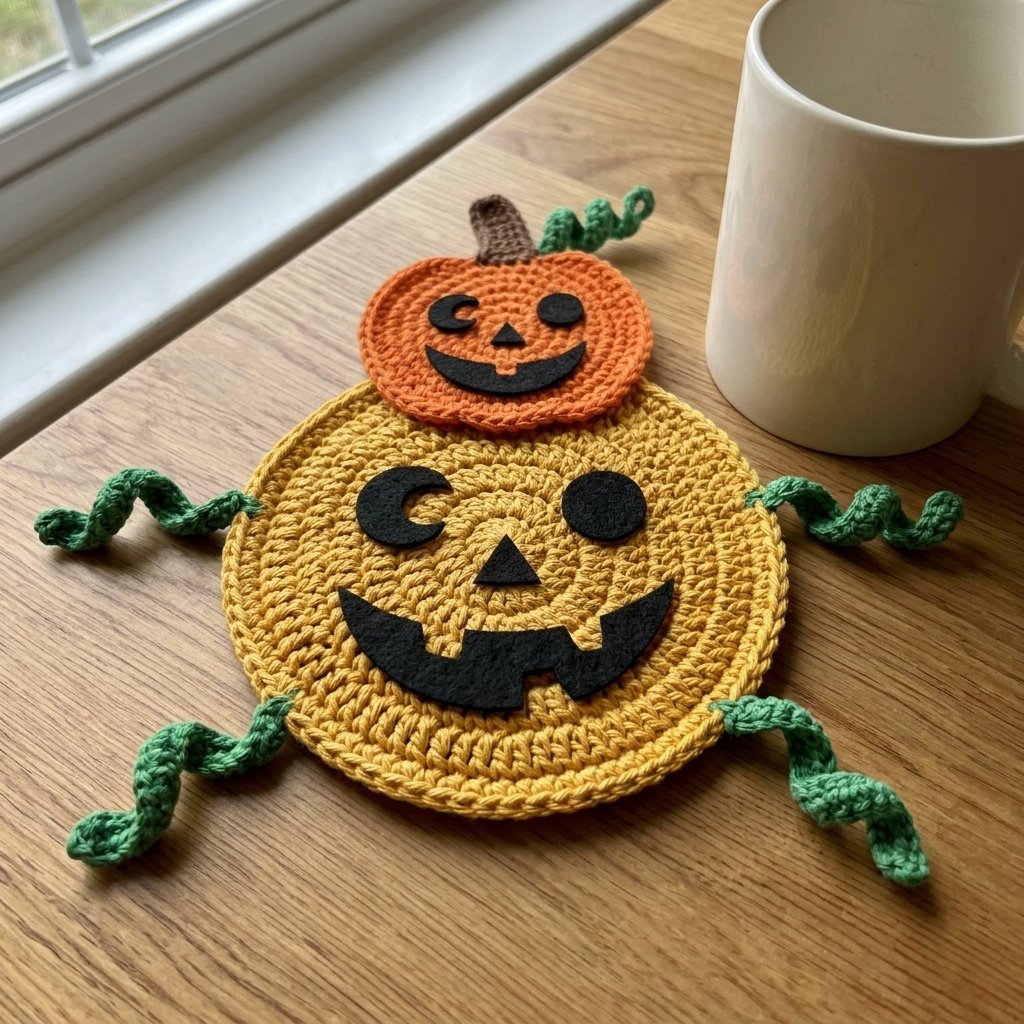
This Halloween pumpkin mug rug crochet pattern adds a playful little character to your coffee table. A golden-yellow circle forms the coaster, while an orange pumpkin head and curly green vines bring it to life.
The center stays flat for your mug, with the face and vines positioned around the outside. Make one for your desk or give it as a small handmade Halloween gift.
This project suits confident beginners who know basic crochet stitches and are ready to practice working in rounds and simple sewing.
Project Details
- Skill Level: Confident beginner
- Estimated Time: Approximately 2–3 hours
- Finished Size: Estimated 6–7 inches across the circular base and 9–10 inches from the lower edge to the top of the head, excluding vines
- Crochet Terminology: US terms
- Construction Method: Flat circular base with a separate flat pumpkin head, stem, and five curly vines
This written design has not been physically tested. Measurements, yarn quantities, and completion time are estimates.
Materials
You will need:
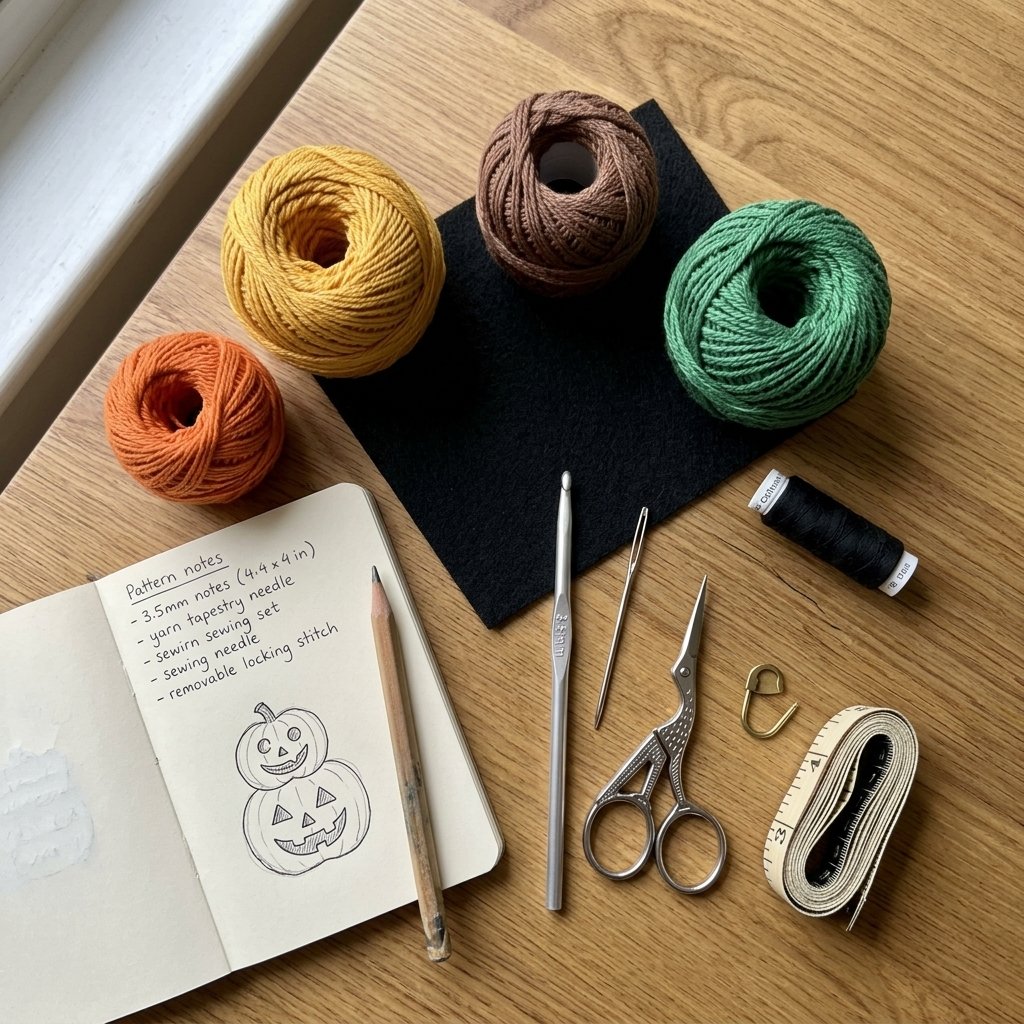
- Medium-weight cotton yarn in golden yellow, orange, green, and brown
- 4 mm (G-6) crochet hook
- Blunt yarn needle
- Sharp sewing needle
- Black sewing thread
- Small piece of black felt, approximately 2 × 3 inches
- Scissors
- Removable stitch marker
- Ruler or measuring tape
- Paper and pencil for the face templates
No stuffing, wire, or glue is needed.
Hook Size
Use a 4 mm (G-6) crochet hook.
Aim for an even fabric that lies flat without large gaps. Keep your turning and joining stitches relaxed so the edges do not pull inward.
Yarn
Use category 4, medium/worsted cotton yarn.
Allow approximately:
- Golden yellow: 35–45 yards
- Orange: 12–18 yards
- Green: 15–20 yards
- Brown: 2–3 yards
These quantities include yarn for sewing and finishing.
Cotton is a practical choice for a washable drink coaster. Use the same yarn weight for every piece to keep the proportions consistent.
For the featured version, choose a warm golden base, bright orange head, leaf-green vines, and a dark brown stem.
Abbreviations
This pattern uses US crochet terminology:
- ch = chain
- sc = single crochet
- hdc = half double crochet
- dc = double crochet
- sl st = slip stitch
- st(s) = stitch(es)
Increases are written out as two or three stitches worked into the same stitch or chain.
Before You Start
The base and head are worked in joined rounds. Do not turn between rounds.
Beginning chains do not count as stitches. Join each round into its first actual stitch, not the beginning chain.
Place a marker in the first stitch if you find it difficult to identify the join.
Gauge: Exact gauge is not essential, but the base must lie flat and extend beyond your mug’s footprint. Check the fabric after each round.
The head is a flat decorative circle. It should sit outside the main drinking area rather than underneath the mug.
Halloween Pumpkin Mug Rug Crochet Pattern Instructions
Part 1 — Crochet the Golden Base
Using golden-yellow yarn, ch 4. Join with a sl st into the first chain to form a ring.
Round 1: Ch 2. Work 12 dc into the ring. Join with a sl st into the first dc. 12 sts.
Round 2: Ch 2. Work 2 dc into each stitch around. Join. 24 sts.
Round 3: Ch 2. Repeat [dc in the next stitch, 2 dc in the next stitch] 12 times. Join. 36 sts.
Round 4: Ch 2. Repeat [dc in the next 2 stitches, 2 dc in the next stitch] 12 times. Join. 48 sts.
Round 5: Ch 2. Repeat [dc in the next 3 stitches, 2 dc in the next stitch] 12 times. Join. 60 sts.
Round 6: Ch 2. Repeat [dc in the next 4 stitches, 2 dc in the next stitch] 12 times. Join. 72 sts.
Round 7: Ch 1. Sc in each stitch around. Join with a sl st into the first sc. 72 sts.
Fasten off, leaving a 6-inch tail.
Use the starting tail to draw the center opening gently closed if needed. Secure it without gathering the surrounding fabric.
Weave in both ends.
Part 2 — Crochet the Pumpkin Head
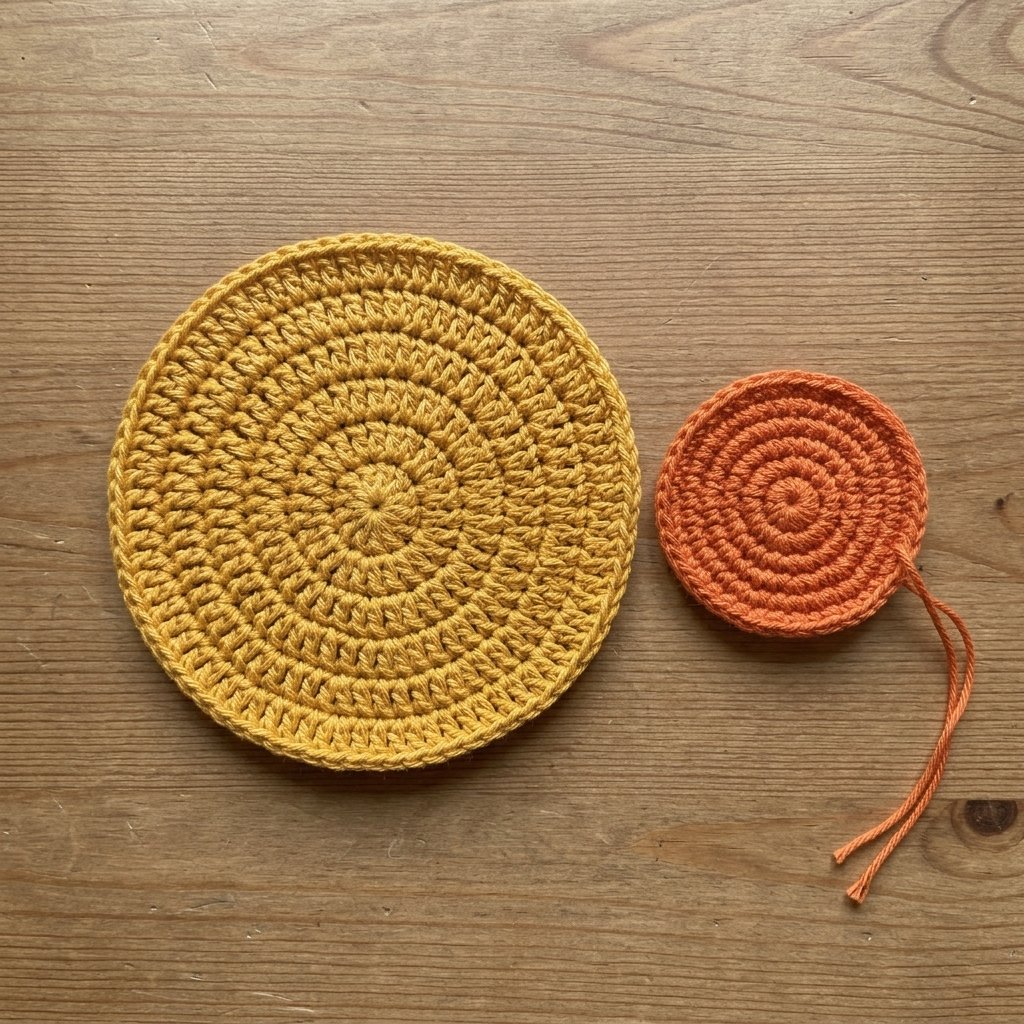
Using orange yarn, ch 2.
Round 1: Work 10 hdc into the second ch from the hook. Join with a sl st into the first hdc. 10 sts.
Round 2: Ch 2. Work 2 hdc in each stitch around. Join. 20 sts.
Round 3: Ch 2. Repeat [hdc in the next stitch, 2 hdc in the next stitch] 10 times. Join. 30 sts.
Round 4: Ch 2. Repeat [hdc in the next 2 stitches, 2 hdc in the next stitch] 10 times. Join. 40 sts.
Fasten off, leaving a 20-inch tail for attaching the head.
Secure the starting tail and close any small center opening. Keep the finishing tail available for assembly.
Lay the head flat and gently shape it into a circle.
Part 3 — Make the Brown Stem
Using brown yarn, ch 5.
Row 1: Sc in the second ch from the hook and each remaining ch. Turn. 4 sts.
Row 2: Ch 1. Sc in each stitch across. 4 sts.
Fasten off, leaving a 12-inch sewing tail.
The stem is a small flat rectangle. Do not roll or stuff it.
Part 4 — Crochet the Curly Vines
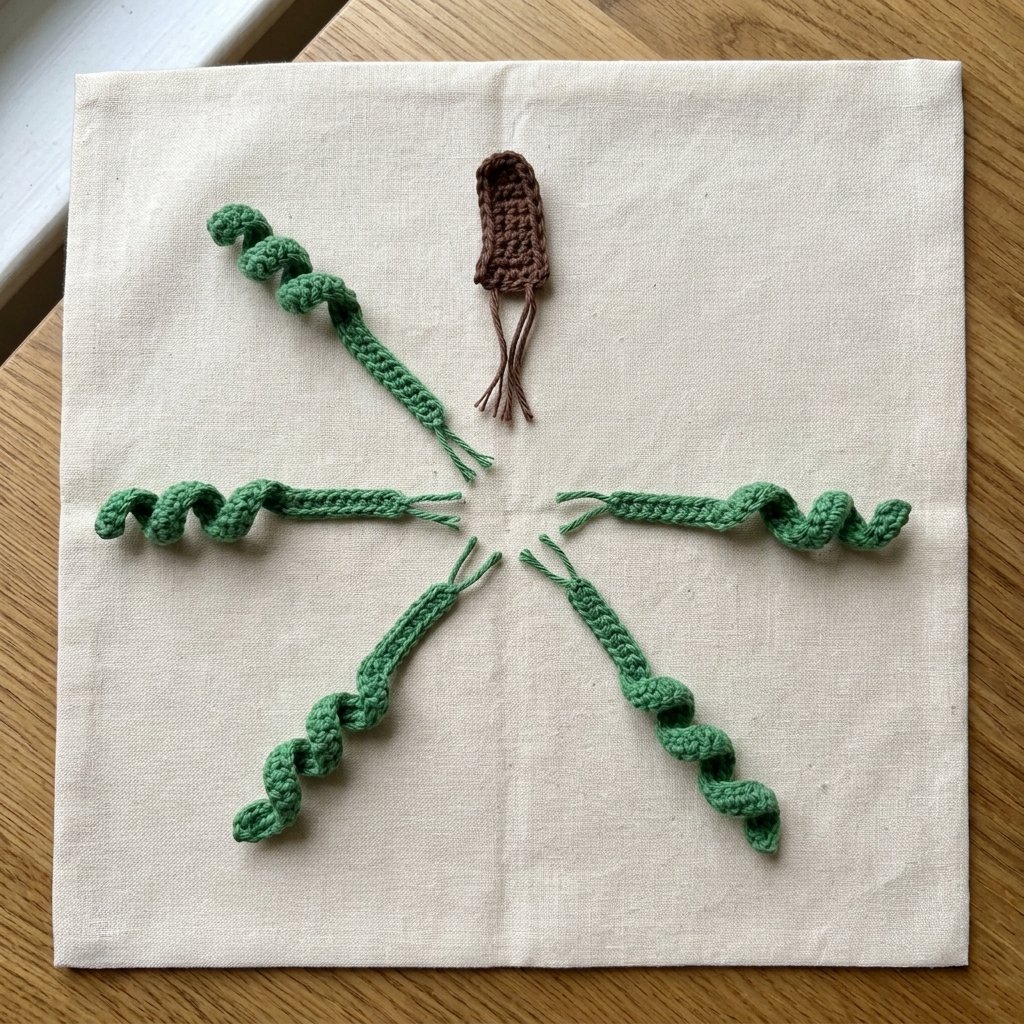
Make five vines using green yarn: four for the body and one for the head.
For each vine, leave an 8-inch starting tail and ch 16.
Starting in the second ch from the hook:
- Work 3 sc into each of the next 5 chains. 15 sc.
- Sl st into each of the remaining 10 chains. 10 slip stitches.
Fasten off, leaving an 8-inch tail.
Each vine has 25 worked stitches across 15 foundation chains.
The section containing three single crochets per chain forms the curly tip. The slip-stitch section forms the narrow stem.
Coil the wider section gently around a finger, then release it.
Both yarn tails are at the narrow end and can be used for attachment.
Part 5 — Make the Jack-O’-Lantern Face
Place the orange circle on your work surface.
Draw the face on paper before cutting the felt. For a head approximately 2½–3 inches across, start with:
- Two eyes, each approximately ½ inch wide
- One smiling mouth, approximately 1¼ inches wide and ½ inch tall
For a playful expression, make one eye triangular and the other a small tilted crescent.
Draw the mouth as a wide upward-curving crescent. Cut a small rectangular notch into its upper edge to create an orange tooth once the felt is placed on the head.
Keep enough felt beneath the notch for the mouth to remain one piece.
Hold the paper pieces against the crochet head. Adjust their size and spacing before tracing them onto black felt.
Cut out the felt shapes.
Part 6 — Sew the Face
Using black sewing thread and a sharp needle:
- Position the eyes on the upper half of the orange circle.
- Sew around each eye with small stitches close to the edge.
- Place the mouth below them.
- Sew around the mouth’s entire outline, including the tooth notch.
Catch the crochet fabric without pulling it into dimples.
Secure the thread ends on the back. Keep them neat and flat.
Part 7 — Attach the Stem and Head Vine
Choose the top of the pumpkin head.
Place one short end of the brown stem behind the top edge, overlapping the orange fabric by approximately ¼ inch.
Sew the overlap securely, leaving the rest of the stem extending upward.
Attach the narrow end of one green vine beside the stem. Make several small stitches through its base and the orange fabric.
Keep the curled end free.
Weave the attachment tails into the back of the head without creating bulky knots.
Part 8 — Join the Head to the Base
Lay the yellow circle flat and mark its top edge.
Position the orange head above it, with the lower edge overlapping the yellow base by approximately ¼–½ inch. Most of the head should remain outside the circular base.
Using the orange sewing tail, stitch across the overlapping area. Make a second pass if needed so the head does not twist loosely at the join.
Keep the seam flat. Avoid gathering either circle.
Secure the yarn and weave in the tail.
Part 9 — Attach the Four Body Vines
Imagine the circular base as a clock face, with the head at 12 o’clock.
Attach the remaining vines near:
- 2 o’clock
- 4 o’clock
- 8 o’clock
- 10 o’clock
Sew each narrow end to the outer edge with several small stitches. Let the curly section point outward.
Keep every attachment at the perimeter so the mug’s supporting surface stays clear.
Weave in all remaining tails.
Finishing
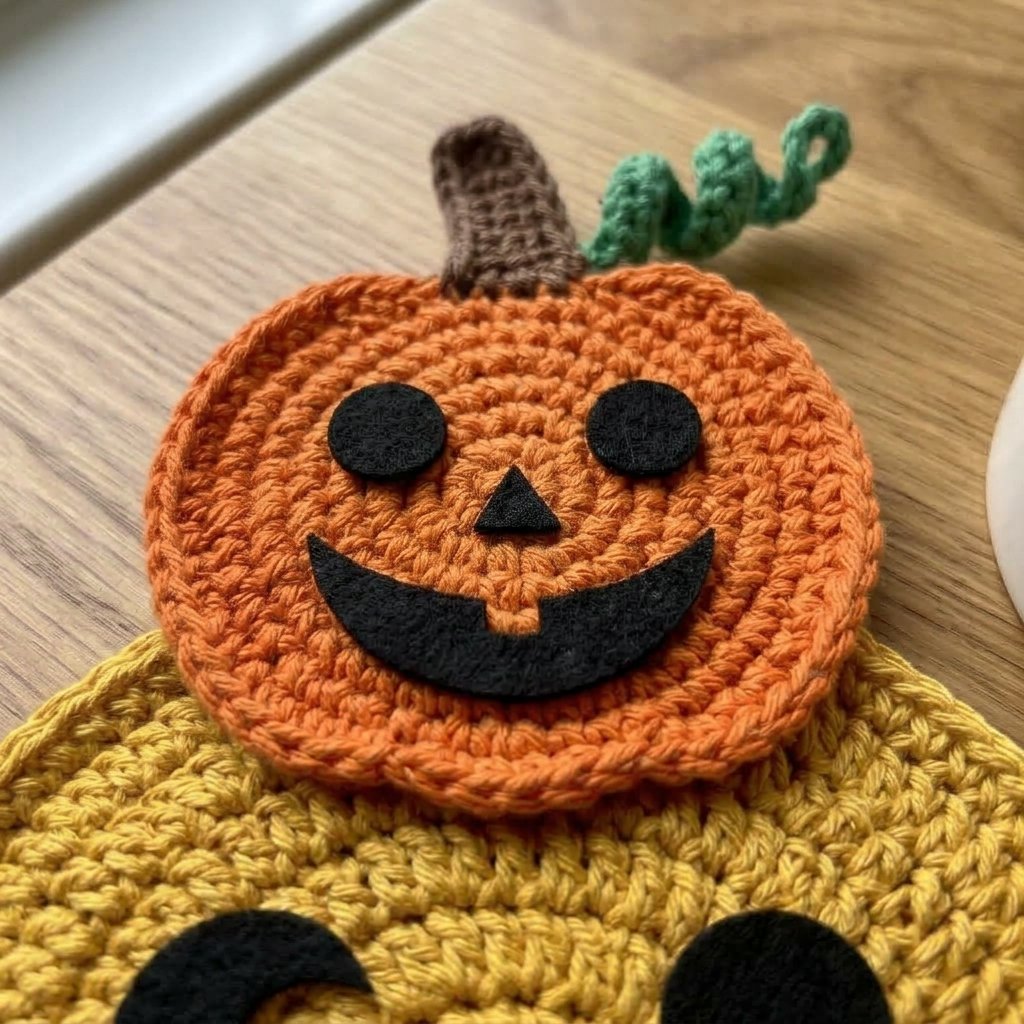
Check the felt edges and vine attachments. Add a small stitch wherever a piece lifts or feels loose.
If the base needs gentle shaping, dampen it according to the yarn and felt care instructions. Lay it flat on a towel and smooth the circle without stretching it.
Let it dry completely.
Test the finished mug rug with an empty mug first. The entire mug base should rest on the flat yellow circle without touching the head or vine attachments.
This project is a drink coaster, not a trivet for hot cookware.
Finished Size
Estimated measurements are:
- Yellow base: Approximately 6–7 inches (15–18 cm) across
- Pumpkin head: Approximately 2½–3 inches (6.5–7.5 cm) across
- Overall length: Approximately 9–10 inches (23–25 cm), excluding the stem and vines
Your yarn, hook, tension, and assembly will affect the actual dimensions.
Tips and Customization
- Use orange for the base and rust for the head for a traditional pumpkin palette.
- Try a cream base with sage-green vines for a softer autumn look.
- Change the eye shapes to give each pumpkin a different expression.
- Keep all felt details on the head rather than the drinking surface.
- For a simpler finish, make only the two upper body vines.
- If the base ruffles or cups strongly, check the stitch counts before attempting to block it flat.
For another small decorative project, try our easy crochet heart pattern for beginners.
Looking for Your Next Crochet Project?
Love crochet projects with a little personality? Explore Cute Stitch Studio’s premium crochet patterns for more cute seasonal makes, cozy accessories, and thoughtful handmade gifts.