Chunky Crochet Bag Pattern: The Pink Everyday Tote
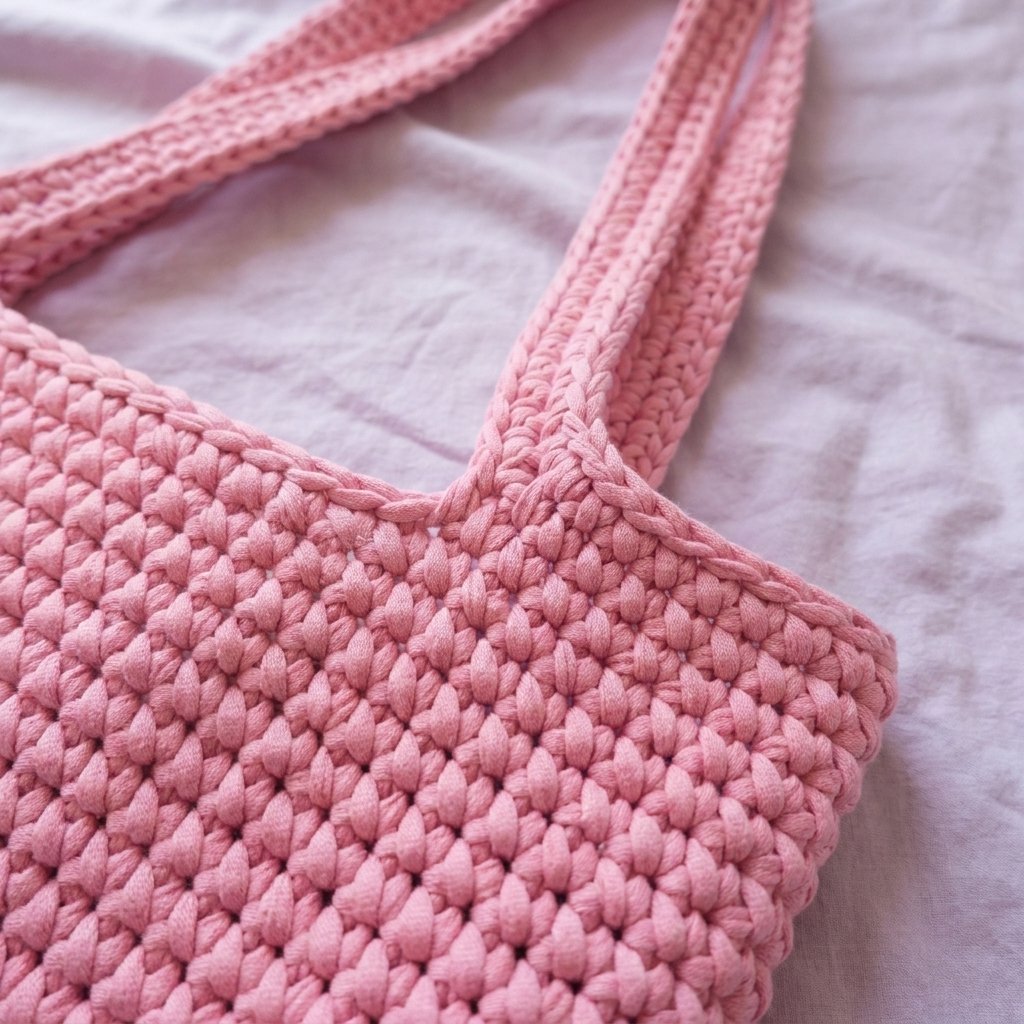
This free chunky crochet bag pattern turns thick pink yarn into a soft, textured tote with two built-in handles. The simple shape leaves plenty of room for your phone, a small notebook, and a few everyday essentials.
Inspired by the playful look of chunky fabric-yarn bags, this original Cute Stitch Studio design uses single crochet throughout the base and body. You will make a small rectangular base, crochet upward around its edges, and create both handles directly in the final rounds.
If you can chain and single crochet, you already know the main stitches. Picking up stitches around a rectangle is the only unfamiliar step many beginners will encounter, and the instructions break it into four manageable sections.

Table of Contents
Chunky Crochet Bag Pattern: The Pink Everyday Tote Instructions
Project Details
- Skill level: Adventurous beginner.
- Estimated time: Approximately 4–7 hours, depending on your experience and yarn.
- Finished size: Approximately 13 inches (33 cm) wide when flattened and 10 inches (25.5 cm) tall, excluding handles.
- Base: Approximately 11 inches (28 cm) long by 2 inches (5 cm) deep.
- Handle drop: Approximately 6–7 inches (15–18 cm), depending on chain tension.
- Crochet terminology: US terms.
- Construction: Flat rectangular base, joined body rounds, and integrated chain handles.
The measurements and yarn amounts are estimates based on the stated gauge. This original pattern has not been physically tested; check the base, body, and handle measurements as you work.
Materials for This Chunky Crochet Bag Pattern
- Approximately 150–200 yards (137–183 m) of category 6 super bulky T-shirt yarn.
- 8 mm crochet hook, or the size needed for the suggested gauge.
- A large-eye yarn needle that accommodates your yarn.
- Scissors.
- Measuring tape.
- Five removable stitch markers: one for the round beginning and four for handle placement.
The handles are crocheted as part of the bag, so you do not need purchased straps, rings, or other hardware. This version has an open top and does not require a lining.
Hook Size
Start with an 8 mm crochet hook. Choose a hook that moves comfortably through the fabric without leaving large gaps between stitches.
If your swatch is smaller than the stated gauge, try a larger hook. If it is larger, try a smaller hook. The finished fabric should feel firm enough to hold its shape while still bending easily.
Yarn
Use category 6 super bulky T-shirt yarn with a smooth cotton or cotton-blend fabric surface. A consistent strip width will make the stitches and handles look more even.
Bubblegum pink gives the tote its cheerful look. Dusty rose, cream, lavender, and chocolate brown also suit the simple silhouette.
Yarns labeled “T-shirt yarn” vary considerably in thickness, stretch, and yardage. Choose by your swatch rather than the label alone. The estimated 150–200 yards includes the base, body, handles, and a little allowance for finishing.
For this chunky crochet bag pattern, avoid changing to a much thinner yarn without recalculating the dimensions. Keeping the same stitch counts with thinner yarn will produce a smaller bag.
Gauge and Size
Suggested gauge: 8 single crochet stitches and 8 rows or rounds = approximately 4 inches (10 cm).
Make a swatch at least 6 inches (15 cm) square. Let it relax, then measure the middle 4 inches without stretching it.
Exact gauge is less critical than it would be for clothing, but it still determines the bag’s dimensions and yarn usage. A loose fabric may stretch noticeably once you add your belongings.
| Measurement | Approximate Size |
|---|---|
| Width with the bag flattened | 13 inches (33 cm) |
| Body height, excluding handles | 10 inches (25.5 cm) |
| Base length | 11 inches (28 cm) |
| Base depth | 2 inches (5 cm) |
| Handle drop | 6–7 inches (15–18 cm) |
The flattened width includes the fabric that forms the sides when the bag is opened. It will therefore be wider than the long edge of the base.
Abbreviations
- ch: chain.
- sc: single crochet.
- sl st: slip stitch.
- st / sts: stitch / stitches.
Single crochet: Insert your hook into the stitch, yarn over, and pull up a loop. Yarn over again and pull through both loops.
Slip stitch: Insert your hook into the stitch, yarn over, and pull the yarn through the stitch and the loop already on your hook.
Before You Start
- The base is worked back and forth in rows. Turn at the end of each base row.
- The body and handles are worked in joined rounds. Do not turn after these rounds.
- A beginning ch 1 never counts as a stitch.
- Join each round to its first sc, not to the beginning chain.
- Work the first stitch of the next round into the same stitch as the join.
- Do not crochet into the joining slip stitch.
- Use both top loops of each stitch unless instructed otherwise.
- Keep the yarn relaxed instead of pulling it tightly after every stitch.
Leave approximately 8 inches (20 cm) of yarn at the beginning and end for weaving in. If you must join another ball, do so at a side of the bag and weave the ends securely through several stitches on the inside.
Chunky Crochet Bag Pattern: Step-by-Step Instructions
Part 1 — Crochet the Rectangular Base
Ch 23 loosely.
Row 1: Sc in the second ch from the hook and in each remaining ch. Turn. (22 sts)
Row 2: Ch 1, sc in each st across. Turn. (22 sts)
Row 3: Repeat Row 2. (22 sts)
Row 4: Ch 1, sc in each st across. Do not turn. (22 sts)
The base should measure approximately 11 inches (28 cm) long by 2 inches (5 cm) deep. Count your stitches before continuing; a missing end stitch here can make the bag uneven.
Part 2 — Work Around the Base
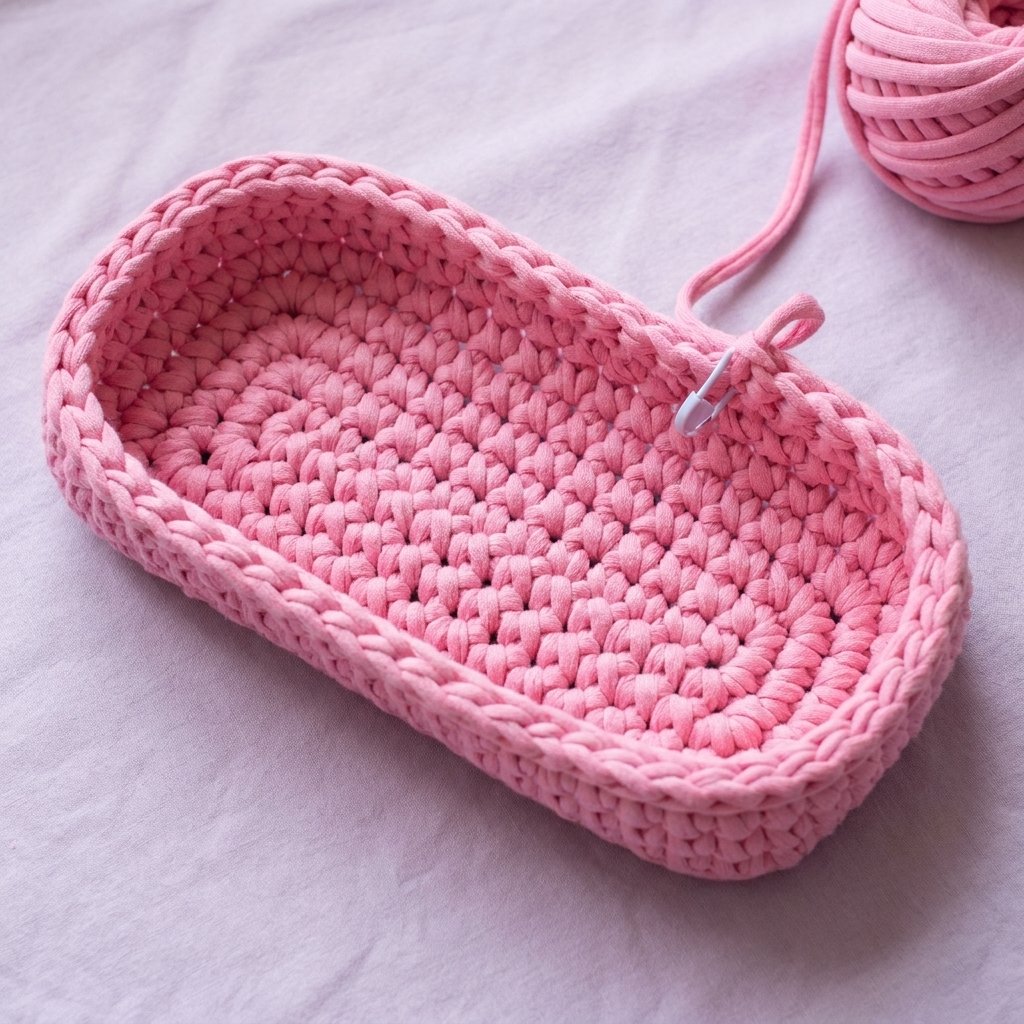
Keep your yarn attached. You will now travel around all four edges of the rectangle. Rotate the work as needed rather than turning it over.
Foundation Round: Ch 1. Work 4 sc down the first short edge, placing one stitch into each row end. Work 22 sc across the unused underside loops of the starting chain. Work 4 sc up the second short edge, one into each row end. Finally, work 22 sc across the top of Row 4. Join with a sl st to the first sc. (52 sts)
Place your round marker in the first sc. The four edge sections contain 4 + 22 + 4 + 22 = 52 stitches.
Do not add extra corner stitches. Each row end and each stitch along the long edges receives only the stitch specified above. The fabric may begin to turn upward, which is expected for this construction.
Part 3 — Build the Bag Body
Body Round 1: Ch 1, sc in each st around. Join with a sl st to the first sc. (52 sts)
Body Rounds 2–18: Repeat Body Round 1. (52 sts per round)
Move the round marker into the first stitch of each new round. Count periodically, especially near the join, where it is easy to accidentally add a stitch.
After Round 18, the vertical wall should measure approximately 9 inches (23 cm) from the base edge. The completed rim will add a little more height.
For a shorter bag, stop a few rounds earlier. For a taller tote, add plain 52-stitch rounds now. Both changes preserve the handle placement, although additional height requires more yarn.
Part 4 — Mark the Handles
Fasten off after Body Round 18. Flatten the bag so that the two long base edges sit beneath the front and back faces. The short base edges should be centered at the sides.
Choose a gap between stitches at one side fold as your new starting point. Starting immediately after that gap, number the upper-edge stitches from 1 to 52.
The first 26 stitches belong to one flattened half of the bag, and the next 26 belong to the other half.
- Place markers in stitches 9 and 18.
- Place markers in stitches 35 and 44.
Stitches 9–18 and 35–44 are the two ten-stitch sections you will skip beneath the handles. Each handle has eight body stitches on either side within its half of the bag.
Join your yarn in stitch 1. Replace the round marker there.
Part 5 — Make the Two Handle Openings
Handle Round 1: Ch 1, sc in stitches 1–8. Ch 32, skip stitches 9–18, and sc in stitches 19–26. Sc in stitches 27–34. Ch 32, skip stitches 35–44, and sc in stitches 45–52. Join to the first sc.
You now have 32 sc and two 32-chain handles, giving 96 stitch or chain positions for the next round.
Before continuing, check that both chains are untwisted and approximately equal in length. Each should measure roughly 16 inches (41 cm) without stretching.
Chain tension varies. If 32 chains produce a noticeably different length, adjust both handles to the same desired length and record the new chain count. The next round will contain 32 body stitches plus the total number of handle chains.
Keep the handles long enough for comfortable carrying, but avoid making them unnecessarily long; the yarn may relax with use.

Part 6 — Reinforce the Handles and Rim
Handle Round 2: Ch 1, sc in each sc and in each individual handle chain around. Join to the first sc. (96 sts when using 32-chain handles)
Work into the chains themselves rather than crocheting around the entire chain arch. This creates a narrow, defined handle with a tidy edge.
Handle Round 3: Do not chain. Sl st loosely in each st around. Finish with a sl st into the first slip stitch of this round. (96 edging slip stitches, plus the closing join)
A tight slip-stitch round can shorten the handles and pucker the opening. Keep each loop comfortably loose and compare the two handles before fastening off.
Fasten off, leaving an 8-inch (20 cm) tail.
Finishing Your Chunky Crochet Bag
Turn the bag inside out and weave each yarn tail through several neighboring stitches. Reverse direction at least once to help hold the tail in place, keeping the yarn hidden inside the thick fabric.
Inspect the four handle attachment points. There should be no skipped stitches or loose loops where the chain arches meet the body.
Turn the bag right side out. Gently open the base and arrange the side folds with your hands. The result should be a soft tote with a shallow rectangular bottom, not a rigid box.
If the yarn label permits washing, wash gently and lay the bag flat to dry. Shape it without stretching, and arrange both handles to the same length. Avoid hanging it while wet.
Once dry, place a few lightweight essentials inside and check how it hangs. If a handle edge puckers, undo and rework the slip-stitch edging more loosely.

Finished Size
At the suggested gauge, the completed bag measures approximately 13 inches (33 cm) wide when flattened and 10 inches (25.5 cm) tall, excluding the handles.
The base is approximately 11 by 2 inches (28 by 5 cm). Expect a handle drop of roughly 6–7 inches (15–18 cm), measured from the top rim to the inside peak of a handle.
This chunky crochet bag pattern creates a flexible tote. The dimensions may change slightly after washing or carrying your belongings.
Tips and Customization
Choose a Color That Shows the Stitches
A medium pink shows the chunky texture clearly and makes stitches easier to count. For a quieter everyday version, try oatmeal or warm gray.
Add a Simple Contrast Rim
Keep the body pink and use cream for both handle rounds and the final slip-stitch edging. Change colors after finishing the body, then follow the same stitch counts.
Adjust the Height First
Changing the body height is the simplest modification to this chunky crochet bag pattern. Each added body round contributes approximately ½ inch (1.3 cm) at the stated gauge.
Changing the base width also changes the circumference and handle spacing, so the original handle instructions would need to be recalculated.
Keep Small Items Together
Use a small zippered pouch inside the tote for keys, lip balm, or other tiny belongings. This keeps them organized without adding a lining or closure to the crochet construction.
Let the Yarn Feed Freely
Thick fabric yarn can feel tiring if you pull it tightly from the ball. Unwind a little at a time and pause regularly to relax your hands.
Use It for Light Everyday Carrying
A phone, small wallet, and compact notebook suit the scale of this bag. Avoid treating it as a heavy grocery tote; its unlined fabric and handles can stretch under weight.
Frequently Asked Questions
Is this chunky crochet bag pattern suitable for beginners?
Yes, if you are comfortable making chains and single crochet. The main learning steps are working around the base, joining rounds, and counting the skipped stitches beneath each handle.
Can I use chunky wool instead of T-shirt yarn?
You can experiment with another yarn that meets the gauge, but the finished bag will have a different texture, weight, and amount of stretch. Make a swatch and check that you like the fabric before starting.
Why is my bag getting wider as I crochet?
Count the body stitches. There should be 52 in every body round. Accidentally working into the joining slip stitch or beginning chain adds stitches and gradually widens the bag.
Why are my handles different lengths?
The chain counts or tension may differ. Lay the bag flat and compare both arches before reinforcing them. Matching the measured length is just as important as matching the count.
Does the bag need a lining?
This version is designed without one. If your fabric has large gaps, check your gauge and hook size. A small removable pouch can keep tiny items from slipping between stitches.
How should I clean the finished tote?
Follow the yarn label. If washing is permitted, reshape the bag gently and dry it flat, supporting the handles so they do not stretch.
Save this chunky crochet bag pattern to your crochet accessories board so you can return to the instructions when your yarn is ready.
Looking for Your Next Crochet Project?
Love this project? Explore Cute Stitch Studio’s premium crochet patterns for more cute, cozy, gift-worthy, and beginner-friendly handmade ideas.