

Free Crochet Sloth Car Mirror Ornament Pattern
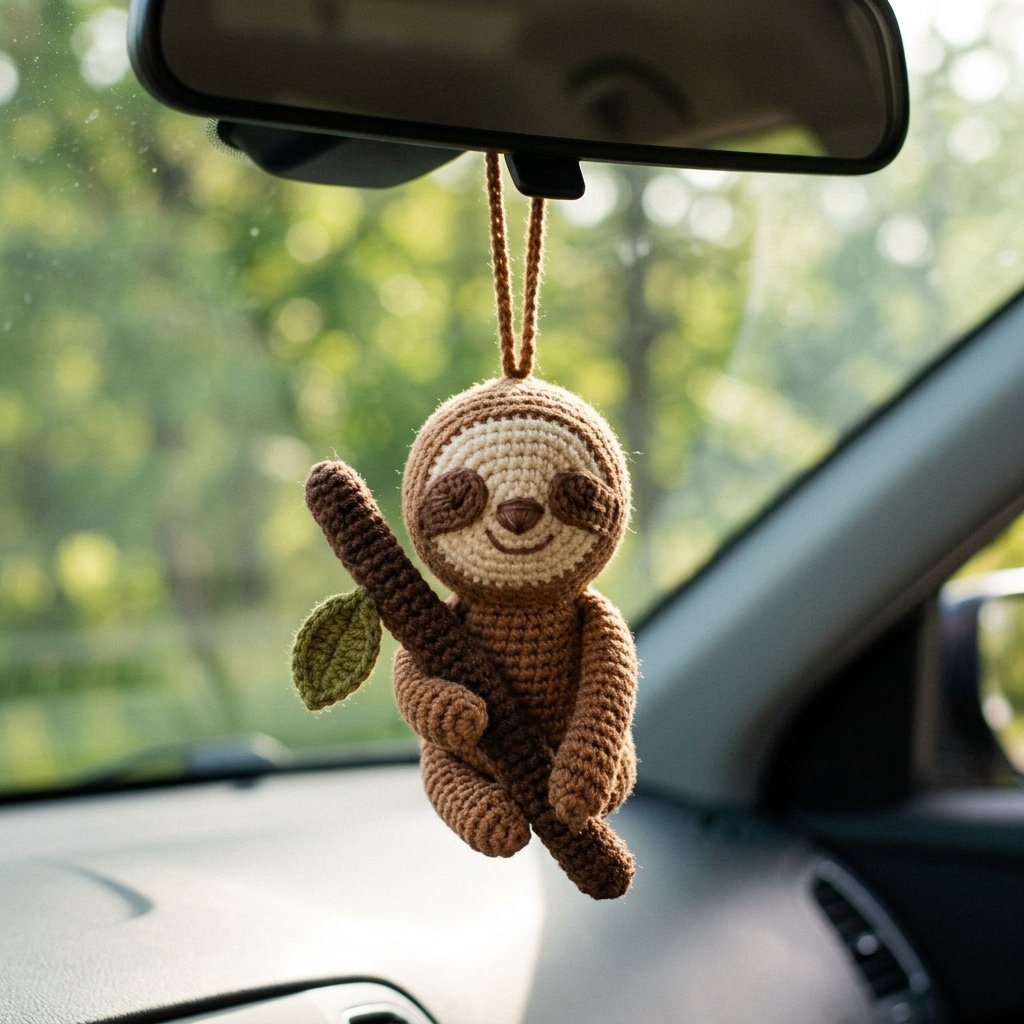
This crochet sloth car mirror ornament pattern is a cute little amigurumi project that turns a sleepy sloth into a handmade hanging decoration. The finished sloth hugs a tiny crochet branch with a green leaf and can be displayed from a suitable hook, decorative stand, or other safe hanging spot.
The project is small, uses simple crochet stitches, and works well for adventurous beginners who already know how to crochet in continuous rounds. The embroidered face gives the sloth plenty of personality without requiring complicated shaping.
It also makes a sweet handmade gift for sloth lovers, animal lovers, and anyone who enjoys tiny crochet decorations.
Important safety note: If displayed in a vehicle, position the ornament so it does not obstruct the driver’s view, interfere with mirrors, controls, airbags, or other safety equipment. Remove it while driving whenever necessary or where hanging mirror decorations are not permitted.
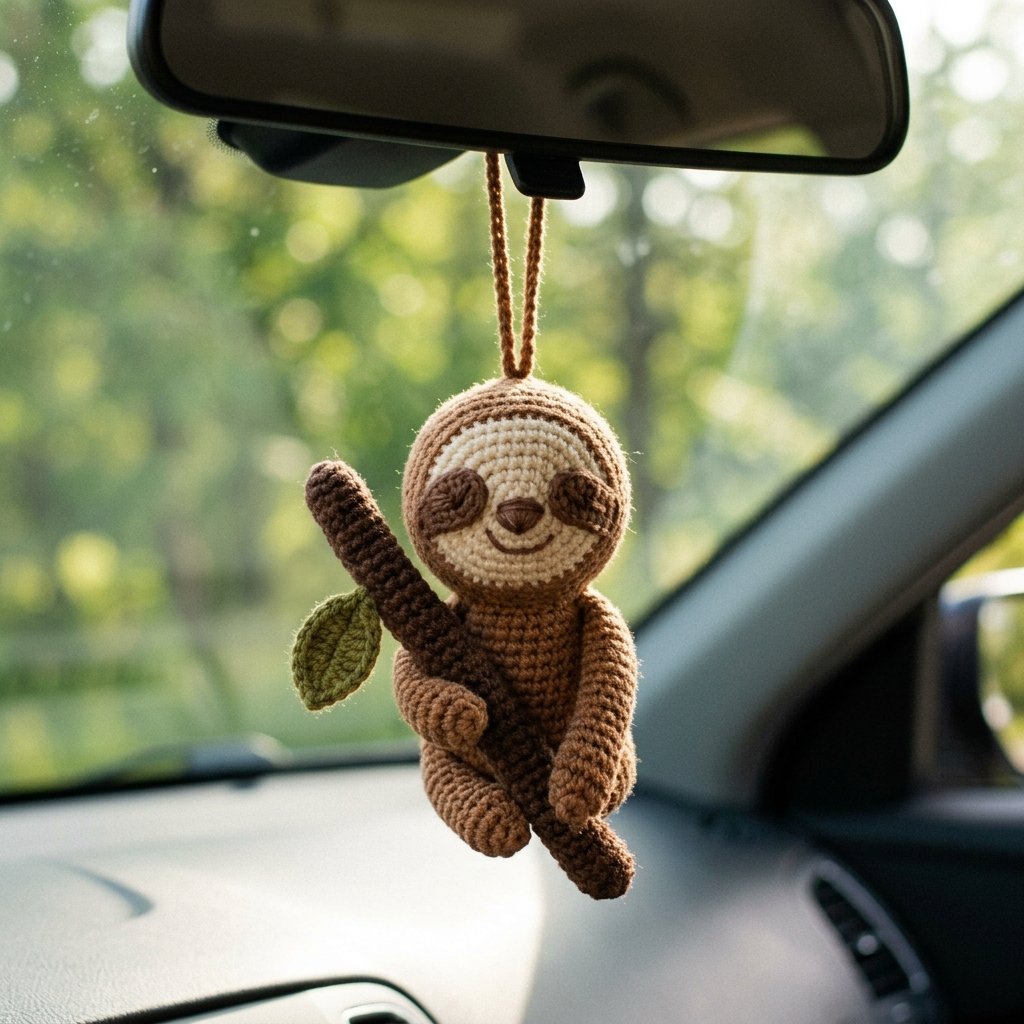
Project Details
- Skill Level: Advanced beginner
- Estimated Time: 3–5 hours
- Finished Sloth Size: Approximately 4.5 inches (11.5 cm) tall
- Finished Ornament Length: Approximately 8–10 inches (20–25 cm), depending on hanging loop
- Crochet Terminology: US terms
- Construction Method: Small amigurumi pieces worked in continuous rounds and sewn together around a separate crochet branch
Materials
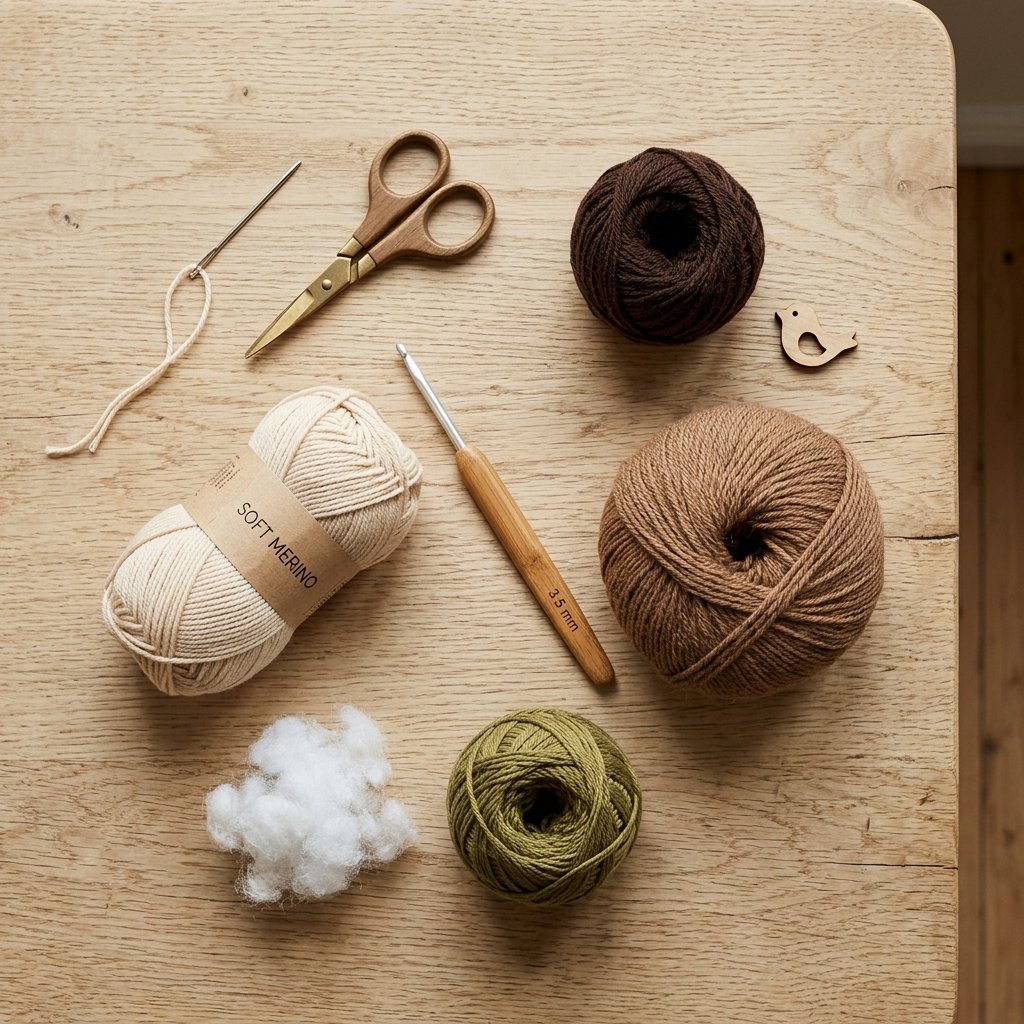
- Worsted weight yarn in medium brown, approximately 35–45 yards
- Worsted weight yarn in cream or light beige, approximately 15–20 yards
- Small amount of dark brown yarn for facial details
- Small amount of olive or forest green yarn for the leaf
- 3.5 mm crochet hook
- Polyester fiberfill
- Yarn needle
- Scissors
- Stitch marker
- Optional thin cotton cord or crochet chain for hanging
Hook Size
Use a 3.5 mm crochet hook with worsted weight yarn. Amigurumi stitches should be firm enough that the stuffing does not show through the fabric.
If your stitches are loose, try a 3.25 mm hook. If your fabric feels too stiff to work comfortably, move up to a 4 mm hook.
Yarn
Category 4 worsted weight yarn works well for this pattern. Cotton, acrylic, or a cotton-acrylic blend can all be used.
- Main Body: Medium brown or taupe
- Face: Cream or warm beige
- Eye Details: Dark brown
- Branch: Dark chocolate brown
- Leaf: Olive green, sage, or forest green
For a softer natural look, try muted earth-tone colors instead of bright yarn.
Abbreviations
- MR = magic ring
- ch = chain
- sc = single crochet
- hdc = half double crochet
- dc = double crochet
- sl st = slip stitch
- st(s) = stitch(es)
- inc = increase, 2 sc in the same stitch
- dec = decrease
Before You Start
The head and body are worked in continuous spiral rounds. Use a stitch marker to mark the first stitch of each round.
Stuff the pieces lightly. A tiny ornament keeps its shape better when it is firm but not overstuffed.
The arms and legs are intentionally long and narrow so they can wrap naturally around the crochet branch.
Gauge is not critical, but keep your tension consistent throughout the project.
Step-by-Step Crochet Instructions
Part 1 — Sloth Head
Using cream or light beige yarn, make a magic ring.
Round 1: Work 6 sc into MR. (6 sts)
Round 2: Inc in each st around. (12 sts)
Round 3: *Sc in next st, inc in next st.* Repeat around. (18 sts)
Rounds 4–6: Sc in each st around. (18 sts)
Round 7: *Sc in next st, dec over next 2 sts.* Repeat around. (12 sts)
Begin stuffing the head lightly.
Round 8: Dec around. (6 sts)
Fasten off, leaving a long tail for sewing. Add a little more stuffing before closing the opening.
Part 2 — Sloth Face Details
Using dark brown yarn, embroider two gently curved eye patches across the upper front of the face.
Inside each patch, embroider one small closed or slightly curved eye to create a sleepy expression.
Embroider a small rounded dark brown nose near the center of the face.
Add a short curved mouth below the nose.
Keep the embroidery simple and symmetrical.
Part 3 — Sloth Body
Using medium brown yarn, make a magic ring.
Round 1: Work 6 sc into MR. (6 sts)
Round 2: Inc in each st around. (12 sts)
Round 3: *Sc in next st, inc in next st.* Repeat around. (18 sts)
Rounds 4–7: Sc in each st around. (18 sts)
Round 8: *Sc in next st, dec over next 2 sts.* Repeat around. (12 sts)
Round 9: Sc in each st around. (12 sts)
Stuff the body lightly.
Round 10: Dec around. (6 sts)
Fasten off and close the opening.
Part 4 — Arms
Make 2 using medium brown yarn.
Round 1: Make a MR and work 5 sc into the ring. (5 sts)
Rounds 2–9: Sc in each st around. (5 sts)
Do not stuff the arms. Flatten the opening and fasten off, leaving a long sewing tail.
Part 5 — Legs
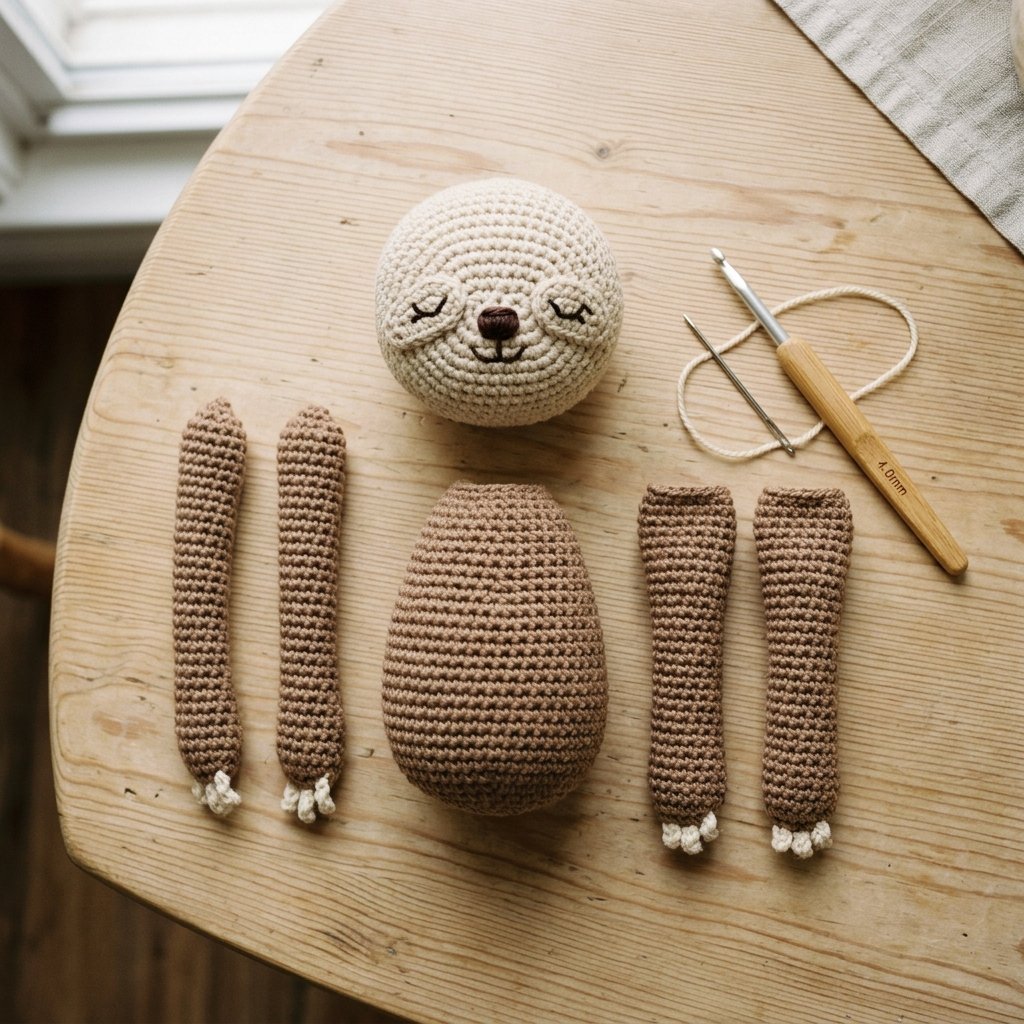
Make 2 using medium brown yarn.
Round 1: Make a MR and work 5 sc into the ring. (5 sts)
Rounds 2–8: Sc in each st around. (5 sts)
Do not stuff. Fasten off, leaving long sewing tails.
Part 6 — Assemble the Sloth
Sew the head securely to the top of the body.
Position one arm on each side near the upper body. Angle the arms slightly forward so they can wrap naturally around the branch.
Sew one leg to each side of the lower body, also angled forward.
Before weaving in the sewing tails, hold the sloth against the branch position to make sure the limbs can comfortably reach around it.
Part 7 — Crochet Branch
Using dark brown yarn, make a magic ring.
Round 1: Work 6 sc into MR. (6 sts)
Rounds 2–15: Sc in each st around. (6 sts)
Add tiny amounts of fiberfill or spare yarn as you work so the branch remains lightly structured.
Round 16: Dec around. (3 sts)
Fasten off and close.
The branch should measure approximately 4–5 inches (10–12.5 cm).
Part 8 — Crochet Leaf
Using green yarn, ch 8.
Starting in the second ch from the hook, work:
Sc in next ch, hdc in next ch, dc in next 3 ch, hdc in next ch, 3 sc in final ch.
Continue working along the opposite side of the foundation chain:
Hdc in next ch, dc in next 3 ch, hdc in next ch, sc in final ch.
Join with a sl st and fasten off.
Sew the leaf close to one end of the branch.
Part 9 — Attach the Sloth to the Branch
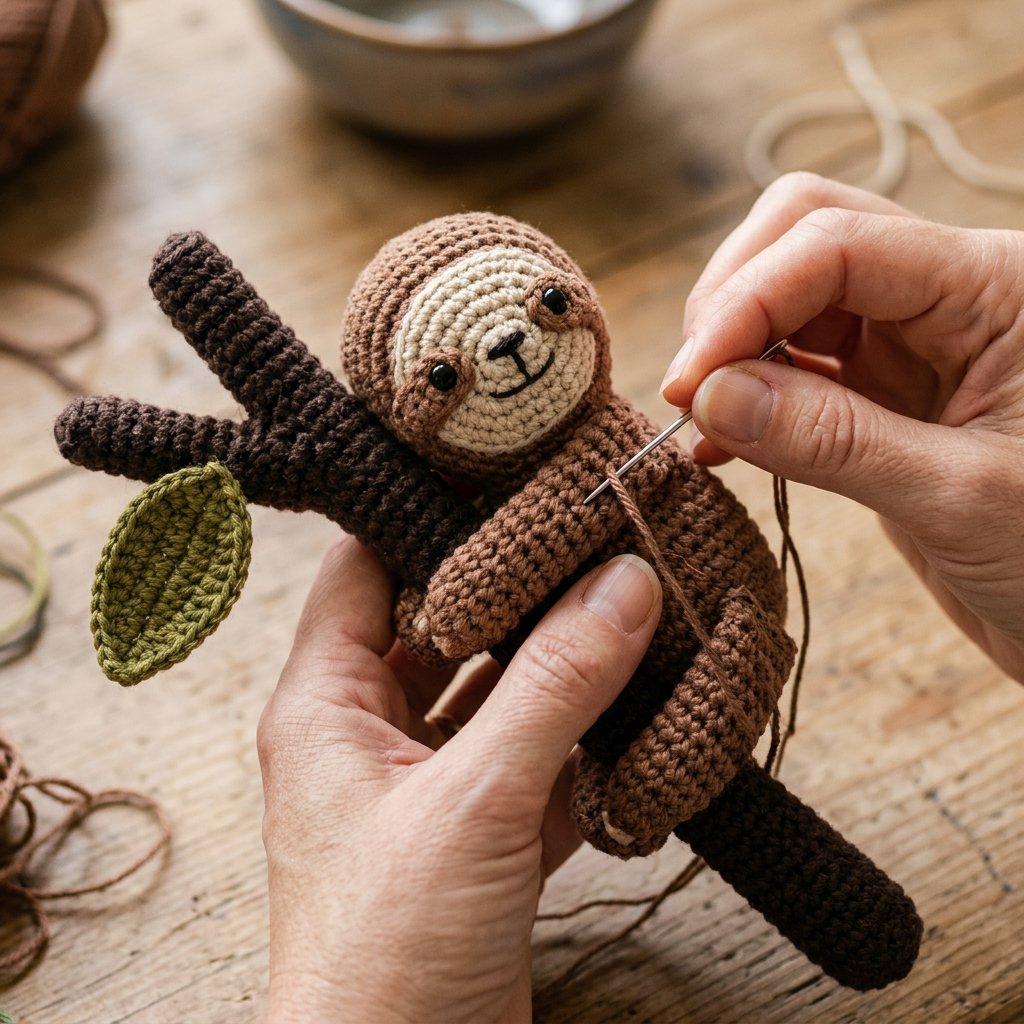
Place the branch diagonally across the front of the sloth.
Wrap both arms around the upper part of the branch and stitch the arm ends securely to the opposite side.
Wrap the legs around the lower section in the same way.
Add one or two hidden stitches between the body and branch so the ornament remains stable.
Part 10 — Hanging Loop
Using brown yarn or thin cotton cord, create a hanging loop approximately 6–8 inches (15–20 cm) long when doubled.
If using crochet yarn, ch approximately 35–45 stitches, depending on the desired length.
Fasten the loop securely to the top of the branch and upper back of the sloth so the finished ornament hangs upright.
Test the balance before weaving in the ends. Adjust the attachment point slightly if the ornament leans too far to one side.
Finishing
Weave in all remaining ends carefully.
Check the embroidered face and gently shape the head and body with your fingers.
Make sure the branch, leaf, limbs, and hanging loop are firmly attached.
If using the ornament in a vehicle, keep it small and positioned where it does not block the windshield, mirror view, controls, or other safety equipment.
Finished Size
- Sloth Height: Approximately 4.5 inches (11.5 cm)
- Branch Length: Approximately 4–5 inches (10–12.5 cm)
- Total Hanging Length: Approximately 8–10 inches (20–25 cm)
Measurements may vary slightly depending on yarn, tension, hook size, and hanging-loop length.
Tips & Customization
- Use gray-brown yarn for a more realistic sloth color palette.
- Make the face cream, beige, or pale tan.
- Embroider closed eyes for an extra-sleepy expression.
- Add a second small green leaf to the branch.
- Use thinner yarn and a smaller hook for a miniature version.
- Turn the same design into a Christmas tree ornament by shortening the hanging loop.
- Hang it from a decorative hook, craft display, or wall peg when not using it as car decor.
Looking for Your Next Crochet Project?
Love this project? Explore Cute Stitch Studio’s premium crochet patterns for more cute, cozy, seasonal, and gift-worthy handmade ideas.


