Buttoned Crochet Mug Cozy Pattern: A Cozy Fall Gift Set
This free buttoned crochet mug cozy pattern makes a simple wrap for a handled mug. A short fastening tab passes through the handle opening and closes over a button, keeping the handle accessible.
Make one in deep red and another in pumpkin orange for a coordinated fall set. The warm colors and chunky-looking stitches give plain ceramic mugs a charming handmade finish.
This beginner-friendly project uses a flat rectangle, a single crochet border, and a small buttonhole tab. The same instructions make both cozies, and you can adjust each wrap to its own mug.

Table of Contents
Buttoned Crochet Mug Cozy Pattern: A Cozy Fall Gift Set Instructions
Project Details
- Skill level: Beginner, with basic sewing.
- Estimated time: Approximately 1–2 hours per cozy.
- Finished wrap size: Approximately 9–9.25 inches (23–23.5 cm) long and 3 inches (7.5 cm) tall, excluding the tab.
- Fastening tab: Approximately 1.5 inches (4 cm) long.
- Crochet terminology: US terms.
- Construction: Flat rectangle with edging, an attached tab, and one sewn button.
- Set: Make two separate cozies, one in each color.
This is an original Cute Stitch Studio interpretation of a buttoned mug wrap. It has not been physically sample-tested. Measurements and yarn requirements are estimates based on the stated gauge.
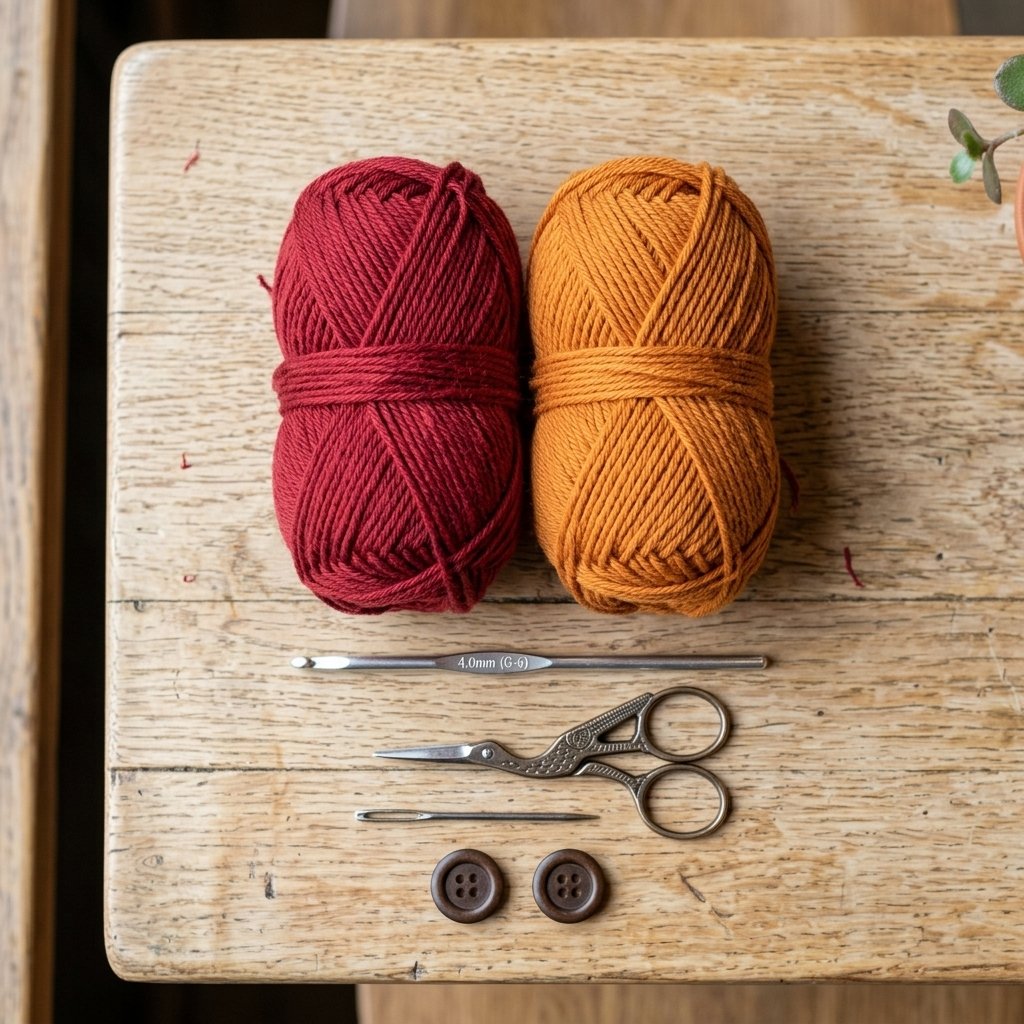
Materials
- Approximately 45–60 yards (41–55 m) of worsted-weight cotton yarn per cozy.
- For the set: one ball or sufficient leftovers in deep red and one in pumpkin orange.
- 4.5 mm crochet hook, or size needed for gauge.
- One smooth button approximately 0.75 inch (19 mm) across per cozy.
- Yarn needle.
- Sewing needle and matching thread.
- Scissors.
- Measuring tape.
- Two stitch markers.
- The empty mugs you want to fit.
The two-cozy set needs approximately 90–120 yards (82–110 m) total and two buttons.

Hook Size
Start with a 4.5 mm crochet hook. Aim for an even, flexible fabric that bends around the mug without becoming stiff.
If your swatch has too many stitches across 4 inches, try a larger hook. If it has too few, try a smaller hook.
Yarn
Use Category 4 worsted-weight cotton yarn. A smooth yarn makes the half double crochet texture and buttonhole easy to see.
Choose deep red and pumpkin orange for the set shown in the image plan. Warm cream, mustard, forest green, and cocoa are other lovely options.
Use yarns of similar thickness if you want the two wraps to look consistent. Follow the yarn label when washing, and check that strongly colored yarn does not transfer color when wet.
Gauge and Mug Measurements
Main fabric: Approximately 14 half double crochet stitches and 10 rows = 4 inches (10 cm).
Single crochet: Approximately 14 stitches and 16 rows = 4 inches (10 cm).
The sample rectangle contains 30 stitches and 6 rows. Before edging, it should measure approximately 8.5 inches (21.5 cm) long and 2.4 inches (6 cm) tall.
The border adds roughly half an inch to the overall length and height. Fit matters more than reaching an exact fraction of an inch.
Measure Your Mug First
Measure around the mug body where the cozy will sit, excluding the handle. The standard wrap is a starting point for a mug approximately 10–10.5 inches (25.5–26.5 cm) around.
The bordered rectangle should stop on either side of the handle, leaving an opening approximately 0.75–1.25 inches (2–3 cm) wide. The tab bridges this opening.
Check the available height as well. The cozy must sit below the drinking rim and above the base. A mug with a very small handle opening may need a narrower tab or shorter wrap.
Abbreviations
- ch: chain.
- sc: single crochet.
- hdc: half double crochet.
- sl st: slip stitch.
- st(s): stitch(es).
Half double crochet: Yarn over, insert the hook into the stitch, yarn over and pull up a loop. Yarn over and pull through all three loops on the hook.
Before You Start
- Work the main rectangle and tab in turned rows.
- Beginning chains do not count as stitches.
- Work through both top loops unless instructed otherwise.
- The rectangle’s long edges become the top and bottom of the cozy.
- The two short edges sit beside the mug handle.
- Make and fit the first cozy before beginning the second.
The fastening tab sits at the middle of one short edge. It passes through the open space inside the mug handle and overlaps the other short edge.
Buttoned Crochet Mug Cozy Pattern: Step-by-Step Instructions
Part 1 — Main Rectangle
Begin with deep red for the first cozy.
Foundation: Ch 32.
Row 1: Hdc in the third chain from the hook and each remaining chain. Turn. 30 hdc.
Row 2: Ch 2. Hdc in each stitch across. Turn. 30 hdc.
Rows 3–6: Repeat Row 2. 30 hdc in every row.
Do not fasten off yet.
Wrap the rectangle around the empty mug to check its placement. Remember that the border will make it slightly longer and taller.
Part 2 — Add the Border
Border Round 1: Ch 1. Work sc around all four edges, placing 3 sc at each corner.
Use the following placement guide:
- Across the final row: work 1 sc in each stitch between the corner stitches.
- Across the foundation edge: work 1 sc in each foundation position between the corners.
- Along each short edge: work approximately 8 sc evenly into the row ends between the corners.
- At each corner: use 3 sc in the corner position instead of an ordinary single stitch.
There are 28 stitches between the corners on each long edge. With 8 stitches along each short edge and 3 in each corner, the suggested total is 84 sc.
Join with a sl st to the first sc and fasten off.
Lay the piece flat. If a short edge waves, reduce its pickup count slightly. If it draws inward, add a stitch. Keep both short edges symmetrical.
Part 3 — Mark the Fastening Tab
Choose one short edge as the tab edge. Locate the six centered border stitches along that edge and mark the first and last of this group.
These six stitches should sit midway between the top and bottom corners. This keeps the tab away from the handle’s upper and lower attachment points.
Part 4 — Crochet the Tab
With the right side of the wrap facing you, join yarn in the first marked stitch.
Tab Row 1: Ch 1. Sc in the same stitch and the next 5 marked stitches. Turn. 6 sc.
Tab Rows 2–4: Ch 1. Sc in each stitch across. Turn. 6 sc per row.
Tab Row 5 — Buttonhole: Ch 1. Sc in the first 2 stitches, ch 2, skip the next 2 stitches, sc in the last 2 stitches. Turn. 4 sc and one chain-2 space.
Tab Row 6: Ch 1. Sc in the first 2 sc, work 2 sc into the chain-2 space, and sc in the final 2 sc. 6 sc.
Fasten off. The tab measures approximately 1.5 inches (4 cm) from the wrap edge, depending on your single crochet row gauge.
Test your button through the completed opening before sewing it on.
It ## STEP 1 — SEO SETUP **Focus Keyword:** crochet mug cozy pattern with button **Secondary Keywords:** – buttoned crochet mug cozy – crochet cozy for a mug with handle – fall crochet mug warmer – reusable crochet mug wrap – beginner crochet mug cozy – crochet coffee gift set – pumpkin orange crochet cozy **SEO Title:** Crochet Mug Cozy Pattern with Button: Easy Fall Set **Slug:** crochet-mug-cozy-pattern-with-button **Meta Description:** Make this crochet mug cozy pattern with button in red and pumpkin orange.
An easy reusable wrap with clear steps, sizing tips, and handmade gift ideas. **Search Intent:** Readers want a free crochet wrap for a handled mug, with a button fastening and clear instructions for adjusting the fit. **Pinterest Angle:** Make a Cozy Pair: Red and Pumpkin Crochet Mug Wraps ## STEP 2 — WORDPRESS-READY ARTICLE “`html Crochet Mug Cozy Pattern with Button: A Cozy Fall Set This free crochet mug cozy pattern with button makes a reusable wrap for a favorite handled mug.
A short fastening tab passes through the handle opening and buttons onto the outside of the cozy, keeping the handle available for holding the mug.
Make one in deep red and another in pumpkin orange for a warm autumn pair. The simple textured fabric and dark brown button give each wrap a finished look without complicated stitches or extra decorations.
This beginner-friendly design starts with a rectangle. You will add a single crochet border, make a small buttonhole tab, and sew on one button. The instructions include measuring checkpoints so you can fit the wrap to your own mug.
Project Details
- Skill level: Beginner.
- Estimated time: Approximately 1–2 hours per cozy.
- Finished main wrap: Approximately 9–9.25 inches (23–23.5 cm) long and 3 inches (7.5 cm) tall.
- Fastening tab: Approximately 1.5 inches (4 cm) long, adjustable.
- Crochet terminology: US terms.
- Construction: Flat rectangle with a border and an attached buttonhole tab.
- Set: Make the pattern twice, once in red and once in pumpkin orange.
This is an original Cute Stitch Studio interpretation of a buttoned mug wrap, not a reproduction of another maker’s pattern. It has not been physically sample-tested. Dimensions and yarn quantities are gauge-based estimates.
Materials
For one cozy:
- Approximately 45–60 yards (41–55 m) of worsted-weight cotton yarn.
- 4.5 mm crochet hook, or size needed for gauge.
- One smooth button approximately 0.875–1 inch (22–25 mm) across.
- Yarn needle.
- Sewing needle and matching thread.
- Scissors.
- Measuring tape.
- Two stitch markers.
- An empty handled mug for fitting.
For the matching pair, use one red yarn color, one pumpkin orange color, and two buttons. Choose buttons with holes large enough for your sewing needle and thread.
Hook Size
Start with a 4.5 mm crochet hook. Aim for a flexible fabric that wraps smoothly around the mug without large gaps.
If your stitches are smaller than the gauge, try a larger hook. If they are larger, try a smaller hook. Check the actual wrap on your mug before adding the tab.
Yarn
Use Category 4 worsted-weight cotton yarn. Smooth cotton makes the stitches easy to see and gives the wrap a clean, defined texture.
Allow approximately 45–60 yards per cozy, or 90–120 yards (82–110 m) for the pair. These quantities are estimates and include the border, tab, and finishing tails.
Deep red and pumpkin orange create the fall combination shown in the image plan. Cream, olive, cranberry, and chocolate brown are other lovely choices.
Gauge
Main fabric: Approximately 14 half double crochet stitches and 10 rows = 4 inches (10 cm).
Tab: Approximately 14 single crochet stitches and 16 rows = 4 inches (10 cm).
Gauge helps estimate the starting size, but the fit around your actual mug matters most. Different mugs can have different handle positions even when their capacities match.
Measure Your Mug
Measure the circumference around the middle of the mug, excluding the handle. Then measure the usable height between the upper and lower handle attachment points.
The standard wrap is intended as a starting point for a mug approximately 10–10.5 inches (25.5–26.5 cm) around, with enough room for a cozy about 3 inches tall.
The main rectangle should leave a small gap beneath the handle. The tab crosses that gap through the handle opening and overlaps the opposite end of the wrap.
Keep the finished fabric below the drinking rim and above the mug base. It should not interfere with setting the mug flat or holding its handle.
Abbreviations
- ch: chain.
- sc: single crochet.
- hdc: half double crochet.
- sl st: slip stitch.
- st(s): stitch(es).
Half Double Crochet
Yarn over, insert the hook into the next stitch, yarn over, and pull up a loop. Yarn over again and pull through all three loops on the hook.
Before You Start
- The main rectangle is worked in turned rows.
- Beginning ch-1 and ch-2 do not count as stitches.
- Work the first stitch into the first stitch of the previous row.
- Work through both top loops unless instructed otherwise.
- The foundation chain controls the length around the mug.
- The number of rows controls the height of the wrap.
- The button is positioned after a fitting check.
The tab is crocheted directly onto one short end. There is no bottom panel or permanent seam closing the wrap into a tube.
Crochet Mug Cozy Pattern with Button: Step-by-Step Instructions
Part 1 — Main Rectangle
Foundation: With red or pumpkin orange, ch 32.
Row 1: Hdc in the third chain from the hook and in every remaining chain. Turn. 30 hdc.
Row 2: Ch 2. Hdc in each stitch across. Turn. 30 hdc.
Rows 3–6: Repeat Row 2. 30 hdc in each row.
Do not fasten off. The rectangle should measure approximately 8.5–8.75 inches (21.5–22 cm) long and 2.4 inches (6 cm) tall before edging.
Wrap it around the empty mug. Allow room for the border to add approximately half an inch to both the total length and height.
Part 2 — Single Crochet Border
Ch 1 and turn so you can work back across the final row.
Border Round 1: Work 3 sc in the first stitch, sc in each of the next 28 stitches, and 3 sc in the last stitch.
Rotate the rectangle. Work 9 sc evenly down the first short edge, placing approximately 3 sc across every 2 row ends. Do not add stitches into the corner stitches already worked.
Rotate again. Along the underside of the foundation, work 3 sc in the first foundation stitch, sc in the next 28 foundation stitches, and 3 sc in the last foundation stitch.
Work 9 sc evenly up the remaining short edge. Join with a sl st to the first sc. 86 sc total.
Fasten off. Lay the piece flat and smooth the corners gently. The border should sit comfortably without curling or ruffling.
Part 3 — Fit the Bordered Wrap
Place the bordered rectangle around the empty mug with the two short ends on either side of the handle.
The wrap should sit against the mug without stretching tightly. A gap of approximately 0.75–1.25 inches (2–3 cm) beneath the handle is a useful starting point.
If the main rectangle overlaps substantially, shorten it before continuing. If the gap is too wide for a short tab to bridge comfortably, lengthen the rectangle.
The sizing section below explains how to adjust the stitch count.
Part 4 — Start the Fastening Tab
Choose one short edge as the tab end. Find the middle six stitches among the nine border stitches along that edge and mark them, leaving one unworked stitch at one end and two at the other.
Join yarn in the first marked stitch with the outside of the wrap facing you.
Tab Row 1: Ch 1. Sc in each of the six marked stitches. Turn. 6 sc.
Tab Rows 2–4: Ch 1. Sc in each stitch across. Turn. 6 sc per row.
Hold the wrap around the empty mug again. Guide the tab through the open space inside the handle toward the opposite end of the wrap.
The finished tab needs to overlap that opposite end enough to hold the button. If more length is needed, add plain rows now, before making the buttonhole.
Part 5 — Make the Buttonhole
Tab Row 5: Ch 1. Sc in the first 2 stitches, ch 2, skip the next 2 stitches, and sc in the last 2 stitches. Turn.
You have 4 sc and one chain-2 space, equal to 6 stitch positions.
Tab Row 6: Ch 1. Sc in the first 2 stitches, work 2 sc into the chain-2 space, and sc in the last 2 stitches. 6 sc.
Fasten off and weave in the tab tail.
Test the button through the completed hole. It should pass with gentle pressure and remain secure when released. Button thickness and shape affect the fit, so choose the final button after this check.
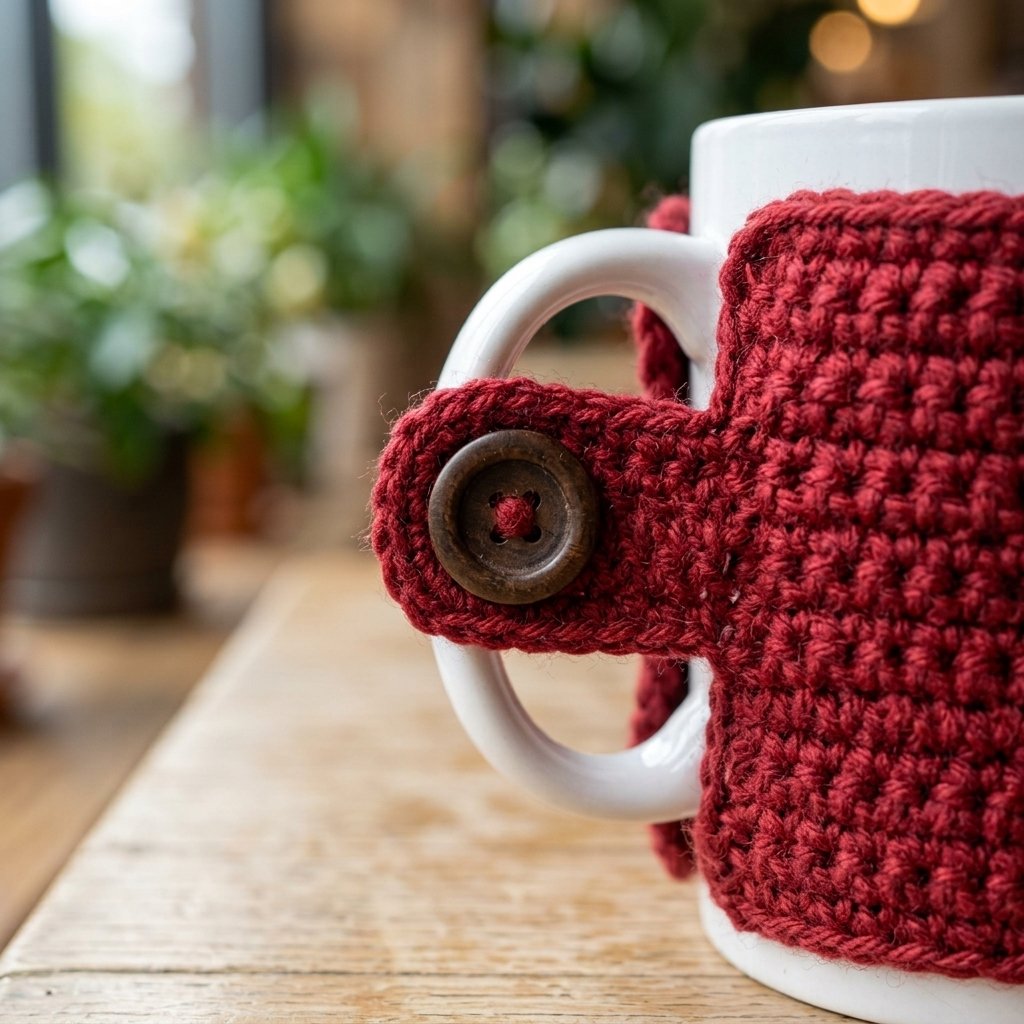
Part 6 — Position and Sew the Button
Fit the wrap around the empty mug. Pass the tab through the handle opening and lay it over the outside of the opposite short end.
Keep both long edges level. Do not pull the tab so tightly that the rectangle puckers or the handle becomes difficult to hold.
Mark the position beneath the center of the buttonhole. Remove the cozy from the mug.
Using a sewing needle and matching thread, attach the button at the marked point. Pass through several strands of the crochet fabric rather than one loose loop, and secure the thread on the inside.
Refit the cozy and button the tab. The mug handle should remain available for a comfortable grip.
Part 7 — Make the Matching Cozy
Repeat the pattern in the second color. Measure the second mug separately rather than assuming it has identical dimensions.
Use matching button styles for a coordinated pair, or choose slightly different buttons to help tell the mugs apart.
Finishing
Weave in all remaining yarn tails on the inside, changing direction before trimming. Keep the weaving relaxed so it does not draw the fabric inward.
If needed, wash the wrap according to the yarn label, reshape it flat, and allow it to dry fully. Check the fit again after washing.
Inspect the button attachment and tab before use. The cozy should stay in position without covering the rim or extending under the mug base.

Finished Size
Each standard main wrap measures approximately 9–9.25 inches (23–23.5 cm) long and 3 inches (7.5 cm) tall, including the border.
The tab is approximately 1.5 inches (4 cm) long and 1.75 inches (4.5 cm) wide. Add plain tab rows if your handle placement requires more reach.
These measurements are starting estimates. The button position and tab length are fitted to the actual mug.
Adjusting the Fit
Change the Wrap Length
Add or remove foundation chains to change the length around the mug. The stitch count will always be the foundation chain count minus two.
At the stated gauge, each stitch changes the length by approximately 0.29 inch (0.7 cm). Make small adjustments and recheck the fit.
When edging a different stitch count, keep 3 sc in each corner and work 1 sc in each stitch between corners. For the original six-row height, keep 9 sc along each short edge.
Change the Height
Add or remove half double crochet rows before edging. Each row changes the height by approximately 0.4 inch (1 cm).
Adjust the short-edge border pickup to approximately 3 sc for every 2 row ends. Keep the edge flat, and center the six-stitch tab on the finished short edge.
Adjust the Tab
Add plain sc rows before the buttonhole to lengthen the tab. For a shorter tab, work fewer plain rows before the buttonhole.
Keep the six-stitch width and make the buttonhole in the final two rows. Fit the tab through the actual handle before sewing on the button.
Tips and Customization
- Make a winter set: Use cranberry and forest green with matching brown buttons.
- Try a neutral pair: Cream and oatmeal give the same design a quieter look.
- Add a contrast border: Join a second color before working the edging and use it for the tab too.
- Package it with the mug: This lets you check the fit before giving the set away.
- Include a care note: Share the yarn’s washing instructions with the recipient.
Using Your Mug Cozy
This wrap adds a soft layer, but it is not tested heat protection. Hold the mug by its actual handle and do not lift it by the crochet tab or button.
Keep the cozy below the drinking rim and remove it before putting the mug in a microwave or dishwasher. Wash the wrap separately according to the yarn label.
Let it dry completely after spills or washing, and check the button regularly for loose stitching.
Frequently Asked Questions
Is This Crochet Mug Cozy Pattern with Button Suitable for Beginners?
Yes. The main piece uses simple half double crochet rows. The border introduces corner increases, and the small tab provides an easy way to practice a buttonhole.
Will It Fit Every Mug?
No. Mug circumference, height, and handle placement vary. Measure your mug and complete the fitting checks before attaching the button.
Does the Tab Wrap Around the Outside of the Handle?
No. It passes through the open space inside the handle, close to the mug body, and fastens to the opposite end of the cozy. This leaves the handle available for holding the mug.
Can I Make It Without a Button?
This version relies on the button to secure the wrap around a handled mug. A button-free sleeve would need a different closure or construction.
Does Pumpkin Mean There Is a Pumpkin Decoration?
Here, pumpkin describes the orange yarn color. The cozy itself is a simple textured wrap with one button.
Save This Pattern for Later
Save this crochet mug cozy pattern with button to your handmade gifts or fall crochet board on Pinterest. It is a useful small project when you want to turn a favorite mug into a personalized gift.
Looking for Your Next Crochet Project?
Love this project? Explore Cute Stitch Studio’s premium crochet patterns for more cute, cozy, gift-worthy, and beginner-friendly handmade ideas.