Crochet Wall Organizer Pattern with 9 Pretty Pockets
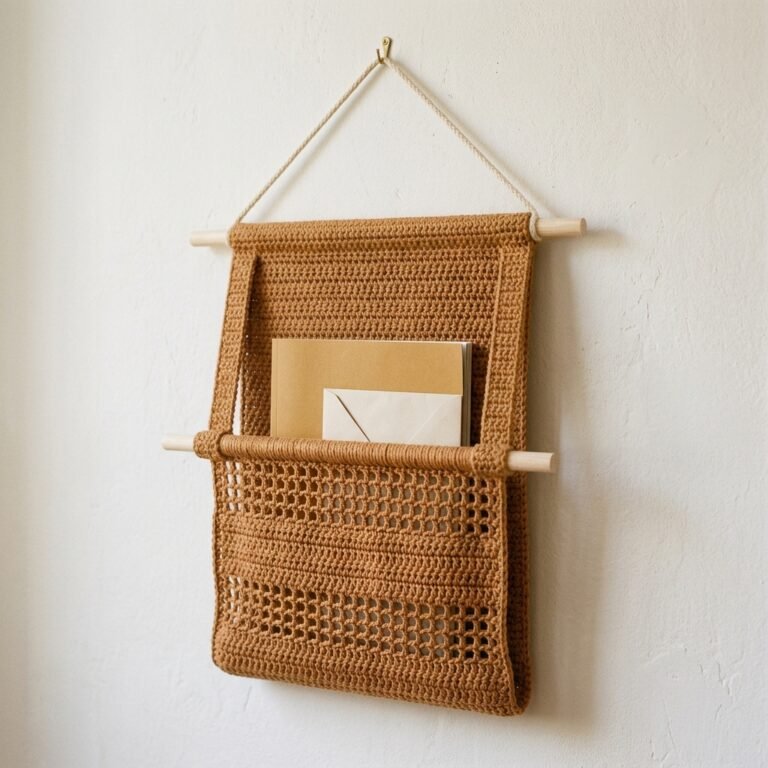
This crochet wall organizer pattern gives your everyday essentials a cozy little home. Nine roomy pockets sit on a soft gray backing, with cream, dusty rose, and gray rows creating a simple color-block design.
A wooden dowel keeps the top spread out, while three optional pink pom-poms add a playful finish. Hang it beside your craft table or near your desk for lightweight supplies you like to keep within reach.
This original Cute Stitch Studio version uses simple half double crochet rectangles. The stitches are approachable for beginners, and the detailed placement guide helps you arrange the pockets neatly.
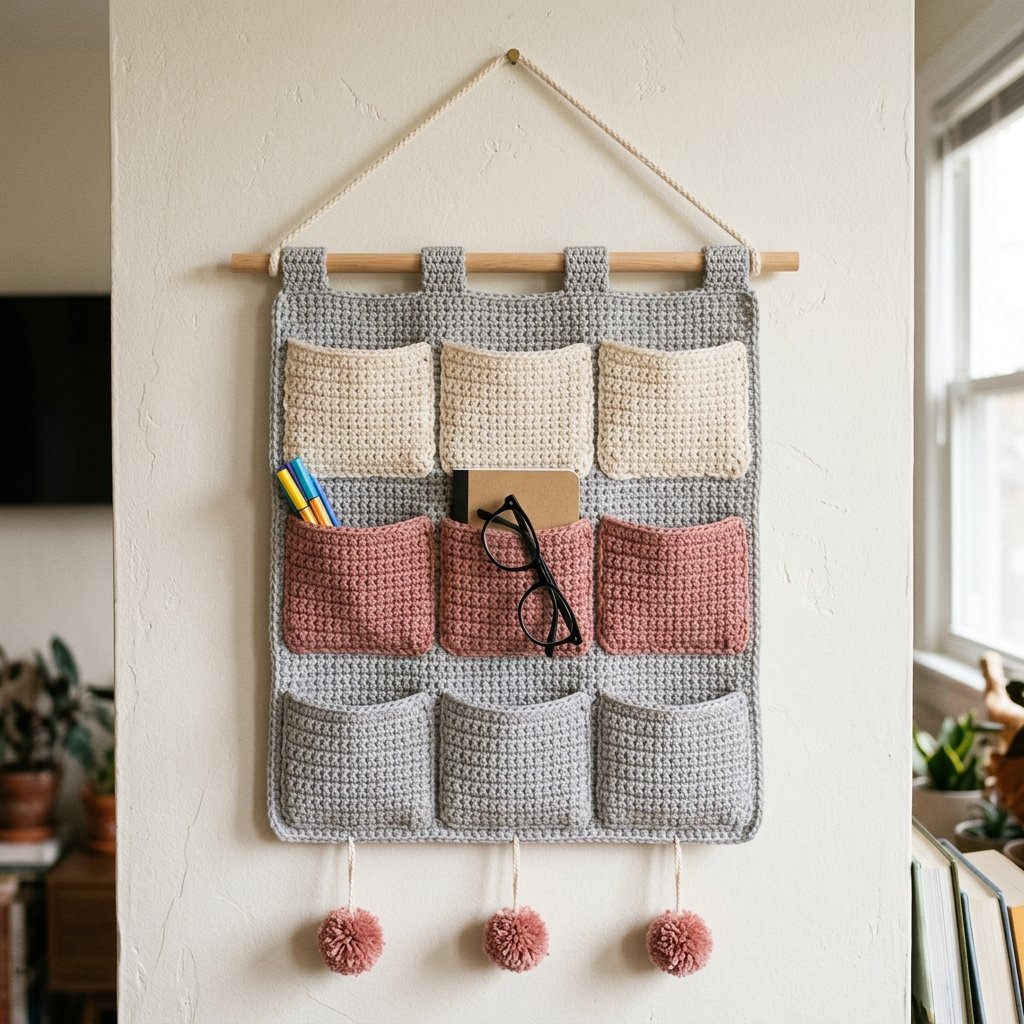
Table of Contents
Crochet Wall Organizer Pattern With 9 Pretty Pockets Instructions
Project Details
- Skill level: Confident beginner; careful measuring and sewing required.
- Estimated time: Approximately 12–18 hours, depending on your pace.
- Finished backing: Approximately 16½ inches wide by 20½ inches tall, including the edging.
- Pocket arrangement: Three columns and three rows.
- Installed pocket size: Approximately 4½ inches wide by 5½ inches tall, with a little extra fabric for depth.
- Crochet terminology: US terms.
- Construction: One flat backing, nine separate pockets, four hanging tabs, and optional pom-poms.
This pattern is an original, untested design draft. Finished measurements and yarn quantities are estimates. Make one pocket and check its fit against the backing before completing all nine.
Materials
- Category 4 cotton yarn: approximately 650–750 yards of light gray, 180–220 yards of cream, and 220–270 yards of dusty rose.
- 4.5 mm crochet hook, or the size needed to meet gauge.
- Yarn needle.
- Scissors.
- Measuring tape.
- Removable stitch markers.
- One smooth wooden dowel approximately 20 inches long and ¾ inch in diameter.
- Approximately 48 inches of sturdy braided cotton hanging cord.
- A wall hook appropriate for your wall and intended display.
- Optional: a small pom-pom maker or a 2-inch-wide piece of stiff cardboard.
The dusty rose yarn estimate includes the optional pom-poms. Use the same yarn weight and fiber for all three colors.
Hook Size
Begin with a 4.5 mm crochet hook.
The fabric should feel flexible but firm enough to hold its shape. If your stitches are loose and stretchy, use a smaller hook and check your gauge again.
Yarn
Choose category 4, worsted-weight cotton with a smooth, firmly spun texture. Cotton gives the pockets clear stitch definition and suits the clean, simple design.
For the reference-inspired palette, use:
- Light gray: Backing, edging, bottom pocket row, and hanging tabs.
- Cream: Top pocket row.
- Dusty rose: Middle pocket row and optional pom-poms.
Avoid mixing a thin cotton with a much thicker or stretchier yarn. Even when both labels say worsted weight, the finished rectangles may turn out differently.

Abbreviations
- ch: chain.
- sc: single crochet.
- hdc: half double crochet.
- sl st: slip stitch.
- st / sts: stitch / stitches.
Before You Start
Gauge
14 hdc and 10 rows = 4 inches, measured over a relaxed swatch.
Make a swatch larger than 4 inches so you can measure away from the edges. Wash and dry it according to the yarn label if you expect to wash the finished organizer.
If you have more than 14 stitches across 4 inches, try a larger hook. If you have fewer, try a smaller hook.
Turning Chains
The ch 1 at the beginning of each row does not count as a stitch. Work your first stitch into the first actual stitch of the row.
Turn after every row unless instructed otherwise.
How the Pockets Get Their Shape
Each pocket is 20 stitches wide, but it is sewn onto a space only 16 backing stitches wide. That extra width gives the front room to bow outward.
You will distribute the extra stitches evenly along the bottom seam. There are no separate side gussets, and the pocket openings remain unsewn.
Mark the Backing
The foundation edge will be the bottom of the organizer. Row 50 will be the top, nearest the dowel.
Keep a marker at the beginning of every tenth row while making the backing. These markers make the later placement steps easier.
Use Notes
This organizer is intended for lightweight supplies. Its load capacity has not been tested. Start with a few items, check the seams and wall attachment, and avoid placing heavy or breakable objects in the pockets.
If you add pom-poms, keep the organizer away from babies and young children who could pull on them.
Crochet Wall Organizer Pattern: Step-by-Step Instructions
Part 1 — Crochet the Gray Backing
With light gray yarn, ch 57.
Row 1: Hdc in the second chain from the hook and in each remaining chain. Turn. (56 sts)
Row 2: Ch 1, hdc in each stitch across. Turn. (56 sts)
Rows 3–50: Repeat Row 2. (56 sts per row)
The unedged backing should measure approximately 16 inches wide by 20 inches tall.
Do not fasten off.
Part 2 — Edge the Backing
Ch 1 and work a round of sc around the rectangle.
- Across the top and bottom, work approximately 1 sc per stitch.
- Along each side, begin by alternating 1 sc in one row end and 2 sc in the next row end.
- At each corner, work 3 sc into the corner stitch or corner space to turn neatly.
Keep checking that the rectangle lies flat. If a side begins to wave, use fewer stitches along that side. If it pulls inward, add a few more evenly spaced stitches.
Join with a sl st in the first sc. Fasten off and weave in the ends.
The edging is a finishing round and is not included in the pocket-placement counts below.
Part 3 — Crochet the Nine Pockets
Make three cream pockets, three dusty rose pockets, and three light gray pockets.
For each pocket, ch 21.
Row 1: Hdc in the second chain from the hook and in each remaining chain. Turn. (20 sts)
Rows 2–14: Ch 1, hdc in each stitch across. Turn. (20 sts per row)
Top edging: Ch 1, sc in each stitch across. (20 sts)
Fasten off. Weave in the ends.
Each loose pocket should measure approximately 5¾ inches wide by 5¾ inches tall, including the narrow top edging.
Lay the finished pockets together and compare them. They should be close in size before you begin sewing.

Part 4 — Mark the Three Pocket Columns
Lay the backing flat with its foundation edge at the bottom. Choose the face you want to show and keep it facing upward.
Count the 56 main backing stitches across from left to right, excluding the edging.
Mark these three pocket spaces:
- Left column: Stitches 3–18.
- Center column: Stitches 21–36.
- Right column: Stitches 39–54.
Each space is 16 backing stitches wide. This leaves two stitches at each outer side and two stitches between neighboring pockets.
Use removable markers to identify the left and right boundary of each column at several heights.
Part 5 — Mark the Three Pocket Rows
Count backing rows upward from the foundation edge.
- Bottom gray pockets: Place the lower edges just below Row 3, with the sides extending alongside Rows 3–16.
- Middle dusty rose pockets: Place the lower edges just below Row 19, with the sides extending alongside Rows 19–32.
- Top cream pockets: Place the lower edges just below Row 35, with the sides extending alongside Rows 35–48.
This leaves two backing rows below the bottom pockets, two rows between pocket bands, and two rows above the top pockets.
The narrow sc edging at each pocket opening extends slightly above its 14 hdc rows.
Part 6 — Sew the First Pocket
Start with the bottom-left gray pocket.
Place its lower-left and lower-right corners at the marked sides of the first column, just below Backing Row 3. The pocket fabric will be wider than the marked space; this is intentional.
Thread a yarn needle with matching yarn. Sew the bottom edge through the backing using small, secure stitches.
To distribute 20 pocket stitches across 16 backing stitches, divide the seam into four sections. In each section, match five pocket stitches to four backing stitches:
- Attach the first pocket stitch to the first backing stitch.
- Attach the second pocket stitch to the second backing stitch.
- Attach both the third and fourth pocket stitches to the third backing stitch, using separate sewing passes.
- Attach the fifth pocket stitch to the fourth backing stitch.
Repeat this arrangement four times across the bottom. Keep the small gathers spread evenly rather than pulling them into one large fold.
Sew the left side upward, matching the pocket’s 14 hdc row ends to Backing Rows 3–16. Catch the fabric securely without pulling the backing into a ridge.
Repeat along the right side. Secure the ends of the sc opening edge at the two upper corners, but leave the entire top opening free.
Reinforce each upper corner with a few extra sewing passes. Weave the ends into the reverse of the backing.
Part 7 — Attach the Remaining Pockets
Sew the other two gray pockets into the bottom row using the same method.
Attach the three dusty rose pockets to the middle row and the three cream pockets to the top row.
After each pocket, lay the organizer flat and check that its side seams remain vertical and its bottom seam is level.
Do not stretch the pocket openings straight across the backing. The extra width should remain at the front so the pockets can open gently.

Part 8 — Make Four Hanging Tabs
With gray yarn, ch 4.
Row 1: Sc in the second chain from the hook and in each remaining chain. Turn. (3 sts)
Row 2: Ch 1, sc in each stitch across. Turn. (3 sts)
Repeat Row 2 until the strip measures approximately 4 inches long. Fasten off, leaving a 12-inch sewing tail.
Make four identical strips.
Check one strip around your dowel before sewing. It should wrap around the wood while allowing both ends to overlap the top of the backing by approximately ½ inch. Add or remove rows if necessary.
Part 9 — Attach the Tabs and Dowel
Along the top backing row, mark stitches 2, 19, 38, and 55. These are the centers of the four tab attachments.
At each marker, place one end of a strip against the front of the backing with approximately ½ inch overlapping the fabric. Sew it securely through the top two backing rows.
Bring the strip over the dowel and place its other end against the reverse of the backing. Sew that end securely in the same area.
Repeat for all four tabs, keeping their overlaps equal. The dowel should slide through all four loops, with some wood visible at both ends.
Check that the backing hangs evenly before finishing the last sewing tails.
Part 10 — Add the Hanging Cord
Tie one end of the braided cord around the left end of the dowel, outside the outermost crochet tab. Wrap it around the dowel twice, then secure it with two half hitches around the standing cord.
To make a half hitch, pass the short end around the standing cord and through the loop you have formed. Tighten, then repeat in the same direction.
Attach the other end to the right side in the same way, leaving enough cord between the attachments to form a triangular hanger.
Adjust until the dowel sits level. Keep generous knot tails until you have checked the hanging position and tightened the knots.
If the cord slips toward the ends of the dowel, use a dowel with secure end stops or suitable hanging hardware before displaying the organizer.
Part 11 — Add Optional Pom-Poms
Make three dusty rose pom-poms approximately 1½–2 inches across.
For a simple cardboard method, wrap yarn loosely around a 2-inch-wide piece of cardboard approximately 60–80 times. Slide the bundle off carefully.
Tie a separate strand very tightly around the center of the bundle, securing it with a double knot. Cut the loops on both sides and trim the yarn into a rounded shape. Keep the two central tying tails long.
Remove loose clippings and gently tug the pom-pom strands to check that the bundle holds together.
Attach one pom-pom beneath the center of each pocket column: approximately below backing stitches 10, 28, and 46.
Use both center tails to secure each pom-pom through several bottom-edge stitches. Leave a short visible suspension of about ½ inch, then weave in the remaining tails.
Finishing
Check the reverse of the organizer and weave in any remaining ends. Make sure no long loose strands could catch on the contents.
Lay the backing flat and gently shape it into a rectangle. If blocking is needed, follow the yarn label and dry it flat without stretching the pockets.
Slide the dowel into place and hang the empty organizer first. Check that the top stays level and the backing does not twist.
Add a few lightweight items gradually. Watch for excessive sagging, loose corner stitches, or shifting knots, and adjust before adding more.

Finished Size
- Backing with edging: Approximately 16½ inches wide by 20½ inches tall.
- Each installed pocket: Approximately 4½ inches across its attachment area and 5½–5¾ inches tall.
- Dowel: Approximately 20 inches long.
- Pom-poms: Approximately 1½–2 inches across.
- Total display height: Approximately 31–35 inches, depending on the hanging cord and optional pom-poms.
Tips and Customization
Change the Color Palette
Try cream, sage, and oatmeal for a softer neutral look. For a colorful craft room, use a different shade for each pocket while keeping the backing one calm color.
Keep the First Version the Same Size
The placement guide is based on 56 backing stitches and 50 rows. Follow those counts for your first organizer so the pocket spacing remains consistent.
Skip the Pom-Poms
Leave the lower edge plain for a simpler look. This also makes the organizer easier to wash and removes an extra decorative attachment.
Store Small Items Thoughtfully
Use a small pouch inside a pocket for tiny items that could slip between stitches. Keep pointed scissors and sharp tools inside a protective case.
Check the Top Corners
The upper corners of the pockets receive extra pull when you reach inside. Inspect those stitches occasionally and reinforce them if they loosen.
Frequently Asked Questions
Is this crochet wall organizer beginner-friendly?
The crochet pieces use basic stitches and straight rows. The main challenge is sewing the nine pockets in consistent positions, so take time to mark the backing before assembly.
Why are the pockets wider than the spaces on the backing?
The extra width creates room for contents. Sewing a pocket completely flat with no extra fabric would make it harder to open and could pull the backing when filled.
Can I use acrylic yarn?
Acrylic changes the drape and stretch of the organizer. If you substitute it, make a swatch and one complete pocket first. The cotton measurements and behavior should not be assumed to carry over unchanged.
Can I put my phone in a pocket?
Measure your phone with its case and check the pocket depth first. This draft does not establish a load rating or device protection, so assess the seams and hanging assembly before storing anything valuable.
Can the organizer be washed?
Follow the yarn’s care instructions. Remove the dowel and hanging cord, and hand-wash the crochet gently if appropriate for your yarn. Dry flat; do not hang it while wet.
Why does the backing pucker around a pocket?
The sewing yarn may be too tight, or the pocket’s extra width may not be distributed evenly. Loosen and redo the affected seam with the backing lying flat.
Save This Pattern for Your Craft Corner
Save this crochet wall organizer pattern to your Pinterest board so you can return to the pocket-placement guide when it is time to assemble your project.
Looking for Your Next Crochet Project?
Love this project? Explore Cute Stitch Studio’s premium crochet patterns for more cute, cozy, gift-worthy, and beginner-friendly handmade ideas.