Crochet Cat Dress Pattern with a Matching Purse
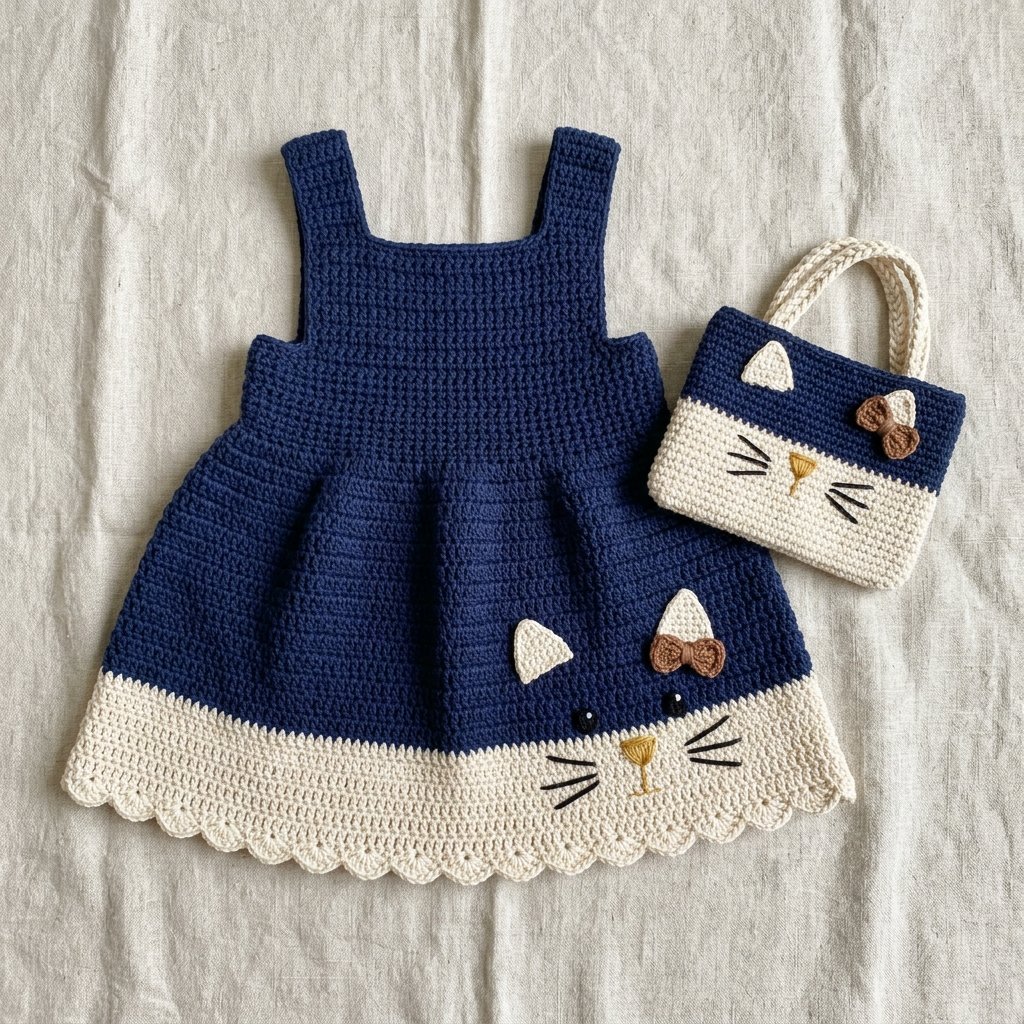
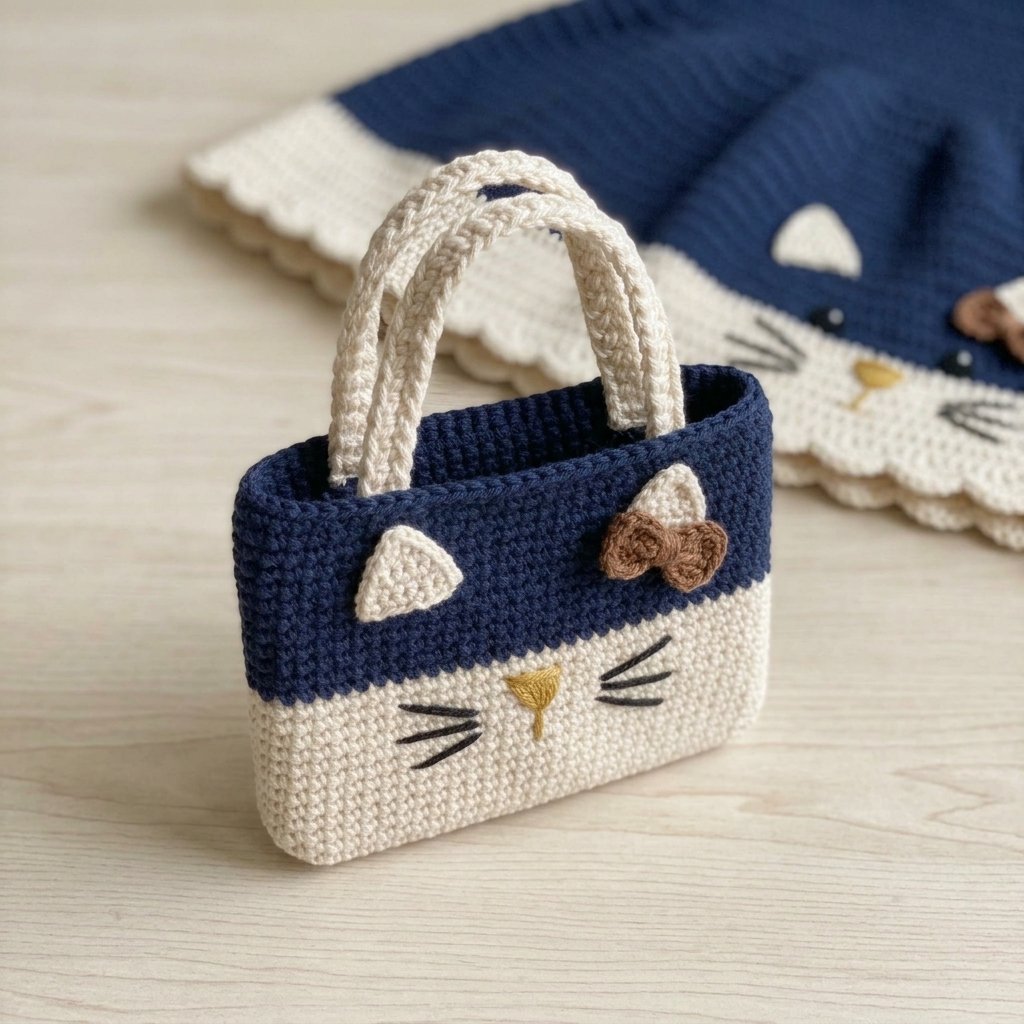
This crochet cat dress pattern combines a navy sundress with a cream cat face along the hem. Little ears, embroidered whiskers, and a brown bow give it a playful finish, while a matching hand-held purse completes the outfit.
The dress uses a gently flared skirt, two simple upper panels, and wide shoulder straps. It is a project for confident beginners who are comfortable counting stitches, changing colors, and sewing pieces together.
Make it for a handmade birthday outfit, a family photo, or a cat-loving little one.

Project Details
- Skill Level: Confident beginner with basic garment-making experience
- Estimated Time: Approximately 12–18 hours for the set
- Dress Size: One measurement-based toddler sample
- Finished Upper-Body Circumference: Approximately 24 inches
- Finished Hem Circumference: Approximately 33 inches before edging
- Finished Dress Length: Approximately 17–18 inches from shoulder to hem
- Purse Size: Approximately 6 inches wide × 4½ inches tall, excluding handles
- Crochet Terminology: US terms
- Construction: Skirt worked downward in joined rounds; front and back upper panels worked upward; shoulder straps sewn in place
This original pattern has not been physically tested. Gauge, garment fit, drape, dimensions, and yarn quantities need confirmation on a sample.
Materials
- Medium-weight yarn in navy, cream, and brown
- Small amounts of black and golden-yellow yarn for embroidery
- 4.5 mm crochet hook, or size needed for gauge
- Yarn needle
- Scissors
- Flexible measuring tape
- Six removable stitch markers
No lining, buttons, zipper, or rigid bag hardware is required.
Hook Size
Start with a 4.5 mm crochet hook.
The dress fabric should drape comfortably. If the fabric feels stiff, reconsider your yarn and hook combination before making the garment.
Use the same hook for the purse and decorative pieces unless you need a small adjustment to keep the appliqués flat.
Yarn
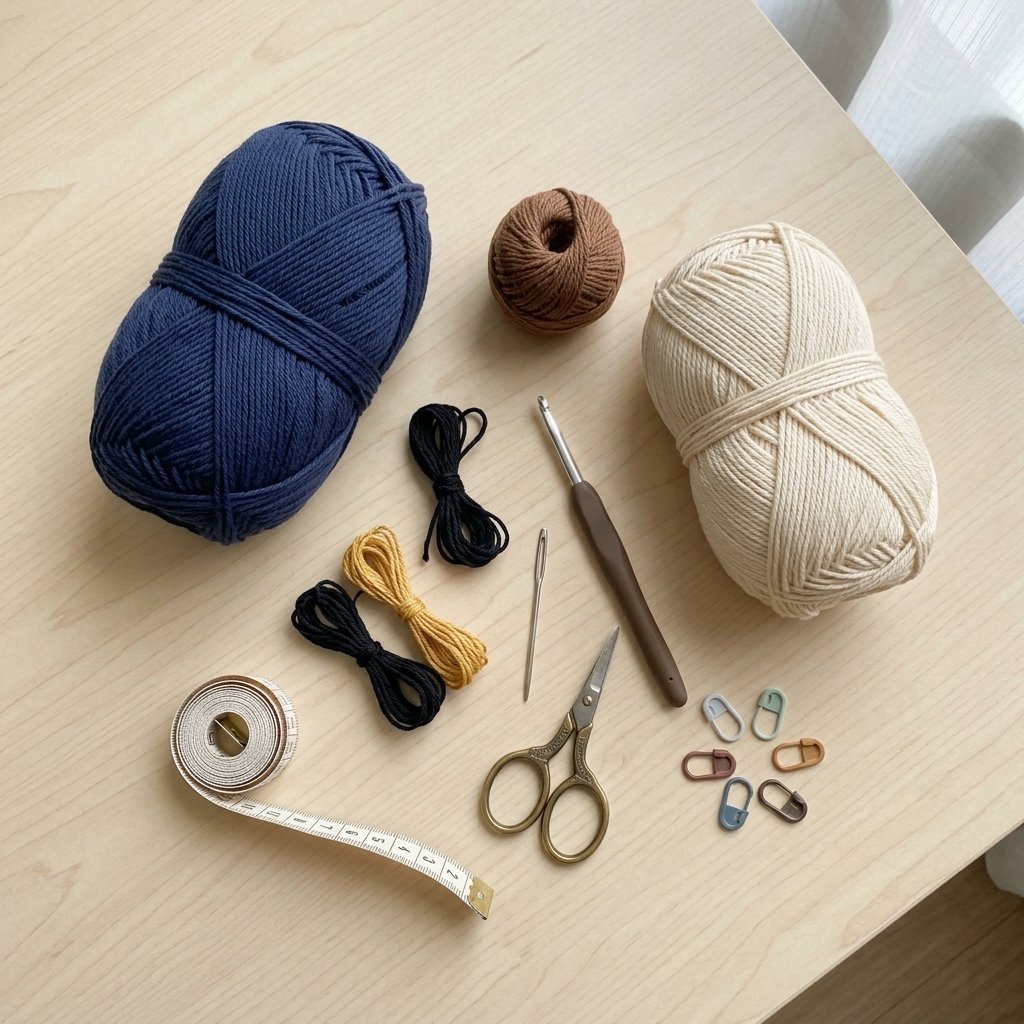
Use medium-weight yarn, category 4, in a smooth cotton-acrylic blend.
For the sample set, allow approximately:
- Navy: 500–650 yards
- Cream: 200–275 yards
- Brown: 15–25 yards
- Black: 5–10 yards
- Golden yellow: 2–3 yards
These are planning estimates. Make a sample and record actual yarn use before publishing a confirmed quantity.
Choose colors with enough contrast for the ears and embroidered features to stand out.
Abbreviations
- ch: chain
- sc: single crochet
- hdc: half double crochet
- dc: double crochet
- sc2tog: single crochet 2 stitches together
- sl st: slip stitch
- st(s): stitch(es)
How to Work sc2tog
Insert your hook into the next stitch, yarn over, and pull up a loop. Insert your hook into the following stitch, yarn over, and pull up another loop.
Yarn over and pull through all 3 loops.
You have turned two stitches into one.
Before You Start
Gauge
Target gauges after washing and drying:
- Dress: 16 hdc stitches and 12 rows or rounds = approximately 4 inches
- Purse: 16 sc stitches and 18 rows = approximately 4 inches
Measure without stretching.
The dress’s upper-body circumference depends on stitch gauge. Its length depends on row gauge.
Check the Recipient’s Measurements
Measure the child’s chest, head circumference, and desired shoulder-to-hem length.
The sample has a 24-inch upper-body circumference. It is intended to provide approximately 2 inches of ease on a 22-inch chest, but check the actual garment.
Do not select the size from age alone.
The shoulder straps affect the neckline opening, armhole depth, and total length. Check these before permanently sewing them.
Turning Chains and Joins
For hdc rows and rounds, ch 2 does not count as a stitch.
For sc rows and rounds, ch 1 does not count as a stitch.
Join skirt rounds with a sl st to the first hdc. Do not turn between skirt rounds.
Turn after each flat row.
Color Changes
To change colors, complete the last yarn-over of the final stitch with the new color. Join the round using the new color, then continue.
Construction Overview
The first skirt round sits beneath the upper panels.
You will work down to the hem, return to the starting edge, and add the front and back panels. Wide straps join those panels over the shoulders.
The cat face belongs on the front cream hem band. Keep this front position in mind during assembly.
Crochet Cat Dress Pattern: Step-by-Step Instructions
Part 1 — Start the Skirt
With navy yarn, ch 96 loosely.
Check that the chain is not twisted. Join with a sl st to the first chain.
Round 1: Ch 2. Hdc in each chain around. Join. (96 sts)
The circumference should be approximately 24 inches at the target gauge.
Check that the foundation edge stretches comfortably and is not tighter than the round above it.
Round 2: Ch 2. Repeat (hdc in the next 7 sts, 2 hdc in the next st) 12 times. Join. (108 sts)
Rounds 3–10: Ch 2. Hdc in each st around. Join. (108 sts per round)
Round 11: Ch 2. Repeat (hdc in the next 8 sts, 2 hdc in the next st) 12 times. Join. (120 sts)
Rounds 12–20: Ch 2. Hdc in each st around. Join. (120 sts per round)
Round 21: Ch 2. Repeat (hdc in the next 9 sts, 2 hdc in the next st) 12 times. (132 sts)
Change to cream in the final stitch and join.
Rounds 22–30: Ch 2. Hdc in each st around. Join. (132 sts per round)
The skirt should measure approximately 10 inches from its starting edge to the bottom of Round 30.
Do not fasten off yet.
Part 2 — Add the Scalloped Hem
Edging Round 1: Ch 1. Sc in each st around. Join to the first sc. (132 sts)
Edging Round 2:
Sl st in the first stitch.
Repeat the following sequence 22 times:
- Skip the next 2 sts.
- Work 5 dc in the next st.
- Skip the next 2 sts.
- Sl st in the next st.
For the final repeat, work the last sl st into the first stitch of the round, where you began.
You will have 22 scallops.
Fasten off and weave in the end.
Part 3 — Mark the Upper Panels
Return to the skirt’s starting-chain edge.
Number its 96 chain positions beginning at the original join. Mark these sections:
- Front panel: Positions 1–32
- First underarm: Positions 33–48
- Back panel: Positions 49–80
- Second underarm: Positions 81–96
The 16-position sections remain unworked for now and form the lower armhole edges.
Part 4 — Crochet the Front Upper Panel
With the outside of the skirt facing you, join navy yarn at position 1.
Work into the available loops along the foundation-chain edge.
Row 1: Ch 2. Hdc in each of the 32 front-panel positions. (32 sts)
Rows 2–12: Ch 2 and turn. Hdc in each st across. (32 sts per row)
Fasten off.
The panel should measure approximately 8 inches wide × 4 inches tall.
Part 5 — Crochet the Back Upper Panel
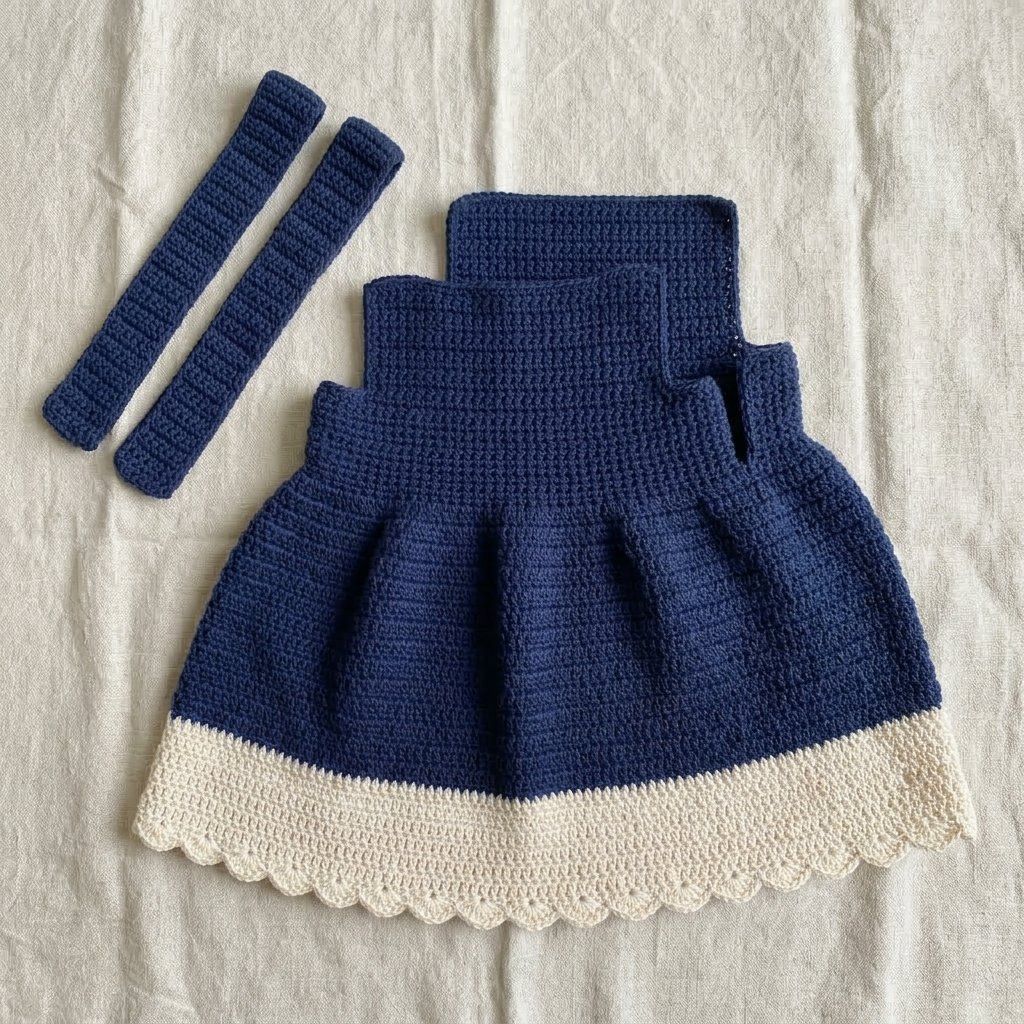
Join navy yarn at position 49 along the skirt’s starting edge, with the outside facing you.
Row 1: Ch 2. Hdc in each of the 32 back-panel positions. (32 sts)
Rows 2–12: Ch 2 and turn. Hdc in each st across. (32 sts per row)
Fasten off.
The back panel should match the front.
Part 6 — Make the Shoulder Straps
Make two in navy.
Ch 10.
Row 1: Hdc in the third chain from the hook and in each remaining chain. (8 sts)
Rows 2–18: Ch 2 and turn. Hdc in each st across. (8 sts per row)
Fasten off, leaving a 12-inch sewing tail. Leave a similar starting tail for the opposite end.
Each strap should measure approximately 2 inches wide × 6 inches long.
Part 7 — Attach and Check the Straps
At the top of each upper panel, reserve:
- The first 8 stitches for one strap
- The center 16 stitches for the neckline
- The final 8 stitches for the other strap
Sew one short end of each strap to the corresponding outer 8 stitches of the front panel.
Connect the opposite ends to the matching positions on the back panel. Keep both straps untwisted and use edge-to-edge seams without overlapping.
Before securing the back seams permanently, check the opening and shoulder fit.
The unedged neckline perimeter is approximately 20 inches at the target gauge. It must pass over the child’s head comfortably without force.
Lengthening a strap increases the neckline opening and armhole depth. Shortening it reduces both. Make the same adjustment to both straps and check the whole fit.
If a comfortable neckline and armhole fit cannot be achieved together, the upper panels need resizing.
Part 8 — Finish the Neckline and Armholes
With navy yarn, work one round of sc around the neckline.
As a starting guide:
- Work 1 sc in each stitch across the front and back neckline edges.
- Work approximately 3 sc for every 2 hdc row ends along the inside strap edges.
Join and fasten off.
Repeat around each armhole, working:
- 1 sc in each foundation-chain position along the underarm
- Approximately 3 sc per 2 hdc row ends along the panel sides and outer strap edge
Adjust the distribution slightly to keep the edging flat. It should not gather or tighten the openings.
Recheck the neckline after edging.
Part 9 — Make the Dress Ears
Make two with cream yarn.
Ch 9.
Row 1: Sc in the second chain from the hook and in each remaining chain. (8 sts)
Row 2: Ch 1 and turn. Sc2tog, sc in the next 4 sts, sc2tog. (6 sts)
Row 3: Ch 1 and turn. Sc2tog, sc in the next 2 sts, sc2tog. (4 sts)
Row 4: Ch 1 and turn. Sc2tog twice. (2 sts)
Row 5: Ch 1 and turn. Sc2tog. (1 st)
Fasten off, leaving a 14-inch sewing tail.
The foundation edge is the ear base. Row 5 forms the tip.
Part 10 — Add the Dress’s Cat Face
Lay the dress flat with the front panel facing upward.
Center the face beneath the front upper panel.
Ears
Place each ear’s base along the navy-to-cream color boundary. The tips point upward onto the navy skirt.
Space the ear centers approximately 4 inches apart.
Sew around all three edges of each ear so the appliqués lie flat.
Eyes
With black yarn, embroider two small filled ovals on the cream band, approximately 3 inches apart.
Make each eye approximately ⅜ inch wide, using several short stitches placed closely together.
Nose
With golden-yellow yarn, embroider a small oval centered between the eyes and slightly lower.
Whiskers
Add three black whiskers on each side of the face.
Work each whisker as two or three short backstitches rather than one long loose stitch. Keep the whiskers within the cream band.
Secure and weave in every embroidery tail on the inside.
Part 11 — Make the Dress Bow
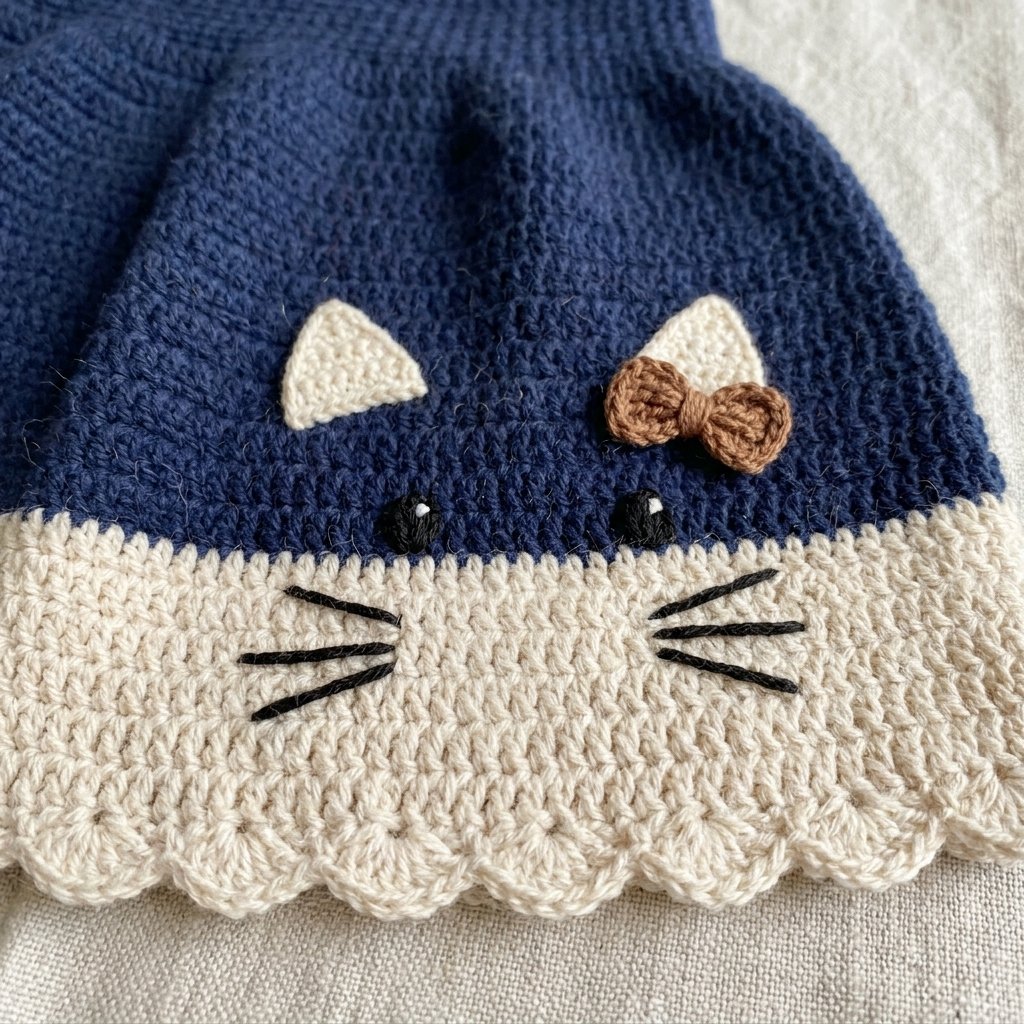
With brown yarn, ch 13.
Row 1: Sc in the second chain from the hook and in each remaining chain. (12 sts)
Rows 2–6: Ch 1 and turn. Sc in each st across. (12 sts per row)
Fasten off, leaving a 24-inch tail.
Pinch the center of the rectangle into a small fold. Sew through the pinched center several times, then wrap the yarn around it six times.
Secure the wraps at the back.
Sew the bow beside one ear. Attach the center and add small stitches through the backs of both wings to keep it from twisting.
Matching Cat Purse Pattern
Part 1 — Make the Panels
Make two identical panels.
With cream yarn, ch 25.
Row 1: Sc in the second chain from the hook and in each remaining chain. (24 sts)
Rows 2–12: Ch 1 and turn. Sc in each st across. (24 sts per row)
Change to navy in the final stitch of Row 12.
Rows 13–20: Ch 1 and turn. Sc in each st across. (24 sts per row)
Fasten off.
Each panel should measure approximately 6 inches wide × 4½ inches tall.
Part 2 — Make the Purse Ears
Make two in cream.
Ch 7.
Row 1: Sc in the second chain from the hook and in each remaining chain. (6 sts)
Row 2: Ch 1 and turn. Sc2tog, sc in the next 2 sts, sc2tog. (4 sts)
Row 3: Ch 1 and turn. Sc2tog twice. (2 sts)
Row 4: Ch 1 and turn. Sc2tog. (1 st)
Fasten off, leaving a sewing tail.
Sew the ears flat onto the front panel, with their bases at the color boundary and tips pointing into the navy section.
Part 3 — Add the Purse Face and Bow
Embroider two black eyes, a golden-yellow nose, and three short whiskers on each side.
Keep the features centered on the cream section. Use approximately 2 inches between the eyes.
For the small bow, use brown yarn.
Ch 9.
Row 1: Sc in the second chain from the hook and in each remaining chain. (8 sts)
Rows 2–4: Ch 1 and turn. Sc in each st across. (8 sts per row)
Fasten off with an 18-inch tail.
Pinch, wrap, and secure the center as for the dress bow. Sew it beside one ear.
Weave in all decoration tails before joining the panels.
Part 4 — Assemble the Purse
Place the panels with their decorated or outer faces together.
Using matching yarn, whipstitch down one side, across the bottom, and up the other side. Leave the navy top edges open.
Use cream yarn along the cream sections and navy along the navy sections.
Turn right side out and gently flatten the seams.
Part 5 — Make and Attach the Handles
Make two with cream yarn.
Ch 5.
Row 1: Sc in the second chain from the hook and in each remaining chain. (4 sts)
Rows 2–36: Ch 1 and turn. Sc in each st across. (4 sts per row)
Fasten off, leaving sewing tails.
Each handle should measure approximately 1 inch wide × 8 inches long.
Attach one handle to the front panel and one to the back:
- Position the handle ends approximately 1 inch inward from each side seam.
- Overlap each end by approximately ¾ inch onto the inside of the navy panel.
- Sew around the overlapped section, then add a line of stitches across its center.
- Check that the handle is not twisted.
This is a small hand-held purse. Do not extend the handles into a neck or crossbody strap for a toddler.
Finishing
Weave in all remaining yarn ends.
Check the shoulder seams, appliqué edges, bow attachments, and purse handles.
Wash and dry according to the yarn label, shaping the dress and bag without stretching. Measure again after drying.
Try the dress on before the intended occasion. The neckline should pass over the head easily, and the armholes should allow comfortable movement.
Use the purse with adult supervision and inspect its attachments regularly.
Finished Size
At the target gauge:
- Upper-body circumference: Approximately 24 inches (61 cm)
- Hem circumference before scallops: Approximately 33 inches (84 cm)
- Shoulder-to-hem length: Approximately 17–18 inches (43–46 cm)
- Upper panel: Approximately 8 × 4 inches (20 × 10 cm)
- Purse body: Approximately 6 × 4½ inches (15 × 11.5 cm)
- Handle length before attachment: Approximately 8 inches (20 cm)
These measurements are estimates for one sample size, not a tested size range.
Tips & Customization
- Change the colors: Try dusty pink and cream, sage and ivory, or charcoal and oatmeal.
- Leave off the bows: The ears and embroidery still create a recognizable cat face.
- Adjust skirt length: Add or remove plain rounds before the final increase round. Keep the cream band deep enough for the face.
- Check garment weight: Use a yarn with a comfortable drape; a heavy, stiff fabric can make the skirt pull on the straps.
- Keep the purse simple: The unlined bag is intended for a few lightweight items.
Frequently Asked Questions
Is this suitable for a first crochet project?
It is better suited to someone who has completed a few smaller projects. The stitches are simple, but garment gauge and assembly need care.
Can I make a different toddler size?
The written instructions provide one sample size. A different chest measurement requires recalculating the skirt’s starting count, upper panels, underarms, and strap placement.
Does the purse need a lining?
A lining is optional for personal customization, but it is not included in these instructions or materials.
Save this project to your crochet Pinterest board so you can return to the dress and matching bag instructions.
Looking for Your Next Crochet Project?
Enjoy making playful handmade outfits? Explore Cute Stitch Studio’s premium crochet patterns for more cute accessories, baby gifts, and animal-inspired projects.