Herringbone Crochet Cape Pattern with a Hood and Pointed Drape
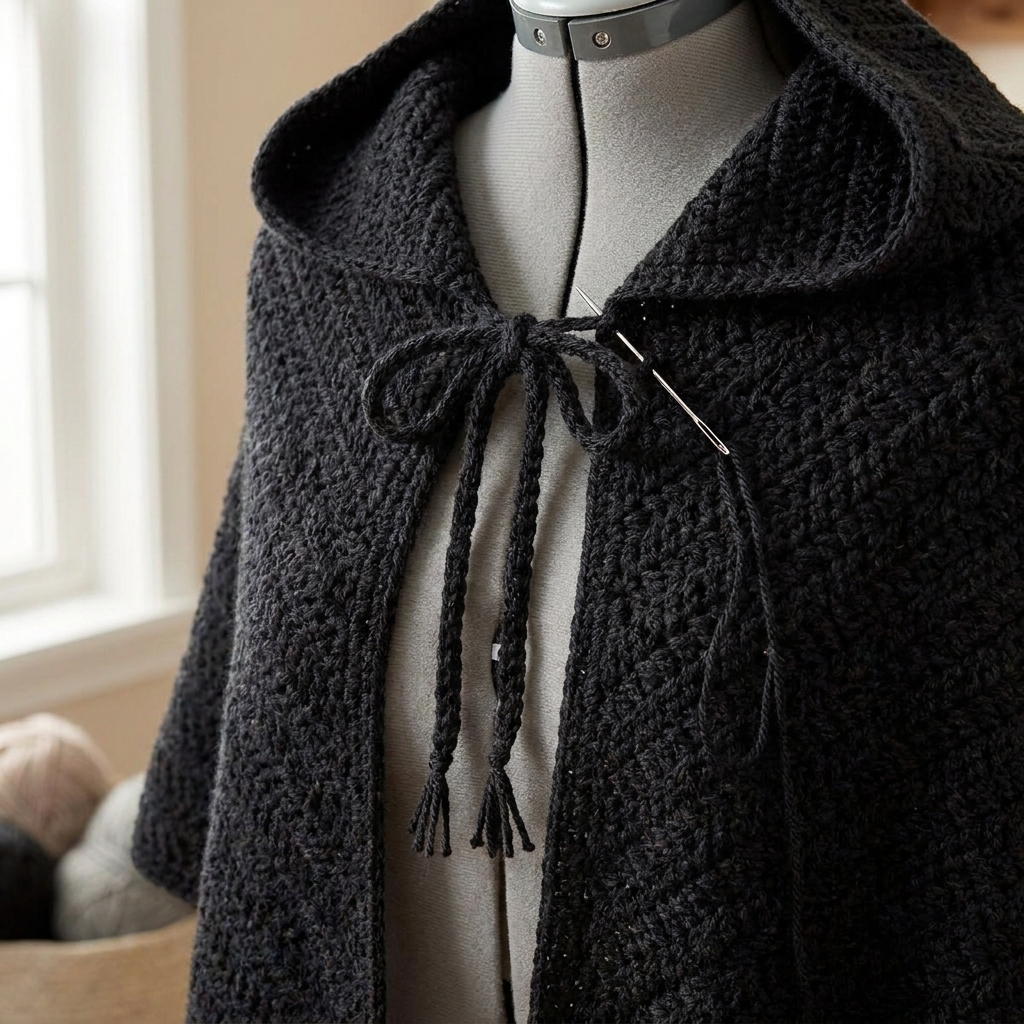
This herringbone crochet cape pattern creates a cozy open-front layer with a generous hood, simple ties, and long corners that drape into points. The subtle slant of the stitches gives the fabric texture without complicated cables or decorative motifs.
Make it in black for a dramatic winter look, or choose oatmeal, charcoal, or forest green for an everyday layer. It slips comfortably over a long-sleeve top and leaves your arms free beneath the fabric.
This original Cute Stitch Studio design begins with a wide rectangle. A hood attaches to the center of its upper edge, while the two long ends fall forward around the shoulders. The pointed appearance comes from those draped corners rather than shaped triangular panels.

Table of Contents
Herringbone Crochet Cape Pattern With A Hood And Pointed Drape Instructions
Why You’ll Love This Herringbone Crochet Cape Pattern With A Hood And Pointed Drape
- Clear step-by-step sections make the project easier to follow.
- Materials, sizing, finishing, and customization notes are easy to find.
- The pattern includes practical tips for a neat handmade result.
Project Details
- Skill level: Confident beginner.
- Estimated time: Approximately 18–30 hours, depending on size and experience.
- Sizes: A, B, and C, selected by finished measurements.
- Crochet terminology: US terms.
- Construction: One rectangular cape body, a hood worked from the center of the upper edge, a crown seam, edging, and two ties.
- Fit: Relaxed, open-front wrap with no sleeves or armholes.
This pattern is an original, untested design draft. Measurements and yarn quantities are estimates. Swatch first and check the drape and hood fit before completing the finishing details.
Materials
- Category 4 yarn: approximately 1,600–1,900 yards for Size A, 1,900–2,300 yards for Size B, or 2,300–2,700 yards for Size C.
- 5.5 mm crochet hook, or the size needed to meet gauge.
- Yarn needle.
- Scissors.
- Measuring tape.
- Removable stitch markers.
No buttons, zipper, or metal cord tips are needed. The two front ties are crocheted from the same yarn.
Hook Size
Start with a 5.5 mm crochet hook.
The fabric should feel soft and flexible enough to fall around your shoulders. If it stands stiffly when folded, reassess your yarn and hook combination before starting the full rectangle.
Yarn
Choose category 4, worsted-weight yarn with a smooth texture and comfortable drape. A wool-acrylic blend or a soft acrylic is a useful starting point.
Black creates the featured look, but it can make the stitches harder to see. Charcoal or a medium shade is easier for learning the herringbone stitch.
Avoid using very heavy cotton for your first version. This is a large piece of fabric, and yarn weight affects how it hangs.

Abbreviations
- ch: chain.
- sc: single crochet.
- sl st: slip stitch.
- hhdc: herringbone half double crochet.
- st / sts: stitch / stitches.
Before You Start
Gauge
12 hhdc and 10 rows = 4 inches, measured after washing and drying the swatch according to the yarn label.
Make a swatch larger than 4 inches and measure the center. The swatch should have the same soft drape you want in the finished cape.
If you have more than 12 stitches across 4 inches, try a larger hook. If you have fewer, try a smaller hook. Check row gauge as well because it determines the depth of the cape and the height of the hood.
Choose Your Size
| Measurement | Size A | Size B | Size C |
|---|---|---|---|
| Body width before edging | 54 inches | 60 inches | 66 inches |
| Body depth before edging | 24 inches | 26 inches | 28 inches |
| Hood base width before folding | 20 inches | 22 inches | 24 inches |
| Hood height before edging | About 13 inches | 14 inches | About 15 inches |
| Hood depth after folding | 10 inches | 11 inches | 12 inches |
These are finished garment measurements, not standard clothing-size labels. For a useful preview, drape a piece of fabric or a blanket of similar dimensions around your shoulders.
Size B is the middle option, with approximately 19 inches of upper edge extending beyond the hood attachment on each side.
Pattern Notes
- Instructions are written as A (B, C).
- The beginning ch 2 does not count as a stitch.
- Work the first stitch into the first actual stitch of each row.
- Turn after every body and hood row.
- Work through both top loops unless directed otherwise.
- The cape body contains no increases or decreases.
How to Work Herringbone Half Double Crochet
The herringbone half double crochet has one extra pull-through movement compared with a regular half double crochet.
- Yarn over and insert the hook into the next stitch.
- Yarn over and draw a loop through the stitch, then continue drawing that same loop through the first loop already on the hook.
- You now have two loops on the hook.
- Yarn over and draw through both loops to finish the stitch.
Keep the pull-through relaxed. Tightening it too much makes the next row difficult to work and reduces the fabric’s drape.
Practice a few rows before beginning the cape. Turning the work after each row changes the direction of the subtle slant.

Herringbone Crochet Cape Pattern
Part 1 — Crochet the Body Rectangle
Ch 164 (182, 200).
Row 1: Hhdc in the third chain from the hook and in each remaining chain. Turn. 162 (180, 198) sts.
Row 2: Ch 2 and hhdc in every stitch across. Turn. 162 (180, 198) sts.
Rows 3–60 (65, 70): Repeat Row 2.
Your body rectangle should measure approximately 54 by 24 inches for Size A, 60 by 26 inches for Size B, or 66 by 28 inches for Size C.
Fasten off and weave in the ends.
Lay the rectangle flat and check that the two short edges are straight. A gradual change in width usually indicates missed or added stitches.
Part 2 — Check the Shoulder Drape
Choose one long edge to be the upper edge. Place its midpoint at the back of your neck and bring the two ends forward over your shoulders.
Let the fabric fall naturally rather than folding the entire upper edge into a thick collar.
Check the back coverage and the length of the two front corners. The front corners should hang lower as the rectangle wraps around the shoulders.
If you want less depth, remove a few rows before continuing. If you want more, add plain rows at the same stitch count and record the change.
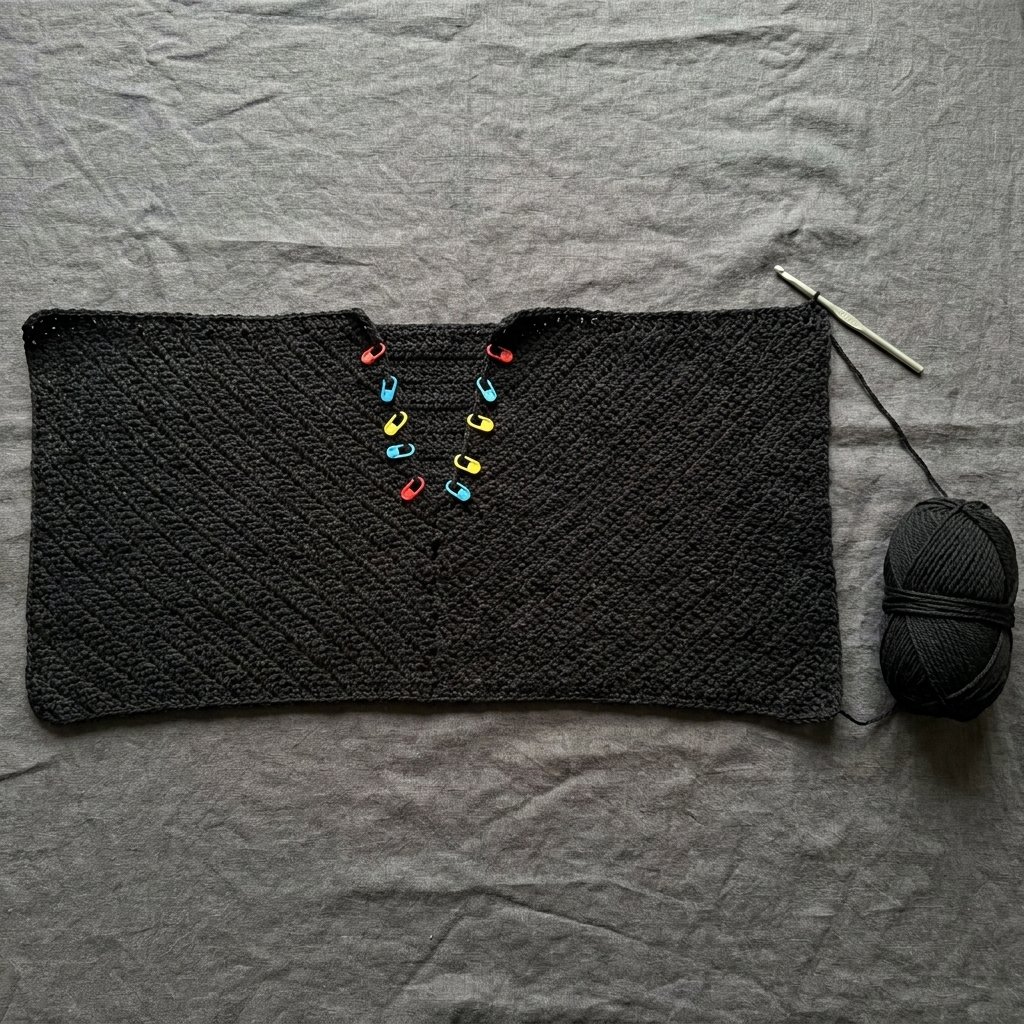
Part 3 — Mark the Hood Attachment
Lay the rectangle flat with its final row at the top. The hood will be centered along this edge.
Mark the following stitch range:
- Size A: Stitches 52–111, giving 60 hood stitches.
- Size B: Stitches 58–123, giving 66 hood stitches.
- Size C: Stitches 64–135, giving 72 hood stitches.
This leaves 51 (57, 63) unused body stitches on each side of the hood attachment.
Place a marker in the first and last stitch of the hood range. Recount before joining the yarn.
Part 4 — Crochet the Hood
Join yarn in the first marked stitch.
Hood Row 1: Ch 2 and work 1 hhdc in each stitch across the marked section, including both marked stitches. Turn. 60 (66, 72) sts.
Hood Row 2: Ch 2 and hhdc in every stitch across. Turn. 60 (66, 72) sts.
Hood Rows 3–33 (35, 38): Repeat Hood Row 2.
Fasten off, leaving a long sewing tail.
The hood is still a rectangle attached to the body. Before sewing, fold it loosely into position and check that its height is comfortable for the intended wearer.
Part 5 — Sew the Hood Crown
Fold the hood in half so its two side edges meet. Keep the faces you want on the outside facing inward while sewing.
Match the two halves of the final hood row. There will be 30 (33, 36) matching stitch pairs.
Whipstitch through each pair across the top, using a relaxed but secure sewing tension.
Fasten off and weave in the tail. Turn the hood right side out.
This simple crown seam creates a softly pointed hood. It is not a fitted, rounded hood.
Part 6 — Work the First Edging Round
The outer edge now travels around the cape body and up around the hood opening. Do not edge across the seam where the hood attaches to the body.
Join yarn at a lower body corner. Ch 1.
- Along horizontal body edges, work approximately 1 sc per stitch.
- Along body and hood row ends, begin by alternating 1 sc in one row end and 2 sc in the next.
- At each outer body corner, work 3 sc into the corner to turn neatly.
- At the two hood-to-body junctions, continue smoothly without adding a corner increase.
Follow the full outline: along the lower edge, up one short body edge, along its free upper edge, around the hood face opening, along the other free upper edge, and down the remaining short edge.
Join with a sl st in the first sc.
Check the border before continuing. If it waves, reduce the number of stitches along the affected row-end section. If it draws inward, add a few stitches evenly.
Part 7 — Finish the Edging
Ch 1 and sc in each stitch around.
At each outer body corner, work 3 sc into the middle stitch of the previous corner group. Work normally through the hood-to-body junctions.
Join with a sl st in the first sc. Fasten off and weave in the ends.
The two rounds add a narrow frame while keeping the cape flexible.
Part 8 — Make the Front Ties
Make two ties.
Leave a 10-inch starting tail. Make a chain approximately 14 inches long without stretching it.
Sl st in the second chain from the hook and in each remaining chain. Work loosely enough that the cord remains flexible.
Fasten off, leaving a second sewing tail.
Compare the two finished cords and make sure they are the same length. The slip stitches may shorten the foundation chain slightly.
Part 9 — Attach the Ties
Try on the cape and bring its upper front edges toward each other. Mark a comfortable tie position on each side, near the base of the hood.
The tie points should help hold the cape at the upper chest without pulling the hood tightly against the throat.
Sew approximately ¾ inch of one tie end against the inside of each marked edge. Use both yarn tails to make several secure passes through the edging and nearby body stitches.
Weave in the remaining tails. Tie a loose bow and check that the cape stays balanced when you move your arms.
Finishing
Check the hood seam, edging, and tie attachments for loose ends or tight areas.
Wash or damp-block according to the yarn label. Support the entire cape while moving it, and dry it flat to avoid stretching the body unevenly.
Shape the rectangle gently and smooth the hood seam. Do not stretch the corners to create exaggerated points.
Once dry, place the center of the upper edge at the back of the neck, settle the hood behind or over the head, and bring the two ends forward. Let the corners fall naturally.
Finished Size
| Size | Body before edging | Hood before edging |
|---|---|---|
| A | 54 inches wide × 24 inches deep | About 13 inches tall × 10 inches deep |
| B | 60 inches wide × 26 inches deep | 14 inches tall × 11 inches deep |
| C | 66 inches wide × 28 inches deep | About 15 inches tall × 12 inches deep |
The edging adds approximately ½–1 inch to overall dimensions, depending on your single crochet tension.
The apparent front length changes with the wearer’s shoulders, how far the fronts overlap, and the yarn’s drape. It is not the same as the flat rectangle depth.
Tips and Customization
Adjust the Body Depth
Add or remove plain body rows before attaching the hood. At the stated gauge, five rows change the depth by approximately 2 inches.
Keep the stitch count unchanged so the hood-placement instructions remain valid.
Adjust the Hood Height Separately
If the hood feels too tall or short, remove or add rows before sewing the crown. Keep its stitch count unchanged.
You can also use the smaller hood stitch count centered on a larger body. Subtract the chosen hood count from the body count, then leave half that remainder unused at each end.
Choose a Lighter Color for Your First Cape
Medium gray or oatmeal makes the slanted stitches easier to see. Once you know the rhythm, the same pattern works in black.
Keep the Ties Simple
The yarn cords are enough to finish the neckline. Leaving off metal tips and heavy embellishments keeps the front closure light.
Plan Your Yarn Supply
Keep enough yarn aside for the hood, edging, and ties before extending the body. Extra rows across a wide rectangle can use more yarn than expected.
Frequently Asked Questions
Is this a cape or a poncho?
This design is an open-front hooded cape. It wraps around the shoulders rather than being pulled over the head through a central opening.
Are the front points shaped with decreases?
No. The body is a rectangle. Its corners hang into points when the long ends drape forward over the shoulders.
Is herringbone half double crochet difficult?
It uses a small variation on a basic stitch. The main adjustment is pulling the new loop through the first loop on the hook before completing the stitch.
Why are my edges getting narrower?
Check the first and last stitch of each row. The beginning ch 2 does not count, so you still need to work into the first actual stitch and complete the full stitch count.
Can I substitute regular half double crochet?
You can use it for a different texture, but make a new swatch. The stitch and row measurements may change, so the listed dimensions would need to be checked again.
Can I make this in bulky yarn?
Bulky yarn changes both the size and weight. The written counts are for worsted-weight yarn at the stated gauge; a bulky version needs recalculated counts.
Save This Cozy Crochet Project
Save this herringbone crochet cape pattern to your Pinterest board so you can return to the size table and hood-placement guide while you work.
Looking for Your Next Crochet Project?
Love this project? Explore Cute Stitch Studio’s premium crochet patterns for more cute, cozy, gift-worthy, and beginner-friendly handmade ideas.