Granny Square Skirt and Top Pattern: A Floral Crochet Set
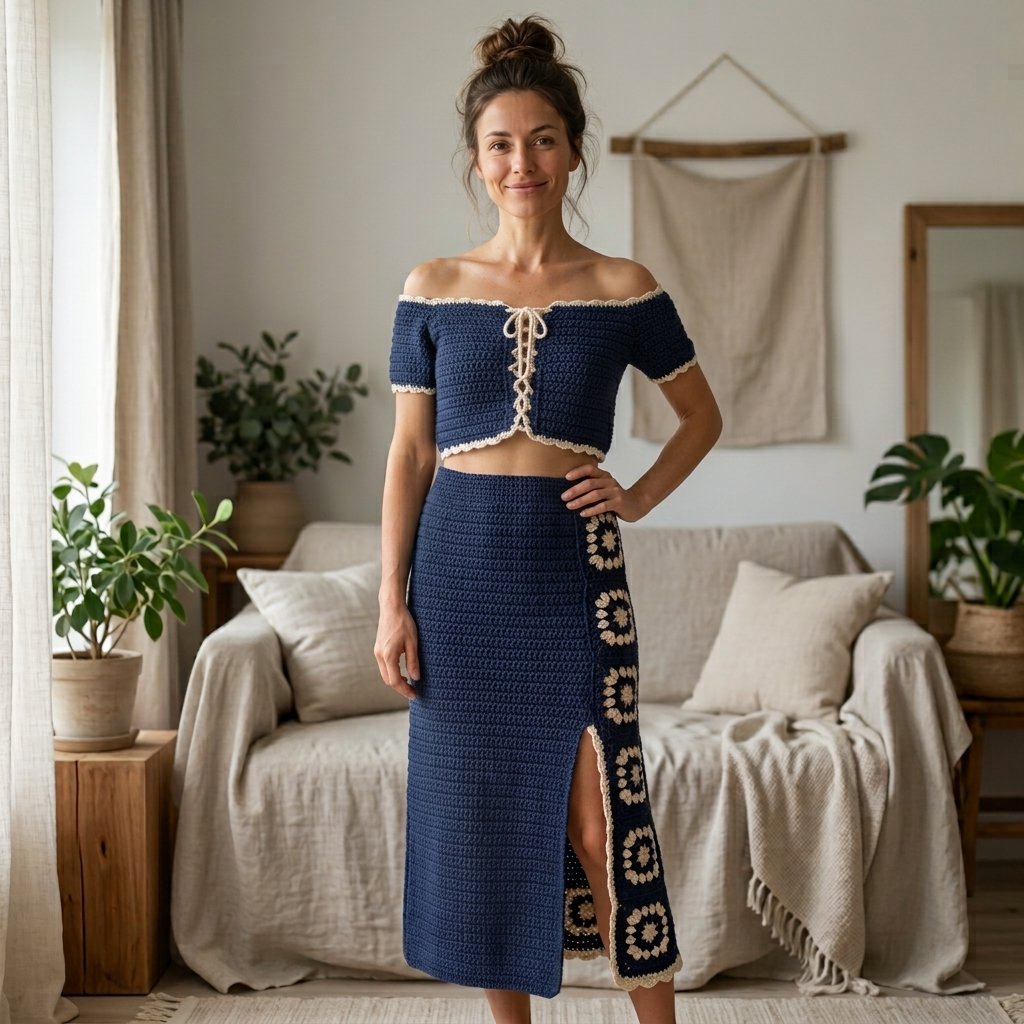
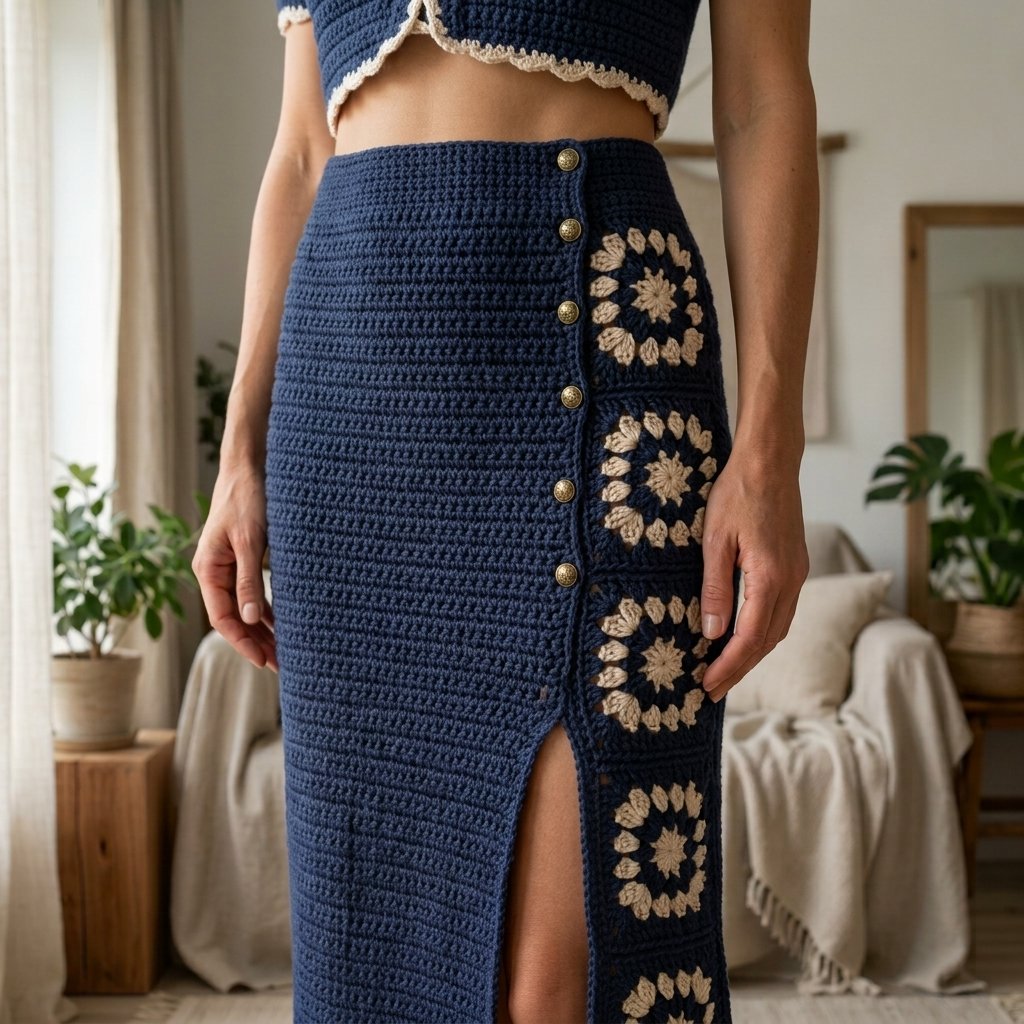
This granny square skirt and top pattern combines cream flower-inspired motifs with navy borders for a coordinated summer outfit. The set includes a cropped tank and a long skirt with an elastic waistband and a side slit.
Each piece begins with the same square. Once you learn the motif, you can work through the squares at your own pace, then join them into two wearable pieces.
This is an intermediate project because garment measurements, joining, and waistband construction need careful attention. The individual motifs use familiar crochet stitches.
Project Details
- Skill Level: Intermediate
- Estimated Time: Approximately 30–45 hours for the sample set
- Sample Top Circumference: Approximately 40 inches
- Sample Top Body Depth: Approximately 10 inches, excluding straps and edging
- Sample Skirt Circumference: Approximately 40 inches
- Sample Skirt Length: Approximately 31–32 inches, including waistband
- Crochet Terminology: US terms
- Construction: Joined floral squares, crocheted shoulder straps, and an elastic waistband
The sample uses 64 squares: 16 for the top and 48 for the skirt.
This original pattern has not been physically tested. Finished measurements, yarn quantities, fit, and garment stretch require sample confirmation.
Materials
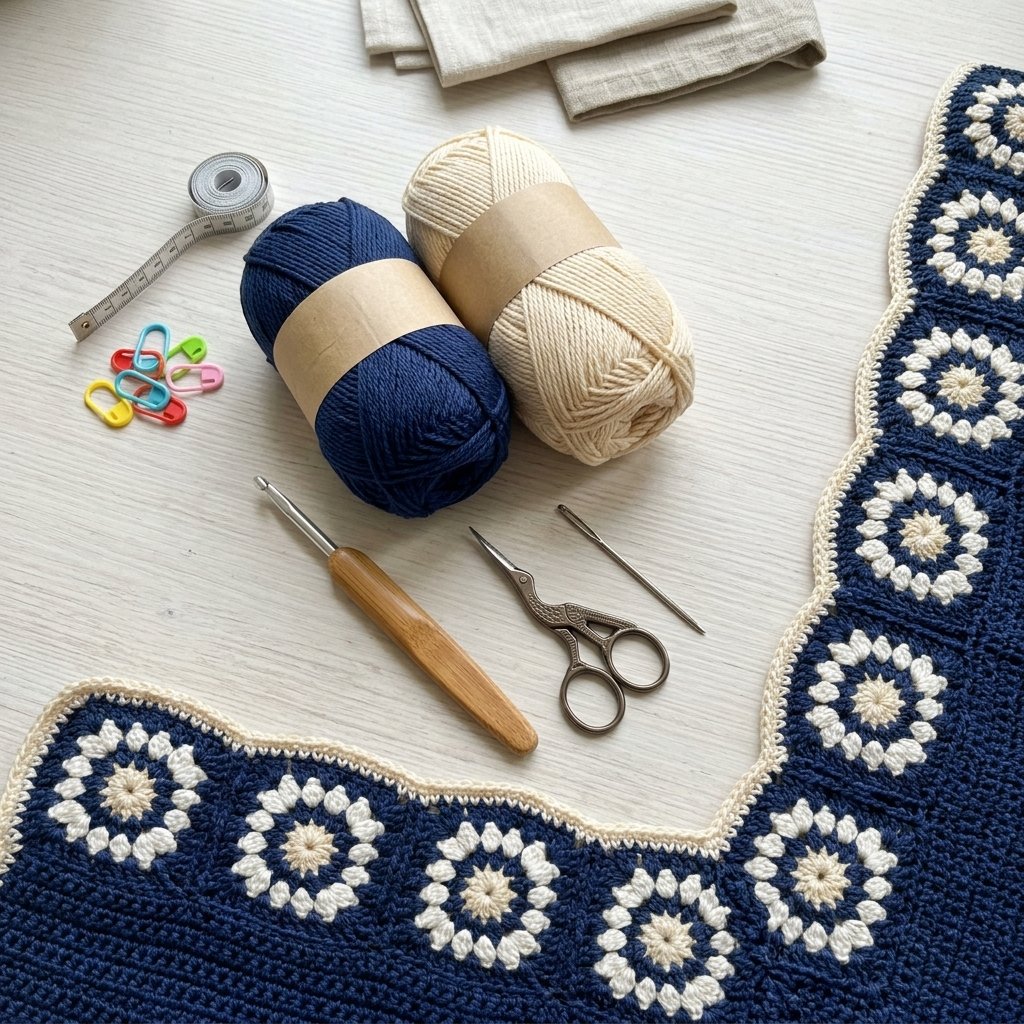
- Light-weight yarn in navy and cream
- 4 mm crochet hook, or size needed for the motif gauge
- Yarn needle
- Scissors
- Measuring tape
- Removable stitch markers
- ¾-inch-wide elastic for the skirt waistband
- Sewing needle and matching sewing thread
- Safety pin for threading the elastic
Choose elastic long enough to fit your waist comfortably, plus approximately 1 inch for overlap.
Remove the safety pin after threading. It is a construction tool, not part of the finished garment.
Hook Size
Start with a 4 mm crochet hook.
Adjust the hook size until your washed and dried square measures approximately 5 inches across.
Use the same hook for the motifs throughout the set. Small differences between squares become more noticeable when many are joined.
Yarn
Use light-weight yarn, category 3, in a smooth cotton-acrylic blend with some resilience.
For the sample set, plan approximately:
- Navy: 1,400–1,800 yards
- Cream: 600–800 yards
- Total: 2,000–2,600 yards
These are preliminary estimates. Yarn use depends on the finished motif size, joining method, and your tension.
Make and weigh one square before purchasing yarn for a larger version. Allow additional navy yarn for seams, straps, edging, and the waistband.
A long crochet skirt can stretch under its own weight. Check how your washed sample fabric hangs before committing to the full garment.
Abbreviations
- ch: chain
- sc: single crochet
- hdc: half double crochet
- dc: double crochet
- sl st: slip stitch
- st(s): stitch(es)
Before You Start
Gauge
Each completed, washed, and dried square should measure:
5 × 5 inches
For the navy finishing fabric, use this starting target:
20 sc stitches and 22 rows = approximately 4 inches
The square measurement determines the garment circumference and length. The single crochet gauge helps you work an even waistband.
Sample Fit
The sample top has a finished circumference of approximately 40 inches. This provides roughly 2–4 inches of ease for a bust measuring 36–38 inches.
The skirt also measures approximately 40 inches around. It should pass comfortably over your hips before the waistband elastic is added.
For the sample, a hip measurement of approximately 38 inches or less leaves some room for movement. Confirm the actual fit rather than relying on a clothing-size label.
The skirt’s length may be midi or maxi depending on the wearer’s height.
Planning a Different Size
Use these relationships:
Garment circumference = number of squares around × finished joined square width
Garment body length = number of square rows × finished joined square height
Choose an even number of squares around the top so the front and back can be divided equally.
At a 5-inch square size:
- 8 squares around produce approximately 40 inches.
- 10 squares around produce approximately 50 inches.
These are large size increments. For a closer fit, you may need to adjust the motif gauge and reswatch rather than simply adding two squares.
Always base the skirt circumference on the hips, not the waist.
Turning Chains
For motif Rounds 1–4, the starting ch 3 counts as one dc.
For sc and hdc rows or rounds, the starting chains do not count as stitches.
Do not turn the motif between rounds.
Joining
Use edge-to-edge whipstitch seams without overlapping the squares.
Make a four-square sample to check the joined measurements. A tight seam can reduce the size and limit stretch.
Granny Square Skirt and Top Pattern: Make the Motifs
Part 1 — Cream Center
With cream yarn, ch 4. Join with a sl st to the first chain to form a ring.
Round 1: Ch 3, then work 11 dc into the ring. Join with a sl st to the top of the starting ch 3. (12 dc)
Round 2: Ch 3 and work 1 dc in the same stitch. Ch 1.
Work (2 dc in the next st, ch 1) 11 times.
Join with a sl st to the top of the starting ch 3. (24 dc and 12 ch-1 spaces)
Fasten off the cream yarn.
The paired stitches form a simple flower-inspired center.
Part 2 — Turn the Center into a Square
Join navy yarn in any ch-1 space.
Round 3:
Ch 3, work 2 dc, ch 2, and work 3 dc in the same space. This forms the first corner.
Work 3 dc in each of the next 2 ch-1 spaces.
Repeat the following sequence 3 times:
- Work (3 dc, ch 2, 3 dc) in the next ch-1 space.
- Work 3 dc in each of the next 2 ch-1 spaces.
Join with a sl st to the top of the starting ch 3.
Count: 48 dc and 4 corner ch-2 spaces.
Do not add chains between the side groups.
Part 3 — Enlarge the Square
Sl st across the next 2 dc and into the corner ch-2 space.
Round 4:
Ch 3, work 2 dc, ch 2, and work 3 dc in the same corner.
Work 3 dc in each of the next 3 gaps between groups along the side.
Repeat the following sequence 3 times:
- Work (3 dc, ch 2, 3 dc) in the next corner.
- Work 3 dc in each of the next 3 gaps between groups.
Join with a sl st to the top of the starting ch 3.
Count: 60 dc and 4 corner ch-2 spaces.
Part 4 — Add the Joining Edge
Round 5: Ch 1. Sc in each dc around, working 3 sc in each corner ch-2 space.
Join with a sl st to the first sc. (72 sc)
Fasten off and weave in the ends.
Mark the middle sc of each three-stitch corner if needed. Each side has 17 stitches between the marked corner stitches.
Part 5 — Check and Repeat
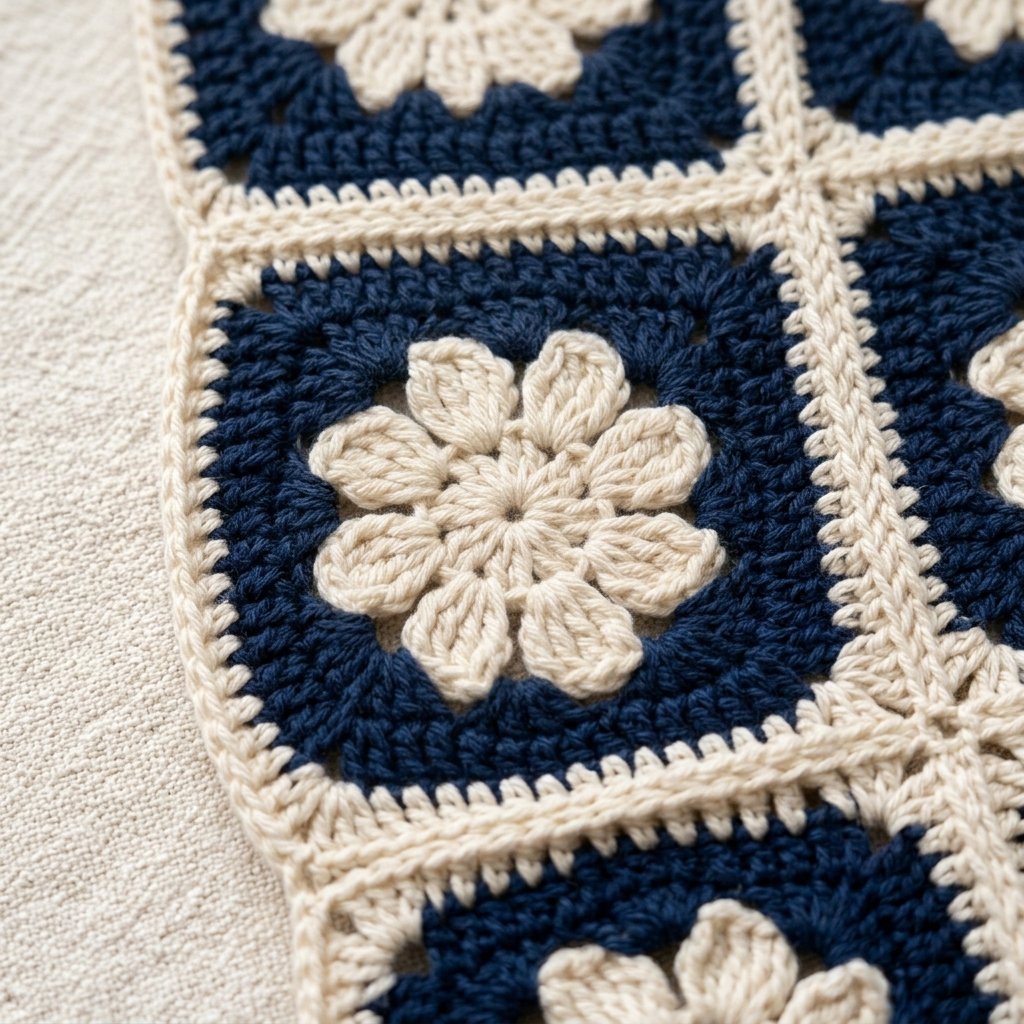
Wash and dry the first square according to the yarn label.
Aim for a relaxed 5-inch square without forcing it into shape.
Once the gauge is established, make:
- 16 squares for the top
- 48 squares for the skirt
Bring the squares to consistent dimensions before joining.
Make the Granny Square Crop Top
Part 1 — Join Two Rows
Arrange 16 squares into a rectangle:
- 8 squares across
- 2 squares high
Keep all right sides facing the same direction.
With navy yarn, whipstitch the neighboring edges together. Match the stitches carefully and keep the seams flexible.
The rectangle should measure approximately 40 inches wide × 10 inches high.
Part 2 — Form the Body

Bring the two short, 10-inch edges together.
Sew them from top to bottom to create a tube. Position this seam at one side of the body.
Divide the tube into a four-square front and a four-square back. Mark both side positions.
Part 3 — Edge the Top and Bottom
Join navy at a side position along the top edge.
Top Edging: Ch 1. Work sc evenly around. Start with approximately 25 sc across each 5-inch square edge, for approximately 200 sc total.
Distribute the stitches across the available edge stitches, occasionally placing 2 sc in one stitch. Count shared seam corners only once.
The edge should lie flat. Adjust the count if it ripples or pulls inward.
Join and fasten off.
Repeat along the bottom edge.
Part 4 — Make the Shoulder Straps
Make two in navy.
Ch 8.
Row 1: Hdc in the third chain from the hook and in each remaining chain. (6 sts)
Row 2: Ch 2 and turn. Hdc in each st across. (6 sts)
Repeat Row 2 until the strap measures approximately 12 inches, or the required length measured over the shoulder between the intended front and back attachment points.
Fasten off, leaving a 12-inch sewing tail at each end.
Make the second strap the same length.
Part 5 — Attach the Straps
Lay the top flat with four squares across the front.
On both front and back, mark points approximately 5 inches inward from each side.
Center each strap end over a marked point. Overlap the end by approximately ½ inch onto the inside of the top.
Sew around the overlapped section and across its center.
Attach the front ends first. Temporarily baste the back ends, try on the top, and adjust the length before sewing them permanently.
The top edge should sit comfortably, and the straps should stay on the shoulders without pulling the body upward.
Make the Granny Square Skirt
Part 1 — Assemble the Main Rectangle
Arrange 48 squares into:
- 8 squares across
- 6 squares high
Join all neighboring edges with navy yarn, keeping the seams flexible.
The rectangle should measure approximately 40 inches wide × 30 inches tall.
Part 2 — Form the Skirt and Side Slit
Bring the two 30-inch edges together.
Sew the seam down from the waist edge for 20 inches, joining the upper four square rows.
Leave the lower two square rows unjoined. This creates an approximately 10-inch side slit.
Secure the end of the seam with several small stitches and weave in the tail.
Try the skirt tube on before adding the waistband. It must pass comfortably over the hips.
For a shorter slit, extend the seam farther toward the hem.
Part 3 — Start the Waistband
Join navy at the waist edge.
Waistband Round 1: Ch 1. Work sc evenly around, starting with approximately 25 sc across each square edge. Join. Approximately 200 sc
The exact count may vary. Record your count and use it for the remaining waistband rounds.
Check that this round does not tighten the hip opening.
Waistband Rounds 2–12: Ch 1. Sc in each st around. Join after each round.
Do not turn.
At the target gauge, the waistband strip should be approximately 2¼ inches tall.
Part 4 — Form the Elastic Casing
Fold the waistband inward so its final round meets the inside of the first waistband round.
The fold creates a casing approximately 1⅛ inches deep.
With navy yarn, sew the final round loosely to the inside base of the waistband. Catch the inner strands without pulling the garment edge tight.
Leave a 2-inch opening near the side seam for inserting elastic.
Part 5 — Insert the Elastic
Wrap the ¾-inch elastic around the wearer’s waist at a comfortable tension. Allow approximately 1 inch for overlap before cutting.
Attach a safety pin to one end and guide it through the casing. Keep hold of the other end so it does not disappear inside.
Check that the elastic is not twisted.
Overlap the ends by 1 inch and sew them securely with sewing thread, using several rows of stitches.
Check the waist fit before closing the casing opening.
Remove the safety pin, distribute the gathers evenly, and sew the opening closed.
Part 6 — Finish the Hem and Slit
Join navy at the bottom of the side seam, where the slit begins.
Work sc evenly:
- Down one slit edge.
- Around the skirt hem.
- Up the other slit edge.
Use approximately 25 sc per 5-inch square edge as a starting guide. Work 3 sc at each lower slit corner to turn smoothly.
Join at the starting point and fasten off.
Adjust the stitch distribution to prevent puckering or flaring.
Finishing
Weave in all remaining ends and inspect every seam.
Check the strap attachments, the top of the slit, and the elastic join.
Wash according to the yarn label and dry flat. Avoid hanging the wet skirt, which can stretch under its weight.
After drying, let the garment hang briefly and measure it again. Recheck the skirt length and strap fit before wearing.
The motifs have open spaces. Wear a separate slip or suitable underlayer if you want more coverage; this pattern does not include a sewn lining.
Finished Size
At a joined motif size of approximately 5 inches:
- Top circumference: 40 inches (102 cm)
- Top body depth: 10 inches (25 cm), excluding edging
- Strap length: Approximately 12 inches (30 cm) before attachment; adjust to fit
- Skirt circumference: 40 inches (102 cm)
- Skirt length: Approximately 31–32 inches (79–81 cm)
- Side slit: Approximately 10 inches (25 cm)
- Waist: Adjusted with elastic
These are sample dimensions, not a graded size chart.
Tips & Customization
Try a Different Palette
Cream flowers with navy borders create a classic contrast. Sage and ivory, brown and butter yellow, or black and blush also work well.
Make a Midi Skirt
Use five rows of squares instead of six.
For an eight-square circumference, that requires 40 skirt squares. Join the upper four rows at the side, leaving the lowest row open for a shorter slit if desired.
Make a Longer Top
Add another row of eight squares for a body approximately 15 inches deep. Recheck strap placement and overall fit.
Keep the Seams Comfortable
Loose, even whipstitches allow the squares to move together. Tight joins can create stiff ridges and reduce the finished size.
Record Your Yarn Use
Weigh a completed motif and note how much yarn remains after joining and finishing. Those measurements are more useful than estimates when planning another set.
Frequently Asked Questions
Can a beginner make this set?
The squares are approachable, but the complete outfit requires garment-fitting and finishing skills. Practice the motif and a joined sample first.
Can I use thicker yarn?
Thicker yarn changes motif size, garment weight, and drape. It requires a new gauge sample and new size calculations.
Is the skirt fully opaque?
No. The motif spaces remain open. Choose a separate underlayer if you prefer more coverage.
Can I make the top without straps?
This design relies on shoulder straps. Removing them would require a different fit and support system.
Save this pattern to your crochet Pinterest board so you can return to the motif and assembly instructions.
Looking for Your Next Crochet Project?
Enjoy creating coordinated handmade pieces? Explore Cute Stitch Studio’s premium crochet patterns for more wearable projects, thoughtful gifts, and cute accessories.