Free Crochet Shorts Pattern with a Ribbed Drawstring Waist
This free crochet shorts pattern combines pink, raspberry, and cream stripes with a soft ribbed waistband. The short length and adjustable drawstring make a cheerful handmade piece for relaxed summer outfits.
You will crochet the waistband first, add the body in joined rounds, and divide it into two leg openings. This is a manageable first garment for crocheters who already feel comfortable with basic stitches and checking gauge.
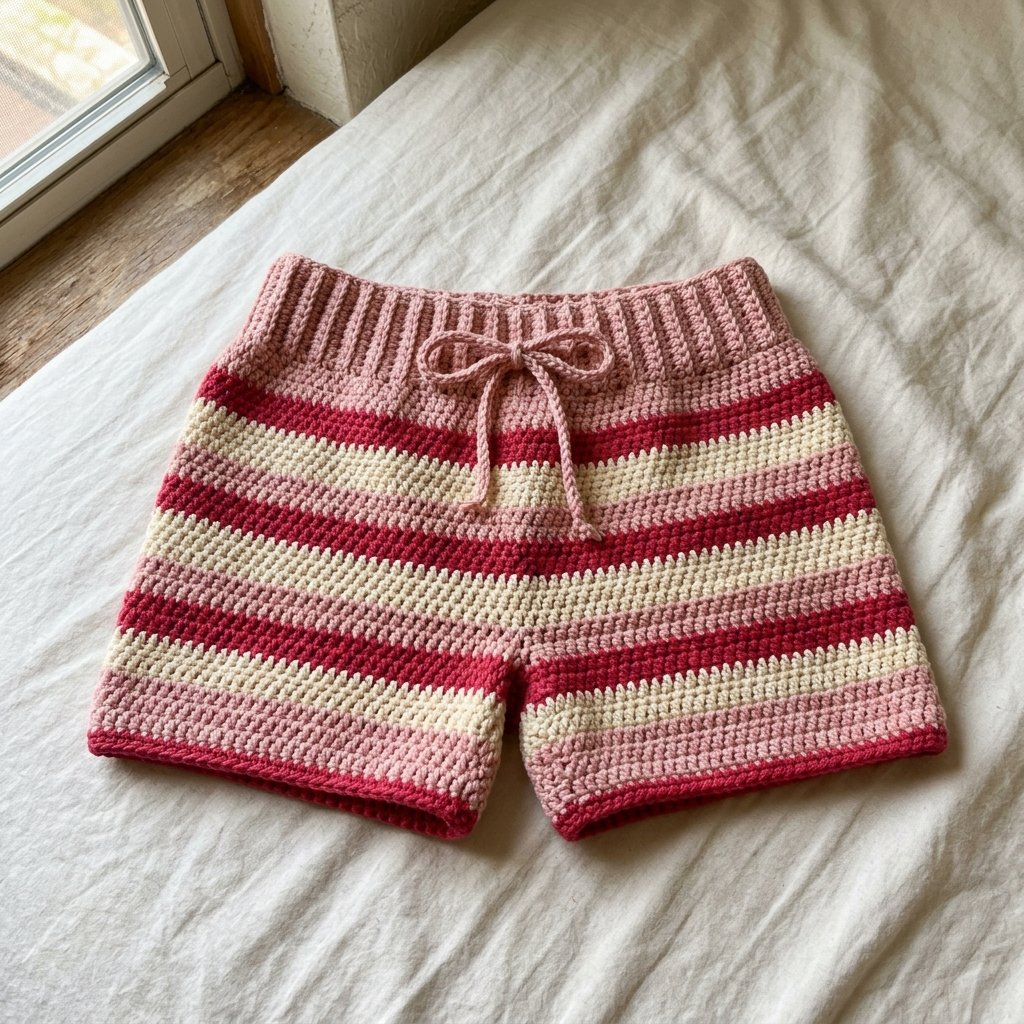
Project Details
- Skill level: Adventurous beginner.
- Estimated time: Approximately 10–16 hours, depending on experience.
- Sample size: One adult size, with approximately 40 inches of finished hip circumference.
- Suggested body measurements: Approximately 36–38 inches around the fullest hip, subject to the thigh and rise checks below.
- Finished upper thigh circumference: Approximately 22 inches per leg.
- Finished inseam: Approximately 2 inches.
- Crochet terminology: US terms.
- Construction: A ribbed waistband joined into a ring, followed by a top-down body and two short legs.
This is an original, untested pattern draft. Measurements and yarn quantities are estimates based on the stated gauge; check your work against your own measurements as you go.
Materials for This Crochet Shorts Pattern
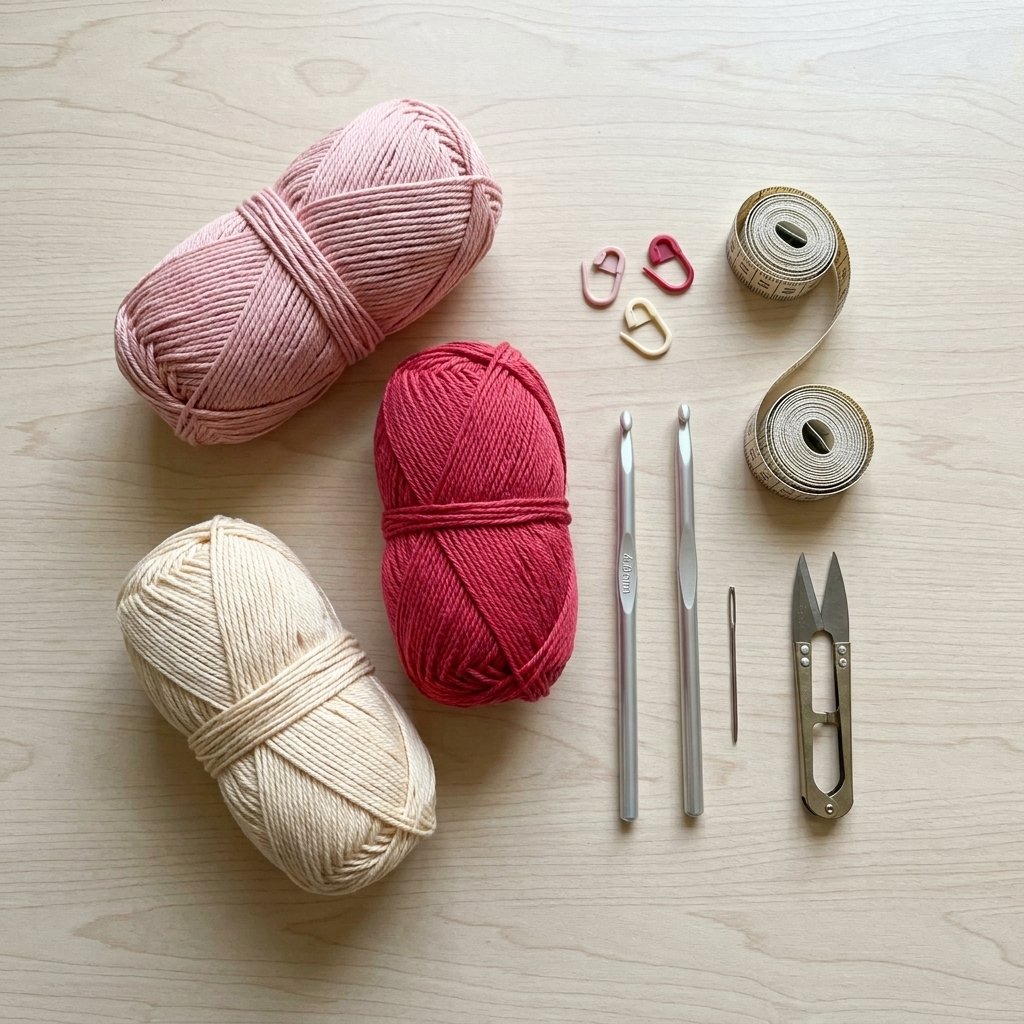
- Category 3, light/DK-weight yarn in three colors.
- 4 mm crochet hook, or the size needed to meet gauge.
- Yarn needle.
- Scissors.
- Measuring tape.
- Three removable stitch markers.
No elastic, buttons, or zipper are needed.
Hook Size
Start with a 4 mm crochet hook.
Your gauge matters more than the hook size printed here. Change hook size if your swatch does not match the measurements below.
Yarn
Choose a smooth category 3, light/DK-weight yarn that produces a soft, flexible fabric.
A cotton-acrylic blend is a practical starting point. Use the same yarn range and weight for all three colors so the stripes behave consistently.
For the sample, allow approximately 700–900 yards total:
- Color A — blush pink: 400–500 yards.
- Color B — raspberry red: 200–250 yards.
- Color C — warm cream: 100–150 yards.
These amounts include the waistband and drawstring. Larger measurements or additional length require more yarn.
Abbreviations
- ch: chain.
- sc: single crochet.
- hdc: half double crochet.
- sl st: slip stitch.
- st / sts: stitch / stitches.
- BLO: back loop only.
Half double crochet: Yarn over, insert your hook into the stitch, yarn over and pull up a loop. Yarn over and pull through all three loops on the hook.
Back loop only: Work into the loop farther away from you at the top of the stitch.
Before You Start
Gauge
After washing and drying your swatch according to the yarn label:
- Body fabric: 16 hdc and 12 rounds = 4 inches.
- Waistband ribbing: 20 sc and 20 rows = 4 inches, measured relaxed.
Check the ribbing separately. Its row gauge determines the length of the waistband.
Make the body swatch in joined rounds if possible, since that is how the shorts are worked.
Fit and Measurements
Measure:
- Your fullest hip circumference.
- Your upper thigh circumference.
- The distance from your chosen waistband position down to the crotch.
The sample body measures approximately 40 inches around. It is intended to provide roughly 2–4 inches of room at the hip.
Each finished leg opening measures approximately 22 inches before edging. Check this separately; hip measurements alone do not determine whether shorts will fit.
The waistband is made wide enough to pull over your hips, then gathered with a drawstring. It is not designed as a tight elastic waistband.
Turning Chains and Joins
- The ch 1 at the beginning of waistband rows does not count as a stitch.
- The ch 2 at the beginning of body and leg rounds does not count as a stitch.
- Work the first hdc into the same stitch as the joining sl st.
- Join each round with a sl st to the first hdc.
- Do not turn after body or leg rounds.
- Do not work into the joining sl st or beginning chains.
Stripe Sequence
For the body, repeat:
- Two rounds in Color A.
- One round in Color B.
- One round in Color C.
Change colors on the final pull-through of the joining sl st before the next round. Cut the previous color, leaving an end long enough to weave in.
For each leg, start the same stripe sequence again so the two legs match.
Crochet Shorts Pattern: Step-by-Step Instructions
Part 1 — Ribbed Waistband

Using Color A, ch 9.
Row 1: Sc in the second ch from the hook and each remaining ch. Turn. (8 sts)
Row 2: Ch 1, sc BLO in each st across. Turn. (8 sts)
Rows 3–200: Repeat Row 2. (8 sts per row)
At the specified gauge, your strip should measure approximately 40 inches long and 1½–1¾ inches wide, without stretching.
Before joining, wrap the strip around your fullest hips. The ends should meet comfortably. If they do not, adjust the strip length before continuing.
Bring the first and last short edges together without twisting the strip. Sew the eight stitches of one short edge to the corresponding stitches of the other edge.
Turn the seam to the inside.
Part 2 — Work Around the Waistband
You will crochet into the row ends along one long edge of the waistband.
Mark the waistband seam as center back. The opposite point is center front.
Join Color A at center back.
Body Round 1: Ch 2. Work 1 hdc into each of the next four row ends, then skip the next row end. Repeat this sequence around the entire waistband. Join. (160 sts)
You are working four stitches across every five waistband rows: 200 row ends become 160 hdc.
Spread the stitches evenly and check that the waistband attachment lies smoothly.
Part 3 — Striped Body
Round 2: Using Color A, ch 2, hdc in each st around. Join. (160 sts)
Round 3: Using Color B, ch 2, hdc in each st around. Join. (160 sts)
Round 4: Using Color C, ch 2, hdc in each st around. Join. (160 sts)
Rounds 5–20: Repeat the four-round stripe sequence four times, working 1 hdc in every st. (160 sts per round)
Rounds 21–22: Using Color A, ch 2, hdc in each st around. Join. (160 sts per round)
The body below the waistband should now measure approximately 7⅓ inches.
The total distance from the top of the waistband to the upcoming leg division is approximately 9 inches.
Check the Rise Before Dividing
Try the body on over close-fitting clothing. Position the waistband where you intend to wear it.
The lower edge should reach the crotch comfortably. Add or remove plain hdc rounds if necessary, keeping 160 stitches in every round.
This design uses the same rise at the front and back. If the back waistband pulls down when sitting, the sample shaping does not provide enough back rise for your fit; do not try to fix that by tightening the drawstring.
Part 4 — Divide for the Legs
Keep the beginning of the round at center back.
Count the body stitches from that point:
- Place one marker in stitch 1.
- Place another marker in stitch 81.
The two marked points are opposite each other.
Fasten off Color A after the final body round.
Join Color A at the center-back boundary, immediately before stitch 1. Ch 8, skip stitches 1–80, and sl st into stitch 81.
This chain bridge runs between the back and front of the shorts and creates the crotch.
Check the fit before proceeding. The bridge should sit comfortably between the legs without pulling the body downward.
Part 5 — First Leg
Leg Round 1: Ch 2. Hdc in stitch 81, then hdc in each remaining body stitch through stitch 160. Work 1 hdc into each of the 8 bridge chains. Join to the first hdc. (88 sts)
The count is:
- 80 body stitches.
- 8 chain stitches.
- 88 stitches total.
Round 2: Using Color A, ch 2, hdc around. Join. (88 sts)
Round 3: Using Color B, ch 2, hdc around. Join. (88 sts)
Round 4: Using Color C, ch 2, hdc around. Join. (88 sts)
Rounds 5–6: Using Color A, ch 2, hdc around. Join. (88 sts per round)
Edging Round: Using Color B, ch 1, sc in each st around. Join to the first sc. (88 sts)
Fasten off.
Part 6 — Second Leg

Join Color A in body stitch 1.
Leg Round 1: Ch 2. Hdc in stitches 1–80. Work 1 hdc into the unused underside of each of the 8 crotch chains. Join. (88 sts)
Work Rounds 2–6 and the Edging Round exactly as for the first leg.
Fasten off.
Both legs share the same chain bridge. There is no separate crotch panel to sew in.
If a small gap remains at either end of the bridge, close it with a yarn tail and a few careful stitches.
Part 7 — Drawstring
Using Color A, make a chain approximately 55–60 inches long.
Sl st in the second ch from the hook and in each remaining ch. Fasten off and weave in both ends.
Place markers approximately 1 inch apart on either side of center front.
Using a yarn needle, thread the cord through the spaces between stitches around the middle of the ribbed waistband. Pass over and under approximately two rows of ribbing at a time.
Begin at one front marker, travel around the waistband, and exit at the other marker.
Adjust until both ends are even. Try on the shorts and tie a bow with enough room for comfortable movement.
Finishing
Weave in every yarn end on the inside, changing direction as you work so the ends stay secure.
Check the waistband seam and crotch corners for gaps.
Wash according to the yarn label and lay the shorts flat to dry. Gently arrange both legs to the same length without stretching the waistband or openings.
Once dry, check the fit again and adjust the drawstring.
Finished Size

At the stated gauge, the sample measures approximately:
| Measurement | Finished size |
|---|---|
| Hip circumference | 40 inches |
| Waistband circumference before gathering | 40 inches |
| Waistband depth | 1½–1¾ inches |
| Upper leg circumference | 22 inches per leg |
| Top of waistband to leg division | 9 inches |
| Inseam before edging | 2 inches |
| Total side length, including edging | 11–11½ inches |
Measurements are approximate. Yarn choice, washing, and individual tension affect the finished fabric.
Tips and Customization
Adjust the Hip Circumference
At the stated gauge, every inch of body circumference requires four hdc.
Choose a finished circumference that provides approximately 2–4 inches of room beyond your fullest hip measurement.
For this waistband pickup method:
- Add 20 waistband rows to add approximately 4 inches of circumference.
- Add 16 body stitches for those extra 20 rows.
For example, a 44-inch version begins with 220 waistband rows and has 176 body stitches.
Split the body into two equal halves before making the crotch bridge. With 176 body stitches and an 8-chain bridge, each leg has 96 stitches, or approximately 24 inches of circumference.
These are adjustment calculations, not separately tested sizes. Check hip, thigh, and rise measurements together.
Adjust the Thigh Opening
Each leg contains half the body stitches plus the crotch-chain stitches.
For the sample:
80 + 8 = 88 stitches = approximately 22 inches.
At this gauge, adding two crotch chains adds approximately ½ inch to each leg circumference. It also widens the crotch bridge, so make only small changes and check the fit before crocheting the legs.
Make the Legs Longer
Add matching hdc rounds to both legs before the edging.
At the stated gauge, three extra rounds add approximately 1 inch of length.
Change the Colors
Try peach, rust, and cream for a softer palette, or navy, sky blue, and white for a coastal look.
Keep the same yarn weight and fiber blend across the stripes.
Check Fabric Coverage
Hold your washed swatch up to the light before starting. Crochet has spaces between stitches, especially when stretched.
If you prefer more coverage, wear the finished shorts over fitted shorts or a swimsuit.
Frequently Asked Questions
Are these crochet shorts suitable for beginners?
They are best for crocheters who already know single crochet, half double crochet, and slip stitch. The garment uses basic stitches, but measuring gauge and checking fit are essential.
Can I make these shorts without elastic?
Yes. The waistband is wide enough to pass over the hips, and the drawstring gathers it to fit.
Can I use a thicker yarn?
A thicker yarn will change the measurements and fabric. To follow the stitch counts as written, use yarn that meets the stated gauge.
Are these high-waisted shorts?
The sample has an approximately 9-inch rise and is intended for a relatively low-to-mid-rise fit, depending on your body measurements. Adjust the body depth before dividing for the legs.
Save this striped crochet shorts pattern to your summer crochet board so you can find it when you are ready to start.
Looking for Your Next Crochet Project?
Enjoyed making your own striped shorts? Explore Cute Stitch Studio’s premium crochet patterns for more cute, wearable, and gift-worthy handmade projects.