Crochet Witch Hat with Curled Tip: Free Halloween Pattern
This crochet witch hat with curled tip combines a tall purple cone, a little black spiral at the top, and a soft black brim. It is a playful accessory for Halloween costumes, autumn photos, and fantasy-inspired outfits.
The hat is worked from the point downward using single crochet stitches. Gradual increases shape the cone, while a wider increase pattern gives the brim its gentle waves.
This original Cute Stitch Studio version is suitable for confident beginners who can work in continuous rounds and count stitches. The curled point is shaped with a few sewing stitches, so no wire or stuffing is needed.

Table of Contents
Crochet Witch Hat With Curled Tip: Free Halloween Pattern Instructions
Why You’ll Love This Crochet Witch Hat With Curled Tip: Free Halloween Pattern
- Clear step-by-step sections make the project easier to follow.
- Materials, sizing, finishing, and customization notes are easy to find.
- The pattern includes practical tips for a neat handmade result.
Project Details
- Skill level: Confident beginner.
- Estimated time: Approximately 8–12 hours.
- Size: One adult size, with measurement-based adjustment notes.
- Finished opening: Approximately 22.25 inches around at the stated gauge.
- Cone length: Approximately 11.5 inches before curling the tip.
- Brim depth: Approximately 3 inches.
- Crochet terminology: US terms.
- Construction: Continuous rounds from the point to the brim, followed by sewing the tip into a curl.
This is an original, untested pattern draft. Stitch counts have been reviewed, but gauge, fit, and finished shape require a physical sample.
Materials
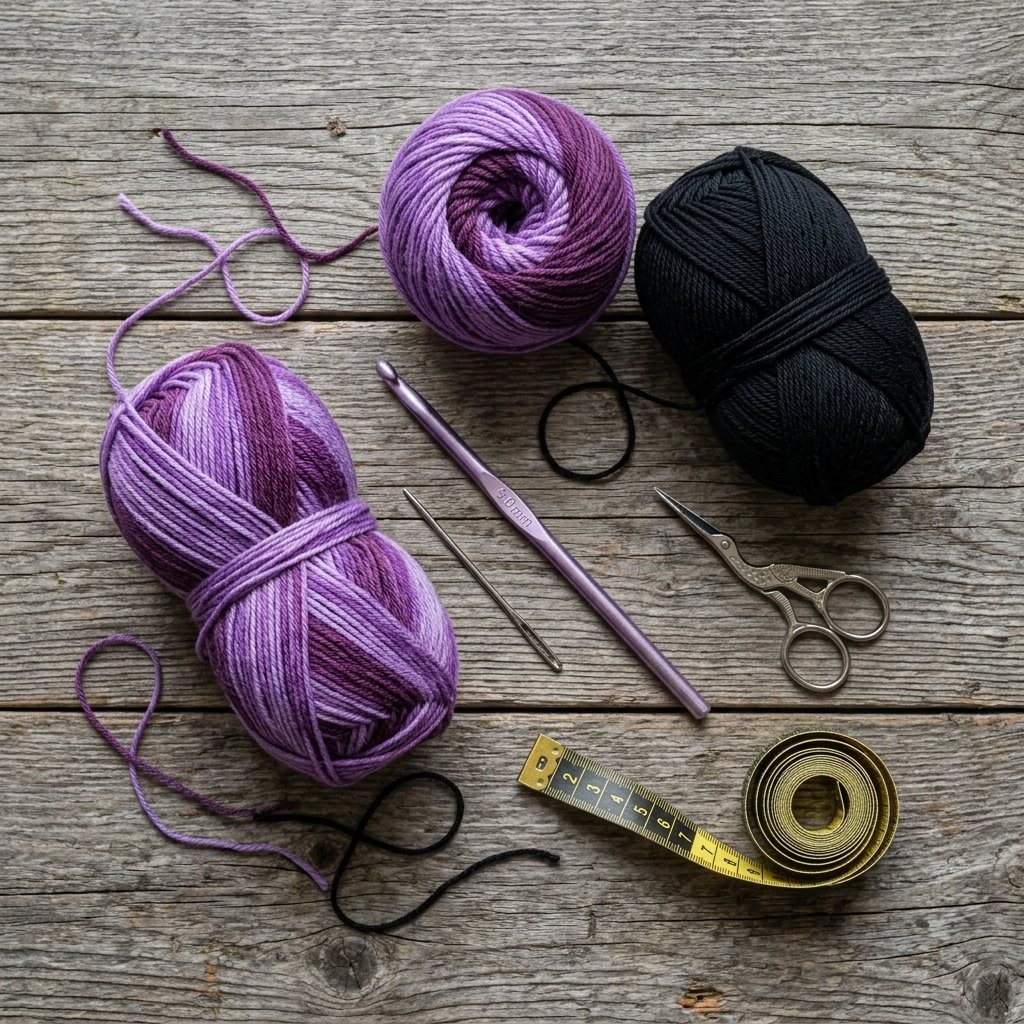
- Worsted-weight yarn in purple or a purple gradient: approximately 180–230 yards.
- Matching-weight black yarn: approximately 160–210 yards.
- 4.5 mm crochet hook, or size needed for gauge.
- Tapestry needle.
- Scissors.
- Removable stitch marker.
- Measuring tape.
Keep approximately 24 inches of black yarn available for shaping and securing the curled tip.
Hook Size
Start with a 4.5 mm crochet hook.
The fabric should feel flexible but fairly compact. A very loose fabric will make the cone collapse more easily, while an overly tight fabric can feel stiff and reduce the head opening.
If your swatch has more stitches per inch than the target, try a larger hook. If it has fewer, try a smaller hook.
Yarn
Use worsted-weight, category 4 yarn. A smooth acrylic or wool-acrylic blend is a practical starting point for this soft costume hat.
Choose black for the point and brim. For the cone, use a purple gradient yarn that moves between lilac, violet, and plum, or work the entire cone in one favorite purple.
Use yarns of similar thickness and texture. A much heavier black yarn can pull the brim downward and change the proportions.
The exact position of gradient colors depends on the yarn’s color repeat. Your stripes or shaded sections will not necessarily appear in the same places as the inspiration image.
Gauge
14 sc and 16 rounds = 4 inches, measured in relaxed single crochet fabric.
Make a swatch large enough to measure away from its edges. Wash and dry it according to the yarn label before checking the gauge.
Both measurements matter. Stitch gauge determines the head opening, while round gauge determines the height of the cone and depth of the brim.
Size and Fit
The standard cone finishes with 78 stitches. At 14 stitches per 4 inches, this creates an opening approximately 22.25 inches around.
This is a starting point for a head measuring approximately 22.5–23 inches if your fabric stretches comfortably. Measure around the head where the hat will sit, and compare that measurement with your actual fabric.
Try on the cone before beginning the brim. The opening should feel secure without needing to be stretched firmly into place.
A small size adjustment is included below. For a substantially different head size, recalculate the opening from your gauge rather than relying on an age label.
Abbreviations
- ch: chain
- sc: single crochet
- sl st: slip stitch
- st(s): stitch(es)
- inc: work 2 sc in the same stitch
- BLO: back loop only
Before You Start
- Work in a continuous spiral. Do not join or turn unless instructed.
- Place a marker in the first stitch of each round and move it upward as you work.
- The beginning chain does not count as a stitch.
- Work through both loops except for the first brim round.
- The cone increases by six stitches on each increase round.
- The brim uses a different increase arrangement to create a soft, gently wavy shape.
- Do not stuff the point or cone.
- Check the fit before changing to the brim.
How to Make a Crochet Witch Hat with Curled Tip
Part 1 — Black Tip
With black yarn, ch 2.
Round 1: Work 6 sc in the second ch from the hook. Place the marker in the first sc. (6 sts)
Rounds 2–8: Sc in each st around. (6 sts each round)
You now have a narrow, unstuffed tube approximately 2 inches long at the target round gauge.
Do not curl it yet. Working the rest of the cone first makes it easier to decide how the finished point should sit.
On the last stitch of Round 8, make the final yarn-over with purple. Cut black, leaving a tail to weave in later.
Part 2 — Purple Cone
Continue with purple. Each increase round contains six evenly repeated sections.
| Round | Instructions | Stitch Count |
|---|---|---|
| 9 | Inc in each st around. | 12 |
| 10–11 | Sc in each st around. | 12 |
| 12 | Repeat [sc in next st, inc] 6 times. | 18 |
| 13–14 | Sc in each st around. | 18 |
| 15 | Repeat [sc in next 2 sts, inc] 6 times. | 24 |
| 16–17 | Sc in each st around. | 24 |
| 18 | Repeat [sc in next 3 sts, inc] 6 times. | 30 |
| 19–20 | Sc in each st around. | 30 |
| 21 | Repeat [sc in next 4 sts, inc] 6 times. | 36 |
| 22–23 | Sc in each st around. | 36 |
| 24 | Repeat [sc in next 5 sts, inc] 6 times. | 42 |
| 25–26 | Sc in each st around. | 42 |
| 27 | Repeat [sc in next 6 sts, inc] 6 times. | 48 |
| 28–29 | Sc in each st around. | 48 |
| 30 | Repeat [sc in next 7 sts, inc] 6 times. | 54 |
| 31–32 | Sc in each st around. | 54 |
| 33 | Repeat [sc in next 8 sts, inc] 6 times. | 60 |
| 34–35 | Sc in each st around. | 60 |
| 36 | Repeat [sc in next 9 sts, inc] 6 times. | 66 |
| 37–38 | Sc in each st around. | 66 |
| 39 | Repeat [sc in next 10 sts, inc] 6 times. | 72 |
| 40–41 | Sc in each st around. | 72 |
| 42 | Repeat [sc in next 11 sts, inc] 6 times. | 78 |
| 43–46 | Sc in each st around. | 78 |
Check the stitch count after every increase round. If the count is incorrect, fix that round before continuing.
The cone should widen gradually from the slim black point to the purple opening. Its soft fabric may lean or bend slightly; it is not intended to behave like a rigid costume hat.
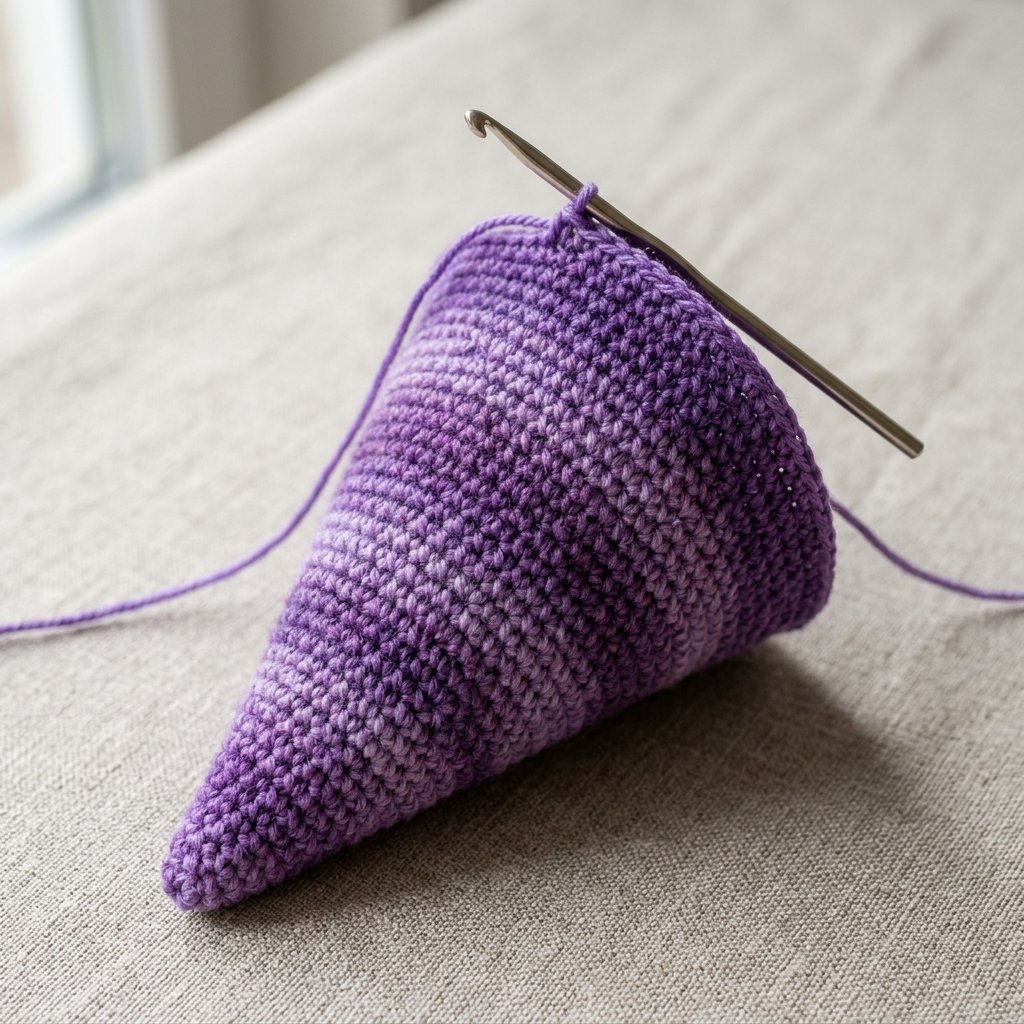
Part 3 — Check the Opening
Try on the cone or measure its lower circumference without stretching.
If it fits comfortably, continue to the brim. If the opening is only slightly too small or large, use the adjustment notes near the end of this pattern before proceeding.
On the final stitch of the last cone round, make the final yarn-over with black. Cut purple and leave a tail for weaving in.
Part 4 — Black Wavy Brim
Restart the round numbering for the brim. These instructions begin with the standard 78-stitch opening.
Brim Round 1: Working in BLO, repeat [sc in the next 5 sts, inc] 13 times. (91 sts)
Brim Round 2: Working through both loops again, repeat [sc in the next 6 sts, inc] 13 times. (104 sts)
Brim Round 3: Sc in each st around. (104 sts)
Brim Round 4: Repeat [sc in the next 7 sts, inc] 13 times. (117 sts)
Brim Round 5: Sc in each st around. (117 sts)
Brim Round 6: Repeat [sc in the next 8 sts, inc] 13 times. (130 sts)
Brim Round 7: Sc in each st around. (130 sts)
Brim Round 8: Repeat [sc in the next 9 sts, inc] 13 times. (143 sts)
Brim Round 9: Sc in each st around. (143 sts)
Brim Round 10: Repeat [sc in the next 10 sts, inc] 13 times. (156 sts)
Brim Rounds 11–12: Sc in each st around. (156 sts each round)
Sl st in the next 2 sts to soften the final step in the spiral. Fasten off and weave in the tail.
The brim is intended to have gentle movement rather than lie completely flat. Its exact waves will depend on yarn firmness and tension.
Part 5 — Shape the Curled Tip
Flatten the narrow black tip gently between your fingers.
Roll its closed end inward into a small spiral, working toward the purple section. Leave a little space in the curl so it looks like a curved point rather than a tight knot.
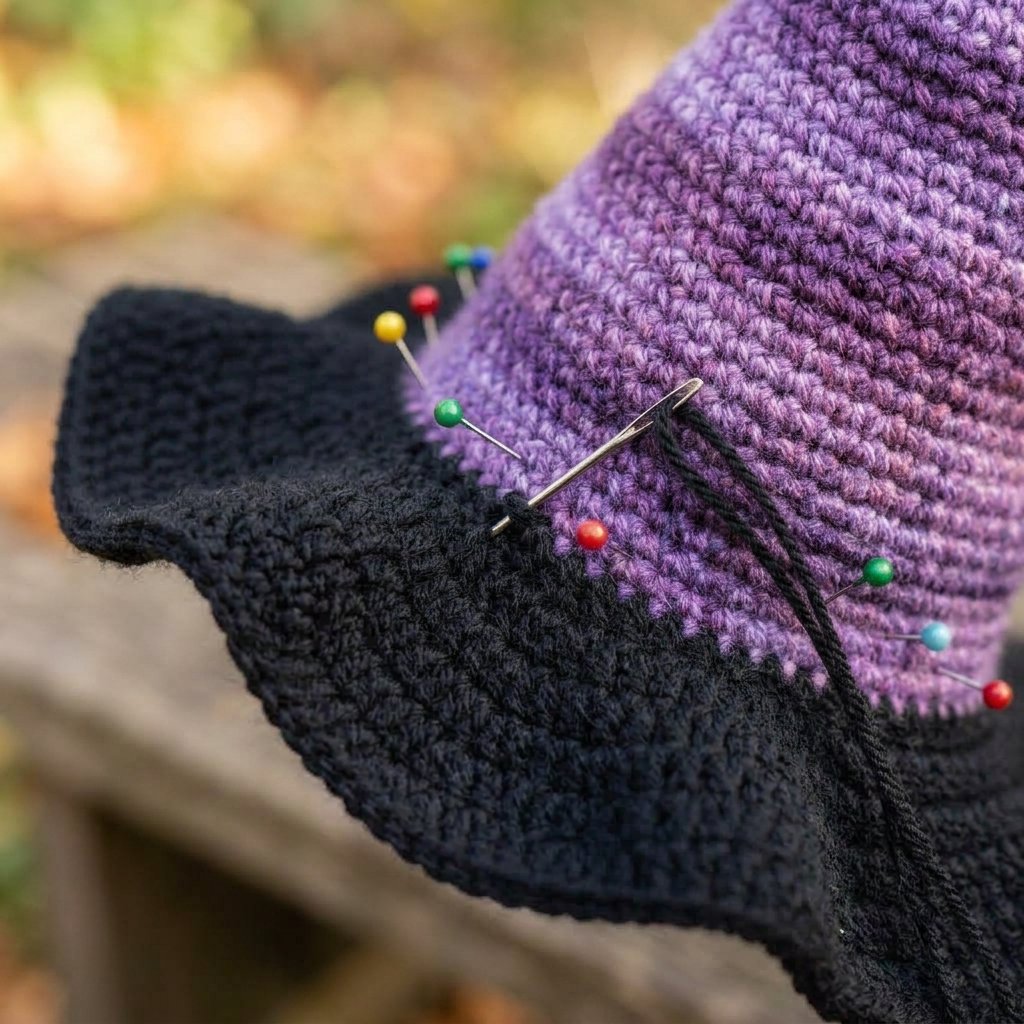
Thread approximately 24 inches of black yarn onto the tapestry needle. Secure it through several stitches on the underside of the black tube.
At two or three places where the curled sections touch, sew through neighboring crochet stitches to hold the spiral together. Keep the sewing on the less visible side.
Pass through each attachment point more than once, then weave in the remaining yarn. Avoid pulling so tightly that the tube becomes pinched.
If the curl flops away from the cone, add one small tack between its base and the uppermost purple stitches. The point should remain soft.
Tips for the Best Crochet Result
Keep your tension consistent throughout this crochet witch hat with curled tip: free halloween pattern. Small tension changes can affect the finished size, shaping, and how neatly the pieces line up during assembly.
Pause at the end of important sections to compare your stitch count with the pattern. Correcting a missed increase or decrease early is much easier than adjusting the finished piece later.
When you reach the finishing stage, take a little extra time with seams, shaping, and yarn ends. These small details can make the finished crochet project look cleaner and more polished.
Finishing and Shaping
Weave in the color-change tails on the inside of the hat. Reverse direction through several stitches before trimming.
Gently shape the brim with your hands. Lift the front edge slightly if it falls too close to the eyes, and let the sides form loose waves.
If the fabric needs damp shaping, follow the yarn label’s care instructions. Support the cone loosely with a clean towel while it dries, without stretching the opening. Remove the towel before wearing.
Avoid pressing the curled point flat. There is no need to add wire, stuffing, or a rigid insert to this version.

Finished Size
- Opening circumference: Approximately 22.25 inches (56.5 cm).
- Cone length before curling: Approximately 11.5 inches (29 cm), measured along the fabric from point to brim.
- Brim depth: Approximately 3 inches (7.5 cm).
- Displayed height: Varies with the curl and natural lean of the cone.
The head opening is the most important measurement. Confirm its fit before relying on the other target dimensions.
Tips and Customization
Make a Slightly Smaller Opening
For a 72-stitch opening, complete the cone through Round 41, then work 4 additional plain rounds at 72 stitches.
This produces an opening approximately 20.5 inches around at the stated gauge. Check that measurement against the intended wearer.
Work the brim using the same repeat instructions, but repeat each increase group 12 times instead of 13. The brim counts become 84, 96, 96, 108, 108, 120, 120, 132, 132, 144, 144, and 144.
Make a Slightly Larger Opening
After standard cone Round 46, work [sc in the next 12 sts, inc] 6 times. (84 sts)
Work 2 plain rounds at 84 stitches. This produces an opening approximately 24 inches around at the stated gauge.
Work the brim using the same repeat instructions, but repeat each increase group 14 times instead of 13. The brim counts become 98, 112, 112, 126, 126, 140, 140, 154, 154, 168, 168, and 168.
These adjustments also change the cone length slightly. Recheck the fit and silhouette before finishing.
Use Solid Purple
A single shade of plum or violet makes the construction especially easy to see. Keep the black tip and brim for contrast.
Create Your Own Purple Stripes
Use two or three purple shades and change colors at the end of a round by completing the last stitch with the new color. Weave in the tails inside the cone.
Because the hat is worked in a spiral, color changes may create a small visible step. Position that area toward the back.
Choose a Shorter Brim
For less coverage, stop after Brim Round 9. Finish with the same two slip stitches and weave in the tail.
Try on the hat before deciding. A shorter brim is lighter and may stay out of the face more easily.
Frequently Asked Questions
Does the cone stand completely upright?
Not necessarily. This is a soft crochet hat with a whimsical, slightly floppy shape. Firm yarn and matching gauge help the cone hold its outline, but it may lean.
Do I need wire for the curled tip?
No. The narrow black tube is rolled and sewn into a curl. The sewing stitches maintain its shape.
Why is my brim too ruffled?
First check the stitch counts. Extra increases can create much more fullness than intended. A loose gauge or very soft yarn can also produce deeper waves.
Why is my cone getting wider too quickly?
Only the listed increase rounds add stitches. Each cone increase round adds exactly six stitches; the rounds between them are plain single crochet.
Can I use chunky yarn?
Chunky yarn will change the opening, height, and weight substantially. Use the stated yarn weight for this version, or recalculate the pattern from a new gauge swatch.
How should I store the hat?
Store it loosely folded or resting on its side, without crushing the spiral. Reshape the brim gently before wearing.
Save This Pattern for Later
Save this crochet witch hat with curled tip to your Halloween crochet or costume board on Pinterest. Keep the cone and brim tables handy so you can check off rounds as you work.
Project Checklist
- Confirm your yarn weight, hook size, and gauge before beginning.
- Read through the full Crochet Witch Hat With Curled Tip: Free Halloween Pattern instructions once before you start.
- Check stitch counts at the end of each row or round before continuing.
- Review the finishing and sizing notes before weaving in the final ends.
Looking for Your Next Crochet Project?
Love this project? Explore Cute Stitch Studio’s premium crochet patterns for more cute, cozy, gift-worthy, and beginner-friendly handmade ideas.