Crochet Twirl Skirt Pattern
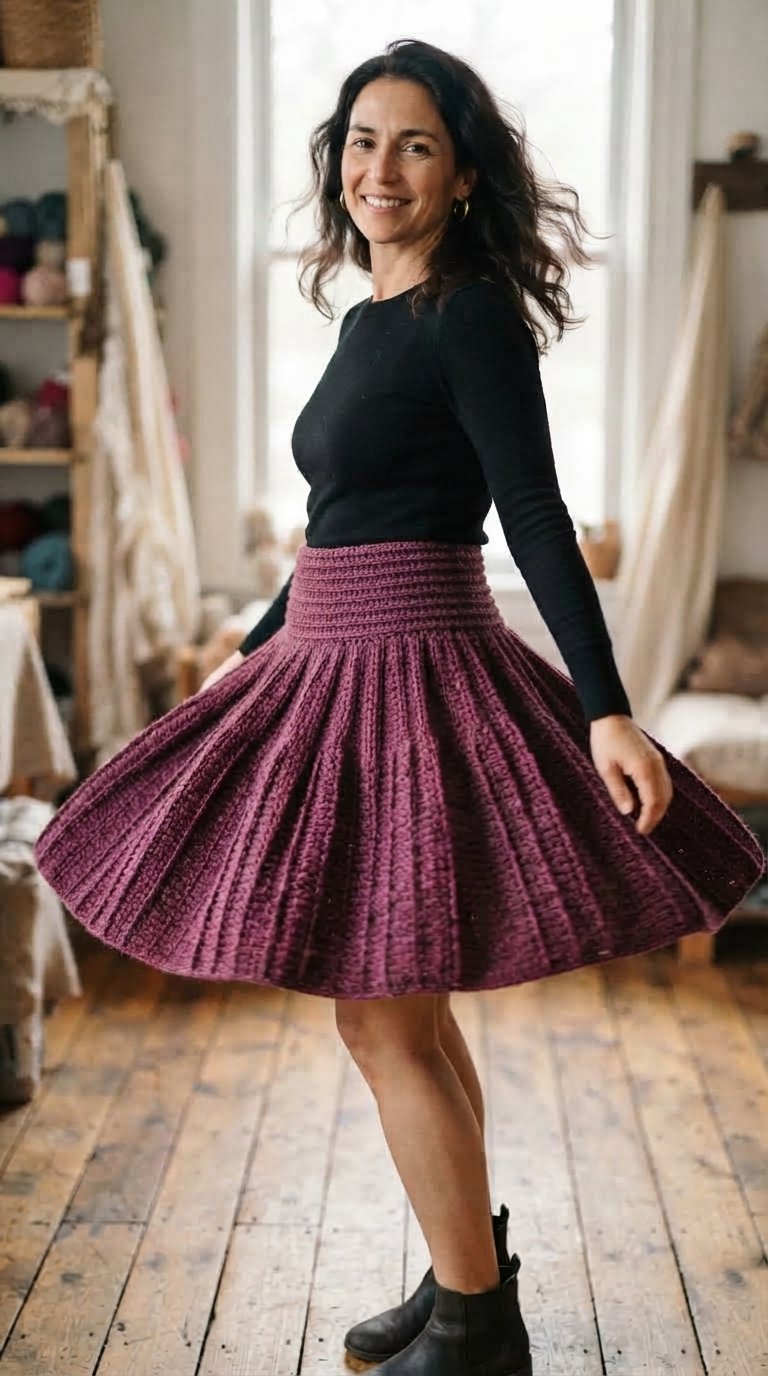
This crochet twirl skirt pattern creates a fun, flattering skirt with a fitted waistband and a full flared shape that moves beautifully when you walk or spin. The vertical crochet texture gives the skirt a soft pleated look without requiring complicated garment construction.
This project is designed for confident beginners who already know basic crochet stitches and are ready to try an easy wearable. The skirt is worked with simple shaping, repeated rows, and a comfortable ribbed waistband that helps it sit neatly at the waist.
You can make the skirt short and playful, extend it to knee length, or continue even farther for a midi version. Choose a rich jewel tone like plum, berry, emerald, or navy for a bold look, or use a neutral shade for an everyday wardrobe piece.

Table of Contents
Why You’ll Love This Crochet Twirl Skirt Pattern
- Clear step-by-step sections make the project easier to follow.
- Materials, sizing, finishing, and customization notes are easy to find.
- The pattern includes practical tips for a neat handmade result.
Project Details
| Detail | Information |
|---|---|
| Skill Level | Confident Beginner to Intermediate |
| Estimated Time | 15–25 hours depending on size and length |
| Sizes | XS, S, M, L, XL, 2XL, 3XL |
| Fit | Fitted at the waist with a full flared skirt |
| Crochet Terminology | US terms |
| Construction Method | Ribbed waistband made first, then the skirt body is worked downward with evenly spaced increases |
Finished Measurements and Sizing
Choose your size based on your actual waist measurement. The ribbed waistband is designed with gentle negative ease so it sits securely without feeling overly tight.
| Size | Fits Waist | Approx. Finished Hip | Suggested Length |
|---|---|---|---|
| XS | 24–26 in / 61–66 cm | 34–36 in / 86–91 cm | 18 in / 46 cm |
| S | 27–29 in / 69–74 cm | 37–39 in / 94–99 cm | 18.5 in / 47 cm |
| M | 30–33 in / 76–84 cm | 40–43 in / 102–109 cm | 19 in / 48 cm |
| L | 34–37 in / 86–94 cm | 44–47 in / 112–119 cm | 19.5 in / 50 cm |
| XL | 38–41 in / 97–104 cm | 48–51 in / 122–130 cm | 20 in / 51 cm |
| 2XL | 42–46 in / 107–117 cm | 52–56 in / 132–142 cm | 20.5 in / 52 cm |
| 3XL | 47–51 in / 119–130 cm | 57–61 in / 145–155 cm | 21 in / 53 cm |
Materials
- DK weight yarn (#3) or light worsted yarn (#4)
- 4.0 mm crochet hook for waistband
- 4.5 mm crochet hook for skirt body
- 1 inch (2.5 cm) wide elastic for waistband, optional but recommended
- Yarn needle
- Scissors
- Stitch markers
- Measuring tape

Yarn Requirements
| Size | Approximate Yardage |
|---|---|
| XS | 1,100–1,300 yd / 1006–1189 m |
| S | 1,250–1,450 yd / 1143–1326 m |
| M | 1,400–1,650 yd / 1280–1509 m |
| L | 1,600–1,850 yd / 1463–1692 m |
| XL | 1,800–2,100 yd / 1646–1920 m |
| 2XL | 2,050–2,350 yd / 1875–2149 m |
| 3XL | 2,300–2,650 yd / 2103–2423 m |
Yarn
A soft DK-weight yarn with good drape works especially well for this skirt. Acrylic blends, cotton blends, bamboo blends, or lightweight wool blends are good options.
A yarn with too much stiffness may make the skirt stand out more than intended, while a soft yarn allows the folds to fall naturally.
Hook Size
Use a 4.0 mm crochet hook for the waistband and a 4.5 mm hook for the skirt body.
If your gauge is too tight, move up one hook size. If the fabric feels too loose or transparent, go down one hook size.
Gauge
Gauge is important for this wearable project.
Main skirt gauge: approximately 16 hdc x 12 rows = 4 x 4 inches (10 x 10 cm) after light blocking.
Waistband ribbing: approximately 18 sc BLO x 16 rows = 4 x 4 inches (10 x 10 cm), measured unstretched.
Make a gauge swatch before starting and wash or block it the same way you plan to care for the finished skirt.
Abbreviations
- ch = chain
- sc = single crochet
- hdc = half double crochet
- dc = double crochet
- sl st = slip stitch
- BLO = back loop only
- FLO = front loop only
- st(s) = stitch(es)
- inc = increase
- rep = repeat
Before You Start
- The waistband is crocheted first in rows of back-loop single crochet.
- The waistband is joined into a ring.
- The skirt body is worked downward in joined rounds.
- Increases are spaced evenly to create a full twirl shape.
- Ch 1 does not count as a stitch.
- Ch 2 does not count as a stitch unless stated otherwise.
- Use stitch markers to divide the skirt into equal sections when increasing.
- Try the skirt on as you work so you can customize the length.
Crochet Twirl Skirt Pattern Instructions
Part 1 — Crochet the Ribbed Waistband
With the 4.0 mm hook, ch 13.
Row 1: Sc in second ch from hook and in each ch across. Turn. (12 sc)
Row 2: Ch 1, sc in BLO in each st across. Turn. (12 sc)
Repeat Row 2 until the waistband measures approximately:
- XS: 23 in / 58 cm
- S: 26 in / 66 cm
- M: 29 in / 74 cm
- L: 33 in / 84 cm
- XL: 37 in / 94 cm
- 2XL: 41 in / 104 cm
- 3XL: 46 in / 117 cm
Do not stretch the ribbing while measuring.
Bring the short ends together and slip stitch through both layers to form a ring.
Turn the waistband so the seam sits toward the inside.
Optional Elastic Waist
For extra support, cut elastic approximately 1 inch (2.5 cm) shorter than your natural waist measurement.
Overlap the elastic ends by about 1 inch and sew securely.
Place the elastic ring inside the crochet waistband. Fold or position the ribbing around it as you begin the skirt body, taking care not to crochet through the elastic itself.
Part 2 — Foundation Round
Switch to the 4.5 mm hook.
Work evenly around one long edge of the waistband.
Round 1: Ch 1, work sc evenly around the waistband edge.
A practical starting stitch count is:
- XS: 96 sts
- S: 104 sts
- M: 112 sts
- L: 120 sts
- XL: 128 sts
- 2XL: 136 sts
- 3XL: 144 sts
Join with sl st to the first sc.
Part 3 — Begin the Flare
Round 2: Ch 2, hdc in each st around. Join.
Round 3: Ch 2, work 7 hdc, 2 hdc in next st around as evenly as possible. Join.
This first increase round begins creating fullness below the waistband.
Rounds 4–6: Ch 2, hdc in each st around. Join.
Part 4 — Second Increase Section
Round 7: Ch 2, work 8 hdc, then 2 hdc in next st. Repeat evenly around.
Rounds 8–11: Hdc in each st around.
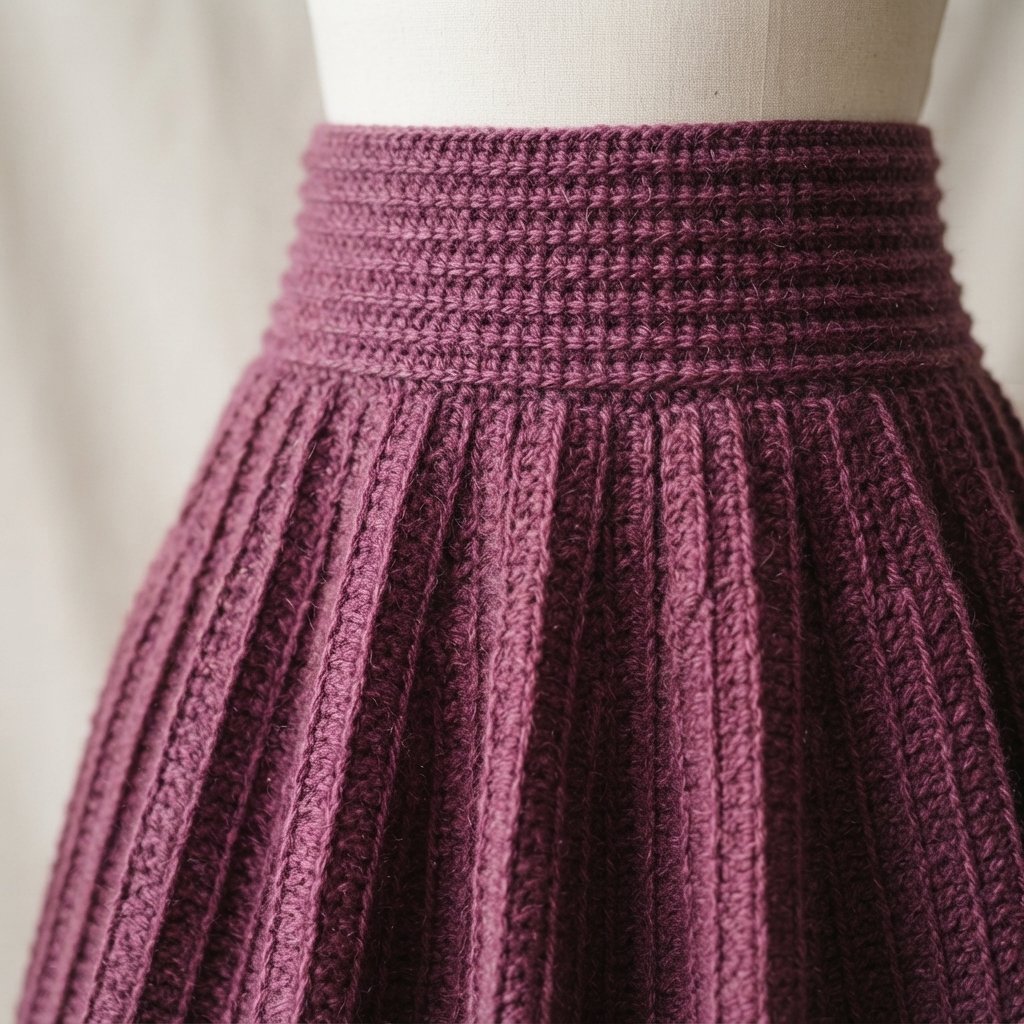
The fabric should begin to flare rather than hanging straight down.
Part 5 — Create the Vertical Texture
The next section creates subtle raised lines that give the skirt a pleated appearance.
Texture Round 1: Ch 2, hdc in BLO in next 3 sts, hdc in FLO in next st. Repeat around.
Texture Round 2: Ch 2, work hdc in each st around.
Repeat these 2 rounds throughout the remaining skirt body.
The alternating loop placement creates gentle vertical texture while keeping the fabric comfortable and flexible.
Part 6 — Add More Fullness
Every 5 to 6 rounds, add another increase round.
Use this progression as a guide:
- Increase Round A: 9 hdc, 2 hdc in next st
- Increase Round B: 10 hdc, 2 hdc in next st
- Increase Round C: 11 hdc, 2 hdc in next st
- Increase Round D: 12 hdc, 2 hdc in next st
Spread any leftover stitches evenly across the round rather than forcing the repeat.
For a fuller skirt, increase every 4 rounds. For a softer A-line silhouette, increase every 6 to 8 rounds.
Part 7 — Continue to Desired Length
Continue alternating the texture rounds and increase sections until the skirt reaches your preferred length.
Measure from the lower edge of the waistband.
- Mini length: approximately 16–18 in / 41–46 cm
- Above-knee: approximately 19–21 in / 48–53 cm
- Knee length: approximately 22–24 in / 56–61 cm
- Midi: continue until your preferred measurement
Remember that the skirt may relax slightly after blocking.
Part 8 — Hem
Once the skirt reaches your desired length, stop increasing.
Hem Round 1: Ch 1, sc in each st around. Join.
Hem Round 2: Ch 1, sc in BLO in each st around. Join.
Hem Round 3: Ch 1, sl st loosely in each st around.
Fasten off.

Optional Pockets
If you like the practical look of a skirt with pockets, you can add two simple patch pockets.
With the main yarn, ch 19.
Row 1: Hdc in second ch from hook and across. Turn. (18 hdc)
Rows 2–14: Ch 2, hdc across. Turn.
Final Row: Ch 1, sc across.
Fasten off, leaving a long sewing tail.
Make two.
Place the pockets symmetrically on the front sides of the skirt at a comfortable hand height. Pin them in position and sew around the two sides and bottom, leaving the top open.
Finishing
- Weave in all yarn ends securely.
- Check the waistband seam.
- Make sure any optional elastic lies flat and is not twisted.
- Check that both pockets are positioned evenly if added.
- Lightly wet block the skirt according to your yarn care instructions.
- Allow it to dry flat or hanging with minimal weight so the skirt does not stretch excessively.
Finished Size
The sample-style skirt is approximately 18 to 21 inches (46 to 53 cm) long depending on size.
The waistband is designed to stretch comfortably to the waist measurements listed in the size chart, while the body becomes progressively fuller toward the hem.
How to Customize the Fit
If you need a slightly smaller waistband, work fewer ribbing rows before joining. For a larger waist, add rows until the unstretched band comfortably wraps around your waist.
For more flare, add increases more frequently. For less volume, increase less often.
You can also adjust the silhouette after the hips by stopping all increases and working straight rounds to create a more controlled A-line shape.
Tips for the Best Result
- Measure the waistband before joining it into a ring.
- Make a gauge swatch before beginning the skirt body.
- Use stitch markers to divide large rounds into sections.
- Spread increases evenly to prevent visible bumps.
- Try the skirt on every few inches.
- Choose yarn with good drape rather than very stiff yarn.
- Keep your hem stitches loose so the lower edge can move naturally.
Customization Ideas
- Classic solid color: use plum, navy, forest green, black, or burgundy.
- Two-tone version: crochet the waistband in a darker coordinating color.
- Striped skirt: change colors every 4 to 6 rounds.
- Longer version: continue the skirt body for a midi silhouette.
- Extra twirl: work increase rounds more frequently.
- Simple A-line: stop increasing once the skirt clears the hips comfortably.
- With pockets: add two matching patch pockets to the front sides.
Why This Crochet Skirt Works Well for Beginners
The construction is straightforward because most of the skirt uses repeated half double crochet rounds. Instead of complicated fitted shaping, the silhouette is created by distributing simple increases around the skirt.
The ribbed waistband also gives you flexibility with sizing, while the repeated texture makes the finished garment look more detailed than the construction actually is.
Frequently Asked Questions
Is this Crochet Twirl Skirt Pattern beginner-friendly?
Check the Skill Level and Pattern Notes sections before you begin. Read through the full pattern once, then keep a stitch marker and your materials nearby as you work.
What yarn should I use for this crochet project?
Use the yarn weight and fiber recommendations listed in the Yarn section. Matching the suggested yarn weight will help you stay closer to the intended size and fabric.
Can I change the colors?
Yes. Color changes are one of the easiest ways to personalize this project without changing the core construction. Keep the same yarn weight for the most consistent result.
How can I keep my stitch counts accurate?
Count at the end of each row or round, move your stitch marker as you work, and correct missed increases or decreases before continuing to the next section.
Looking for Your Next Crochet Project?
Love this project? Explore Cute Stitch Studio’s premium crochet patterns for more cute, cozy, gift-worthy, and beginner-friendly handmade ideas.