Red Riding Hood Crochet Cape Pattern
This red riding hood crochet cape pattern creates a cozy, open-front layer with a roomy hood and a single button at the neckline. Deep cranberry yarn gives it a woodland feel that works for autumn outfits, storybook costumes, and chilly-weather layering.
The cape uses alternating single crochet and half double crochet stitches for a softly textured surface. Gradual increases create the flare, while a simple folded rectangle forms the hood.
This original Cute Stitch Studio version includes three adult sizes. It is an approachable garment project for confident beginners who can count stitches, follow increase rows, and sew a short seam.
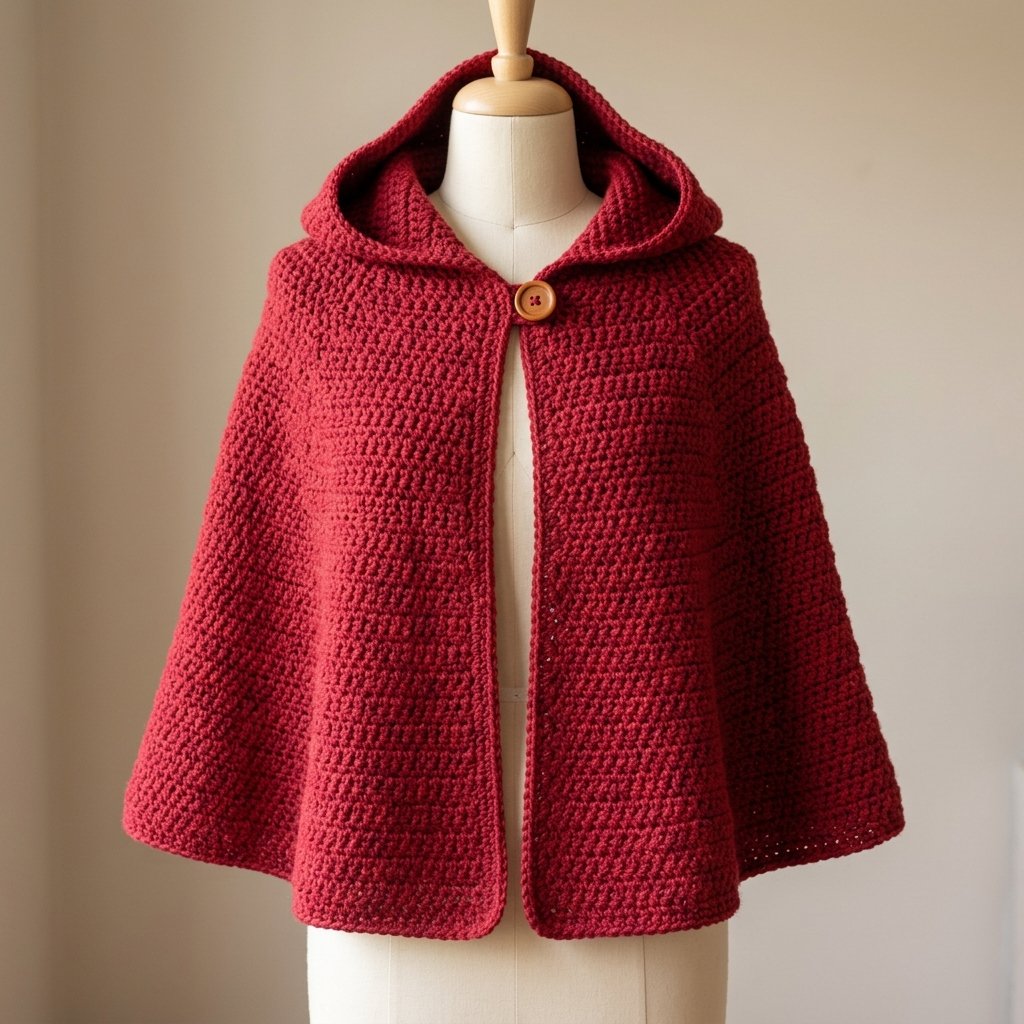
Table of Contents
Project Details
- Skill level: Confident beginner.
- Estimated time: Approximately 20–30 hours, depending on size and experience.
- Sizes: A, B, and C, selected by body measurements.
- Finished cape length: Approximately 18.5, 20.5, or 22 inches, excluding the hood.
- Terminology: US crochet terms.
- Construction: Cape worked from the neckline downward in rows; hood added to the foundation edge and seamed across the top.
- Closure: One button and a fitted crochet loop.
This original pattern has not been physically tested. Stitch counts have been reviewed, but gauge, fit, yarn quantities, and finished drape require sample verification.
Sizing
Measure around the fullest part of your bust while wearing the clothing you plan to layer underneath. Use that measurement as a starting point, then check the length and intended arm coverage.
This cape has open sides beneath its drape and no fitted armholes. The lower-edge measurement describes the full sweep of the fabric, not a conventional sweater chest circumference.
| Measurement | Size A | Size B | Size C |
|---|---|---|---|
| Suggested body bust | 30–36 inches | 38–44 inches | 46–52 inches |
| Neckline edge before edging | 18.25 inches | 20.5 inches | 22.75 inches |
| Finished cape length, excluding hood | 18.5 inches | 20.5 inches | 22 inches |
| Lower-edge sweep before edging | 57 inches | 61.75 inches | 66.25 inches |
| Hood height before edging | 12 inches | 12.5 inches | 13 inches |
| Hood depth after folding | 9.1 inches | 10.3 inches | 11.4 inches |
These measurements are calculated targets at the stated gauge. The neckline is a relaxed opening beneath the hood, not a fitted collar.
If you fall between sizes, consider how much clothing you will wear underneath and how far you want the cape to drape over your arms.
Materials
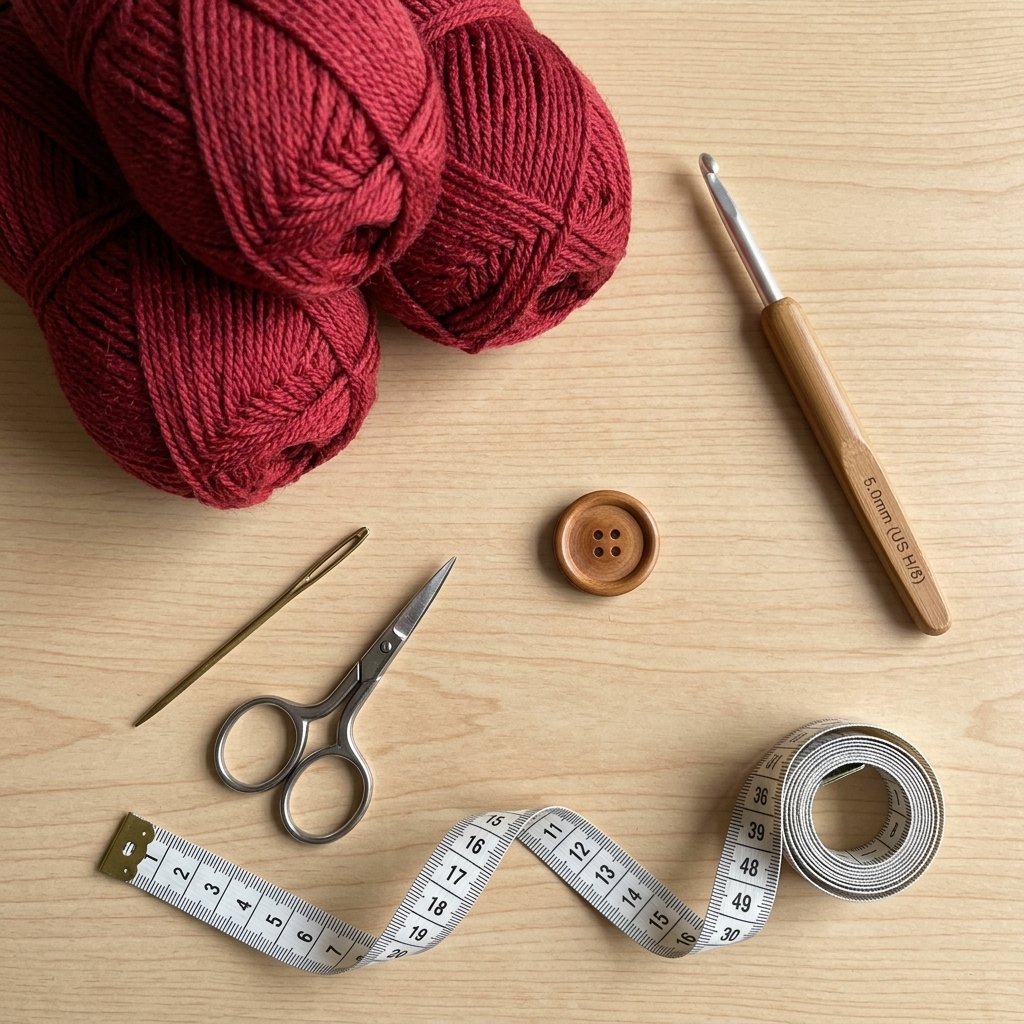
- Worsted-weight yarn in cranberry or deep red: approximately 1,300–1,550 yards for A, 1,550–1,850 yards for B, or 1,850–2,200 yards for C.
- 5 mm crochet hook, or size needed for gauge.
- One smooth sew-through button, approximately 1 inch across.
- Matching strong sewing thread and a sewing needle.
- Tapestry needle.
- Scissors.
- Measuring tape.
- Four removable stitch markers.
Hook Size
Start with a 5 mm crochet hook.
The finished fabric should bend and drape comfortably. If it feels stiff, a larger hook may help, but recheck the gauge before beginning the garment.
If your swatch has too many stitches per inch, try a larger hook. If it has too few, try a smaller hook.
Yarn
Use worsted-weight, category 4 yarn with a smooth or lightly heathered finish. A soft wool-acrylic blend or acrylic yarn is a practical choice for this design.
Cranberry, burgundy, and deep cherry red suit the storybook look. A smooth yarn makes the alternating stitches easier to recognize than a very fuzzy yarn.
Yardage is an estimate. Buy enough yarn from the same dye lot, particularly if you plan to add length.
Gauge
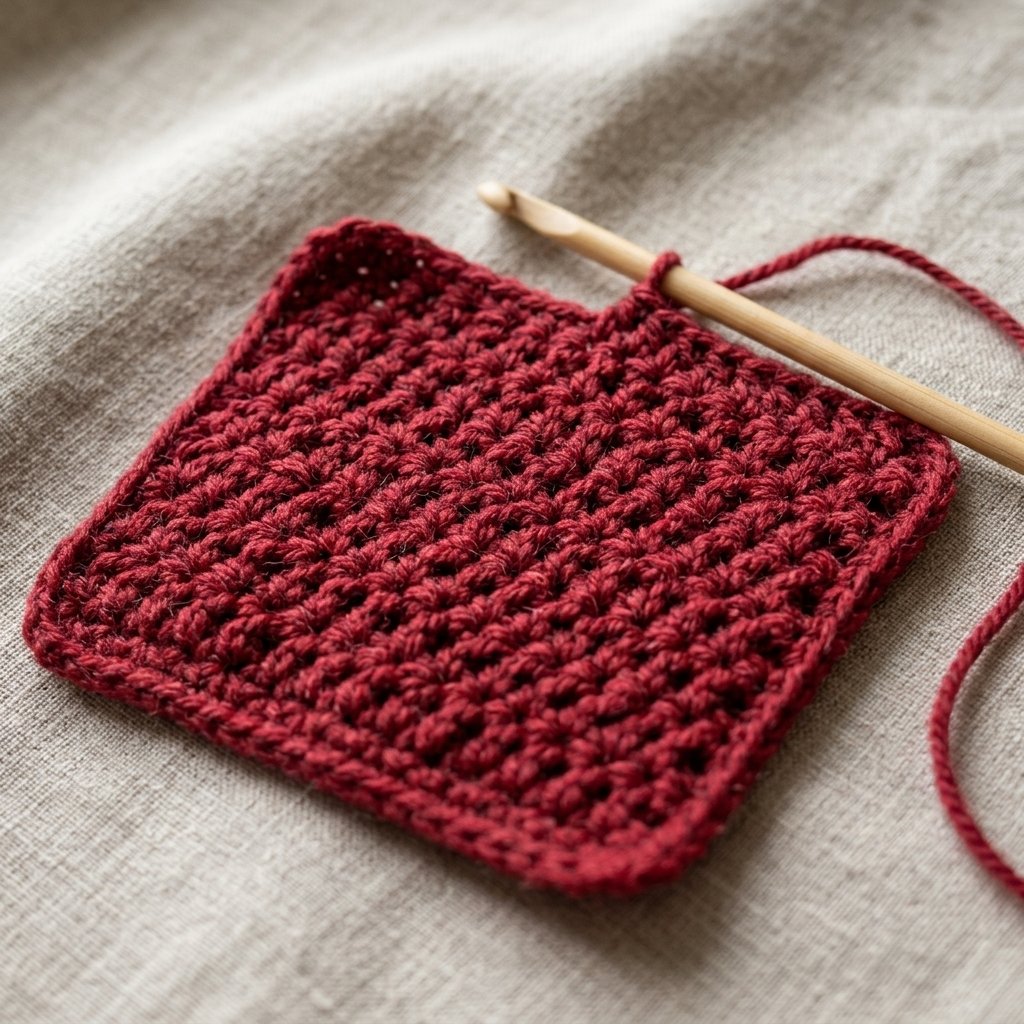
14 stitches and 14 rows = 4 inches in the textured stitch pattern, measured after washing and drying according to the yarn label.
Make a Gauge Swatch
Ch 23.
Swatch Row 1: Sc in the second ch from the hook, hdc in the next ch. Repeat [sc in the next ch, hdc in the next ch] across. Turn. (22 stitches)
Swatch Row 2: Ch 1. Repeat [sc in the next st, hdc in the next st] across. Turn. (22 stitches)
Repeat Swatch Row 2 until the piece is at least 6 inches tall. Measure a central 4-inch section rather than including the edges.
Because each row has an even number of stitches and you turn after every row, single crochet stitches fall above half double crochet stitches and vice versa.
Abbreviations
- ch: chain
- sc: single crochet
- hdc: half double crochet
- sl st: slip stitch
- st(s): stitch(es)
Before You Start
- Instructions are written as A (B, C).
- Beginning ch 1 does not count as a stitch.
- Work through both loops throughout.
- Each plain row begins with sc and ends with hdc.
- The cape is divided into four equal sections for shaping.
- Each increase row adds two stitches per section, or eight stitches overall.
- Turn after every cape and hood row unless instructed otherwise.
- Complete the cape before working the hood into the unused foundation-chain loops.
Red Riding Hood Crochet Cape Pattern Instructions
Part 1 — Neckline Foundation
With cranberry yarn, ch 65 (73, 81).
Row 1: Sc in the second ch from the hook, hdc in the next ch. Repeat [sc in the next ch, hdc in the next ch] across. Turn. 64 (72, 80) stitches.
Divide the row into four equal sections of 16 (18, 20) stitches. Place a marker in the last stitch of each section.
The markers identify section boundaries only. Do not work extra stitches into them unless the increase-row instructions call for it.
Part 2 — Learn the Two Cape Rows
Plain row: Ch 1. Repeat [sc in the next st, hdc in the next st] across. Turn. The stitch count stays the same.
Increase row: Ch 1. Work the following instructions separately across each of the four sections:
- Work [sc, hdc] together in the first stitch of the section.
- Across the middle stitches, repeat [sc in the next st, hdc in the next st] until only the last stitch of that section remains.
- Work [sc, hdc] together in the last stitch of the section.
Repeat for all four sections, then turn. Each section gains two stitches, and the whole row gains eight.
After each row, reposition the markers to divide the new row into four equal sections. All section counts remain even, so the alternating stitch sequence fits between the increases.
Example for Size A: On the first increase row, each 16-stitch section becomes 18 stitches. The full row grows from 64 to 72 stitches.
Part 3 — Shape the Shoulders and Cape
Row 2: Work an increase row. 72 (80, 88) stitches.
Rows 3–16: Work a plain row on every odd-numbered row and an increase row on every even-numbered row.
At the end of Row 16, you will have 128 (136, 144) stitches.
Rows 17–52: Work plain rows except on Rows 20, 24, 28, 32, 36, 40, 44, 48, and 52, which are increase rows.
Use the table to check your progress.
| After Row | Size A | Size B | Size C |
|---|---|---|---|
| 1 | 64 | 72 | 80 |
| 2 | 72 | 80 | 88 |
| 4 | 80 | 88 | 96 |
| 6 | 88 | 96 | 104 |
| 8 | 96 | 104 | 112 |
| 10 | 104 | 112 | 120 |
| 12 | 112 | 120 | 128 |
| 14 | 120 | 128 | 136 |
| 16 | 128 | 136 | 144 |
| 20 | 136 | 144 | 152 |
| 24 | 144 | 152 | 160 |
| 28 | 152 | 160 | 168 |
| 32 | 160 | 168 | 176 |
| 36 | 168 | 176 | 184 |
| 40 | 176 | 184 | 192 |
| 44 | 184 | 192 | 200 |
| 48 | 192 | 200 | 208 |
| 52 | 200 | 208 | 216 |
Part 4 — Complete Your Size
Size A: Work plain rows for Rows 53–64. Finish with 200 stitches.
Size B: Work plain rows for Rows 53–55. Work an increase row on Row 56, giving 216 stitches. Work plain rows for Rows 57–70.
Size C: Work plain rows for Rows 53–55. Work an increase row on Row 56, giving 224 stitches. Work plain rows for Rows 57–59. Work an increase row on Row 60, giving 232 stitches. Work plain rows for Rows 61–76.
Fasten off and weave in the end. Remove the section markers.
Place the cape around your shoulders to check the drape before adding the hood. The front edges are intended to fall open below the neckline.
Part 5 — Add the Hood
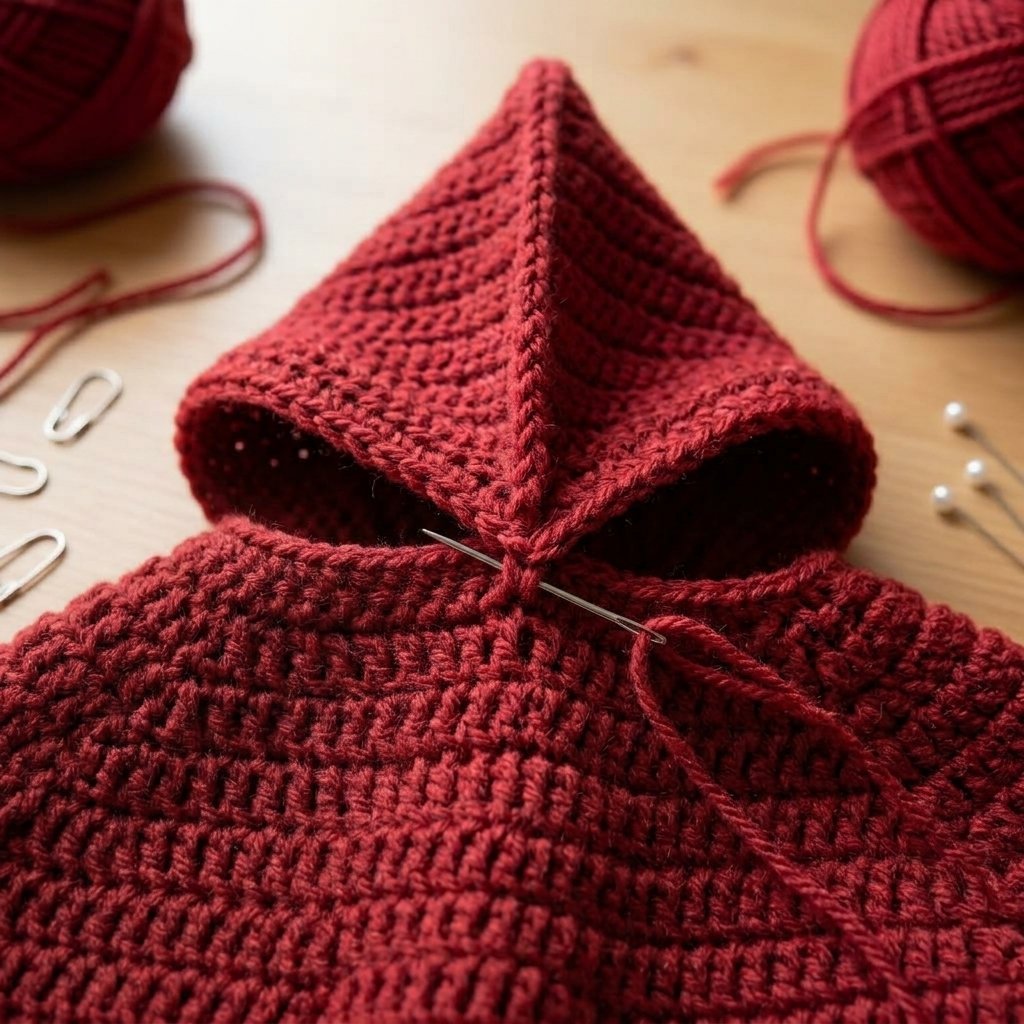
Lay the cape with its neckline accessible. Choose the side you want to face outward and keep that side facing you.
Join yarn at one front corner of the neckline. Work into the unused underside loops of the foundation chain, directly opposite the stitches of Cape Row 1.
Hood Row 1: Ch 1. Repeat [sc in the next foundation position, hdc in the next foundation position] across the neckline. Turn. 64 (72, 80) stitches.
Work one stitch opposite each original cape stitch. Do not add a stitch into the unused turning chain.
Hood Row 2: Ch 1. Repeat [sc in the next st, hdc in the next st] across. Turn. 64 (72, 80) stitches.
Hood Rows 3–42 (44, 46): Repeat Hood Row 2.
The hood rectangle should measure approximately 12 (12.5, 13) inches tall. Check the actual measurement and add or remove plain rows if needed.
Fasten off, leaving a long sewing tail.
Part 6 — Sew the Hood Top
Fold the hood in half with its chosen outer surfaces facing each other. Bring the two upper front corners together so the final row folds at its midpoint.
The two halves of the final row should line up stitch for stitch. Sew through corresponding stitches across 32 (36, 40) pairs, working from the front opening toward the folded back.
Secure the seam without pulling it tight. Weave in the tail and turn the hood right side out.
This simple seam creates a roomy hood with a softly pointed back corner. It will round slightly when worn.

Part 7 — Edge the Cape and Hood
With the outside facing you, join yarn at the lower corner of one front edge.
Edging Round 1: Ch 1. Work sc evenly up the first front edge, around the hood opening, and down the opposite front edge. Start with approximately 1 sc in each row end.
At the lower front corner, work 3 sc into the corner stitch. Continue across the hem with 1 sc in each stitch. Work 3 sc at the remaining lower corner, then sl st into the first edging sc to join.
Where the cape and hood meet at the neckline, place the stitches close enough to avoid a gap, but do not bunch several stitches into one small space.
Edging Round 2: Ch 1. Sc in each edging stitch around, working 3 sc into the middle stitch of each lower corner group. Sl st into the first sc.
Fasten off and weave in the tail.
The edging should lie smoothly. If a section pulls inward, undo that section and add a few evenly spaced stitches. If it ripples, reduce the number of stitches along that section.
Part 8 — Button and Loop
Try on the cape and bring the front edges together comfortably at the neckline. Mark the desired button position, approximately 0.5–1 inch below the hood join.
Sew the button securely to one front edge using strong matching sewing thread. Catch several crochet stitches behind the button to distribute the pull.
On the opposite edge, join yarn at the matching height. Ch 8 as a starting point.
Wrap the chain around the button to check the fit. Adjust the chain count until the button passes through with gentle pressure.
Sl st back into the attachment point to form a loop. Work sc around the chain loop until it is evenly covered without crowding. Sl st into the attachment point and fasten off.
Check the fit again, because covering the chain makes the loop smaller. If needed, remake it with a longer chain before securing the tails.
Weave both loop tails through several nearby stitches, reversing direction before trimming.
Finishing
Check the hood seam, button attachment, and front edges. Weave in all remaining yarn ends.
Wash or dampen the cape according to the yarn label. Lay it flat, arrange the hem evenly, and gently open the hood without stretching the neckline.
Let it dry completely before wearing. Avoid hanging a wet cape from its shoulders, as the weight can change its dimensions.
Finished Size
The cape measures approximately 18.5 (20.5, 22) inches long, or 47 (52, 56) cm, from the neckline to the hem, excluding the hood.
The lower-edge sweep before edging is approximately 57 (61.75, 66.25) inches, or 145 (157, 168) cm.
The hood measures approximately 12 (12.5, 13) inches high, with a folded depth of approximately 9.1 (10.3, 11.4) inches.
Actual dimensions depend on gauge, edging tension, and blocking.
Tips and Customization
Make It Longer
After completing the final row for your size, add plain textured rows before edging. At the stated gauge, approximately 7 additional rows add 2 inches of length.
Adding plain rows lengthens the cape without increasing its lower-edge sweep. Check arm movement and drape before making it much longer.
Make It Shorter
For a shorter version, omit some of the final plain rows after the last increase for your size. Keep the shaping rows so you retain the intended width.
Adjust the Hood Height
Add or remove hood rows before sewing the top seam. Change the height in small increments, checking that the hood reaches comfortably over the head without pulling up the neckline.
Choose Another Color
Forest green creates a woodland look, charcoal suits a simple everyday layer, and cream gives the texture a softer appearance.
Keep the Cape Drapey
If your swatch feels heavy or stiff, reconsider the yarn before beginning. A garment-sized piece magnifies those qualities, so a soft, flexible swatch is worth getting right.
Frequently Asked Questions
Is this a beginner crochet cape?
It is suitable for confident beginners who already know single crochet and half double crochet. The main skills to practice are dividing rows into equal sections and checking the increase counts.
Does this cape have sleeves?
No. The fabric drapes over the shoulders and arms, and the front remains open below the button.
Why do my increase rows have the wrong count?
Each section receives one extra stitch at its beginning and one at its end. That adds two stitches per section and eight overall. Check that you are working both sc and hdc into each designated increase stitch.
Can I use bulky yarn?
Bulky yarn changes the measurements and garment weight. Use the stated yarn weight for this version, or recalculate the design from a new swatch.
Will the hood be completely rounded?
The hood is made from a folded rectangle, so it has a softly pointed back corner. It takes on a rounder shape when worn.
Can I wear it as a costume?
Yes. The cranberry color and hood suit a Red Riding Hood-inspired outfit, while the simple closure also works for everyday autumn layering.
Save This Pattern for Later
Save this red riding hood crochet cape pattern to your crochet clothing or handmade costume board on Pinterest. Keep the shaping table nearby so you can check off each increase row as you work.
Looking for Your Next Crochet Project?
Love this project? Explore Cute Stitch Studio’s premium crochet patterns for more cute, cozy, gift-worthy, and beginner-friendly handmade ideas.