Crochet Bell Sleeve Crop Top Pattern with Boho Stripes
This crochet bell sleeve crop top pattern combines earthy stripes, airy stitchwork, and beautifully flared sleeves. A cropped body and wide boat neckline keep the shape relaxed, while cream accents brighten the olive, mustard, brown, and burgundy yarn.
Layer it over a fitted tank and pair it with high-waisted jeans or a simple skirt. The open rows make it a comfortable decorative layer for a mild autumn day.
This original Cute Stitch Studio design uses two rectangular body panels and two sleeves that widen toward the wrists. A repeating sequence of solid and open rows creates variety without requiring complicated motifs.
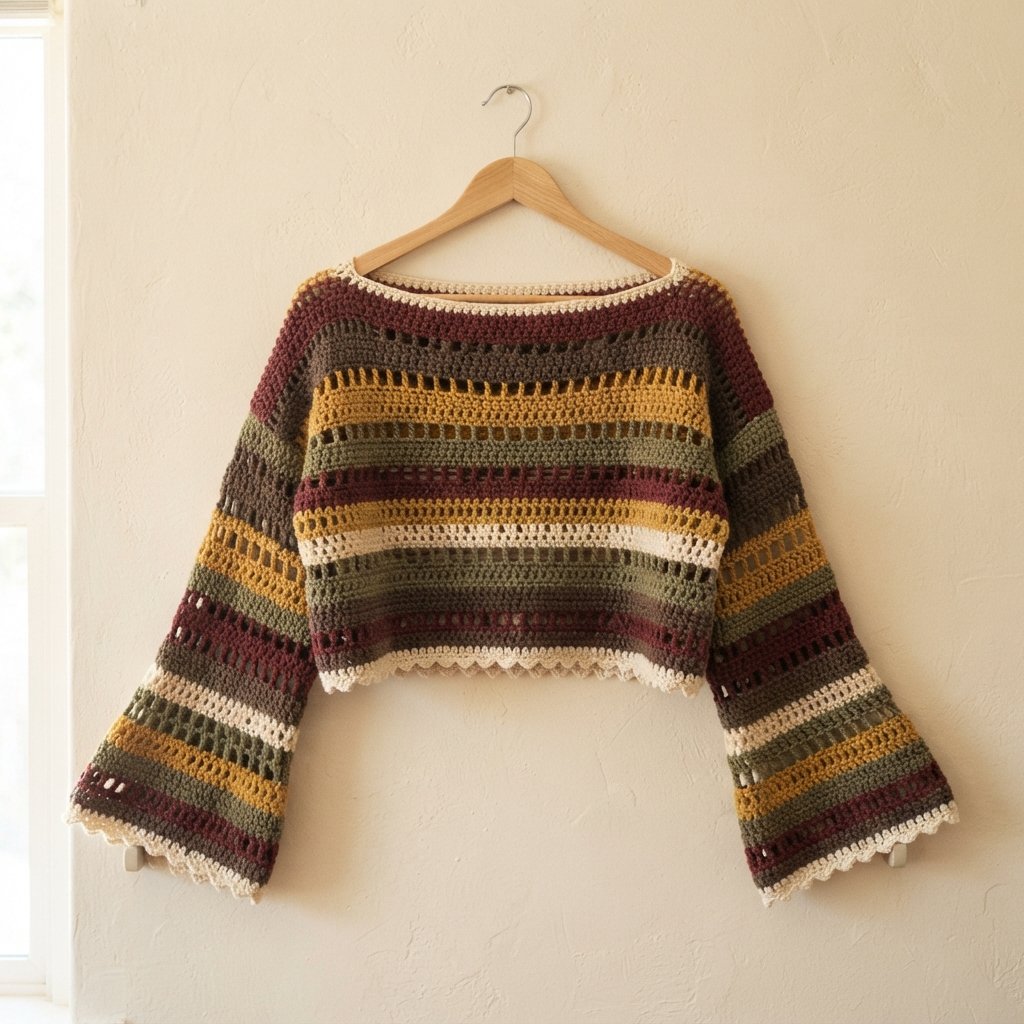
Table of Contents
Crochet Bell Sleeve Crop Top Pattern With Boho Stripes Instructions
Project Details
- Skill level: Confident beginner to intermediate.
- Estimated time: Approximately 15–25 hours.
- Sizes: A, B, and C, chosen by finished measurements.
- Fit: Loose cropped body, dropped shoulders, and wide bell sleeves.
- Crochet terminology: US terms.
- Construction: Two body panels and two sleeves, joined with simple seams.
This is an original, untested design draft. Measurements and yarn quantities are estimates. Swatch the complete stitch sequence and check the fit before completing the seams.
Materials
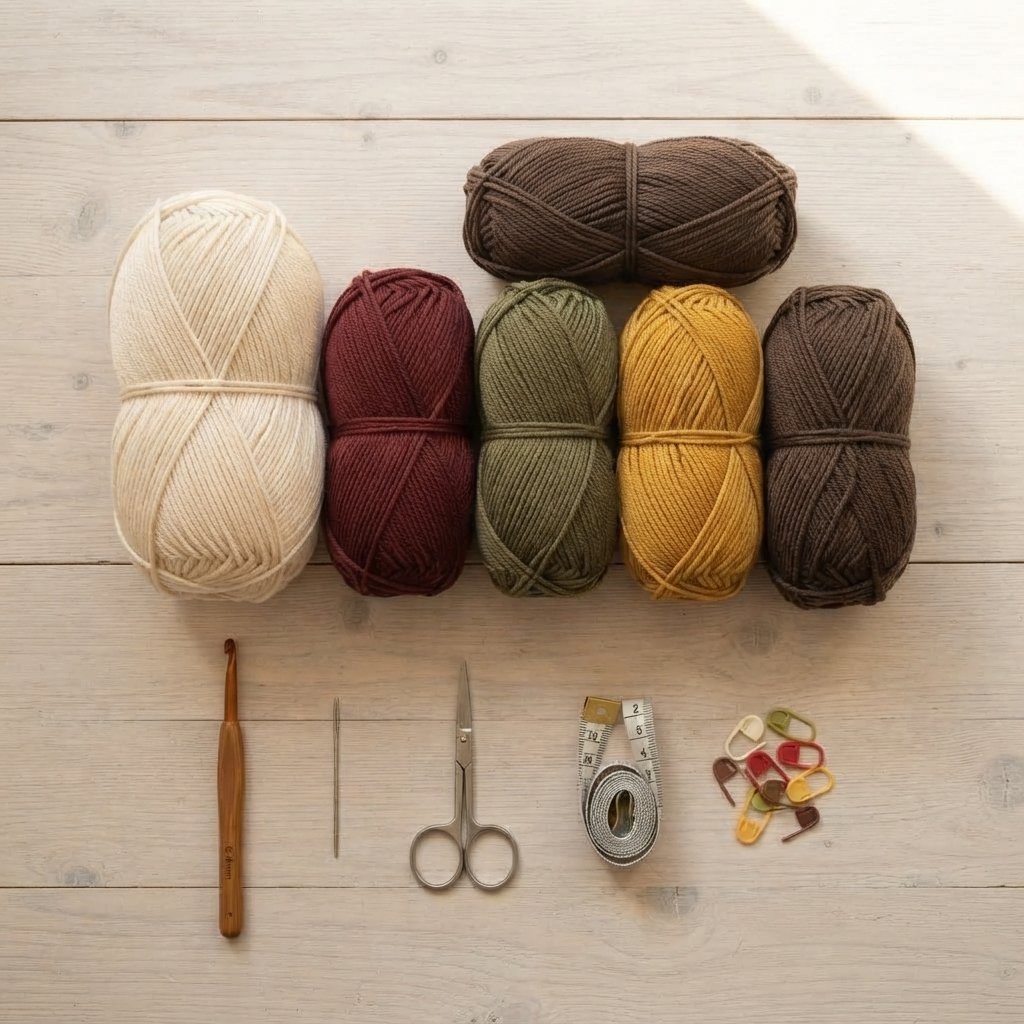
- Category 3 yarn in burgundy, cream, olive green, mustard, and dark brown.
- Approximately 1,000–1,200 yards total for Size A, 1,200–1,400 yards for Size B, or 1,400–1,650 yards for Size C.
- 4.5 mm crochet hook, or the size needed to meet gauge.
- Yarn needle.
- Scissors.
- Measuring tape.
- Removable stitch markers.
Allow roughly one quarter of the total yarn for cream, with the remainder divided among the other four colors. Actual use varies because solid rows use more yarn than open rows.
Hook Size
Start with a 4.5 mm crochet hook.
The finished fabric should be soft and open enough to drape. If your swatch feels stiff, adjust the hook and recheck both its width and height.
Yarn
Use category 3, DK-weight yarn with a smooth texture. Cotton blends or lightweight acrylic yarns can work well, provided all five colors have similar thickness and behavior.
The featured palette is:
- Burgundy for rich red accents.
- Cream for contrast and finishing.
- Olive green for a woodland feel.
- Mustard for warm highlights.
- Dark brown to balance the brighter stripes.
Avoid combining unrelated yarn weights. Uneven thickness can make the panels change width from stripe to stripe.
Abbreviations
- ch: chain.
- sc: single crochet.
- dc: double crochet.
- tr: treble crochet.
- sl st: slip stitch.
- st / sts: stitch / stitches.
Before You Start
Gauge
10 stitch positions and 8 rows = 4 inches across the mixed-stitch pattern after washing and drying the swatch according to the yarn label.
In an open row, count each chain space as one position and each tall stitch as one position.
For a useful swatch, ch 22, work 21 sc, then follow the eight-row sequence below twice. Measure the center across all the row types rather than measuring only a solid stripe.
Size Guide
| Measurement | Size A | Size B | Size C |
|---|---|---|---|
| Approximate finished chest | 41 inches | 49 inches | 57 inches |
| Body panel width | 20½ inches | 24½ inches | 28½ inches |
| Body length before edging | 14 inches | 15 inches | 16 inches |
| Armhole depth, laid flat | 8 inches | 9 inches | 10 inches |
| Sleeve length before edging | About 16 inches | About 16 inches | About 16 inches |
| Bell opening circumference | About 24½ inches | 26 inches | 28½ inches |
Choose a finished chest approximately 4–8 inches larger than your bust for a relaxed fit. These three options are not a complete standard-size grading system; use the garment measurements.
The wide body creates a dropped shoulder. Measure sleeve length from that dropped attachment point rather than from the top of your natural shoulder.
Turning Chains
- For sc rows, ch 1 does not count as a stitch.
- For solid dc rows, ch 2 does not count as a stitch.
- For dc mesh rows, ch 3 counts as the first dc.
- For tr mesh rows, ch 4 counts as the first tr.
Mark the top of a counted turning chain so you can find it at the end of the next row.
Color Changes
Fasten off at the end of each stripe and join the next color at the beginning of the following row. Leave tails long enough to weave securely into the fabric.
Make the front and back with the same color order and row count. Do the same for the two sleeves.
Stitches Used in This Pattern
Double Crochet Mesh
Ch 3, which counts as the first dc. Repeat [ch 1, skip the next stitch, dc in the next stitch] across.
Because the starting stitch count is odd, the row ends with a dc in the final stitch.
Treble Crochet Mesh
Ch 4, which counts as the first tr. Repeat [ch 1, skip the next stitch, tr in the next stitch] across.
To make a treble crochet, yarn over twice, insert the hook, and draw up a loop. Yarn over and pull through two loops three times.
Working a Solid Row Over Mesh
Work into each tall stitch and around each ch-1 space. Treat the top of the previous turning chain as the final stitch.
This restores a solid row without changing the total number of stitch positions.
Crochet Bell Sleeve Crop Top Pattern
Part 1 — Make the First Body Panel
Instructions are written as A (B, C).
With burgundy, ch 52 (62, 72).
Row 1: Sc in the second chain from the hook and in every remaining chain. Turn. 51 (61, 71) sts.
Continue with the stripe sequence below.
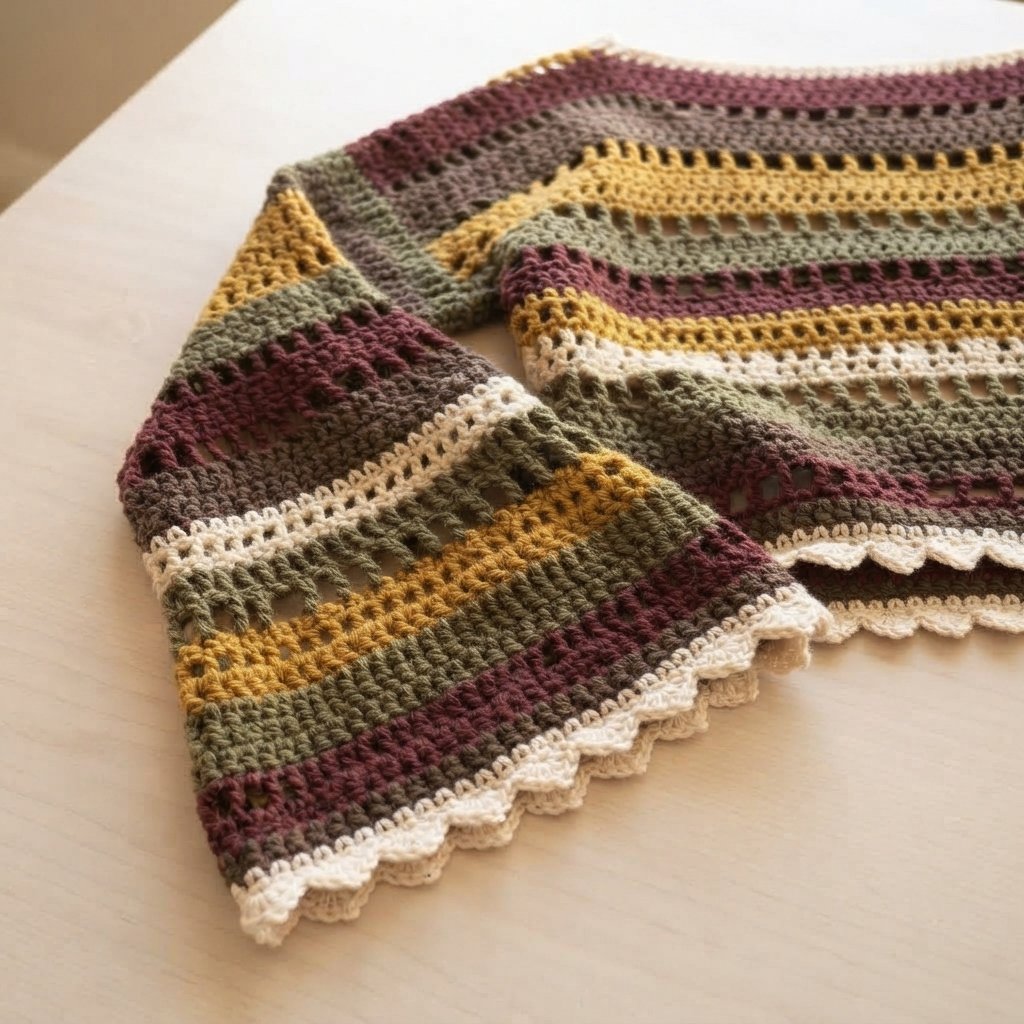
Part 2 — Work the Eight-Row Stripe Sequence
Row 2 — Dark brown, solid dc: Ch 2 and dc in every stitch across. Turn. 51 (61, 71) sts.
Row 3 — Mustard, dc mesh: Ch 3, then repeat [ch 1, skip 1 stitch, dc in the next stitch] across. Turn. 26 (31, 36) dc and 25 (30, 35) spaces.
Row 4 — Cream, solid sc: Ch 1. Sc in the first dc and in each remaining dc and chain space across. Turn. 51 (61, 71) sts.
Row 5 — Olive, tr mesh: Ch 4, then repeat [ch 1, skip 1 stitch, tr in the next stitch] across. Turn. 26 (31, 36) tr and 25 (30, 35) spaces.
Row 6 — Burgundy, solid dc: Ch 2. Dc in the first tr and in every remaining tr and chain space across. Turn. 51 (61, 71) sts.
Row 7 — Cream, dc mesh: Repeat the stitch instructions for Row 3.
Row 8 — Mustard, solid sc: Repeat the stitch instructions for Row 4.
Row 9 — Dark brown, tr mesh: Repeat the stitch instructions for Row 5.
Repeat Rows 2–9 in the same order until you have completed a total of 28 (30, 32) rows, including Row 1. Stop at the required row even if the final repeat is incomplete.
Fasten off. Make a second identical body panel.
The eight-row sequence begins again at Rows 10, 18, and 26. Keep a written row tally so the two panels match.
Part 3 — Join the Shoulders
Lay the panels together with their chosen outer faces touching. Align the stripes and upper edges.
Leave the central 25 stitch positions unsewn for the neckline.
Sew the following number of positions at each outer shoulder:
- Size A: 13 positions at each side.
- Size B: 18 positions at each side.
- Size C: 23 positions at each side.
On a mesh edge, one stitch or one chain space counts as a position. Match tall stitches to tall stitches and spaces to spaces.
Use a relaxed whipstitch and do not pull the seam tight. The central opening should measure approximately 10 inches across before edging.
Check that your head passes through comfortably before securing the sewing ends. If you need a wider opening, undo the same number of positions at both inner shoulder ends.
Part 4 — Mark and Sew the Side Seams
From each shoulder edge, measure down approximately 8 (9, 10) inches and mark the bottom of the armhole on both panels.
At the stated row gauge, the armhole uses the upper 16 (18, 20) rows. This leaves approximately 12 lower rows to seam on each side.
Whipstitch the matching lower row ends together from the hem to the armhole marker. Keep the stripes aligned.
Leave the upper sections open for the sleeves. Try on the body before continuing.
Part 5 — Begin a Sleeve at the Upper Arm
The sleeves are worked flat from the upper arm toward the wrist. They widen gradually to create the bell shape.
With burgundy, ch 42 (46, 52).
Sleeve Row 1: Sc in the second chain from the hook and in every remaining chain. Turn. 41 (45, 51) sts.
This edge should measure approximately 16½ (18, 20½) inches and closely match the full armhole circumference.
Compare it with the assembled body now. Small differences can be eased during sewing, but a large difference means you should recheck gauge or armhole depth.
Part 6 — Widen the Bell Sleeve
Follow the same eight-row stitch and color sequence used for the body, with one change: increase on Sleeve Rows 2, 6, 10, 14, and 18.
Each of these is a solid dc row.
Increase row: Ch 2, work 3 dc in the first stitch, work 1 dc in each middle position across, and work 3 dc in the last stitch. Turn.
When working over mesh, place one dc around each middle chain space as usual. The increases belong only in the first and last tall stitches.
Each increase row adds four stitches. All intervening rows keep the current stitch-position count.
| After sleeve row | Size A | Size B | Size C |
|---|---|---|---|
| 1 | 41 | 45 | 51 |
| 2 | 45 | 49 | 55 |
| 6 | 49 | 53 | 59 |
| 10 | 53 | 57 | 63 |
| 14 | 57 | 61 | 67 |
| 18 | 61 | 65 | 71 |
After Row 18, continue the stripe sequence without further increases through Sleeve Row 33.
The sleeve should measure approximately 16 inches long. Check its length from your dropped shoulder to your wrist before fastening off.
Make the second sleeve with the same row count and adjustments.

Part 7 — Sew the Sleeves
Fold each sleeve lengthwise with its outer face inward. Match the corresponding row ends along the two long edges.
Whipstitch from the upper arm to the wrist, keeping the colored rows aligned. Do not tighten the sewing yarn enough to shorten the seam.
Turn each sleeve right side out.
Part 8 — Attach the Sleeves to the Body
Keep the body inside out and place one right-side-out sleeve inside an armhole. The garment’s outer faces should touch.
Match the sleeve seam to the body side seam. Mark the midpoint of the sleeve’s upper edge and align it with the shoulder seam.
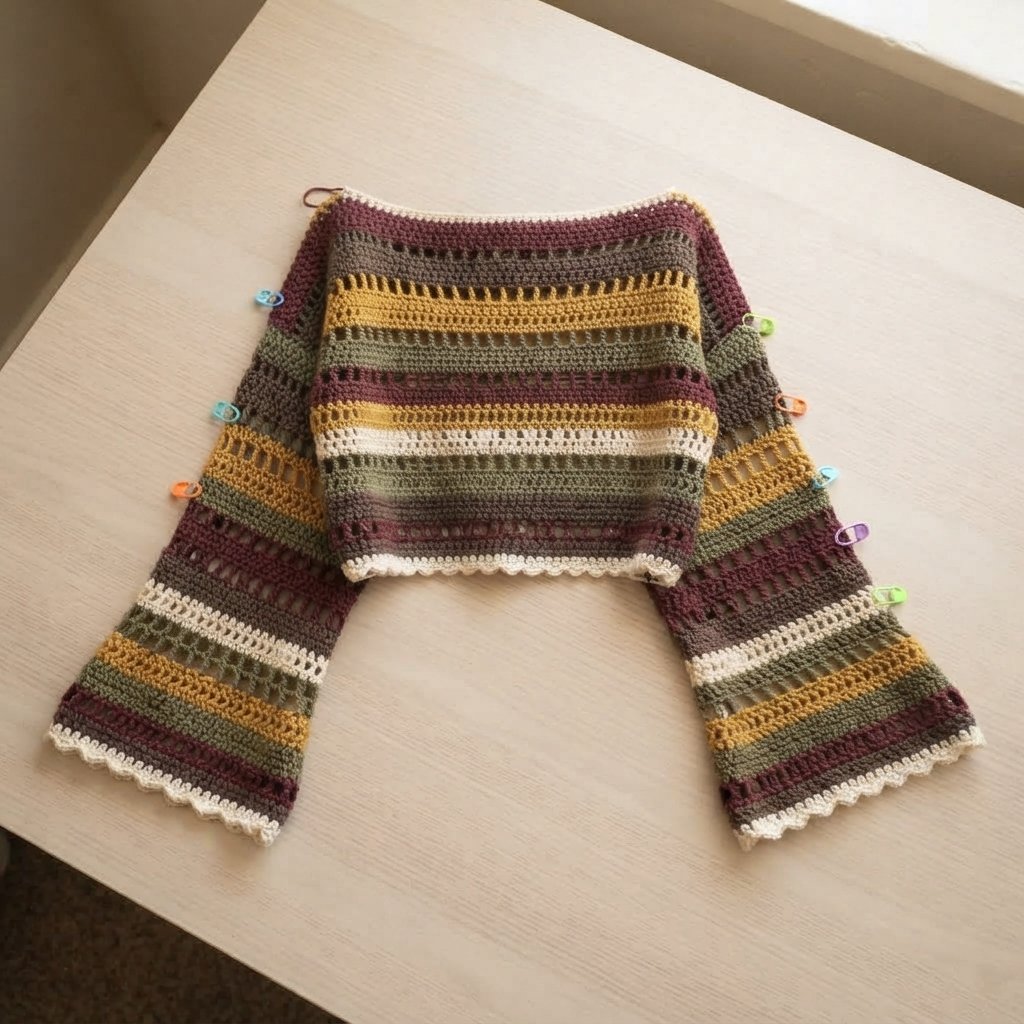
Distribute the remaining upper sleeve edge evenly around the armhole and secure it with markers.
Sew the sleeve edge to the armhole with small whipstitches. You are joining stitch tops to body row ends, so distribute the sewing passes evenly rather than forcing a one-to-one stitch match.
Repeat with the second sleeve. Turn the sweater right side out and check that both sleeves hang evenly.
Part 9 — Finish the Neckline
Join cream yarn at one shoulder seam.
Ch 1 and work a relaxed round of sc around the neck opening. Across solid sections, work approximately one sc per stitch. Across mesh sections, work one sc in each tall stitch and one around each chain space.
Work neatly over the two shoulder-seam junctions without pulling them inward. Join with a sl st in the first sc and fasten off.
Check the head opening again. If it has become too tight, redo this round with a larger hook or a few extra evenly spaced stitches.
Part 10 — Add the Cream Picot Edging
Use the same finish around the lower body edge and both wrist openings.
Edging Round 1: Join cream yarn, ch 1, and sc evenly around the opening. At the body foundation edge, work approximately one sc into each foundation stitch. At a mesh wrist edge, work one sc into each tall stitch and one around each chain space. Join with a sl st in the first sc.
Edging Round 2: Ch 1. Repeat [sc in the next 3 stitches, ch 3, sl st in the first chain of that ch-3] around. Work any remaining 1 or 2 stitches as sc. Join with a sl st in the first sc.
Fasten off. The small chain points create a light decorative edge without adding a heavy cuff.
Finishing
Weave in the color-change ends along matching-color stitches where possible. Change direction while weaving so the tails remain secure.
Wash or damp-block according to the yarn label. Lay the sweater flat, align the stripes, and shape both sleeves to matching dimensions.
Do not stretch the neckline or pull the bell openings wider than their natural shape.
Once dry, try it on over your chosen underlayer. Check the shoulder seams, underarms, sleeve length, and neckline.
Finished Size
- Size A: Approximately 41-inch chest and 14-inch body length before edging.
- Size B: Approximately 49-inch chest and 15-inch body length before edging.
- Size C: Approximately 57-inch chest and 16-inch body length before edging.
- Sleeves: Approximately 16 inches from the dropped shoulder attachment before edging.
- Neck opening: Approximately 10 inches across before edging, adjusted as needed for comfortable dressing.
Measurements depend on the mixed-stitch gauge. The edging adds a small amount to the body and sleeve lengths.
Tips and Customization
Make a Longer Body
Add matching rows to both body panels before seaming. Keep the armhole depth measured from the top edge, allowing the extra rows to extend the lower body.
Adjust Sleeve Length
After the final increase on Sleeve Row 18, continue the stripe sequence to your preferred length. Change both sleeves equally.
Use a Softer Palette
Try sage, oatmeal, dusty pink, cream, and cocoa while keeping the same color order. Similar yarn weights matter more than the exact shades.
Keep the Stripes Aligned
Lay the pieces side by side before sewing. Correcting a missing row is much easier before the garment is assembled.
Wear It as a Layer
The mesh rows provide limited coverage. A fitted tank or camisole lets the stitch pattern show clearly and makes the sweater comfortable to style.
Frequently Asked Questions
Is this crochet bell sleeve crop top pattern beginner-friendly?
The construction uses simple panels, but the changing stitches, color changes, and sleeve increases need careful counting. It suits confident beginners who already know basic stitches and simple seams.
Why do my open rows look narrower than the solid rows?
Your chain stitches may be too tight. Check the counts first, then relax the chains so the mesh has a similar width to the solid stripes.
Can I use scrap yarn?
Yes, if the scraps have similar thickness, fiber behavior, and care instructions. Make a mixed-color swatch before starting the garment.
Why is the neckline too wide?
The design has a boat neckline, but you can sew a few more matching positions at each inner shoulder edge. Check that the opening still passes over your head before finishing the neckline.
Can I make the sleeves less flared?
For a smaller bell opening, omit one or more later increase rows and work those rows evenly instead. Keep the upper sleeve edge unchanged so it still matches the armhole.
How should I store it?
Fold it rather than hanging it for long periods. The open stitches and wide sleeves may stretch unevenly on a hanger.
Save This Boho Crochet Project
Save this crochet bell sleeve crop top pattern to your Pinterest board so you can return to the stripe sequence and sleeve-count table while you work.
Looking for Your Next Crochet Project?
Love this project? Explore Cute Stitch Studio’s premium crochet patterns for more cute, cozy, gift-worthy, and beginner-friendly handmade ideas.