Bobble Ripple Crochet Blanket Pattern in Woodland Greens
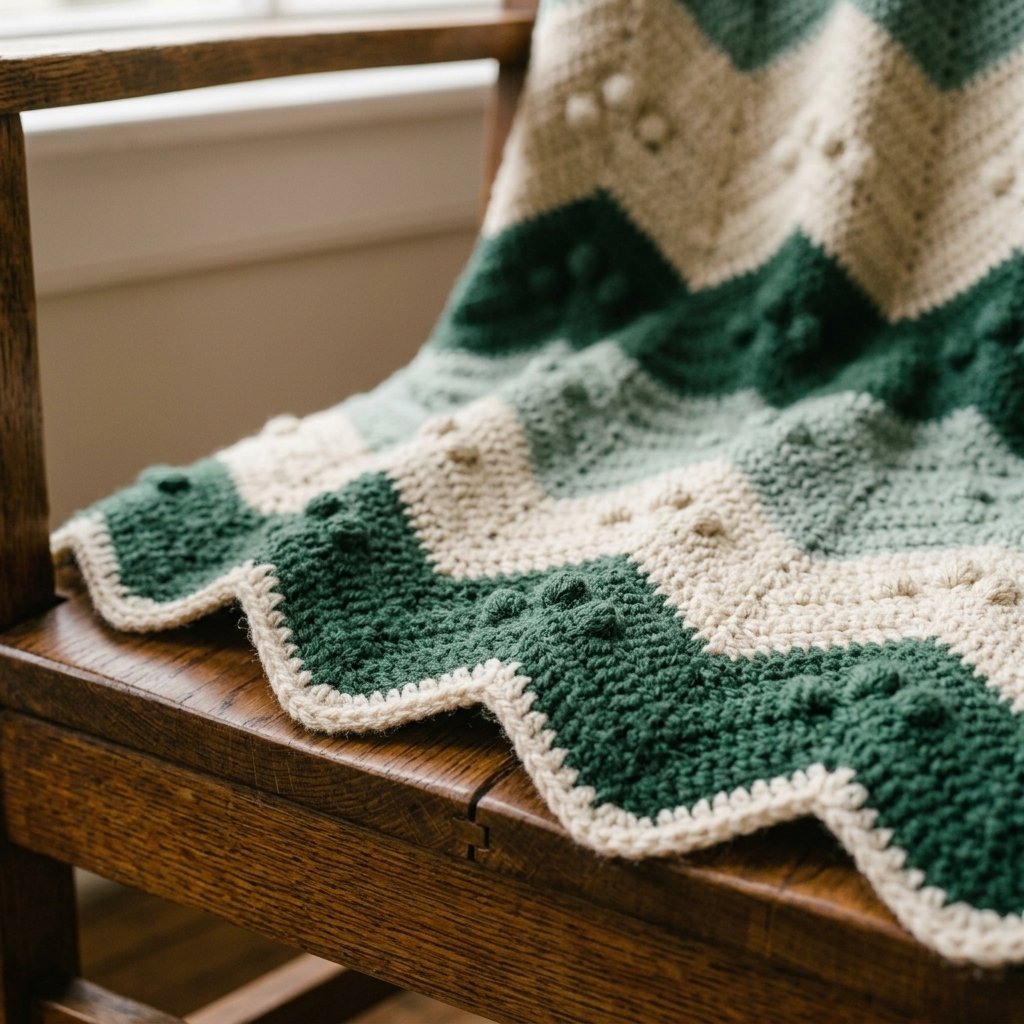
This free bobble ripple crochet blanket pattern combines flowing zigzag stripes with small raised bobbles. Deep forest green, eucalyptus, pale sage, and cream create a calm woodland palette that feels equally at home on a reading chair or across the end of a bed.
The blanket is worked in one piece, so there are no squares to join. Most rows use double crochet, with a textured row inside each color band to add little rounded details along the ripples.
This is a confident-beginner project with a repeat that becomes familiar once the first few rows are complete. The instructions include a throw-size version, a complete color schedule, and guidance for changing the width and length.
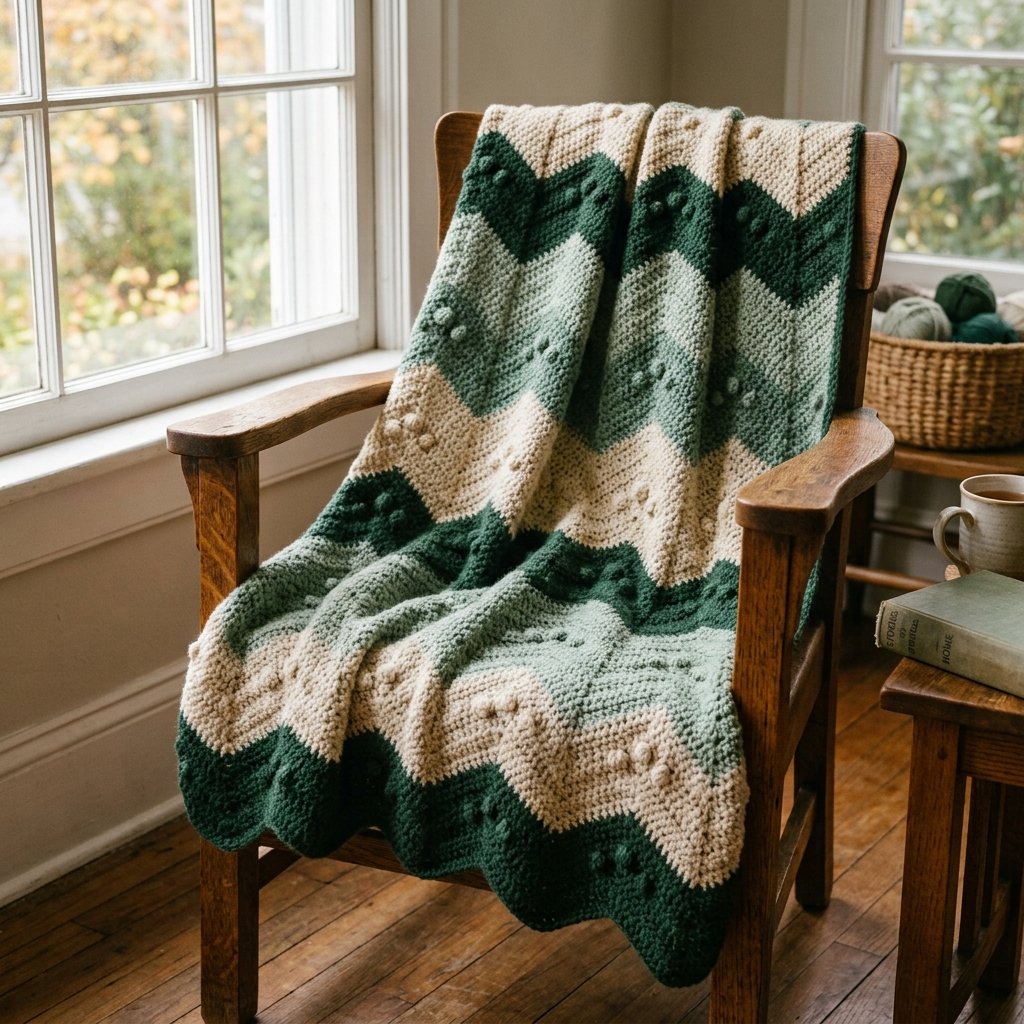
Table of Contents
Bobble Ripple Crochet Blanket Pattern In Woodland Greens Instructions
Project Details
- Skill level: Confident beginner.
- Estimated time: Approximately 35–55 hours, depending on crochet speed.
- Finished size: Approximately 48 × 60 inches (122 × 152.5 cm), after gentle blocking.
- Crochet terminology: US terms.
- Construction: One piece worked in turned rows.
- Texture: Double crochet ripples with a bobble row in each stripe.
- Edges: Straight sides with natural zigzag starting and finishing edges; no separate border.
This is an original Cute Stitch Studio interpretation of a textured striped blanket. It is not an exact reconstruction of the reference blanket. It has not been physically sample-tested; size and yarn quantities are gauge-based estimates.
Materials
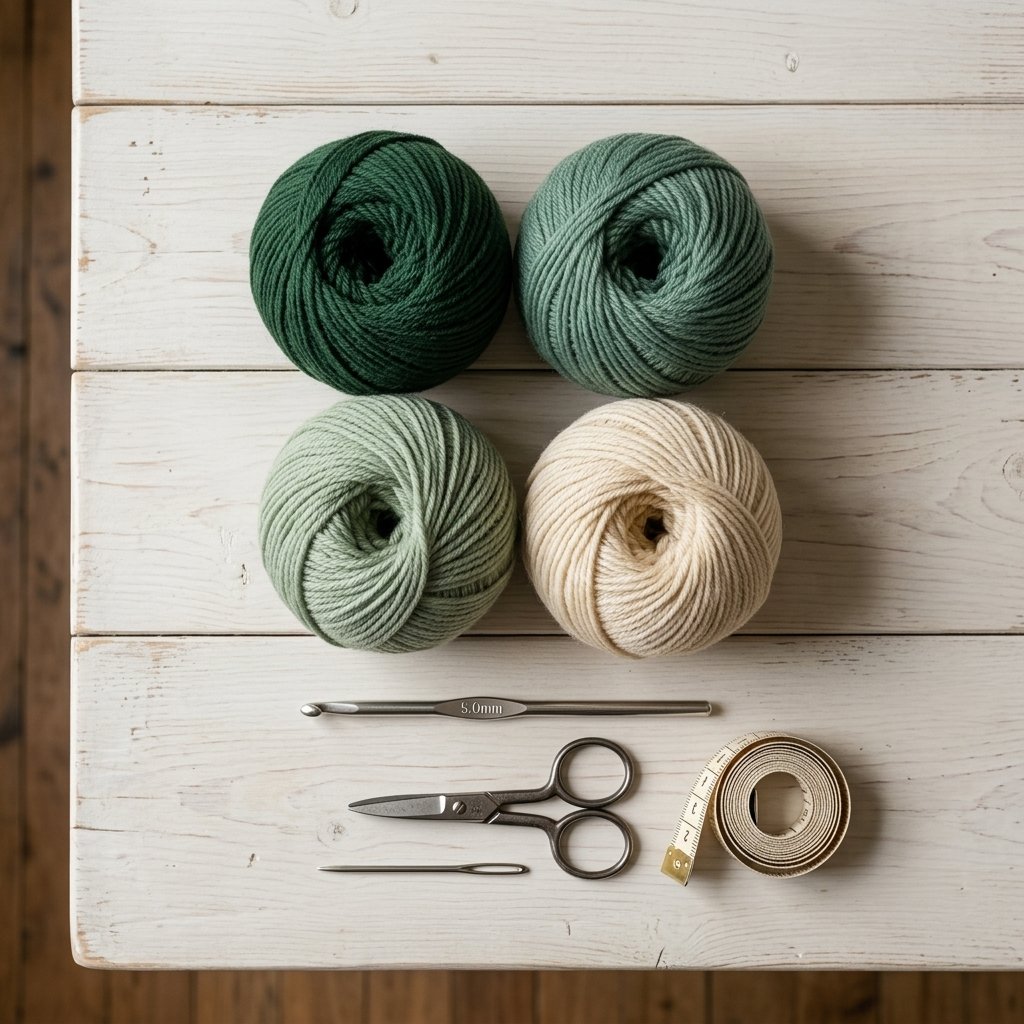
- Approximately 3,200 yards (2,925 m) total of Category 4 worsted-weight yarn in four colors.
- 5.5 mm crochet hook, or size needed for gauge.
- Yarn needle.
- Scissors.
- Measuring tape.
- Locking stitch markers for the beginning, end, and ripple repeats.
No stuffing is needed for the bobbles. Their shape comes from the stitches themselves.
Hook Size
Start with a 5.5 mm crochet hook. The fabric should have enough movement to drape comfortably while keeping the bobbles defined.
If your swatch is too narrow, try a larger hook. If it is too wide, try a smaller hook. Recheck the measurements after washing and drying the swatch.
Yarn
Use Category 4 worsted-weight yarn in four coordinating shades. Smooth acrylic or a soft acrylic-wool blend will make the stitch texture easy to see.
| Color | Suggested shade | Estimated quantity |
|---|---|---|
| A | Deep forest green | 800 yards (730 m) |
| B | Medium eucalyptus green | 800 yards (730 m) |
| C | Pale sage | 800 yards (730 m) |
| D | Warm cream | 800 yards (730 m) |
These are purchasing estimates rather than measured sample usage. Bobbles use more yarn than ordinary double crochet, and substitutions can change consumption. Buy additional yarn if you plan a larger blanket.
Choose colors from yarns with similar thickness and care requirements. Matching weight labels alone do not guarantee that different yarns will work up identically.
Gauge and Sizing
Pattern gauge: One complete 14-stitch ripple repeat measures approximately 4 inches (10 cm) across, and 8 rows measure approximately 4 inches tall, after gentle blocking.
Measure the width horizontally across the fabric, not along the sloping stitches of a ripple.
The throw uses 12 ripple repeats across and 120 rows in length. Its target measurements are approximately 48 × 60 inches.
Make a Swatch First
Ch 31 and follow the pattern with two ripple repeats instead of twelve. Your rows will contain 28 stitches.
Work 12 rows, including bobble rows at Rows 4 and 10. Wash and dry the swatch according to the yarn label, then measure several repeat points to estimate the full blanket size.
If your two-repeat swatch measures 9 inches rather than 8 inches across, for example, a 12-repeat blanket will be closer to 54 inches wide. Use your actual gauge when planning a larger project.
Abbreviations
- ch: chain.
- dc: double crochet.
- dc2tog: double crochet two stitches together.
- st(s): stitch(es).
- RS: right side.
- WS: wrong side.
Double Crochet Two Together
Yarn over, insert the hook into the next stitch, yarn over and pull up a loop. Yarn over and pull through two loops, leaving two loops on the hook.
Yarn over, insert the hook into the following stitch, yarn over and pull up a loop. Yarn over and pull through two loops. Yarn over and pull through all three remaining loops.
One dc2tog uses two stitches and produces one stitch.
Four-Double-Crochet Bobble
Yarn over, insert the hook into the designated stitch, yarn over and pull up a loop, then yarn over and pull through two loops.
Repeat that partial double crochet three more times in the same base stitch. You will have five loops on the hook.
Yarn over and pull through all five loops. Do not add a closing chain. The completed bobble counts as one stitch.
Work bobble rows with the WS facing you. Gently push each bobble away from you so it sits on the RS of the blanket.
Before You Start
- Turn after every row.
- The beginning ch-3 counts as the first dc.
- On every row after Row 1, work another dc into the first stitch at the base of the ch-3.
- Work the final two dc into the top of the previous row’s beginning ch-3.
- Mark the top of each beginning ch-3 if it is difficult to identify.
- All full-size rows contain 168 stitches, including the beginning ch-3.
- Two consecutive dc2tog create each valley.
- Two consecutive increases create each interior peak.
Row 1 is an RS row. Even-numbered rows are WS rows, so all scheduled bobble rows fall on the correct side.
Color Schedule
Each color stripe contains six rows. Repeat the four-color sequence five times for a total of 20 stripes.
| Color | Rows |
|---|---|
| A — Forest green | 1–6, 25–30, 49–54, 73–78, 97–102 |
| B — Eucalyptus | 7–12, 31–36, 55–60, 79–84, 103–108 |
| C — Pale sage | 13–18, 37–42, 61–66, 85–90, 109–114 |
| D — Cream | 19–24, 43–48, 67–72, 91–96, 115–120 |
Change color on the final yarn-over of the last dc in the old-color row. Cut the old yarn, leaving a tail approximately 8 inches (20 cm) long, then turn and begin the next row with the new color.
Bobble Ripple Crochet Blanket Pattern: Step-by-Step Instructions
Part 1 — Foundation
With Color A, ch 171 loosely.
The starting-chain formula is a multiple of 14, plus 3. For this throw, 14 × 12 + 3 = 171.
If your chains tend to be tight, use a slightly larger hook for the foundation chain, then return to your main hook.
Part 2 — Establish the Ripples
Row 1 — RS: Dc in the fourth chain from the hook. The three skipped chains count as the first dc, so there are now two stitches at the beginning.
Repeat the following sequence 11 times:
- Dc in the next 4 chains.
- Dc2tog over the next 2 chains.
- Dc2tog over the next 2 chains again.
- Dc in the next 4 chains.
- Work 2 dc in the next chain.
- Work 2 dc in the next chain.
Finish the row: dc in the next 4 chains, dc2tog twice over the next 4 chains, dc in the next 4 chains, and work 2 dc in the final chain. Turn. 168 stitches.
Do not expect the starting edge to lie straight. Its zigzag shape is part of the design.
Part 3 — Plain Ripple Row
Row 2 — WS: Ch 3, then dc in the first stitch at the base of that chain.
Repeat the following sequence 11 times:
- Dc in the next 4 stitches.
- Dc2tog twice, using the next 4 stitches.
- Dc in the next 4 stitches.
- Work 2 dc in the next stitch.
- Work 2 dc in the next stitch.
Finish: dc in the next 4 stitches, dc2tog twice, dc in the next 4 stitches, then work 2 dc in the top of the previous row’s beginning ch-3. Turn. 168 stitches.
Row 3: Repeat Row 2.
Check that the peaks and valleys stack above one another. If the fabric begins shifting sideways, count the stitches on each slope before continuing.

Part 4 — Bobble Ripple Row
Row 4 — WS: Ch 3, then dc in the first stitch.
Repeat the following sequence 11 times:
- Dc in the next stitch, make one bobble in the next stitch, then dc in the next 2 stitches.
- Dc2tog twice, using the next 4 stitches.
- Dc in the next stitch, make one bobble in the next stitch, then dc in the next 2 stitches.
- Work 2 dc in the next stitch.
- Work 2 dc in the next stitch.
Finish: dc in the next stitch, bobble in the next stitch, dc in the next 2 stitches, dc2tog twice, dc in the next stitch, bobble in the next stitch, dc in the next 2 stitches, then work 2 dc into the top of the previous beginning ch-3.
Turn. 168 stitches, including 24 bobbles.
Each bobble replaces one ordinary dc. It does not add a stitch to the row.
Part 5 — Complete the First Stripe
Rows 5–6: Repeat the plain ripple instructions from Row 2.
When working Row 5, treat the closed top of each bobble as one stitch. Work into that top once and continue with the normal ripple repeat.
Change to Color B on the final yarn-over of Row 6.
Part 6 — Continue the Blanket
Rows 7–120: Continue the plain ripple pattern, replacing the fourth row of every six-row stripe with a bobble ripple row.
Work bobble rows at these row numbers:
4, 10, 16, 22, 28, 34, 40, 46, 52, 58, 64, 70, 76, 82, 88, 94, 100, 106, 112, and 118.
All other rows use the plain ripple instructions from Row 2. Follow the color schedule so each color lasts six rows.
After Row 120, fasten off and leave a tail for weaving in.
Finishing
Weave in the color-change tails as you go, working through the backs of stitches within the matching stripe. Change direction before trimming so the ends are less likely to work loose.
Check that each bobble sits on the RS. If one has popped inward, gently push it toward the front with your fingers.
Wash or dampen the blanket according to the yarn label. Lay it flat on a clean surface and smooth the stripes into even ripples.
Keep the natural peaks and valleys at both short ends. Do not stretch them into straight edges or flatten the bobbles under heavy pressure.
This version is finished without an added border. The unbordered edges keep the construction simple and preserve the ripple outline.

Finished Size
The target finished size is approximately 48 inches wide × 60 inches long, or 122 × 152.5 cm, after gentle blocking.
Width is measured straight across the blanket. Length is measured between corresponding points on the starting and finishing ripple edges.
This size is intended as a throw. It can be draped across a bed, but it is not a full fitted bedspread.
Adjusting the Blanket Size
Change the Width
Choose the number of ripple repeats, multiply by 14, then add 3 for the foundation chain.
| Ripple repeats | Starting chain | Approximate width |
|---|---|---|
| 9 | 129 | 36 inches (91.5 cm) |
| 12 | 171 | 48 inches (122 cm) |
| 15 | 213 | 60 inches (152.5 cm) |
| 18 | 255 | 72 inches (183 cm) |
In each row, work the full repeated sequence one fewer time than your chosen number of ripples, then work the finishing section.
For example, a nine-ripple blanket uses eight full sequences plus the finishing section. Its rows contain 126 stitches and each bobble row contains 18 bobbles.
Change the Length
Add or remove complete six-row stripes. Each stripe adds approximately 3 inches (7.5 cm) at the stated gauge.
For a roughly 72-inch-long blanket, work 144 rows instead of 120. Continue the same four-color sequence and bobble placement.
To plan a bed-sized version, measure the mattress and your preferred overhang. Use your washed swatch measurements to calculate the repeats, and increase the yarn allowance accordingly.
Tips and Customization
- Keep the value contrast: Use a dark shade, a medium shade, a pale shade, and a light neutral so the ripples remain easy to see.
- Try an autumn palette: Replace the greens with rust, caramel, pale peach, and cream.
- Use fewer bobbles: Replace selected bobble rows with plain ripple rows. The stitch count stays unchanged.
- Mark difficult sections: Place markers near valleys or repeat boundaries until the shaping becomes familiar.
- Check each new stripe: Counting before the next color change makes mistakes easier to find.
Troubleshooting
My Blanket Is Getting Wider
Check whether you are adding a stitch beside the turning chain. The ch-3 counts as the first dc, and only one additional dc goes into the first stitch.
Also check each bobble row: one bobble replaces one dc, and no extra closing chain is added.
My Peaks Are Moving Sideways
A missed stitch on one slope can shift the next peak. Count the four stitch positions before and after each pair of decreases, then check the two consecutive increases.
The Bobbles Are on the Wrong Side
Work bobble rows on the WS and push them away from you. Keep the row schedule consistent so all textured rows face the same way.
Frequently Asked Questions
Is This Bobble Ripple Crochet Blanket Pattern Good for Beginners?
It suits beginners who already know double crochet and can follow a stitch repeat. Practice a two-ripple swatch before starting the full foundation chain.
Are the Bobbles Stuffed?
No. Each bobble is made from four partial double crochet stitches closed together in one base stitch.
Does the Pattern Include the Exact Border in the Reference Photos?
No. This version uses natural ripple ends and unbordered side edges. Its texture and construction are independently designed.
Can I Use Bulky Yarn?
Bulky yarn will change the size, weight, and drape. Make a swatch and calculate the repeat count from its actual width rather than using the worsted-weight size estimates.
How Much Yarn Will a Larger Blanket Need?
Yarn use generally increases with the blanket’s area, but bobble tension and yarn construction also matter. For a better estimate, weigh a completed swatch and scale its yarn use to your planned dimensions, allowing extra for tails and variation.
Save This Pattern for Later
Save this bobble ripple crochet blanket pattern to your crochet blankets board on Pinterest so you can return to the color schedule, bobble placement, and sizing table when you begin.
Looking for Your Next Crochet Project?
Love this project? Explore Cute Stitch Studio’s premium crochet patterns for more cute, cozy, gift-worthy, and beginner-friendly handmade ideas.