Cabled Beanie Knitting Pattern: DK and Chunky Yarn Options
This free cabled beanie knitting pattern combines classic rope cables, narrow knitted ribs, and a generous folded brim. The result is a cozy everyday hat with plenty of texture and a simple, softly gathered crown.
Choose DK yarn for smaller, more detailed stitches or chunky yarn for a bolder version. Both options use the same basic cable motif, with different stitch counts and cable-round spacing to suit the yarn.
This is a knitting project worked with needles. If you can knit, purl, and work in the round, the clearly explained cable crossing makes it a useful first cable project.
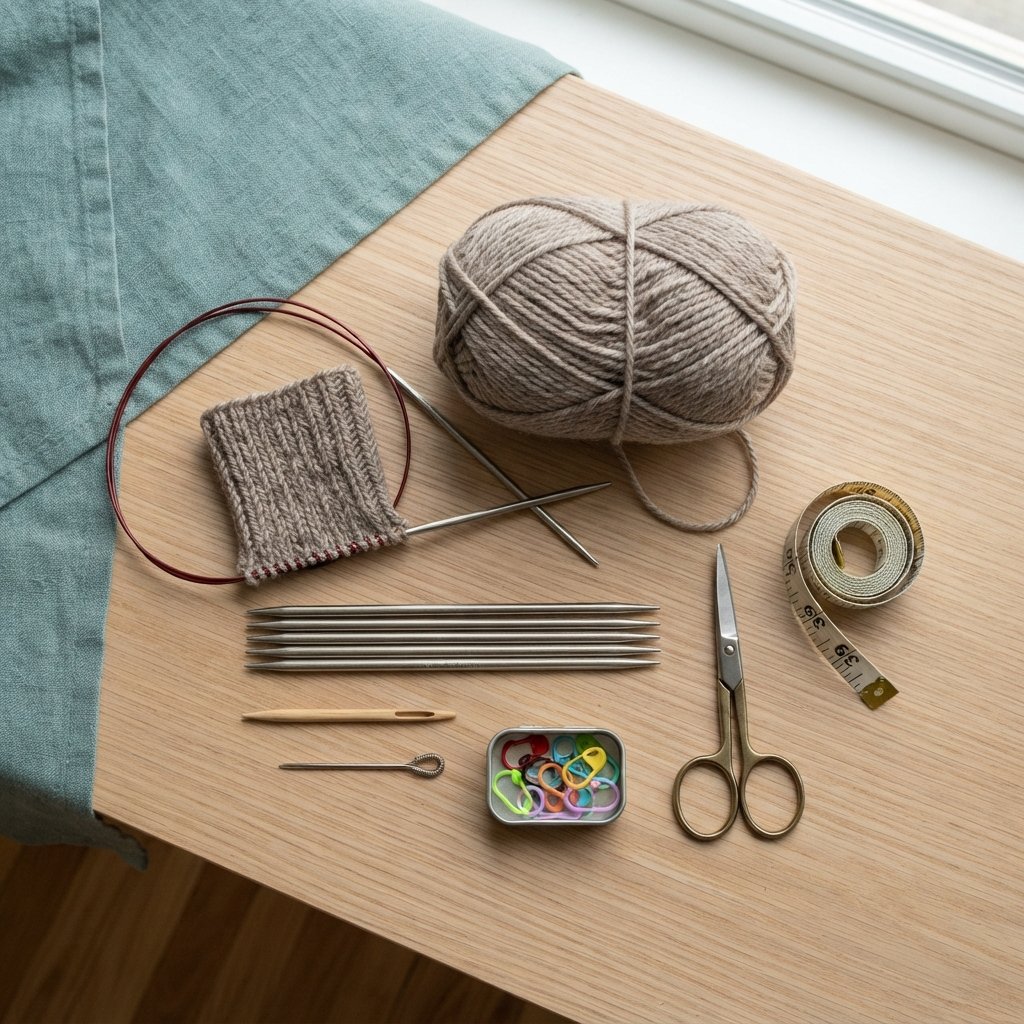
Table of Contents
Cabled Beanie Knitting Pattern: Dk And Chunky Yarn Options Instructions
Project Details
- Skill level: Adventurous beginner to intermediate.
- Estimated time: Approximately 6–10 hours for DK or 4–7 hours for chunky yarn.
- Size: One adult size per yarn option.
- Suggested head circumference: Approximately 21–22½ inches (53–57 cm).
- Finished circumference: Approximately 20 inches (51 cm), measured relaxed.
- Terminology: US knitting terms.
- Construction: Seamless, bottom-up knitting in the round, with a folded ribbed brim and a decreased crown.
This original Cute Stitch Studio pattern has not been physically tested. Measurements and yarn requirements are estimates based on the stated gauges. Make a swatch and check the fit before completing the hat.
Choose Your Yarn Version
Follow one column consistently. The chunky version is not made by substituting thicker yarn into the DK stitch counts.
| Detail | DK Version | Chunky Version |
|---|---|---|
| Yarn category | Category 3, light/DK | Category 5, bulky/chunky |
| Estimated yarn | 230–280 yards (210–256 m) | 130–170 yards (119–155 m) |
| Brim needles | 3.5 mm, US 4 | 5.5 mm, US 9 |
| Body needles | 4 mm, US 6 | 6 mm, US 10 |
| Cast-on stitches | 120 | 84 |
| 12-stitch motif repeats | 10 | 7 |
| Relaxed circumference | 20 inches (51 cm) | Approximately 19¾ inches (50 cm) |
| Height with brim folded | Approximately 8¾ inches (22 cm) | Approximately 8⅓ inches (21 cm) |
Both versions are intended to stretch approximately 1–2¾ inches around the suggested head measurements. This difference between head size and relaxed hat size is called negative ease.
Materials for the Cabled Beanie Knitting Pattern
- The yarn quantity listed for your chosen version.
- One 16-inch (40 cm) circular needle in the brim size.
- One 16-inch (40 cm) circular needle in the body size.
- Double-pointed needles in the body size for the crown, or a long circular needle if you already use the magic-loop method.
- A cable needle suited to your yarn.
- One beginning-of-round marker.
- Optional additional markers between the 12-stitch motif repeats.
- A yarn needle.
- Scissors.
- Measuring tape.
The sample design has no pom-pom, buttons, or other added decorations.

Needle Sizes
For DK yarn, begin with 3.5 mm needles for the brim and 4 mm needles for the body.
For chunky yarn, begin with 5.5 mm needles for the brim and 6 mm needles for the body.
These sizes are starting points. Use the body needle size that gives the required cable-pattern gauge, then choose a brim needle approximately 0.5 mm smaller.
If your swatch has too many stitches per inch, try larger needles. If it has too few, try smaller needles.
Yarn
Choose a smooth wool or wool-blend yarn with enough stitch definition to show the cables. A softly plied yarn can look lovely, but a very fuzzy surface may hide the crossing details.
The neutral taupe shade gives the hat a classic look. Oatmeal, heather gray, dusty blue, and muted sage are other options that show the stitch pattern clearly.
For this cabled beanie knitting pattern, choose either category 3 DK or category 5 chunky yarn. Check the gauge even when your yarn label matches the category: thickness and elasticity vary between yarns.
The yardage estimates include the folded brim. Allow extra yarn if you add height or need a larger swatch.
Gauge
Measure over the cable pattern after washing and drying the swatch according to the yarn label. Let the cables sit naturally; do not stretch them flat.
- DK: 24 stitches and 32 rounds = 4 inches (10 cm).
- Chunky: 17 stitches and 24 rounds = 4 inches (10 cm).
The 12-stitch motif is k6, p2, k2, p2. Work cable crossings using the round sequence for your chosen version below.
Use a swatch worked in the round when possible. Plain stockinette gauge is not a substitute for cable-pattern gauge because the crossings draw the fabric inward.
Check stitch gauge first for circumference. Round gauge affects the height and can be adjusted by adding or removing complete cable repeats.
Abbreviations
- k: knit.
- p: purl.
- k2tog: knit two stitches together.
- p2tog: purl two stitches together.
- C6F: cable six front.
- st / sts: stitch / stitches.
How to Work C6F
Slip the next 3 stitches onto a cable needle and hold them in front of the work. Knit the next 3 stitches from the left needle, then knit the 3 stitches from the cable needle.
This crosses a six-stitch cable without changing the stitch count. Keep the stitches close to the needle tips, and avoid pulling the working yarn tightly across the crossing.
How to Work the Decreases
K2tog: Insert the right needle through the next two stitches together as if to knit, then knit them as one stitch.
P2tog: Insert the right needle through the next two stitches together as if to purl, then purl them as one stitch.
Each decrease turns two stitches into one.
Before You Start
- Work every round with the outside of the hat facing you.
- Place a marker at the beginning of the round and move it onto the right needle as you pass it.
- Instructions inside parentheses are repeated around the entire hat.
- The body contains ten motif repeats for DK or seven for chunky.
- Do not add cable crossings during the crown shaping.
- Change to double-pointed needles or magic loop when the stitches no longer fit comfortably around the short circular needle.
Check that the cast-on edge is not twisted before joining. A twist cannot be corrected later without undoing the knitting.
Cabled Beanie Knitting Pattern: Step-by-Step Instructions
Part 1 — Cast On
Using the smaller needles, cast on 120 stitches for DK or 84 stitches for chunky.
Use a familiar cast-on that has enough stretch for a hat brim. If you use long-tail cast-on, leave enough yarn for your chosen stitch count.
Arrange the stitches around the circular needle, check for twisting, place the beginning-of-round marker, and join to work in the round.
Part 2 — Knit the Folded Brim
Brim Round 1: Repeat (k2, p2) around. (120 DK / 84 chunky sts)
Brim Round 2 onward: Repeat Brim Round 1 until the ribbing measures approximately 4 inches (10 cm) from the cast-on edge.
Measure without stretching the ribbing. This section will fold upward by approximately 2 inches (5 cm) when the hat is finished.
There are no increases or decreases in the brim. The cast-on counts are divisible by four, so the ribbing repeats evenly.
Change to the larger body needles as you work the first body round.

Part 3A — DK Cable Body
Use this section only for the DK version.
Body Rounds 1–3: Repeat (k6, p2, k2, p2) around. (120 sts)
Body Round 4: Repeat (C6F, p2, k2, p2) around. (120 sts)
Body Rounds 5–8: Repeat (k6, p2, k2, p2) around. (120 sts)
Body Rounds 9–40: Repeat Body Rounds 1–8 four more times.
You have now worked five complete eight-round repeats. The body above the brim should measure approximately 5 inches (12.5 cm).
The cable-crossing rounds are 4, 12, 20, 28, and 36. The total stitch count stays at 120.
Part 3B — Chunky Cable Body
Use this section only for the chunky version.
Body Rounds 1–2: Repeat (k6, p2, k2, p2) around. (84 sts)
Body Round 3: Repeat (C6F, p2, k2, p2) around. (84 sts)
Body Rounds 4–6: Repeat (k6, p2, k2, p2) around. (84 sts)
Body Rounds 7–24: Repeat Body Rounds 1–6 three more times.
You have now worked four complete six-round repeats. The body above the brim should measure approximately 4 inches (10 cm).
The cable-crossing rounds are 3, 9, 15, and 21. The total stitch count stays at 84.

Check the Height Before Shaping
Fold the brim upward by approximately 2 inches (5 cm). The DK version should measure about 7 inches (18 cm) from the folded lower edge to the needles. The chunky version should measure about 6 inches (15 cm).
The crown adds approximately 1¾ inches (4.5 cm) in DK or 2⅓ inches (6 cm) in chunky yarn.
For more height, add one complete body repeat before shaping. An extra repeat adds approximately 1 inch (2.5 cm) at either stated gauge.
Part 4 — Shape the Crown
Both versions use the same decrease sequence. Repeat each instruction 10 times for DK or 7 times for chunky.
Each repeat begins with the stitches that previously formed a six-stitch cable. The groups gradually become narrower as the crown closes.
| Crown Round | Repeat Around | DK Count | Chunky Count |
|---|---|---|---|
| 1 | k6, p2tog, k2, p2 | 110 | 77 |
| 2 | k6, p1, k2, p2 | 110 | 77 |
| 3 | k6, p1, k2, p2tog | 100 | 70 |
| 4 | k6, p1, k2, p1 | 100 | 70 |
| 5 | k6, p1, k2tog, p1 | 90 | 63 |
| 6 | k6, p1, k1, p1 | 90 | 63 |
| 7 | k2tog, k2, k2tog, p1, k1, p1 | 70 | 49 |
| 8 | k4, p1, k1, p1 | 70 | 49 |
| 9 | k2tog, k2tog, p1, k1, p1 | 50 | 35 |
| 10 | k2, p1, k1, p1 | 50 | 35 |
| 11 | k2tog, k1, k2tog | 30 | 21 |
| 12 | Knit all stitches | 30 | 21 |
| 13 | k2tog, k1 | 20 | 14 |
| 14 | k2tog | 10 | 7 |
From Crown Round 11 onward, work the decreases and remaining stitches as knit stitches, even where a stitch was previously purled.
Count after every decrease round. If your count differs from the table, correct that round before continuing.
Part 5 — Close the Crown
Cut the yarn, leaving an approximately 10-inch (25 cm) tail. Thread it through a yarn needle.
Pass the needle through the remaining 10 DK stitches or 7 chunky stitches, removing them from the knitting needles as you go.
Pull gently until the opening closes. Pass the yarn through the gathered stitches again, take it to the inside of the hat, and secure it through nearby stitches.
Finishing
Weave in the cast-on tail and any joining ends on the inside. Keep the brim tail loose enough that it does not restrict the ribbing.
Wash or dampen the hat according to the yarn label. Press out excess water gently in a towel without twisting, then lay the hat flat to dry.
Arrange the cables with your hands, but do not stretch them open or flatten them aggressively. Avoid pulling the brim to the same width as the cable body; the ribbing should retain its natural spring.
When dry, fold the brim upward by approximately 2 inches (5 cm). Adjust the fold slightly for your preferred fit.

Finished Size
The DK version is approximately 20 inches (51 cm) around and 8¾ inches (22 cm) tall with the brim folded.
The chunky version is approximately 19¾ inches (50 cm) around and 8⅓ inches (21 cm) tall with the brim folded.
Both are intended for an adult head measuring approximately 21–22½ inches (53–57 cm). These are gauge-based estimates rather than physically verified fit measurements.
Tips and Customization
Use a Light or Medium Color for Your First Cable Hat
Taupe, pale gray, and oatmeal make it easier to see the knit columns and purl channels. Very dark yarn can make counting and correcting cable stitches more difficult.
Adjust the Slouch with Complete Repeats
For a slightly slouchier cabled beanie knitting pattern, add one complete body repeat before starting the crown. Keep the crown instructions unchanged.
Write down the added repeat so you can reproduce the same height if you make another hat.
Change the Brim Fold
A shallower fold leaves more height in the hat. A deeper fold makes the fit shorter. Try adjusting the fold before changing the body length.
Keep Circumference Changes Separate from Height Changes
Adding one 12-stitch motif changes the circumference by approximately 2 inches in DK or 2¾ inches in chunky yarn. That is a substantial adjustment.
The written pattern provides one adult size per yarn weight. Do not add stitches casually; a different circumference requires checking the new gauge-based size and updating every crown total.
Count the Cable Rounds
Use a simple tally to track the eight-round DK repeat or six-round chunky repeat. Consistent crossing intervals give the cable columns their even appearance.
Frequently Asked Questions
Is this cabled beanie knitting pattern suitable for a first cable project?
Yes, if you already knit and purl comfortably in the round. The hat repeats one six-stitch cable throughout, and the cable crossing does not change the stitch count.
Can I use DK and chunky yarn interchangeably?
No. Choose the matching needle suggestions, cast-on count, gauge, and body instructions. Both versions share the crown sequence, but their stitch totals differ.
Why does my cable fabric look narrower than my ribbing?
Cable crossings draw the fabric inward. Check your washed cable-pattern gauge rather than judging the size from the first few uncrossed rounds.
What if I miss a cable crossing?
For beginners, the clearest correction is to carefully undo back to the missed crossing and work it again. Adding an extra crossing on the following round can leave the spacing uneven.
Can I knit the whole hat on a short circular needle?
You can knit the brim and body on a 16-inch circular needle. As the crown narrows, switch to double-pointed needles or magic loop so the remaining stitches are not stretched around the cable.
Does this pattern need a pom-pom?
No. The gathered crown is complete on its own and keeps the focus on the cable texture.
Save this cabled beanie knitting pattern to your winter knitting board so you can find both yarn options when you are ready to cast on.
Looking for Your Next Crochet Project?
Love this project? Explore Cute Stitch Studio’s premium crochet patterns for more cute, cozy, gift-worthy, and beginner-friendly handmade ideas.