Hooded Crochet Vest Pattern with Easy Vertical Texture
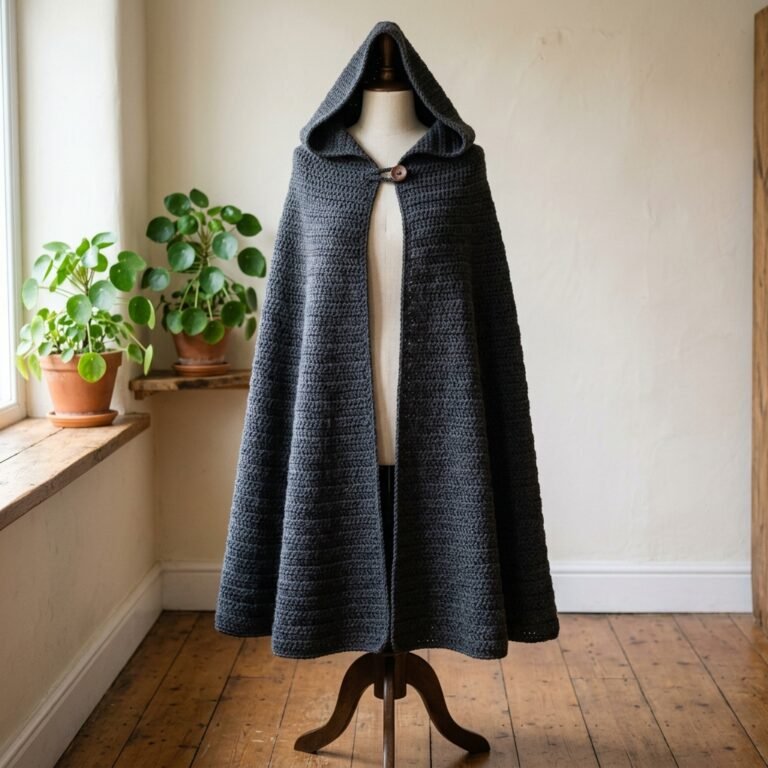
This free hooded crochet vest pattern creates a long, comfortable layering piece with subtle vertical ridges and a five-button front. The sleeveless shape slips easily over a long-sleeved shirt, while the hood adds a cozy finishing touch.
Warm cream keeps the texture in focus and pairs beautifully with jeans, leggings, or a simple dress. The straight silhouette is relaxed rather than fitted, with an open upper neckline that folds back softly.
This project suits confident beginners who are comfortable with single crochet and ready to try a larger garment. You will make three rectangular body panels, join them, and crochet the hood directly onto the neckline.
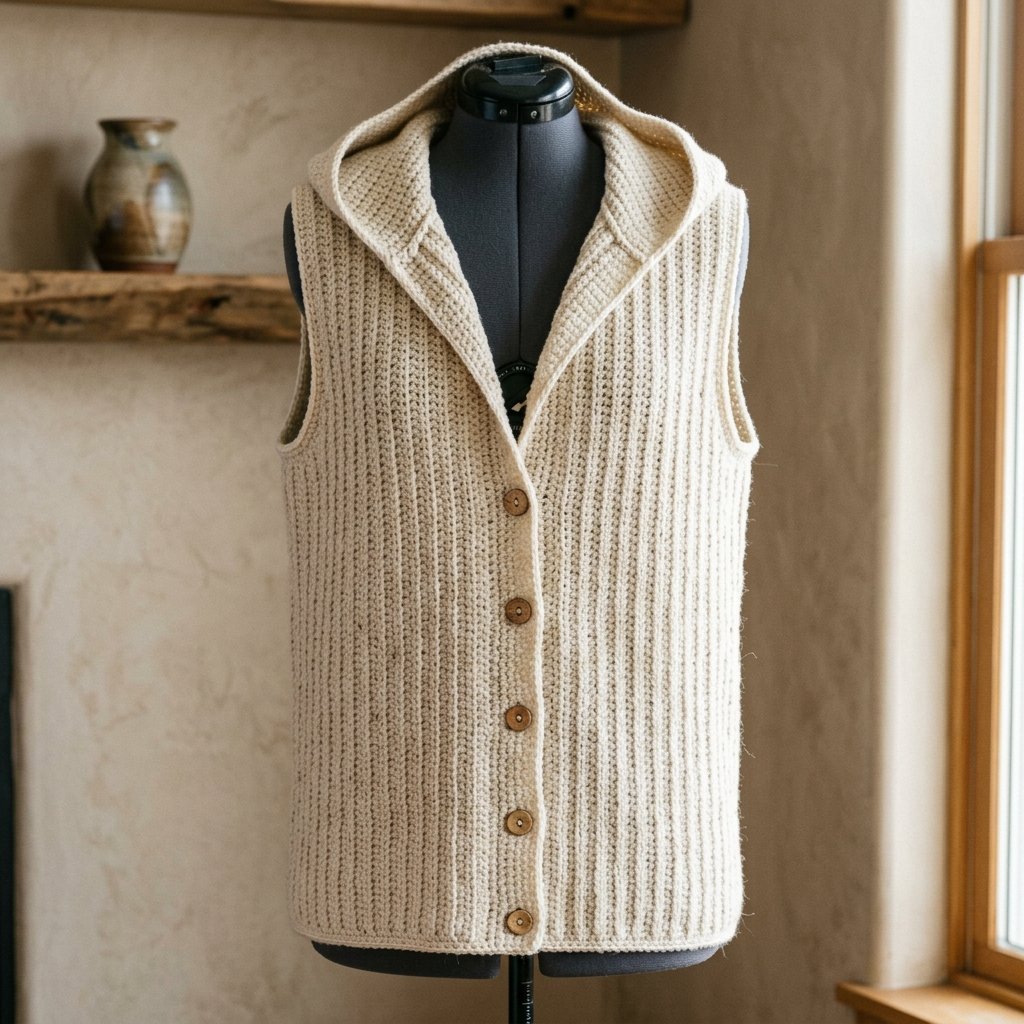
Table of Contents
Hooded Crochet Vest Pattern With Easy Vertical Texture Instructions
Project Details
- Skill level: Confident beginner.
- Estimated time: Approximately 30–45 hours, depending on size and crochet speed.
- Sizes: A, B, C, and D, chosen by body measurements.
- Finished body length: Approximately 28 inches (71 cm), excluding the hood.
- Crochet terminology: US terms.
- Construction: Three sideways-worked body panels, shoulder and side seams, an attached hood, and front edging.
- Closure: Five buttons along the lower front, leaving an open upper neckline.
This is an original Cute Stitch Studio interpretation with a straight fit and button closure. It has not been physically sample-tested. Finished measurements and yarn requirements are estimates based on the stated gauge.
Choose Your Size
Measure around your fullest bust and around the fullest part of your hips. Because this vest is long and closes below the waist, use whichever measurement is larger when choosing your size.
Aim for approximately 3–7 inches (7.5–18 cm) of positive ease over that measurement. This leaves room for a lightweight layer underneath.
| Measurement | A | B | C | D |
|---|---|---|---|---|
| Suggested largest bust or hip measurement | 34–38 in (86.5–96.5 cm) | 42–46 in (106.5–117 cm) | 50–54 in (127–137 cm) | 58–62 in (147.5–157.5 cm) |
| Approximate finished circumference with bands overlapped | 41 in (104 cm) | 49 in (124.5 cm) | 57 in (145 cm) | 65 in (165 cm) |
| Back panel width | 20 in (51 cm) | 24 in (61 cm) | 28 in (71 cm) | 32 in (81.5 cm) |
| Each front panel width before band | 10 in (25.5 cm) | 12 in (30.5 cm) | 14 in (35.5 cm) | 16 in (40.5 cm) |
| Body length | 28 in (71 cm) | 28 in (71 cm) | 28 in (71 cm) | 28 in (71 cm) |
| Armhole depth before edging | 8 in (20.5 cm) | 9.1 in (23 cm) | 10 in (25.5 cm) | 11.1 in (28 cm) |
If your measurements fall between the suggested ranges, compare them directly with the finished circumference. Choose the roomier size if you want to wear the vest over a thicker top.
The front bands add approximately 1 inch (2.5 cm) to the combined panel circumference when overlapped. Seaming tension and blocking can slightly change the final measurement.
Materials
- Category 4 worsted-weight yarn in cream; estimated quantities are listed below.
- 5 mm crochet hook, or the size needed to match gauge.
- Five smooth buttons approximately 0.75 inch (19 mm) across.
- Yarn needle.
- Sewing needle and matching thread for attaching the buttons.
- Scissors.
- Measuring tape.
- Locking stitch markers for shoulders, armholes, and button placement.

Hook Size
Start with a 5 mm crochet hook. Choose the final hook size from your washed gauge swatch rather than the yarn label alone.
If you have too many stitches across 4 inches, try a larger hook. If you have too few, try a smaller hook. Check row gauge as well, because the body panels are worked sideways.
Yarn
Use Category 4 worsted-weight yarn with a smooth surface and comfortable drape. A soft acrylic-wool blend or a smooth acrylic yarn can work well for this layering piece.
Avoid very stiff yarn: the hood and upper front should fold naturally. Choose a light color if you want the ridges to stand out clearly.
| Size | Estimated yarn quantity |
|---|---|
| A | 1,500 yards (1,370 m) |
| B | 1,750 yards (1,600 m) |
| C | 2,000 yards (1,830 m) |
| D | 2,250 yards (2,060 m) |
These are purchasing estimates, not measured sample usage. Allow extra for a longer vest, and use matching dye lots whenever possible.
Gauge
Body gauge: 14 single crochet stitches and 16 rows = 4 inches (10 cm), worked in the back loop only, after washing and drying flat.
Hood gauge: Aim for the same 14 stitches and 16 rows per 4 inches in ordinary single crochet. Adjust the hook for the hood if needed.
Make a generous swatch and measure its center without stretching the ridges. Because the body is worked sideways, the stitch count controls the vest length and the row count controls its width.
Let the dry swatch hang for several hours and measure again. If your yarn grows noticeably, take that into account before committing to the full garment.
Abbreviations
- ch: chain.
- sc: single crochet.
- sl st: slip stitch.
- st(s): stitch(es).
- BLO: back loop only.
Increase: Work 2 sc into the same stitch. This adds one stitch.
Back loop only: Look at the two loops along the top of a stitch. Insert the hook under the loop farther away from you, leaving the front loop unworked.
Before You Start
- Instructions list sizes in this order: A (B, C, D).
- Work the body panels in turned rows.
- Beginning ch-1 does not count as a stitch.
- Work the first sc into the first stitch of the previous row.
- Each body row runs from the hem toward the shoulder or back again.
- The ridges will run vertically when the finished panels are worn.
- The hood uses ordinary sc through both top loops.
The body has no waist shaping or curved armholes. The reference silhouette is adapted into a simpler, straight construction with five buttons rather than a decorative clasp.
Hooded Crochet Vest Pattern: Step-by-Step Instructions
Part 1 — Back Panel
Foundation: Ch 99 for every size.
Row 1: Sc in the second chain from the hook and in every remaining chain. Turn. 98 sc.
Row 2: Ch 1. Sc in the BLO of each stitch across. Turn. 98 sc.
Rows 3–80 (96, 112, 128): Repeat Row 2 until the panel has 80 (96, 112, 128) total rows.
Fasten off. After blocking, the panel should measure approximately 28 inches long and 20 (24, 28, 32) inches wide.
Part 2 — Front Panels
Make two identical front panels.
Foundation: Ch 99.
Row 1: Sc in the second chain from the hook and in every remaining chain. Turn. 98 sc.
Row 2: Ch 1. Sc in the BLO of each stitch across. Turn. 98 sc.
Rows 3–40 (48, 56, 64): Repeat Row 2 until the panel has 40 (48, 56, 64) total rows.
Fasten off. Each blocked front should measure approximately 28 inches long and 10 (12, 14, 16) inches wide.
Lay the fronts together and check that their edges match. Label the top and bottom of all three panels with markers before assembly.

Part 3 — Block the Body Panels
Wash or dampen the panels according to the yarn label. Gently smooth them to the intended measurements on a flat surface.
Keep the ridges relaxed rather than stretching them open. Allow the pieces to dry fully before measuring the seams.
Part 4 — Sew the Shoulders
Place the back flat with your chosen right side facing up. Lay the two fronts on top with right sides facing the back. Align their outer side edges and top edges.
The top edges consist of row ends. Starting at each outer shoulder, sew together 24 (32, 40, 48) matching row ends from the front and back.
Each shoulder seam measures approximately 6 (8, 10, 12) inches.
This leaves 32 back row ends unseamed in the center and 16 row ends unseamed at the inner top edge of each front.
The hood neckline therefore contains 64 row ends in every size: 16 on one front, 32 across the back, and 16 on the other front.
Part 5 — Sew the Side Seams
From the top of each outer side edge, count down 28 (32, 35, 39) stitch positions and place a marker. Leave this upper section open for the armhole.
Sew the remaining lower side edges together, matching stitch positions from the marker to the hem. There are 70 (66, 63, 59) stitch positions in each side seam.
Repeat on the other side. Use a small, flexible seam and avoid pulling it tight.
Try on the body before securing all seam ends. Check that the armholes feel comfortable over your intended base layer and that the fronts reach the center without strain.
Part 6 — Start the Hood
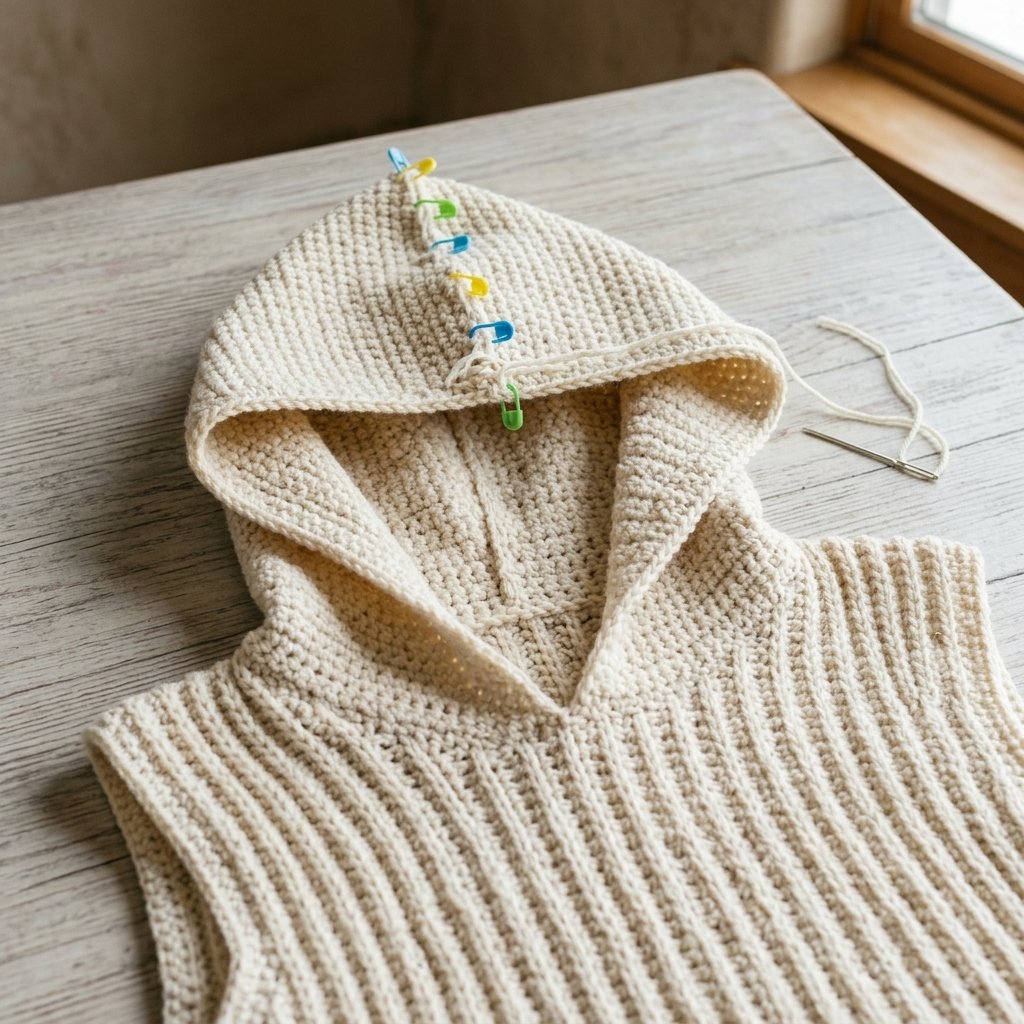
Turn the vest right side out. With the neckline facing you, join yarn at the inner top corner of one front.
Hood Row 1: Ch 1. Work 56 sc evenly across the 64 neckline row ends, continuing across the front, back, and other front. Turn. 56 sc.
For an even pickup, divide the neckline into eight groups of eight row ends. Work 7 sc across each group, leaving one row end unworked in each group. Do not add extra stitches over the shoulder seams.
The hood begins approximately 16 inches (40.5 cm) wide and gradually widens to provide room around the head.
Part 7 — Shape the Hood
Work all hood stitches through both top loops.
Hood Row 2: Ch 1. Repeat [sc in the next 13 stitches, 2 sc in the next stitch] 4 times. Turn. 60 sc.
Hood Row 3: Ch 1. Sc in each stitch across. Turn. 60 sc.
Hood Row 4: Ch 1. Repeat [sc in the next 14 stitches, 2 sc in the next stitch] 4 times. Turn. 64 sc.
Hood Row 5: Sc across as in Row 3. 64 sc.
Hood Row 6: Ch 1. Repeat [sc in the next 15 stitches, 2 sc in the next stitch] 4 times. Turn. 68 sc.
Hood Row 7: Sc across. 68 sc.
Hood Row 8: Ch 1. Repeat [sc in the next 16 stitches, 2 sc in the next stitch] 4 times. Turn. 72 sc.
Hood Row 9: Sc across. 72 sc.
Hood Row 10: Ch 1. Repeat [sc in the next 17 stitches, 2 sc in the next stitch] 4 times. Turn. 76 sc.
Hood Row 11: Sc across. 76 sc.
Hood Row 12: Ch 1. Repeat [sc in the next 18 stitches, 2 sc in the next stitch] 4 times. Turn. 80 sc.
Hood Row 13: Sc across. 80 sc.
Hood Row 14: Ch 1. Repeat [sc in the next 19 stitches, 2 sc in the next stitch] 4 times. Turn. 84 sc.
Hood Rows 15–52: Ch 1. Sc in each stitch across. Turn. 84 sc per row.
Fasten off, leaving a long sewing tail. The hood should measure approximately 13 inches (33 cm) tall from the neckline and 24 inches (61 cm) across its final row.
Part 8 — Close the Hood Top
Fold the hood in half with right sides together so its two front edges meet. The final row folds into two halves of 42 stitches.
Sew those two halves together, pairing one stitch from each half. This creates the top seam and a softly pointed back corner.
Turn the hood right side out. Check the fit before weaving in the seam tail.

Part 9 — Front and Hood Band
The band travels from the lower front corner on the wearer’s left, up that front, around the hood opening, and down the wearer’s right front.
Band Row 1: With the right side facing you, join yarn at the lower left front corner. Ch 1. Work 98 sc up the front edge, 46 sc evenly along the first hood edge, 46 sc along the second hood edge, and 98 sc down the other front. Turn. 288 sc.
Each hood edge has 52 row ends. To distribute 46 stitches, divide it into sections of 13 row ends and place 12, 11, 12, and 11 sc across those sections. Do not add a stitch into the top seam.
Band Row 2 — Buttonholes: You are now at the bottom of the wearer’s right front. Ch 1. Sc in the next 7 stitches, ch 2 and skip 2 stitches. Repeat [sc in the next 12 stitches, ch 2 and skip 2 stitches] 4 times. Sc in the remaining 223 stitches. Turn.
You have five buttonholes, 278 sc, and five chain-2 spaces. Counting each chain separately, the row still contains 288 stitch positions.
Band Row 3: Ch 1. Sc in each sc and work 2 sc into every chain-2 space. 288 sc. Fasten off.
Before completing the full final row, test one button through the first finished hole. It should pass with gentle pressure and stay secure when released. If necessary, adjust the button size to suit the hole.
Part 10 — Finish the Armholes
Armhole Round 1: Join yarn at the underarm with the right side facing you. Ch 1. Work 1 sc in each unseamed stitch position around the opening. Join with a sl st to the first sc.
You should have 56 (64, 70, 78) sc. Do not add stitches into the underarm seam. Fasten off and repeat on the other armhole.
Keep the edging relaxed. If it draws the opening inward, rework it with a slightly larger hook.
Part 11 — Attach the Buttons
Lay the vest flat and overlap the buttonhole band over the plain band. Align the hem corners without stretching the fabric.
Mark the center of each buttonhole on the plain band. Sew one button at each mark with matching sewing thread, passing securely through the band fabric several times.
The buttons sit approximately 2.5, 6.5, 10.5, 14.5, and 18.5 inches above the hem, depending on your gauge. The remaining upper front stays open and can fold back softly beside the hood.
Finishing
Weave in all remaining yarn tails on the inside, changing direction to help secure them. Check both underarms, the hood seam, and the ends of the front band.
Lay the vest flat and smooth the bands gently. If the hood needs shaping, dampen it according to the yarn label and allow it to dry without stretching.
Button the vest and try it on over a light shirt. The lower fronts should meet comfortably, the armholes should allow easy movement, and the hood should sit without pulling the shoulders upward.
Finished Size
The completed vest measures approximately 28 inches (71 cm) long, excluding the hood.
With the front bands overlapped, the approximate circumference is 41 (49, 57, 65) inches, or 104 (124.5, 145, 165) cm.
The hood is approximately 13 inches (33 cm) tall, with a folded top depth of approximately 12 inches (30.5 cm).
Tips and Customization
Change the Color
Oatmeal, charcoal, dusty blue, and deep olive all suit this simple hooded crochet vest pattern. Choose buttons that blend in for a quiet finish or contrast gently for more definition.
Adjust the Body Length
The starting chain controls length. Adding or removing 7 stitches changes the body length by approximately 2 inches (5 cm).
Make the same change to all three panels. Keep the armhole depth unchanged by counting down from the shoulder, and adjust the front-band pickup counts to match the new front edges. Reposition the five buttons evenly along the lower front.
Check the Hood Before Finishing
If you need more hood height, add plain rows after Row 52 before sewing the top. Additional rows also require extra pickup stitches along the hood opening when making the band.
Choose Buttons After Swatching
Make a small buttonhole sample with your chosen yarn before purchasing buttons. Cord thickness, stitch tension, and button shape all affect the fit.
Frequently Asked Questions
Is This Hooded Crochet Vest Pattern Beginner-Friendly?
It is suitable for beginners who are comfortable making even single crochet rows and counting stitches. The body panels are rectangles; the hood introduces simple increases and one seam.
Why Are the Body Panels Worked Sideways?
Working from hem to shoulder makes the back-loop ridges run vertically. This gives the vest its long textured lines without using cables or complicated stitch patterns.
Does This Vest Have Waist Shaping?
No. It has a straight body with room for layering. Choose the size using your larger bust or hip measurement so the buttoned lower front does not pull.
Can I Use Different Yarn?
Yes, if it produces the stated gauge and a fabric you like. Swatch both back-loop single crochet and ordinary single crochet, since the body and hood use different textures.
Are the Fronts Buttoned All the Way to the Neck?
No. Five buttons close the lower front, while the upper section remains open. This creates a relaxed neckline beside the hood.
Save This Pattern for Later
Save this hooded crochet vest pattern to your crochet clothing board on Pinterest so you can return to the size chart, hood shaping, and buttonhole instructions when you are ready to begin.
Looking for Your Next Crochet Project?
Love this project? Explore Cute Stitch Studio’s premium crochet patterns for more cute, cozy, gift-worthy, and beginner-friendly handmade ideas.