Crochet Mesh Shrug Pattern with Balloon Sleeves
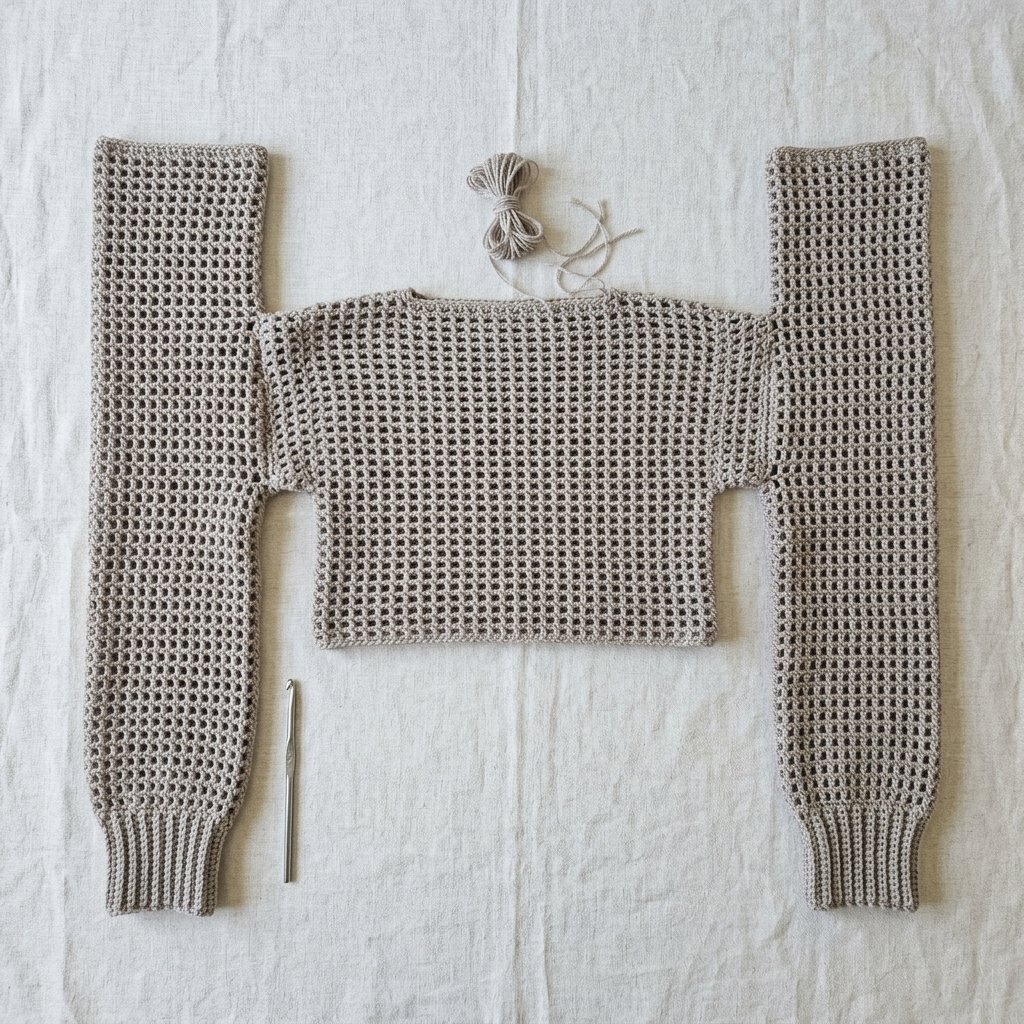
This free crochet mesh shrug pattern combines airy sleeves, a short upper front, and long ribbed cuffs with thumb openings. Wear it over a fitted tank or a simple dress for a handmade layer that leaves the outfit underneath visible.
The generous sleeves gather into close-fitting cuffs, creating a soft balloon shape. Taupe gives the design an earthy feel, while black makes the open mesh stand out beautifully against a light base layer.
The stitch pattern is straightforward, but this project includes divided front sections, gathered sleeve attachment, and thumb-hole seams. It is best suited to confident beginners who are comfortable counting stitches and sewing crochet pieces together.

Table of Contents
Crochet Mesh Shrug Pattern With Balloon Sleeves Instructions
Project Details
- Skill level: Confident beginner to intermediate assembly.
- Estimated time: Approximately 18–28 hours.
- Sizes: A, B, C, and D.
- Crochet terminology: US terms.
- Construction: Separate front, back, sleeves, and ribbed cuffs, joined with sewn seams.
- Fit: Relaxed across the shoulders, with an open lower front and gathered sleeves.
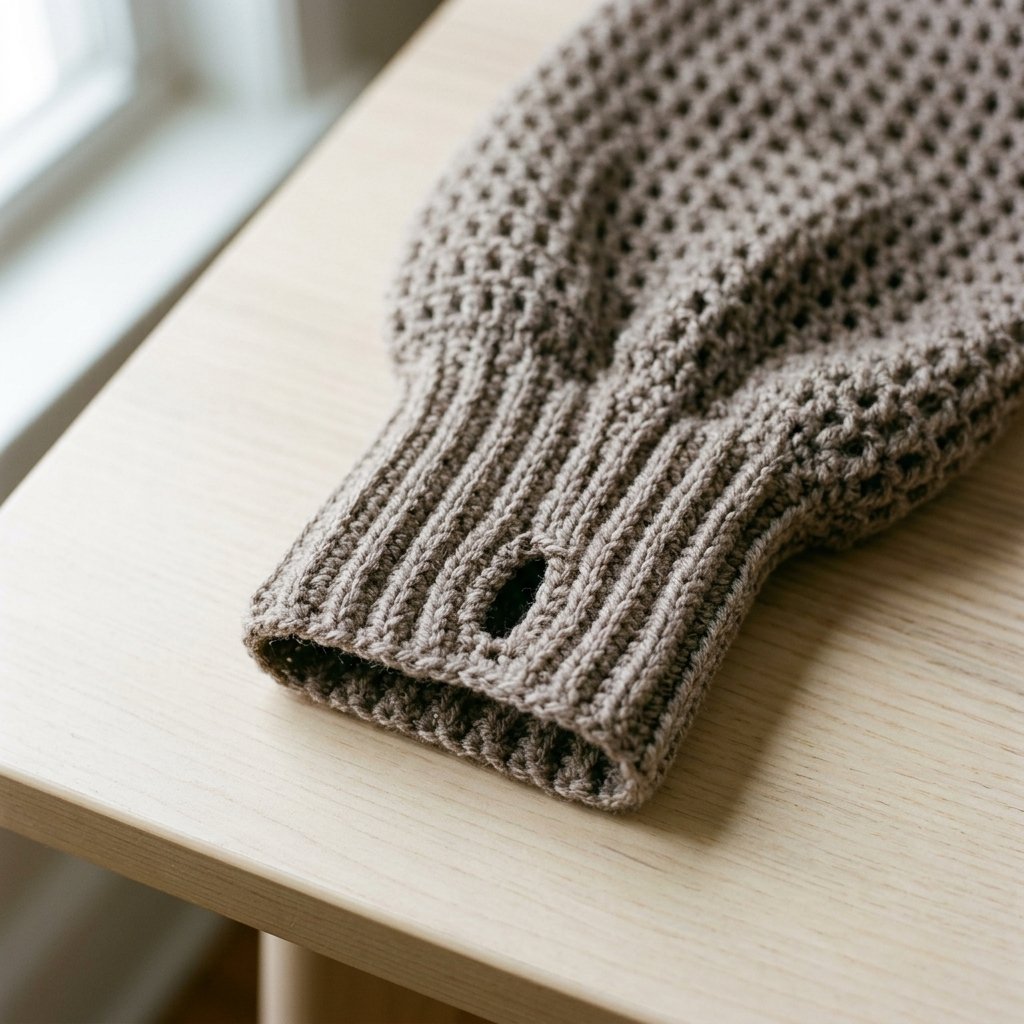
- Hand detail: Extended cuffs with thumb openings; no separate fingers.
This original Cute Stitch Studio version interprets the mesh-and-balloon-sleeve look with simple rectangular construction and a squared opening that softens when worn. It has not been physically sample-tested. Dimensions and yarn quantities are gauge-based estimates.
Choose Your Size
Use your bust measurement as a starting point, then check your upper arm and wrist. The lower front is open, so this garment does not fit like a closed sweater.
The combined front-and-back width allows approximately 4–8 inches (10–20 cm) of ease over the suggested bust measurements. Sleeve attachment openings must also fit comfortably around your upper arms.
| Measurement | A | B | C | D |
|---|---|---|---|---|
| Suggested body bust | 34–38 in (86.5–96.5 cm) | 42–46 in (106.5–117 cm) | 50–54 in (127–137 cm) | 58–62 in (147.5–157.5 cm) |
| Each body panel width | 21 in (53.5 cm) | 25 in (63.5 cm) | 29 in (73.5 cm) | 33 in (84 cm) |
| Back length before edging | 9 in (23 cm) | 10 in (25.5 cm) | 11 in (28 cm) | 12 in (30.5 cm) |
| Sleeve attachment opening circumference | 18 in (45.5 cm) | 20 in (51 cm) | 22 in (56 cm) | 24 in (61 cm) |
| Ungathered sleeve circumference | 21 in (53.5 cm) | 23 in (58.5 cm) | 25 in (63.5 cm) | 27 in (68.5 cm) |
| Mesh sleeve length | 15 in (38 cm) | 13 in (33 cm) | 11 in (28 cm) | 9 in (23 cm) |
Each cuff adds approximately 3.5 inches (9 cm) to the sleeve length. The larger sizes have shorter sleeve panels because the wider body creates a deeper dropped shoulder.
If you fall between sizes, compare the panel widths and sleeve openings rather than relying on a clothing label. For comfortable movement, choose an attachment opening larger than your upper-arm measurement.
Materials
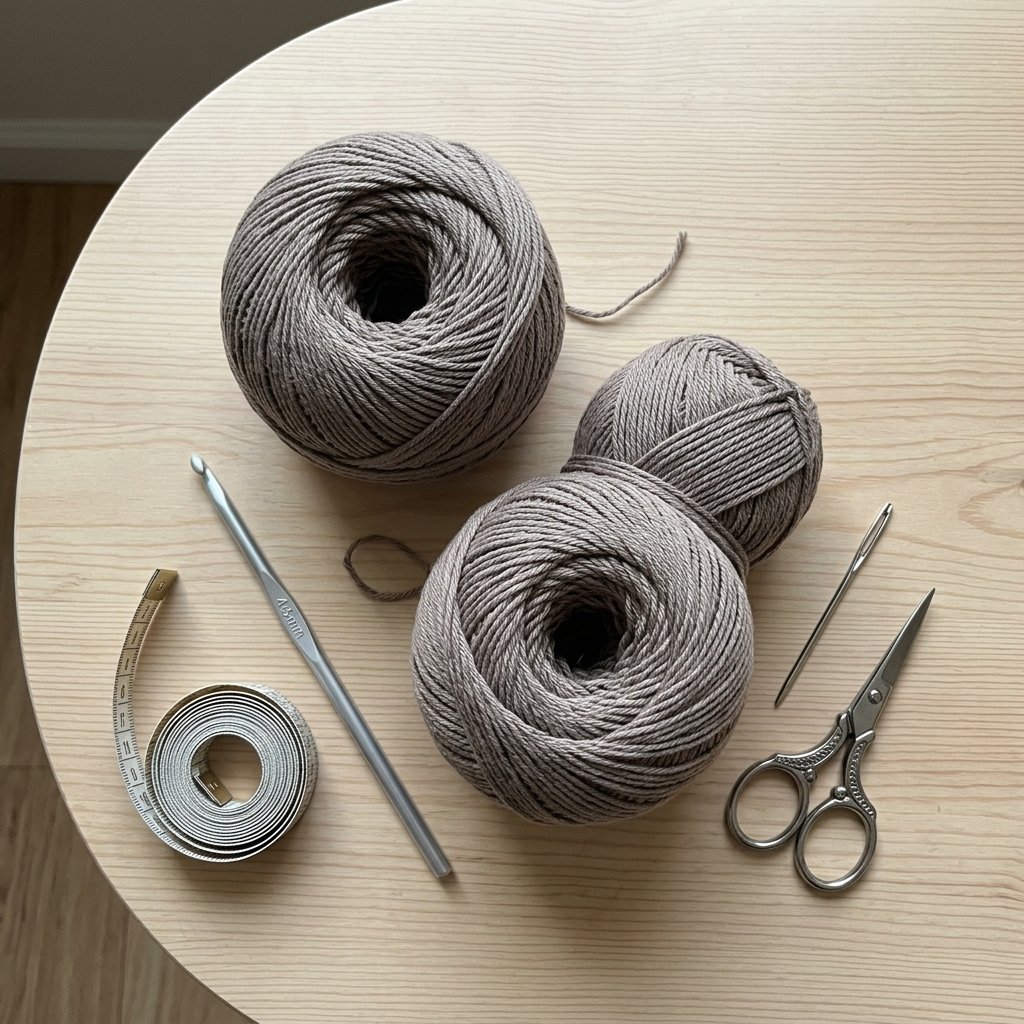
- Category 3 DK-weight yarn in taupe or black.
- 5 mm crochet hook for the mesh, or size needed for gauge.
- 4 mm crochet hook for the cuffs, or size needed for cuff gauge.
- Yarn needle.
- Scissors.
- Measuring tape.
- Locking stitch markers for shoulders, sleeve placement, and thumb openings.
Hook Size
Start with a 5 mm hook for the mesh and a 4 mm hook for the ribbed cuffs.
The mesh should drape easily, while the cuffs should feel flexible and gently supportive. Adjust each hook independently to match its gauge.
Yarn
Use Category 3 DK-weight yarn with a smooth surface. A soft acrylic blend or a lightweight wool blend can provide drape without making the sleeves overly heavy.
- Size A: Approximately 800 yards (730 m).
- Size B: Approximately 950 yards (870 m).
- Size C: Approximately 1,100 yards (1,005 m).
- Size D: Approximately 1,250 yards (1,145 m).
These are purchasing estimates rather than measured sample usage. Buy extra if you plan to extend the sleeves or cuffs.
Taupe highlights the stitch structure. Black, cocoa, olive, and dusty plum are other lovely options. Use the same yarn for the mesh and cuffs.
Gauge
Mesh: 12 stitch positions and 8 mesh rows = 4 inches (10 cm), after washing and drying flat.
Count each double crochet and each chain-1 space as one stitch position when measuring the mesh width.
Cuff ribbing: 16 single crochet stitches and 20 rows = 4 inches (10 cm), worked in the back loop only and measured relaxed.
Make separate swatches for the mesh and cuff. Check that the washed cuff fabric stretches comfortably and returns toward its original width.
The foundation single crochet row is shorter than a mesh row, so the listed panel lengths are approximate. Measure your actual pieces before seaming.
Abbreviations
- ch: chain.
- sc: single crochet.
- dc: double crochet.
- sl st: slip stitch.
- st(s): stitch(es).
- BLO: back loop only.
Before You Start
- Instructions list sizes as A (B, C, D).
- Work the pieces in turned rows.
- Beginning ch-1 and ch-2 do not count as stitches.
- Every mesh row begins and ends with a dc.
- On later mesh rows, work dc into dc and place ch-1 spaces above the previous spaces.
- The front begins as a full-width panel, then divides into two narrow side sections.
- The sleeves gather slightly at the shoulder and more strongly at the cuffs.
The front opening is created by leaving the center unworked below the short upper panel. It is not cut from completed fabric.
Crochet Mesh Shrug Pattern: Step-by-Step Instructions
Part 1 — Back Panel
Foundation: With the mesh hook, ch 64 (76, 88, 100).
Row 1: Sc in the second chain from the hook and each remaining chain. Turn. 63 (75, 87, 99) sc.
Row 2: Ch 2. Dc in the first stitch. Repeat [ch 1, skip the next stitch, dc in the next stitch] across. Turn.
You have 32 (38, 44, 50) dc and 31 (37, 43, 49) chain-1 spaces.
Row 3: Ch 2. Dc in the first dc. Repeat [ch 1, skip the next chain-1 space, dc in the next dc] across. Turn. Keep the same counts.
Rows 4–18 (20, 22, 24): Repeat Row 3 until you have 18 (20, 22, 24) total rows. Fasten off.
The foundation edge is the shoulder and neckline edge. The final mesh row is the lower back edge.
Part 2 — Front Upper Panel
Foundation: Ch 64 (76, 88, 100).
Rows 1–3: Work as for the back panel.
Rows 4–8: Repeat Back Row 3. You still have 63 (75, 87, 99) stitch positions.
The upper front is approximately 4 inches (10 cm) deep. Next, you will continue only the outer nine stitch positions at each side.
Part 3 — First Front Side Section
Row 9: Ch 2. Dc in the first dc. Repeat [ch 1, skip the next chain-1 space, dc in the next dc] 4 times. Stop and turn, leaving the rest of the row unworked.
This section contains 5 dc and 4 chain-1 spaces, or 9 stitch positions.
Rows 10–18 (20, 22, 24): Ch 2. Dc in the first dc. Repeat [ch 1, skip the next space, dc in the next dc] 4 times. Turn after each row.
Fasten off after the row number matching the back panel.
Part 4 — Second Front Side Section
Return to Front Row 8. Count the final nine stitch positions at its other end and place a marker in the first dc of that group.
Join yarn in that marked dc. Ch 2 and work a dc in the same stitch. Repeat [ch 1, skip the next space, dc in the next dc] 4 times. Turn.
This is Row 9 of the second side section. Continue as for the first section until it has the same total row count. Fasten off.
The unworked center contains 45 (57, 69, 81) stitch positions. The front now resembles a short upper panel with a narrow extension at each outer side.
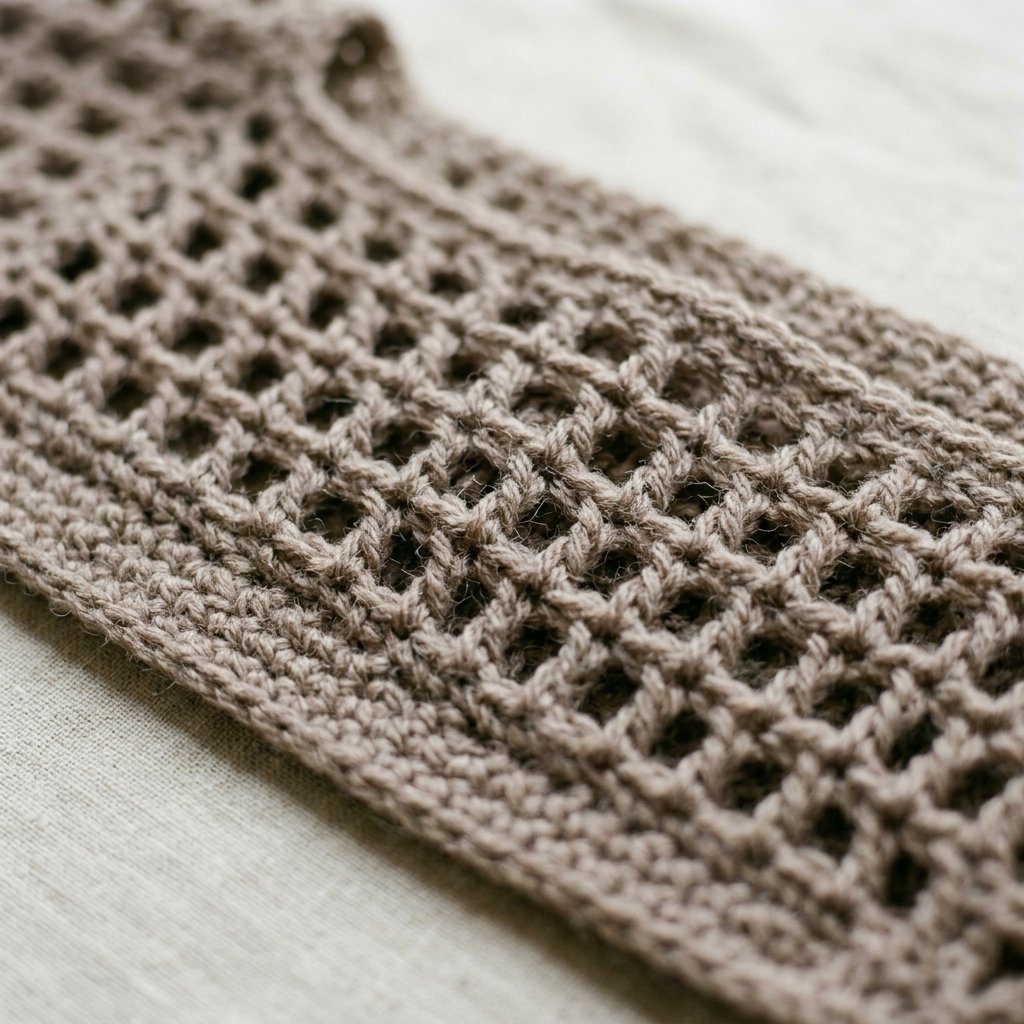
Part 5 — Make Two Mesh Sleeves
Foundation: Ch 64 (70, 76, 82).
Row 1: Sc in the second chain from the hook and each remaining chain. Turn. 63 (69, 75, 81) sc.
Row 2: Ch 2. Dc in the first stitch. Repeat [ch 1, skip the next stitch, dc in the next stitch] across. Turn.
You have 32 (35, 38, 41) dc and 31 (34, 37, 40) chain-1 spaces.
Row 3: Ch 2. Dc in the first dc. Repeat [ch 1, skip the next space, dc in the next dc] across. Turn.
Rows 4–30 (26, 22, 18): Repeat Row 3. Fasten off.
Make the second sleeve identically. The foundation edge attaches at the shoulder; the final row attaches to the cuff.
Part 6 — Make Two Ribbed Cuffs
Switch to the smaller hook.
Foundation: Ch 15.
Cuff Row 1: Sc in the second chain from the hook and each remaining chain. Turn. 14 sc.
Cuff Row 2: Ch 1. Sc in the BLO of each stitch across. Turn. 14 sc.
Rows 3–30 (32, 36, 38): Repeat Row 2. Fasten off, leaving a sewing tail.
The cuffs measure approximately 3.5 inches (9 cm) from wrist edge to hand edge. Their relaxed circumferences before seaming are approximately 6 (6.4, 7.2, 7.6) inches.
Wrap a cuff around your wrist before making the second one. Add or remove rows if needed: the cuff should feel comfortable, stretch over your hand, and stay in place without squeezing.
Part 7 — Create the Thumb Openings
Bring the cuff foundation edge and final row together to form a tube. Match the 14 stitch positions along those edges.
Choose one end as the hand opening. Starting there, sew the first 3 matching stitch pairs together.
Leave the next 5 stitch pairs unseamed for the thumb opening. Secure the seam yarn before the opening, then rejoin below it.
Sew the remaining 6 stitch pairs together toward the wrist edge. Secure the ends.
Repeat for the second cuff. Try them on before attaching them to the sleeves.
Part 8 — Block and Join the Body
Wash or dampen the mesh pieces according to the yarn label. Lay them flat, smooth the edges gently, and allow them to dry fully. Do not stretch the mesh openings aggressively.
Place the front and back with right sides together and align their foundation edges.
At each outer shoulder, sew together 15 (21, 27, 33) stitch positions. Leave the center 33 positions of each panel unseamed for the neck.
The neck opening measures approximately 11 inches (28 cm) across when laid flat. Check that it passes comfortably over your head before securing the seam tails.
Part 9 — Attach the Balloon Sleeves
Open the body flat at the shoulders, with its wrong side facing up.
Find the midpoint of a sleeve foundation edge and align it with the shoulder seam. Place the two foundation corners at the lower corners of the front and back outer edges.
The sleeve foundation is approximately 3 inches (7.5 cm) wider than this attachment edge. Distribute that excess evenly as small gathers.
Use markers at the midpoint, ends, and quarter points. With a yarn needle, sew the sleeve foundation to the body row ends, easing a little extra sleeve fabric into each section rather than making one large pleat.
Attach the second sleeve in the same way.
Fold the garment at the shoulders with right sides together. Sew each sleeve’s long edges together from the wrist toward the underarm. Secure the join where the front and back lower corners meet.
The large lower body opening remains open. Do not sew across it.
Part 10 — Gather the Sleeves into the Cuffs
Turn the garment right side out. Put on each cuff and mark where its thumb opening naturally sits on that hand.
Align each cuff’s wrist edge with the end of its sleeve, keeping the thumb opening toward the thumb side. The left and right placements should mirror each other.
Divide the sleeve opening and cuff wrist edge into four equal sections with markers.
Using a separate length of matching yarn, run a loose gathering stitch through the sleeve’s final row. Draw it in gently until it matches the cuff edge.
Distribute the gathers evenly between markers, then sew the sleeve edge to the cuff row ends. Keep the seam flexible enough for your hand to pass through.
Secure the gathering yarn and seam ends. Repeat for the other sleeve.
Part 11 — Neck and Body Edging
Neckline Round 1: With the mesh hook, join yarn near a shoulder seam. Ch 1. Work 1 sc into each of the 33 unseamed front foundation positions and 33 back positions. Join with a sl st to the first sc. 66 sc. Fasten off.
Lower Opening Round 1: Join yarn at an underarm. Ch 1. Work around the complete lower opening: across the back hem, the bottom of one front side section, up its inner edge, across the underside of the short upper front, down the other inner edge, and across the remaining side-section bottom.
Work 1 sc in each dc, 1 sc into each chain-1 space, and approximately 2 sc around each mesh row end. At each inner corner, avoid adding extra stitches. Join with a sl st to the first sc and fasten off.
Lay the opening flat as you work. If the edging waves, reduce the pickup rate slightly along the row ends. If it pulls inward, add a few evenly spaced stitches. The aim is a smooth edge that preserves the opening.
Finishing
Weave in all remaining ends on the inside, passing through solid stitch sections where possible so the tails do not show across the mesh.
Check the shoulder joins, underarms, and cuff seams. Slide your hands through the cuffs and place your thumbs through the openings to make sure the seams remain comfortable.
Wear the shrug over a fitted top or dress. The cuffs should sit partly over the hands while the mesh sleeves blouse softly above them.
Finished Size
The back measures approximately 21 (25, 29, 33) inches wide and 9 (10, 11, 12) inches long before edging.
The front upper section is approximately 4 inches (10 cm) deep, with narrow side extensions framing the open lower front.
Mesh sleeves measure approximately 15 (13, 11, 9) inches long. Each ribbed cuff adds approximately 3.5 inches (9 cm).
Tips and Customization
- Adjust sleeve length: Add or remove mesh rows before attaching the cuffs. Each mesh row changes length by approximately 0.5 inch (1.25 cm).
- Fit cuffs independently: Choose cuff circumference from your wrist and hand, even if it differs from the suggested garment size.
- Skip the thumb openings: Sew all 14 cuff stitch pairs together for ordinary extended cuffs.
- Change the color: Try black over a cream dress, or taupe over a white tank and denim.
- Keep both sleeves consistent: Record any length changes and apply them to the second sleeve.
Frequently Asked Questions
Is This Crochet Mesh Shrug Pattern Suitable for a First Garment?
It can be, if you already crochet even rows and feel comfortable sewing pieces together. The stitches are simple, but fitting the cuffs and distributing the sleeve gathers need some patience.
Are the Cuffs Separate Gloves?
No. They are attached ribbed cuffs with a thumb opening in each seam. The fingers remain uncovered.
Why Is the Front Different from the Back?
The short upper front connects the shoulders while the open area underneath reveals your base layer. The deeper back helps support the sleeves across the shoulders.
Can I Use Heavier Yarn?
A heavier yarn will change the size and make the gathered sleeves bulkier. Use DK yarn that matches the gauge for this version.
Will It Look Exactly Like the Reference Photos?
This pattern creates its own version of the look. It uses a simple square mesh, a divided front panel, and sewn gathers rather than reproducing another maker’s construction.
Save This Pattern for Later
Save this crochet mesh shrug pattern to your crochet clothing board on Pinterest so you can return to the sizing chart, thumb-hole instructions, and sleeve assembly steps.
Looking for Your Next Crochet Project?
Love this project? Explore Cute Stitch Studio’s premium crochet patterns for more cute, cozy, gift-worthy, and beginner-friendly handmade ideas.