Hooded Crochet Cloak Pattern for a Cozy Fantasy Cape
This hooded crochet cloak pattern creates a sweeping layer with a roomy pointed hood, a gently flared body, and a simple button closure. Charcoal yarn gives it a medieval-inspired look that works beautifully for Halloween costumes and fantasy outfits.
The fabric uses double crochet throughout most of the project. You will work the cloak from the neckline down, then add the hood directly to the starting edge.
This is an adventurous beginner project with plenty of repetition. Its main challenges are keeping track of the increase rows, handling a large piece of fabric, and checking the fit as the cloak grows.
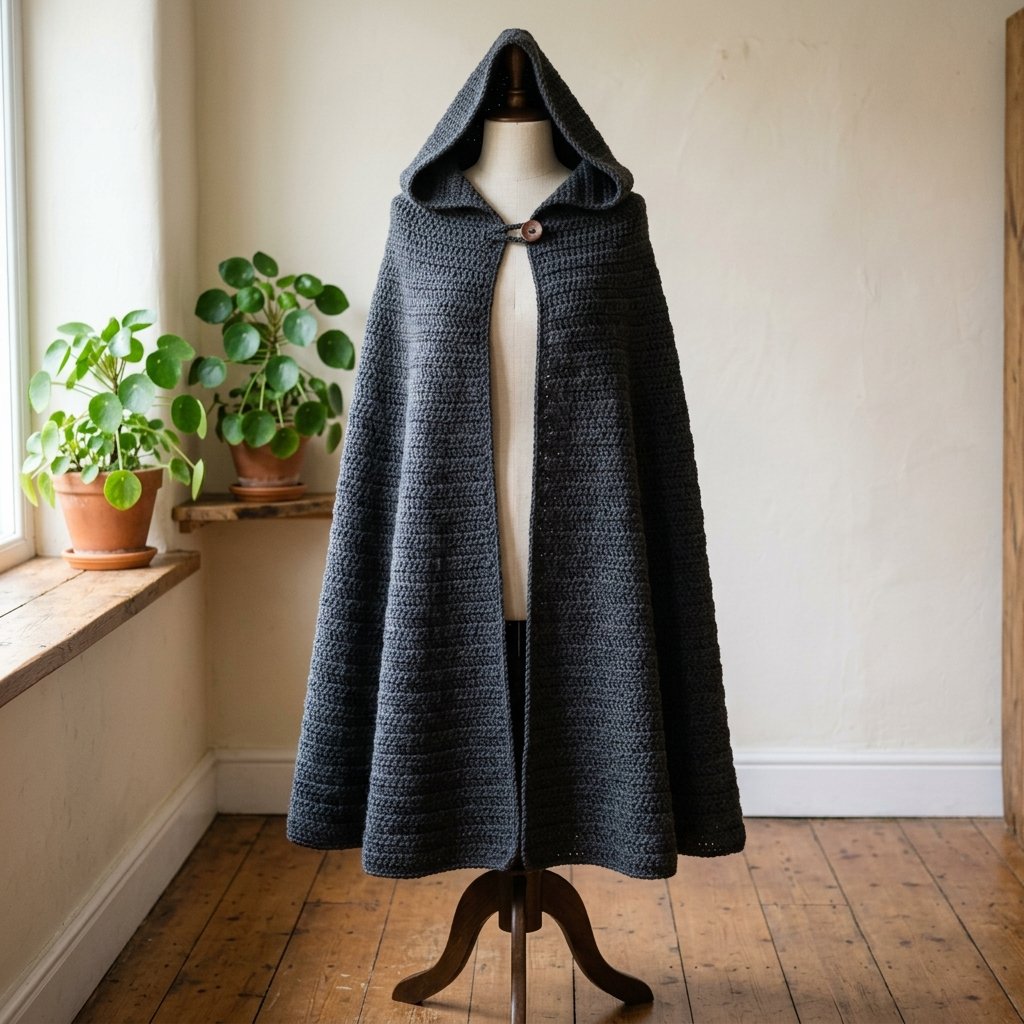
Table of Contents
Hooded Crochet Cloak Pattern For A Cozy Fantasy Cape Instructions
Project Details
- Skill level: Adventurous beginner.
- Estimated time: Approximately 25–40 hours, depending on size, length, and experience.
- Sizes: Three adult sizes, labeled A, B, and C.
- Standard body length: Approximately 44 inches (112 cm), measured from the neckline, excluding the hood.
- Crochet terminology: US terms.
- Construction: A top-down cloak worked flat in rows, with a hood added to the neckline and seamed across its top.
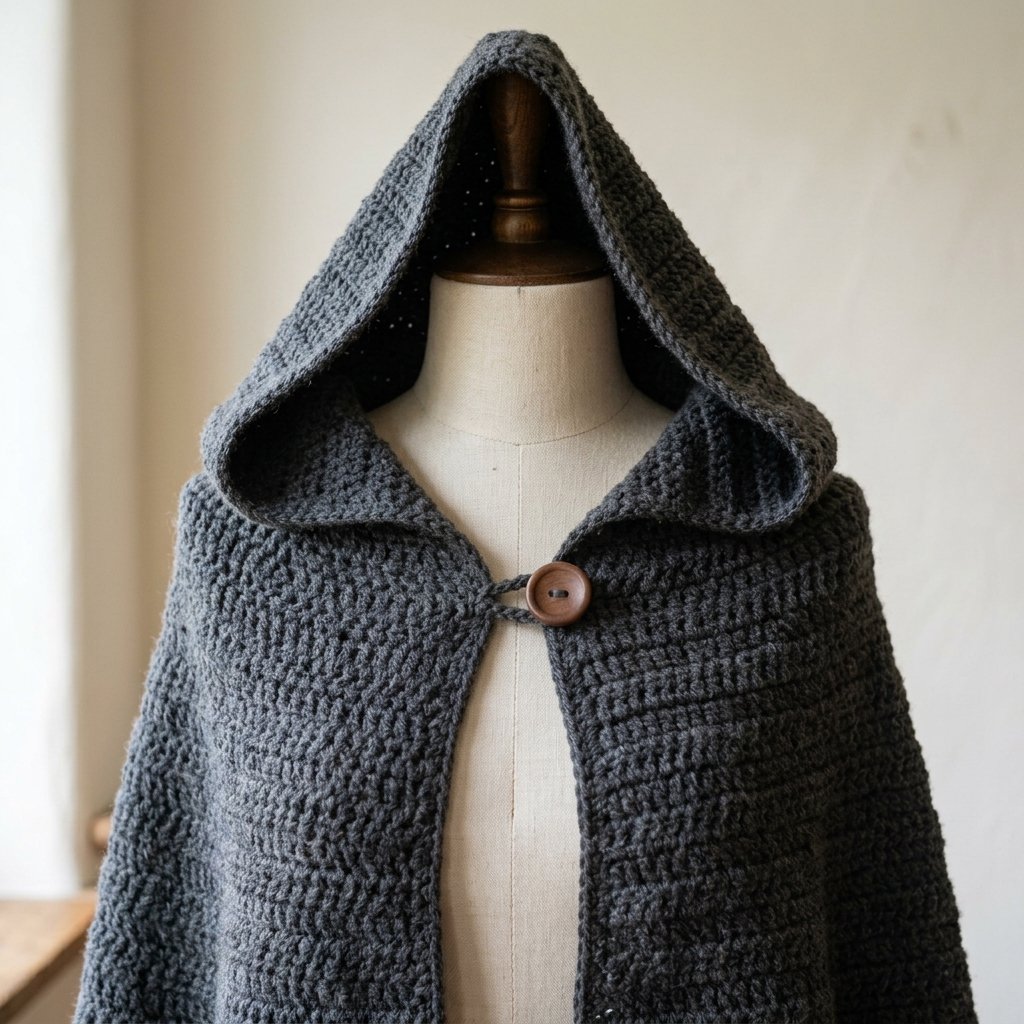
- Closure: One button and a small crochet loop.
This original Cute Stitch Studio pattern has not been physically tested. Dimensions and yarn quantities are estimates. Check your washed gauge, shoulder fit, and finished length before completing the garment.
Choose Your Size
The cloak has an open front and no armholes. Choose your size using both your bust measurement and the amount of coverage you prefer over your shoulders and upper arms.
The upper-body widths below describe the fabric measured along a row. They are not closed garment circumferences, because the front can remain open.
| Size | Suggested bust | Starting neckline width | Fabric width after Row 16 | Standard hem width |
|---|---|---|---|---|
| A | 30–36 in (76–91 cm) | 20 in (51 cm) | 52 in (132 cm) | 80 in (203 cm) |
| B | 38–44 in (97–112 cm) | 22 in (56 cm) | 54 in (137 cm) | 82 in (208 cm) |
| C | 46–52 in (117–132 cm) | 24 in (61 cm) | 56 in (142 cm) | 84 in (213 cm) |
All three sizes have a standard body length of approximately 44 inches before edging. Instructions for shorter and longer versions appear below.
Check the shoulder section over the clothing you plan to wear underneath. Moving your arms forward should not pull the neckline tightly against your throat.
Materials
- Worsted-weight yarn in charcoal or your preferred color, using the estimated quantity below.
- 5.5 mm crochet hook, or the size needed to obtain gauge.
- One smooth button approximately 1 inch (2.5 cm) across, with holes large enough for your sewing yarn.
- Yarn needle.
- Scissors.
- Six removable stitch markers.
- Measuring tape.
No lining, drawstring, or separate sleeve pieces are needed.
Hook Size
Begin with a 5.5 mm crochet hook.
If your swatch has too many stitches per inch, try a larger hook. If it has too few, try a smaller hook. The finished fabric should drape rather than hold a stiff shape.
Yarn
Use worsted-weight yarn, category 4. A smooth, lightweight acrylic or wool-acrylic blend is a practical starting point for a large garment.
| Size | Estimated yarn for the standard length |
|---|---|
| A | 2,800 yards (2,560 m) |
| B | 3,000 yards (2,743 m) |
| C | 3,200 yards (2,926 m) |
These are planning estimates, including the hood and edging. Yarn construction and individual tension can change consumption considerably.
Charcoal, forest green, deep brown, burgundy, and midnight blue all suit the fantasy style. Buy matching dye lots before starting.
Gauge
12 double crochet stitches and 7 rows = 4 inches (10 cm), after washing and drying flat.
For a swatch, chain 22. Double crochet in the third chain from the hook and across for 20 stitches. Continue for 12 rows, chaining 2 and turning between rows. The turning chain does not count as a stitch.
Wash and dry the swatch according to the yarn label, then measure the center. Check both stitch and row gauge: width affects shoulder coverage, while row gauge affects the length and increase spacing.
Abbreviations
- ch: chain.
- sc: single crochet.
- dc: double crochet.
- sl st: slip stitch.
- st(s): stitch(es).
Before You Start
- Instructions are written for A (B, C).
- Work the cloak flat, turning at the end of every row.
- The beginning ch 2 does not count as a stitch. Work the first dc into the first stitch.
- Every increase row adds 12 stitches.
- Increase rows divide the fabric into six equal sections.
- The hood is added after the body, using the unused side of the foundation chain.
- Count your stitches after each increase row.
How the Increase Sections Work
Before an increase row, divide the current stitch count by six. This gives the number of stitches in each section.
Place a marker in the first stitch of each section. In every section, work 2 dc into its first stitch, 1 dc into each middle stitch, and 2 dc into its last stitch.
Each section gains two stitches, so the full row gains twelve. Move the markers into the first newly made stitch of each section as you work.
On the next increase row, count the sections from the edge where you begin. The turning direction changes, but the sections remain equal.
Hooded Crochet Cloak Pattern: Step-by-Step Instructions
Part 1 — Starting Neckline
Chain 62 (68, 74) loosely.
Row 1: Dc in the third chain from the hook and in every remaining chain. 60 (66, 72) sts.
The starting edge should measure approximately 20 (22, 24) inches without stretching.
Do not join the ends. These two edges become the open front of the cloak.
Part 2 — Shoulder Shaping
Row 2: Ch 2, turn. Divide the stitches into six sections of 10 (11, 12) sts.
In each section, work 2 dc in the first st, dc in the next 8 (9, 10) sts, and 2 dc in the last st. Repeat for all six sections. 72 (78, 84) sts.
Row 3: Ch 2, turn. Dc in every st.
Rows 4–16: Work an increase row on every even-numbered row and a plain dc row on every odd-numbered row.
Use the table below to check the section sizes and finished counts. “Stitches per section” refers to the stitches you are about to work into, before making the increases.
| Increase row | Stitches per section: A (B, C) | Total after row: A (B, C) |
|---|---|---|
| 2 | 10 (11, 12) | 72 (78, 84) |
| 4 | 12 (13, 14) | 84 (90, 96) |
| 6 | 14 (15, 16) | 96 (102, 108) |
| 8 | 16 (17, 18) | 108 (114, 120) |
| 10 | 18 (19, 20) | 120 (126, 132) |
| 12 | 20 (21, 22) | 132 (138, 144) |
| 14 | 22 (23, 24) | 144 (150, 156) |
| 16 | 24 (25, 26) | 156 (162, 168) |
For example, if a section contains 18 stitches, work 2 dc in its first stitch, 1 dc in each of the next 16 stitches, and 2 dc in its last stitch.
Fit checkpoint: After Row 16, the shoulder section measures approximately 9 inches deep. Drape it around your shoulders with the two front corners near your upper chest.
Check coverage and movement over your intended clothing. If it feels too narrow, check gauge and consider the next size before continuing with the long body.
Part 3 — Flowing Body
The increases now become less frequent to produce a gradual flare.
Rows 17–23: Ch 2, turn. Dc in every st. 156 (162, 168) sts.
Row 24: Work an increase row using six equal sections. 168 (174, 180) sts.
Continue with plain dc rows between the increase rows listed below.
| Increase row | Stitches per section before increasing: A (B, C) | Total after row: A (B, C) |
|---|---|---|
| 24 | 26 (27, 28) | 168 (174, 180) |
| 32 | 28 (29, 30) | 180 (186, 192) |
| 40 | 30 (31, 32) | 192 (198, 204) |
| 48 | 32 (33, 34) | 204 (210, 216) |
| 56 | 34 (35, 36) | 216 (222, 228) |
| 64 | 36 (37, 38) | 228 (234, 240) |
| 72 | 38 (39, 40) | 240 (246, 252) |
Rows 73–77: Ch 2, turn. Dc in every st. 240 (246, 252) sts.
Fasten off. At gauge, the body measures approximately 44 inches from the starting neckline.
Support the fabric on your lap or a table while working. Letting the full garment hang from the hook can stretch the stitches and make it harder to maintain even tension.
Part 4 — Length Options
Choose the length before adding the outer edging.
- Approximately 40 inches: Stop after Row 70. Your last increase is Row 64, leaving 228 (234, 240) sts.
- Approximately 44 inches: Follow the standard instructions through Row 77.
- Approximately 48 inches: Continue through Row 84, working plain dc after Row 72. Keep 240 (246, 252) sts.
These lengths exclude the edging and assume the stated row gauge. Measure on your own body before choosing a long hem, and leave enough clearance for comfortable walking.
Part 5 — Hood
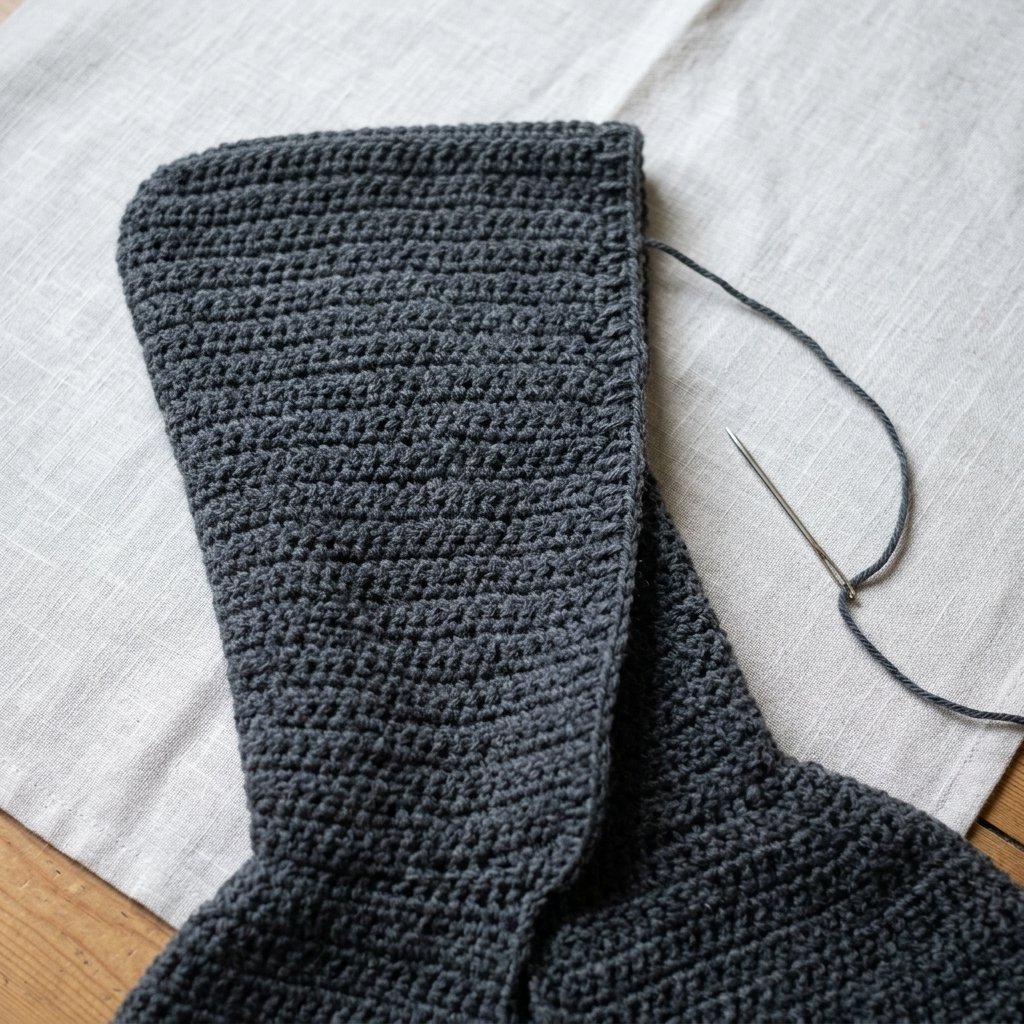
Place the cloak with the outside facing you and the starting neckline accessible. Join yarn at one end of the unused side of the foundation chain.
Hood Row 1: Ch 2. Work 1 dc into the underside of each foundation chain corresponding to a body stitch. 60 (66, 72) sts.
Do not work into the two original turning chains.
Hood Rows 2–23: Ch 2, turn. Dc in every st. 60 (66, 72) sts in every row.
The hood rectangle measures approximately 13 inches tall from the neckline. Fasten off, leaving a long sewing tail.
Before sewing, fold the hood into position and check the height over your head. Add or remove plain rows if needed. Keep the hood wide enough to frame the face comfortably.
Part 6 — Seam the Hood
Fold the hood vertically at its center, bringing its two front corners together with the outside surfaces facing each other.
The two halves of the final hood row now meet along the top. Match 30 (33, 36) stitches from one half with the same number on the other half.
Whipstitch the paired stitches together, working from the front toward the folded back corner. Keep the seam relaxed and secure the end.
Turn the hood right side out. The folded back corner creates the pointed fantasy-style shape. The two side edges of the rectangle form the face opening.

Part 7 — Outer Edging
With the outside facing you, join yarn at one lower front corner.
Edging Round 1: Work sc up the first front edge, around the entire hood opening, down the second front edge, and across the lower hem.
Begin with approximately 2 sc per dc row end along the front and hood edges. Across the hem, work 1 sc in each dc. Work 3 sc into each lower front corner to turn smoothly.
At the top hood seam, continue evenly over the join without making an extra corner. Join to the first sc with a sl st.
Edging Round 2: Ch 1. Sc in each st around, working 3 sc in the center stitch of each lower corner group. Join and fasten off.
Check the edging as you work. If it waves, reduce the pickup count slightly along the affected row ends. If it pulls the fabric inward, add stitches evenly. Treat both front edges alike.
Part 8 — Button Closure
Try on the cloak and mark a comfortable closure point approximately 1–2 inches below the neckline. The button should sit on the upper chest rather than pulling against the throat.
Sew the button to one front edging, using several passes through its holes and catching multiple edging stitches. Secure the yarn on the inside.
For the loop, join yarn to the opposite front edging at the matching height. Chain 6, skip 1 edging stitch, and sl st into the next edging stitch.
Test the loop over your actual button. Add or remove chains if necessary before fastening off. The loop should pass over the button without stretching excessively and remain secure when released.
Weave in the loop ends thoroughly. Check the closure again with the full weight of the cloak hanging from your shoulders.
Finishing
Weave in all ends on the inside, passing through several stitches and changing direction to secure them.
Inspect the hood seam, neckline join, and button attachment. The hood seam should remain flexible, and the button should not distort the front edge.
Wash or block according to the yarn label. Support the wet garment fully, then arrange it flat on towels. Smooth the fronts to equal lengths without stretching the shoulder section.
Allow the cloak to dry completely before trying it on again. Check the hem clearance and adjust your styling or length if needed.

Finished Size
The standard body length is approximately 44 inches (112 cm), excluding the hood and narrow edging.
The hem measures approximately 80 (82, 84) inches, or 203 (208, 213) cm, along its full edge.
The hood is approximately 13 inches (33 cm) tall, with a folded depth of approximately 10 (11, 12) inches, or 25 (28, 30) cm.
Actual worn length depends on your shoulders, posture, yarn, and the weight of the finished fabric.
Tips and Customization
- Choose a woodland palette: Forest green and dark brown work well for a ranger-inspired costume.
- Keep the fabric light: Check the weight and drape of your swatch before buying yarn for the full cloak.
- Adjust only one feature at a time: Keep the standard width while changing length, or keep the body unchanged while adjusting hood height.
- Use a contrast border: Work the two edging rounds in a darker or lighter shade.
- Make a shorter cape: Stop the body at your preferred row, maintaining the increase schedule up to that point.
- Track completed rows: Mark each increase row in the table as you finish it.
Frequently Asked Questions
Is this hooded crochet cloak pattern suitable for beginners?
It suits beginners who already know double crochet, can count stitches, and are ready for a large project. The repeated increase sections are simple, but keeping an accurate row count matters.
Does the cloak have sleeves?
No. It drapes over the shoulders and arms, with an open front and no sleeve openings.
Can I use bulky yarn?
Bulky yarn changes the gauge, finished size, weight, and drape. Use yarn that meets the stated gauge for this version rather than substituting without recalculating.
Why is the hood pointed?
The hood is a rectangle folded in half and seamed across its top. That construction creates a corner at the back, giving it a fantasy-style point.
Can I make it without the button?
Yes. Omit the button and loop for an open-front cloak. The remaining instructions stay the same.
Why do the increase sections form visible lines?
The increases align in six sections, which can create subtle shaping lines. These are part of the construction and become less prominent when the cloak drapes.
How should I store the finished cloak?
Fold it loosely rather than leaving the full weight hanging from the shoulders for long periods. Keep the hood and front edges smooth when folding.
Save This Fantasy Crochet Project
Save this pattern to your Halloween crochet, fantasy costume, or handmade wardrobe board on Pinterest so you can find it when you are ready to begin.
Looking for Your Next Crochet Project?
Love this project? Explore Cute Stitch Studio’s premium crochet patterns for more cute, cozy, gift-worthy, and beginner-friendly handmade ideas.