Crocodile Stitch Hooded Cape Pattern with Red Dragon Scales
This crocodile stitch hooded cape pattern combines a flowing red cape with a generous hood and layers of raised dragon scales. The textured hood, decorative middle band, and scalloped lower edge give it a storybook feel.
Wear it over a simple outfit for a fantasy costume, a Halloween gathering, or a dramatic handmade layer. The open front lets the scale details stand out without hiding everything underneath.
This original Cute Stitch Studio version uses a shaped double crochet cape with separately crocheted crocodile stitch strips. Making the scales separately lets you check their spacing before sewing them onto the garment.
The project is best suited to intermediate crocheters. Adventurous beginners can start with the scale swatch before committing to the full cape.
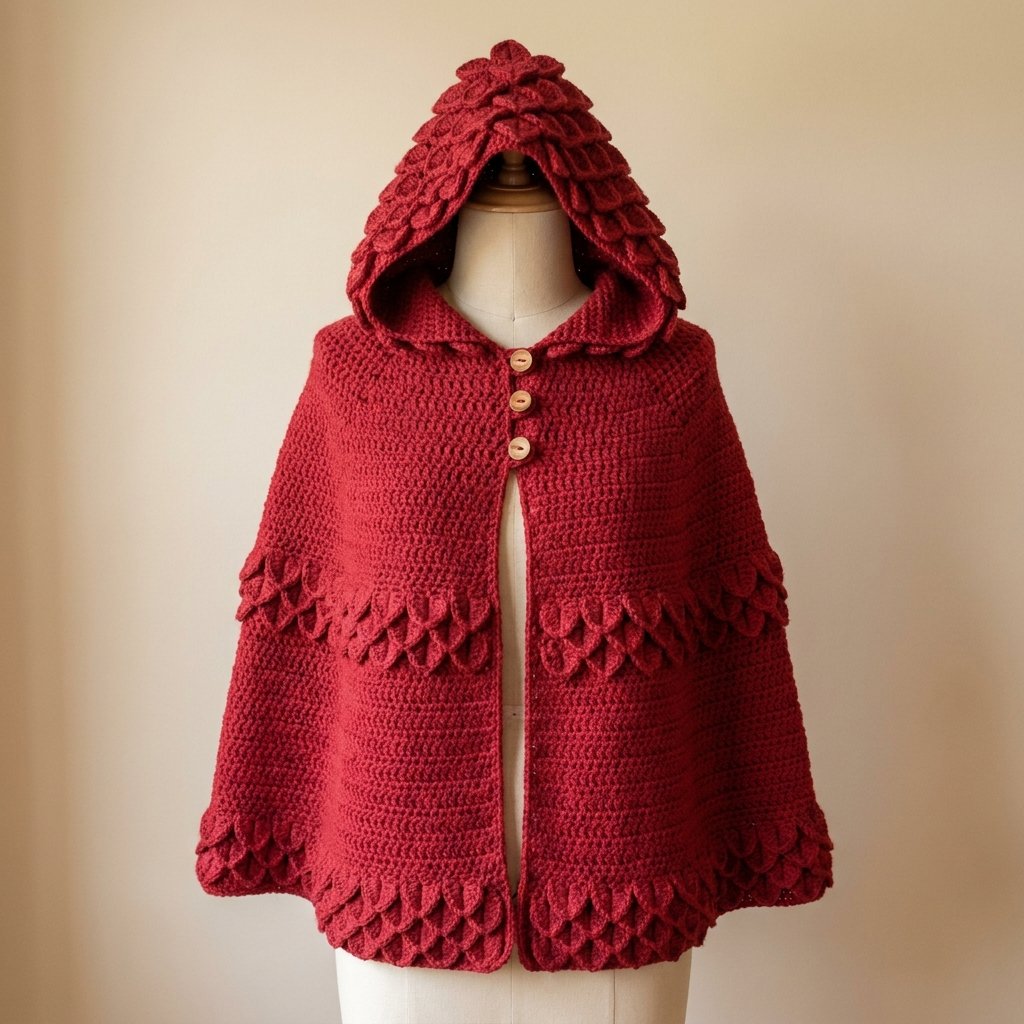
Table of Contents
Crocodile Stitch Hooded Cape Pattern With Red Dragon Scales Instructions
Project Details
- Skill level: Intermediate.
- Estimated time: Approximately 30–45 hours, depending on your experience.
- Size: One adult size with an open front; use the finished measurements to assess fit.
- Finished neckline: Approximately 20 inches before the front edging and closure overlap.
- Body length: Approximately 24 inches before the lowest scales extend beyond the hem.
- Hem width: Approximately 64 inches measured along the open lower edge.
- Hood: Approximately 14 inches tall and 10 inches deep before edging.
- Crochet terminology: US terms.
- Construction: Top-down cape, attached rectangular hood with a crown seam, and separately made scale strips sewn to the outside.
This is an original, untested design draft. Yarn quantities and finished measurements are estimates. Swatch the plain fabric and scales, and check the garment on the intended wearer before completing the decorative bands.
Materials
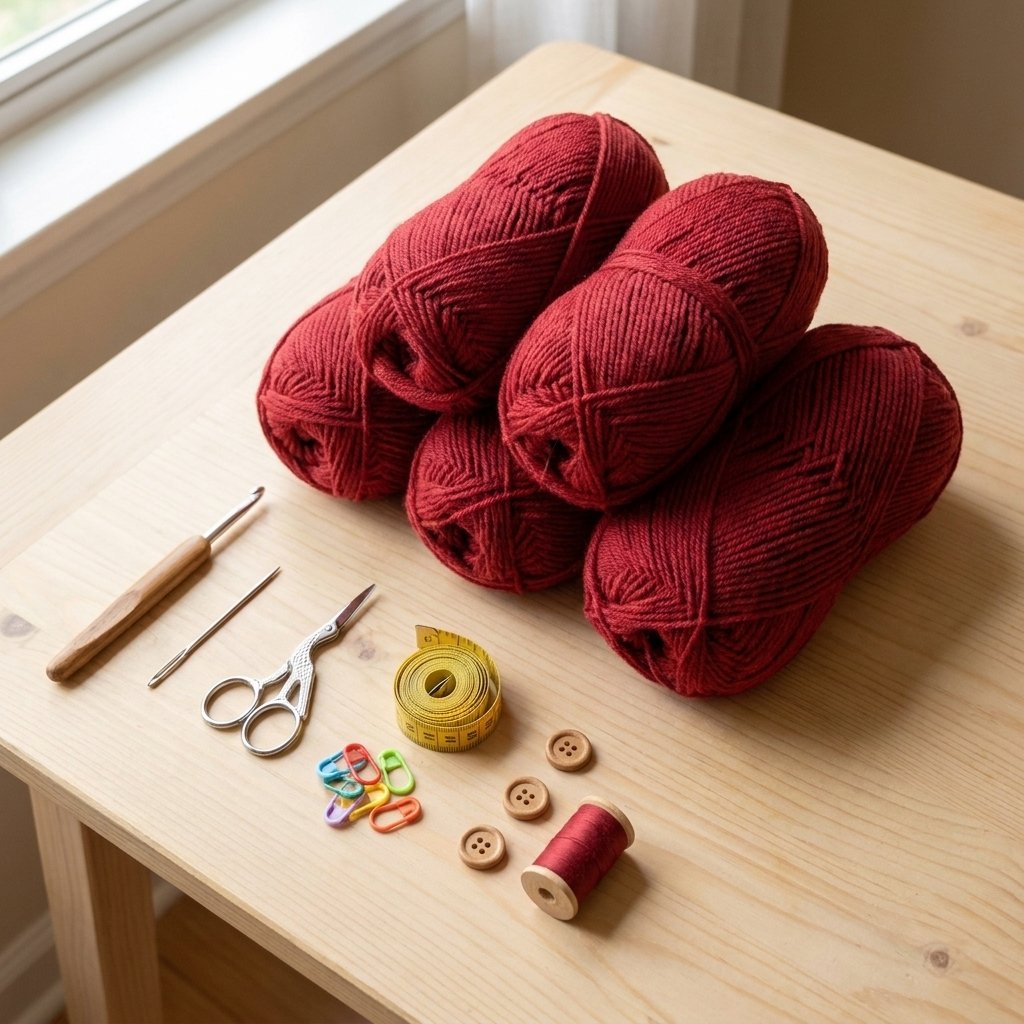
- Approximately 2,400–3,000 yards of category 3 yarn in deep red.
- 4 mm crochet hook, or the size needed to meet gauge.
- Yarn needle.
- Scissors.
- Measuring tape.
- Removable stitch markers.
- Three lightweight buttons approximately ¾ inch across.
- Needle and matching sewing thread for the buttons.
Buy enough yarn from the same dye lot. The scale sections use considerably more yarn than a plain cape of the same size.
Hook Size
Start with a 4 mm crochet hook. Adjust as needed to achieve the stated gauge while keeping the plain fabric soft and flexible.
Use the same hook for your first scale swatch. If the scales feel too stiff, try a slightly larger hook for the decorative strips and measure their finished width again.
Yarn
Choose category 3, DK-weight yarn with a smooth texture. A lightweight acrylic or wool-acrylic blend is a practical starting point for this layered design.
Deep red creates the featured storybook look. Burgundy, forest green, charcoal, and midnight blue also show the overlapping scale texture beautifully.
Avoid very heavy cotton or bulky yarn for your first version. The extra fabric in the scales already adds substantial weight.
Abbreviations
- ch: chain.
- sc: single crochet.
- dc: double crochet.
- sl st: slip stitch.
- st / sts: stitch / stitches.
Before You Start
Plain Fabric Gauge
12 dc and 7 rows = 4 inches, measured on a relaxed, washed-and-dried swatch.
This is a fairly open gauge for DK yarn. If your swatch is much smaller, adjust your hook rather than assuming the written stitch counts will produce the listed size.
Turning Chains
For the cape and hood, ch 2 at the start of a row does not count as a stitch. Work into the first actual stitch immediately beneath the turning chain.
The scale-strip foundation uses a different beginning chain, explained in its own instructions.
Fit Check
The cape has no sleeves or armholes. Check the neckline, shoulder drape, front coverage, and length against the intended wearer.
The 20-inch neckline includes room for the hood and a modest front overlap. It should rest comfortably around the shoulders without pulling against the throat when closed.
Scale Construction
Each scale is worked around two neighboring dc posts that share the same foundation chain. Five dc travel down one post and five travel up the other, creating a small leaf-like shape.
The strips are sewn on by their upper foundation edges. Their lower scallops remain free, allowing the scales to overlap.
Crocodile Stitch Hooded Cape Pattern
Part 1 — Begin the Cape
Ch 62.
Row 1: Dc in the third chain from the hook and in each remaining chain. Turn. (60 dc)
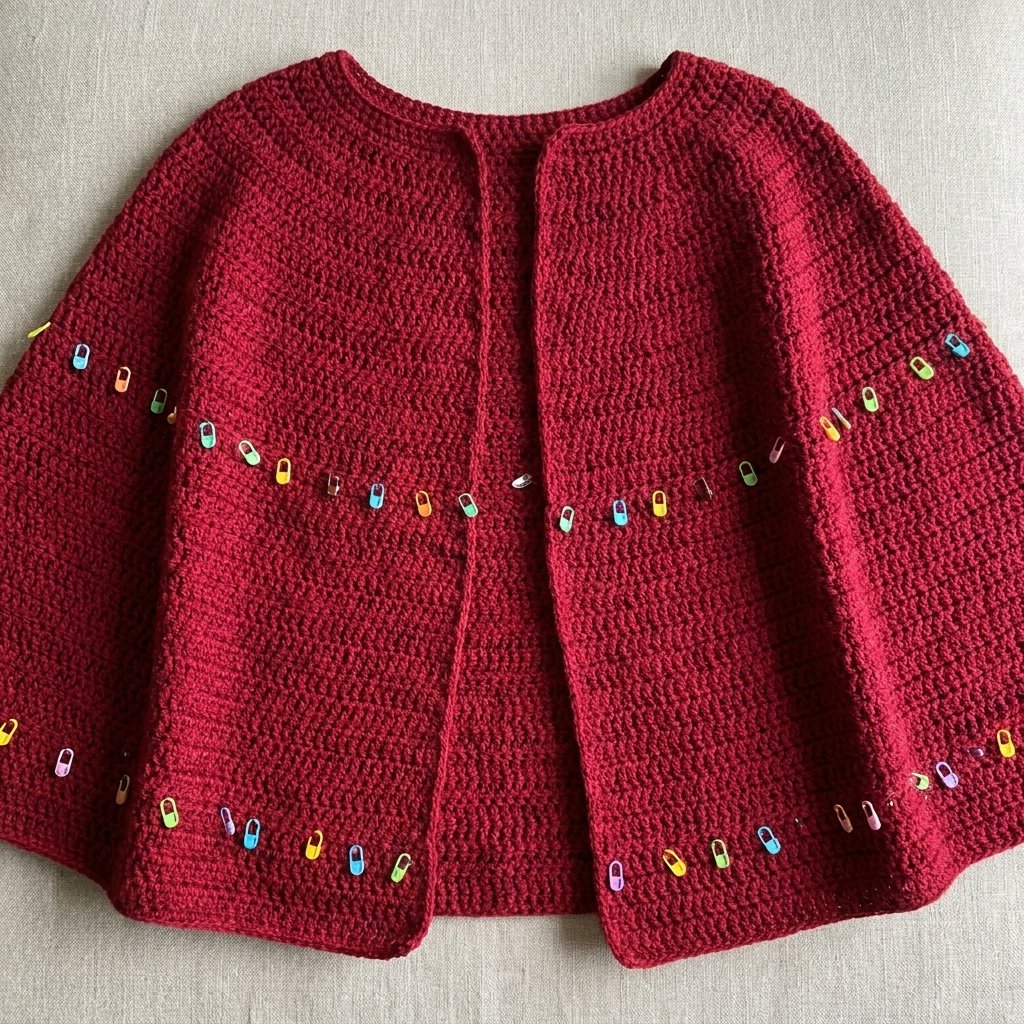
Divide the row into six sections of 10 stitches. Place a marker in the last stitch of each section.
These six sections remain separate counting groups throughout the shaping. Move the markers as you work.
Part 2 — Learn the Increase Row
Increase row: Ch 2. In each marked section, work 2 dc in its first stitch, 1 dc in every middle stitch, and 2 dc in its last stitch.
Each section gains 2 stitches, so the whole row gains 12 stitches. Place the section marker in the last newly made stitch of that section. Turn.
Plain row: Ch 2 and dc in every stitch across. Keep the section markers in place. Turn.
Do not add extra increases beside a marker. The first and last stitch of each section are the only increase points.
Part 3 — Shape the Shoulders
- Row 2: Increase row. (72 sts)
- Row 3: Plain row. (72 sts)
- Row 4: Increase row. (84 sts)
- Row 5: Plain row. (84 sts)
- Row 6: Increase row. (96 sts)
- Row 7: Plain row. (96 sts)
- Row 8: Increase row. (108 sts)
- Row 9: Plain row. (108 sts)
- Row 10: Increase row. (120 sts)
- Row 11: Plain row. (120 sts)
- Row 12: Increase row. (132 sts)
- Row 13: Plain row. (132 sts)
- Row 14: Increase row. (144 sts)
Check the piece around the shoulders. It should spread outward evenly, with the front edges hanging freely.
Part 4 — Continue the Body
- Rows 15–17: Plain rows. (144 sts)
- Row 18: Increase row. (156 sts)
- Rows 19–21: Plain rows. (156 sts)
- Row 22: Increase row. (168 sts)
- Rows 23–25: Plain rows. (168 sts)
- Row 26: Increase row. (180 sts)
- Rows 27–29: Plain rows. (180 sts)
- Row 30: Increase row. (192 sts)
- Rows 31–42: Plain rows. (192 sts)
Fasten off. Leave markers at both ends of Rows 22, 24, 26, 38, 40, and 42. These identify the decorative scale-strip attachment lines.
The body should measure approximately 24 inches from the neckline to the lower edge.

Part 5 — Crochet the Hood
With the outside of the cape facing you, join yarn at one end of the neckline foundation edge.
Hood Row 1: Ch 2. Work 1 dc into the underside of each of the 60 foundation stitches. Turn. (60 dc)
Hood Rows 2–24: Ch 2 and dc in every stitch across. Turn. (60 dc)
Fasten off, leaving a long sewing tail.
Fold the hood in half so the two front edges meet and the outside faces are together. Match the two halves of Hood Row 24.
Whipstitch the 30 matching stitch pairs along this top edge. Turn the hood right side out.
This makes a roomy hood with a simple pointed crown seam. Try it on before adding scales; the face opening should remain comfortably clear.
Part 6 — Practice a Crocodile Scale Strip
Make a small practice strip with five dc pairs.
Foundation: Ch 16.
Foundation row: Dc in the fourth chain from the hook. The three skipped chains count as the first dc, giving you the first pair. Repeat [ch 1, skip 2 chains, work 2 dc in the next chain] four times. You now have five dc pairs separated by four ch-1 spaces.
Do not turn as though beginning a normal row. Rotate the work as needed to crochet around the vertical posts.
First scale: Ch 1. Work 5 dc around the first post of Pair 1, moving from the top of that post toward its base. Ch 1. Rotate the strip and work 5 dc around the second post of the same pair, moving from its base toward the top.
You have made one scale around Pair 1. The ch-1 at its lower point forms the small turn between its two sides.
Anchor: Sl st between the two posts of Pair 2. Leave Pair 2 otherwise unworked.
Second scale: Work 5 dc down the first post of Pair 3, ch 1, and work 5 dc up its second post.
Sl st between the posts of Pair 4, then make the final scale around Pair 5. Fasten off. (3 scales)
Lay the strip with its foundation edge at the top and the scalloped points facing downward. Practice until all three scales face the same way and sit without twisting.

Part 7 — Calculate the Full Strip Lengths
The scale strips must fit the actual garment. Their width depends on your chain and post-stitch tension, so use measurements rather than assuming that the plain dc gauge applies.
For a strip containing an odd number of pairs:
- Starting chain: Three times the number of pairs, plus 1.
- Foundation row: Make the first pair as in the swatch, then repeat the pair instructions until the chain is used.
- Scale row: Make a scale around every odd-numbered pair and a slip-stitch anchor between the posts of every even-numbered pair.
- Scale count: Half of one more than the number of pairs.
For example, 19 pairs require ch 58 and produce 10 scales.
To estimate a larger strip, divide your swatch foundation-edge width by five to find the approximate width per pair. Divide the desired strip length by that measurement, then choose a nearby odd number of pairs.
Check the strip against its attachment line before sewing. Keep the foundation edge relaxed; do not stretch it to force a fit.
Part 8 — Make the Body Scale Bands
Make six separate strips: three for the middle band and three for the lower band.
Measure across the cape along each marked row, following the curve of the fabric. Leave approximately ½ inch clear at each front edge.
- Middle band: Attach strips along Rows 22, 24, and 26.
- Lower band: Attach strips along Rows 38, 40, and 42.
For each band, make the center strip approximately one finished scale-width shorter than the other strips would be at that location. Centering this slightly shorter strip offsets its scales and creates a staggered effect.
The lower band will be wider than the middle band. Calculate each strip from its own measured attachment line.
Part 9 — Sew the Body Scales
Lay the cape with the outside facing upward. Position every strip with its foundation edge toward the neckline and its points toward the hem.
Begin with the lowest strip in each band. Pin its foundation edge along the marked row, then sew that edge securely to the cape with matching yarn.
Catch the foundation edge and the underlying body stitches. Keep the sewing tension relaxed enough for the garment to drape.
Attach the middle strip, then the upper strip. The upper scales should overlap the foundation edge of the strip below.
Leave the curved sides and pointed ends free. Do not stitch the entire scale flat to the backing.
Part 10 — Add Scales to the Hood
Mark Hood Rows 4, 7, 10, 13, 16, 19, and 22.
At each marked row, measure from one face-opening edge around the back of the hood to the other. Leave approximately ½ inch clear beside each front edge.
Make one scale strip for each line using the measured method from Part 7. On alternate lines, shorten the strip by approximately one scale-width and center it to stagger the points.
With the hood upright, place each strip so its points face toward the neckline. Begin sewing at Row 4, then move upward toward the crown.
Check the overlap before securing each strip. The upper scales should partly cover the attachment edge below without bunching the hood.
If your scale swatch is too shallow to overlap at three-row intervals, add an extra strip between existing lines where needed. Measure each additional strip against the hood.
Part 11 — Finish the Front and Hood Opening
Join yarn at one lower front corner. Ch 1 and work sc evenly up the front edge, around the hood opening, and down the opposite front edge.
Begin with approximately 2 sc per dc row end. Adjust where necessary so the edging lies flat without waving or pulling inward.
Turn. Ch 1 and sc in every stitch back along the same continuous edge. Fasten off.
Keep the edging clear of the free scale points. The lowest scale strip finishes the hem, so no additional hem border is required.
Part 12 — Add the Buttons and Loops
Try on the cape and overlap the upper front edges slightly. Mark three comfortable closure positions: approximately ½ inch, 1¾ inches, and 3 inches below the neckline.
Sew the three buttons to one front edge using matching sewing thread. Reinforce the attachment through several crochet stitches.
At each matching point on the opposite edge, join yarn and ch 6. Sl st back into the same attachment area to make a loop.
Check the loop over its button. Adjust the chain count if necessary, then work sc around the loop to strengthen it. Fasten off and weave in the ends.
The finished closure should rest comfortably without tightening across the throat.
Finishing
Weave in all remaining ends, especially those at the ends of the scale strips.
Lay the cape flat and arrange the scales with their points facing downward. Block according to the yarn label, supporting the entire garment rather than hanging it while wet.
Avoid pressing the scales flat. Their raised edges are part of the design.
Once dry, check the shoulder drape, hood opening, button placement, and movement of the free scale tips.
Finished Size
- Neckline: Approximately 20 inches before closure overlap.
- Body length: Approximately 24 inches, plus the lowest scale tips.
- Open hem edge: Approximately 64 inches.
- Hood height: Approximately 14 inches.
- Hood depth: Approximately 10 inches.
These measurements depend on achieving gauge. The decorative layers may change the drape, so assess the finished cape on the intended wearer.
Tips and Customization
Make a Shorter Cape
For a shorter version, finish the body after Row 36. Move the lower scale band to Rows 32, 34, and 36. Keep the middle band in its original position.
Add More Length
After Row 42, work additional plain rows of 192 dc. Place the lower band on the final row and the two rows spaced two rows above it. Extra length and scales require additional yarn.
Change the Dragon Palette
Use one color for a classic textured look. For subtle contrast, make the scales one shade darker than the body while keeping the hood and edging coordinated.
Keep the First Scale Swatch
Use it as a reference while making the longer strips. Consistent post-stitch tension helps the scales remain similar in size.
Check Movement
Try the cape with the clothes you intend to wear underneath. Check that you can move your arms freely and that the hood does not slide forward over your eyes.
Frequently Asked Questions
Is this a traditional all-over crocodile stitch cape?
This version uses crocodile stitch strips attached to a shaped double crochet base. The separate construction simplifies the cape shaping and lets you position the decorative scales after checking the fit.
Can a beginner make this pattern?
The cape body is straightforward, but the scales require working around posts and rotating the fabric. Practice the small strip first. This is an intermediate project overall.
Why do my scales twist?
Check that you work down the first post and up the second post of the same pair. Both halves must curve around that one pair, with the chain at the bottom point.
Do I sew down every scale?
No. Sew the upper foundation edge of each strip to the garment. Leave the scale tips and curved sides free so they can overlap.
Can I use bulky yarn?
Bulky yarn would change the measurements and create a much heavier garment. Use the recommended yarn weight for this version.
Can I make this for a child?
The written measurements and closure are for an adult. A child’s version needs separate grading and an age-appropriate closure; it should not be made simply by guessing smaller stitch counts.
Save This Fantasy Crochet Project
Save this crocodile stitch hooded cape pattern to your Pinterest crochet board so you can return to the shaping schedule and scale instructions as you work.
Looking for Your Next Crochet Project?
Love this project? Explore Cute Stitch Studio’s premium crochet patterns for more cute, cozy, gift-worthy, and beginner-friendly handmade ideas.