Free Crochet Poison Apple Pattern for Halloween
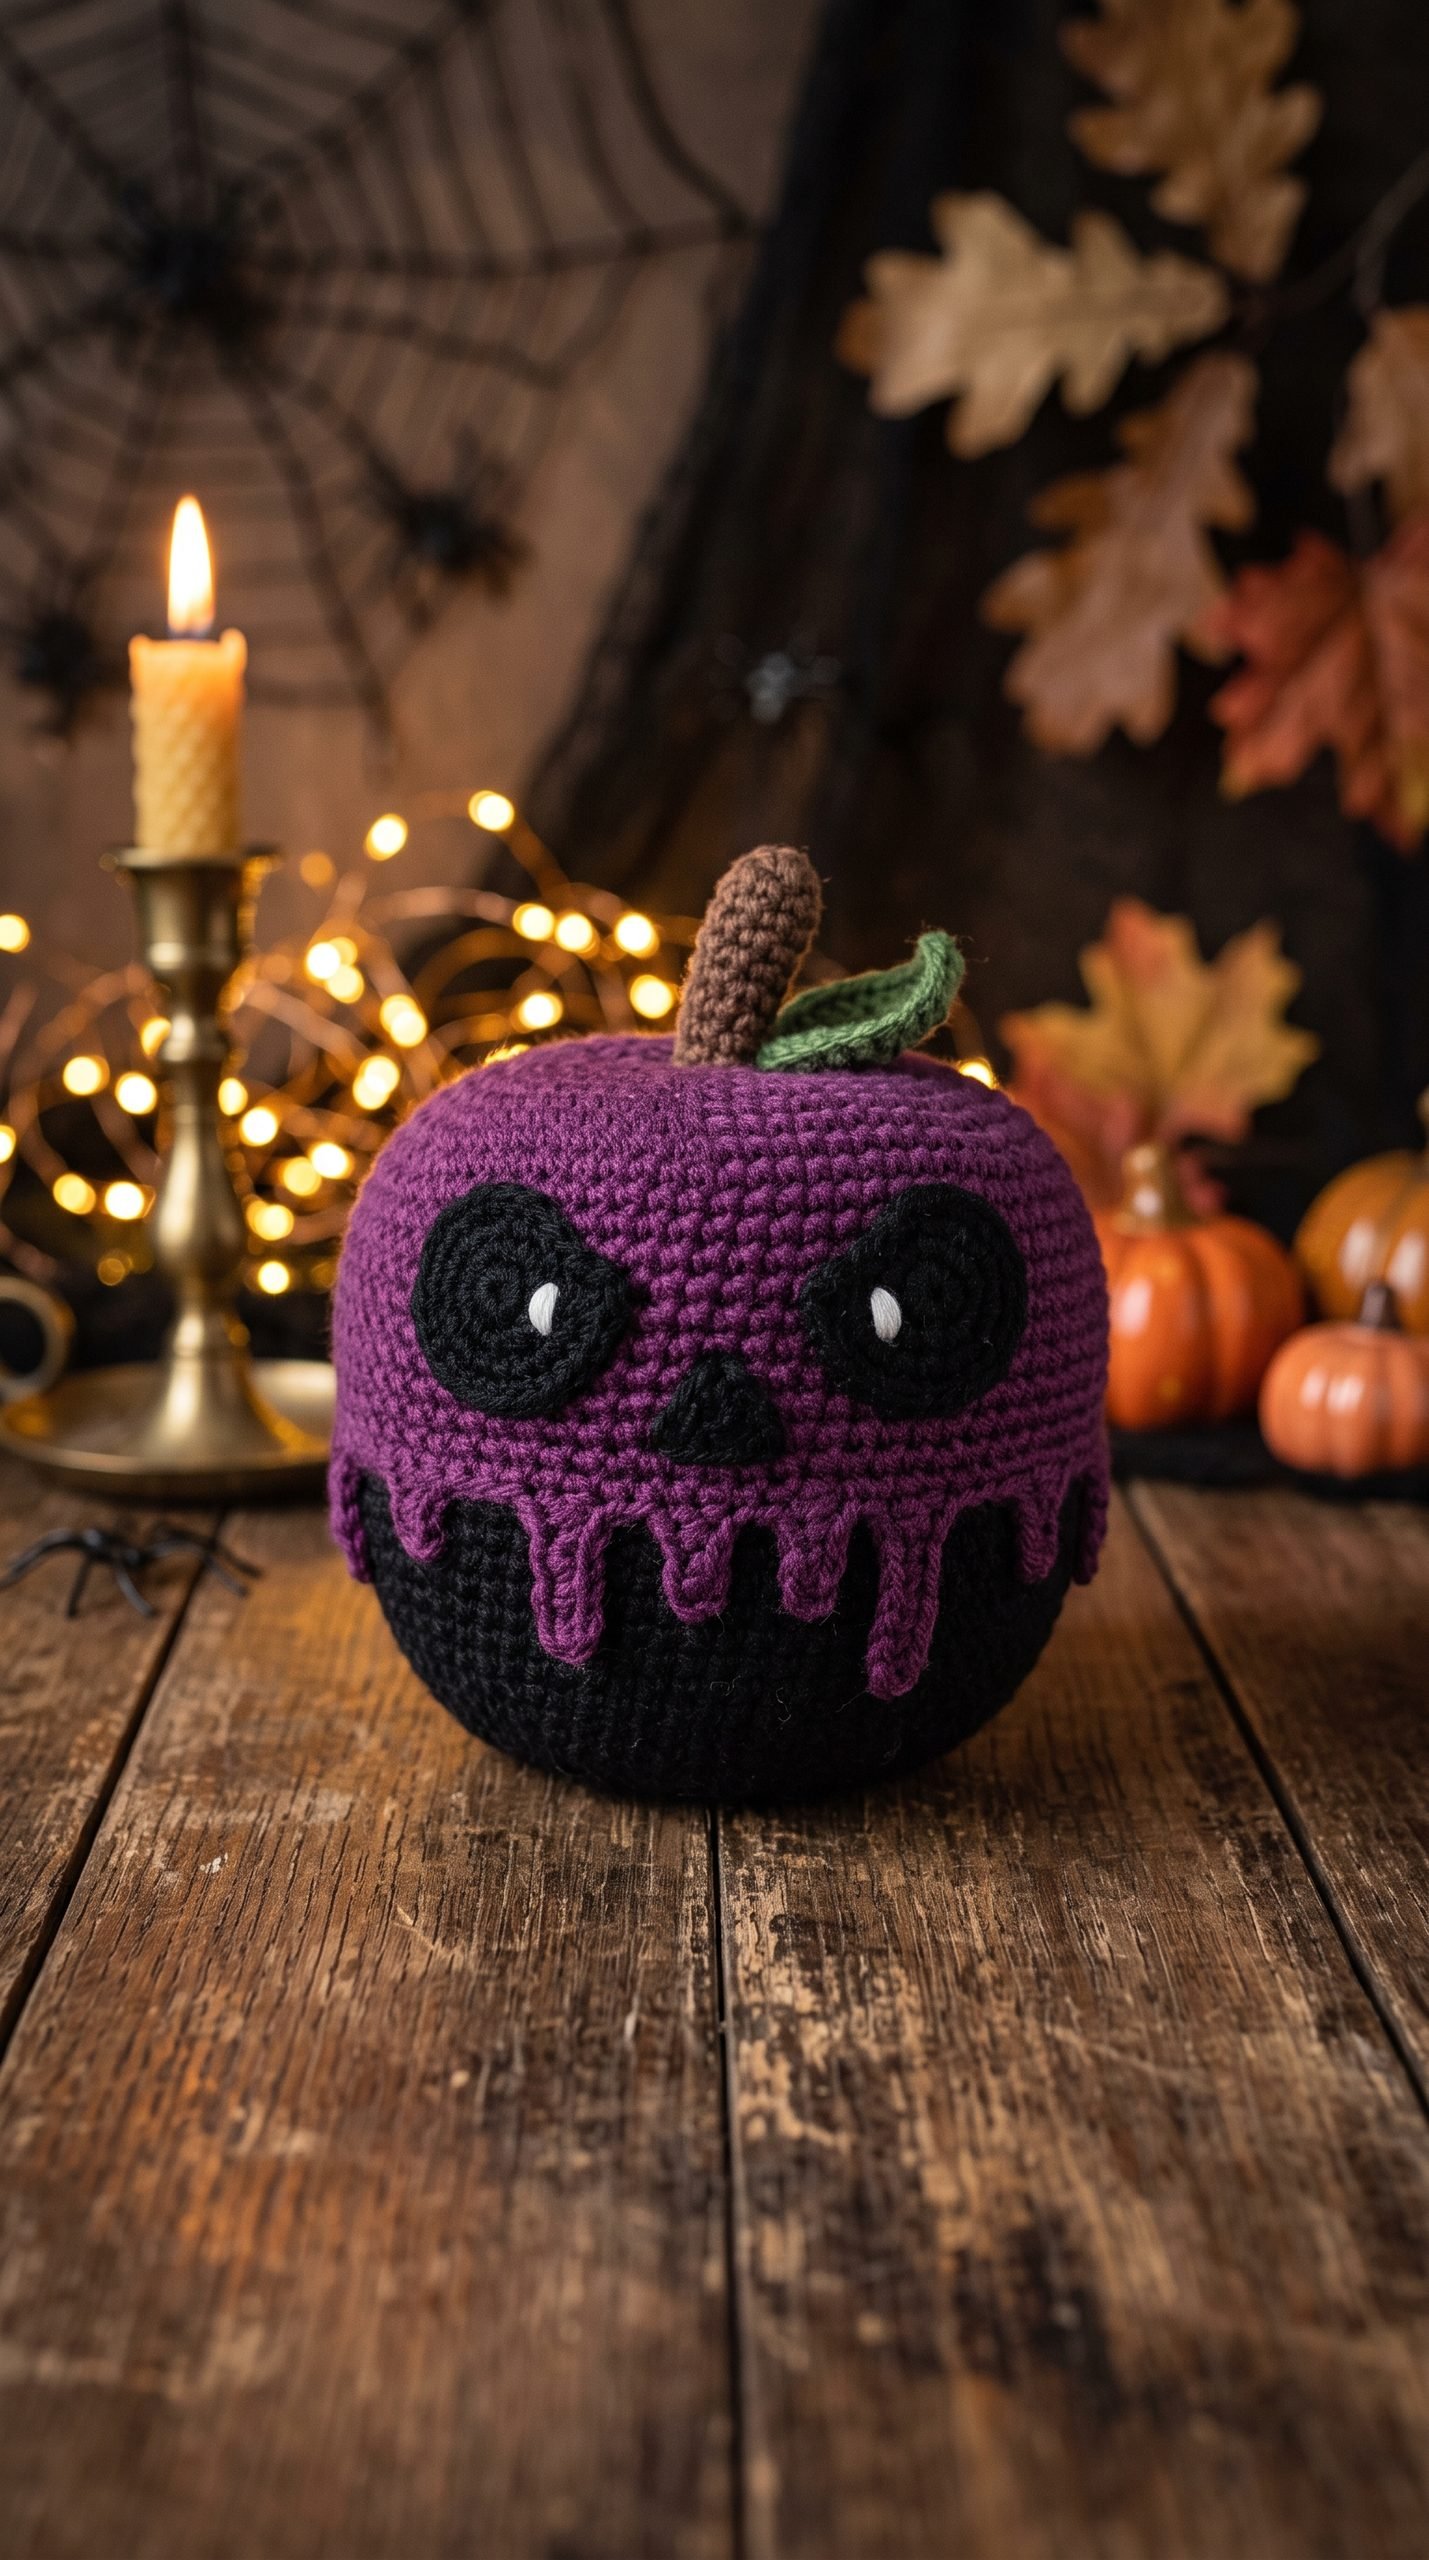
Looking for a spooky handmade project for Halloween? This crochet poison apple pattern combines a plump amigurumi apple with a creepy-cute skull-style face, dripping poison details, and a dramatic purple-and-black color palette.
The main apple is crocheted in continuous rounds, stuffed, and shaped before the facial pieces and poison drips are added. It is a fun Halloween project for advanced beginners who are comfortable with single crochet, increases, decreases, simple appliqués, and basic sewing.

Project Details
- Skill Level: Advanced Beginner
- Estimated Time: 3–5 hours
- Finished Size: Approximately 6 inches tall including the stem and 5–6 inches wide
- Crochet Terminology: US terms
- Construction: The apple is worked in continuous rounds, stuffed, shaped, and decorated with separate crochet facial appliqués and dripping poison pieces.
Materials
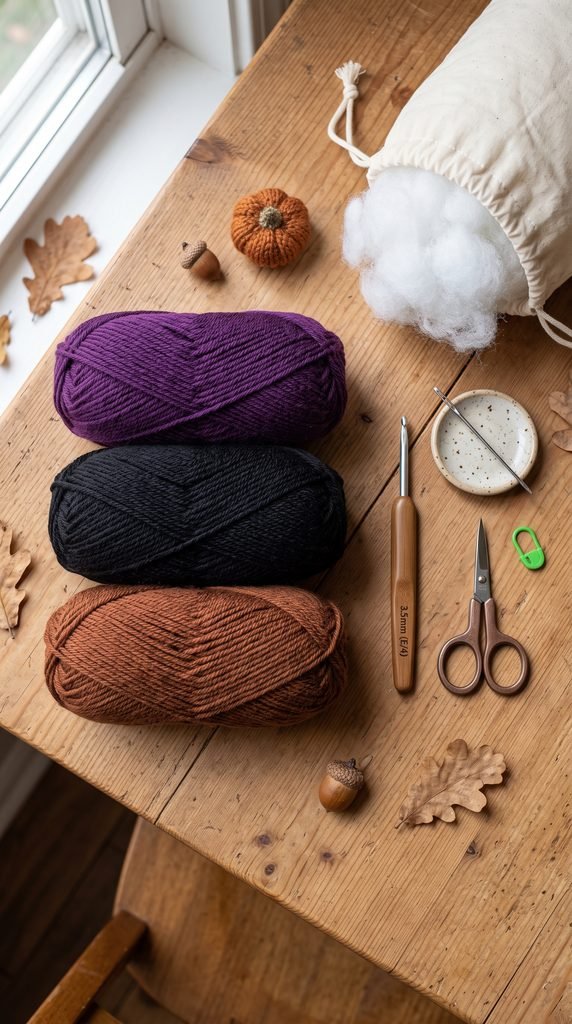
- Worsted weight #4 yarn in purple
- Worsted weight #4 yarn in black
- Small amount of brown yarn
- 3.5 mm crochet hook
- Polyester fiberfill stuffing
- Yarn needle
- Scissors
- Stitch marker
- Straight pins for positioning appliqués, optional
Hook Size
Use a 3.5 mm (E/4) crochet hook.
For amigurumi, the stitches should be tight enough that the stuffing does not show through the crochet fabric.
Yarn
Use worsted weight #4 yarn. Acrylic, cotton, or a cotton-acrylic blend can all work for this project.
Approximate yarn amounts:
- Purple: 70–90 yards
- Black: 35–45 yards
- Brown: Less than 10 yards
A rich violet or poison-purple yarn creates a strong Halloween look. You can also try neon green, dark red, or acid green for a different spooky style.
Abbreviations
- MR = magic ring
- ch = chain
- sc = single crochet
- sl st = slip stitch
- st(s) = stitch(es)
- inc = increase, work 2 sc in the same stitch
- dec = invisible single crochet decrease
Before You Start / Pattern Notes
The main apple is worked in continuous spiral rounds. Do not join the rounds unless instructed.
Place a stitch marker into the first stitch of each round and move it upward as you work.
Gauge is not critical for this project. Use tight, even stitches and stuff the apple firmly without stretching the fabric.
The lower portion of the apple changes from purple to black. Purple crochet drips are later sewn over the black area to create the poisoned effect.
Free Crochet Poison Apple Pattern

Part 1 — Crochet Apple Body
Begin with purple yarn.
Round 1: Work 6 sc into MR. (6 sts)
Round 2: Inc in each st around. (12 sts)
Round 3: *Sc in next st, inc.* Repeat around. (18 sts)
Round 4: *Sc in next 2 sts, inc.* Repeat around. (24 sts)
Round 5: *Sc in next 3 sts, inc.* Repeat around. (30 sts)
Round 6: *Sc in next 4 sts, inc.* Repeat around. (36 sts)
Round 7: *Sc in next 5 sts, inc.* Repeat around. (42 sts)
Round 8: *Sc in next 6 sts, inc.* Repeat around. (48 sts)
Round 9: *Sc in next 7 sts, inc.* Repeat around. (54 sts)
Rounds 10–16: Sc in each st around. (54 sts)
Round 17: *Sc in next 7 sts, dec.* Repeat around. (48 sts)
Change to black yarn.
Round 18: Sc around. (48 sts)
Round 19: *Sc in next 6 sts, dec.* Repeat around. (42 sts)
Round 20: *Sc in next 5 sts, dec.* Repeat around. (36 sts)
Round 21: *Sc in next 4 sts, dec.* Repeat around. (30 sts)
Begin stuffing the apple firmly.
Round 22: *Sc in next 3 sts, dec.* Repeat around. (24 sts)
Round 23: *Sc in next 2 sts, dec.* Repeat around. (18 sts)
Add more stuffing and shape the apple with your hands.
Round 24: *Sc in next st, dec.* Repeat around. (12 sts)
Finish stuffing.
Round 25: Dec around. (6 sts)
Fasten off and close the remaining opening.
Part 2 — Shape the Apple
Thread a long piece of purple yarn onto your yarn needle.
Insert the needle through the bottom center of the apple and bring it out through the center of the top.
Pull gently to create a small indentation at the top of the apple.
Bring the yarn back through the center once or twice more until the apple has a natural rounded shape.
Secure the yarn and hide the end inside the apple.
Part 3 — Crochet Stem
Using brown yarn:
Round 1: Work 6 sc into MR. (6 sts)
Rounds 2–7: Sc around. (6 sts)
Fasten off, leaving a long tail for sewing.
Lightly stuff the stem if desired.
Sew the stem securely into the indentation at the top of the apple.
Part 4 — Large Skull Eyes
Make 2 using black yarn.
Ch 8.
Round 1: Starting in the second chain from the hook, sc in next 6 chains, work 3 sc in the final chain.
Continue along the opposite side of the foundation chain and sc in next 5 chains, then work 2 sc in the final chain.
Join with a sl st.
Fasten off, leaving a long tail for sewing.
Gently stretch each piece into an elongated oval.
When sewing, angle the inner corners slightly downward to create a dramatic skull-like expression.
Part 5 — Skull Nose
Using black yarn:
Ch 5.
Row 1: Starting in the second chain from the hook, sc across. (4 sts)
Row 2: Ch 1, dec twice. (2 sts)
Row 3: Ch 1, dec. (1 st)
Fasten off, leaving a sewing tail.
The piece should form a small triangle.
Part 6 — Poison Drips
The purple drips are sewn over the black lower portion of the apple.
Make 5 drips in slightly different lengths.
Long Drip — Make 1
Using purple yarn, ch 9.
Starting in the second chain from the hook, sc back across. (8 sts)
Fasten off, leaving a sewing tail.
Medium Drips — Make 2
Using purple yarn, ch 7.
Starting in the second chain from the hook, sc back across. (6 sts)
Fasten off.
Short Drips — Make 2
Using purple yarn, ch 5.
Starting in the second chain from the hook, sc back across. (4 sts)
Fasten off.
Part 7 — Assemble the Poison Face

Place the two black eye appliqués on the upper purple portion of the apple.
Leave enough space between them for the nose.
Pin them temporarily before sewing so you can check that both eyes sit evenly.
Sew the eyes securely using the black yarn tails.
Place the triangular nose between and slightly below the eyes, then sew it into position.
Arrange the five purple drips along the color-change line where the purple upper apple meets the black lower section.
Place the longest drip near the center and use the shorter drips toward the sides.
Sew the top of each drip securely to the purple portion of the apple. Let the remaining length hang downward across the black section.
Curve the ends slightly with your fingers to create a more natural dripping-poison effect.
Finishing
Weave in all remaining yarn ends securely.
Check that the eye, nose, and drip appliqués are firmly attached.
Gently reshape the apple by rolling it between your hands.
Adjust the top indentation around the stem if necessary.
Straighten or curve the purple drips until the face looks balanced.
Blocking is not normally necessary for this stuffed project.

Finished Size
Using worsted weight #4 yarn and a 3.5 mm crochet hook, your finished poison apple should measure approximately:
5–6 inches wide (13–15 cm)
About 6 inches tall (15 cm) including the crochet stem.
Your finished measurements may vary depending on yarn, tension, stuffing, and shaping.
Tips and Customization Ideas
Try a Green Poison Apple
Replace the purple yarn with bright acid green for an extra-toxic Halloween color palette.
Make a Classic Red Version
Use deep red yarn for the apple and green or black yarn for the dripping details.
Add a Crochet Leaf
For a more traditional apple shape, crochet a small green leaf and sew it beside the brown stem.
Change the Expression
Make the eyes narrower, wider, or slightly uneven to give each poison apple its own personality.
Make Mini Poison Apples
Use DK weight yarn with a smaller hook to create mini versions for Halloween baskets, shelf decor, or ornaments.
Create a Halloween Display
Pair your finished poison apple with crochet pumpkins, ghosts, spiders, or witch hats for a complete handmade Halloween display.
How to Display Your Crochet Poison Apple
This spooky amigurumi makes a fun addition to a Halloween mantel, bookshelf, tiered tray, entryway table, craft room shelf, or party centerpiece.
It also makes a playful handmade gift for crochet lovers and anyone who enjoys spooky seasonal decor.
Looking for Your Next Crochet Project?
Love this spooky project? Explore Cute Stitch Studio‘s premium crochet patterns for more cute, cozy, seasonal, and gift-worthy handmade ideas.