

Crochet Baby Booties with Bows: Free Pattern
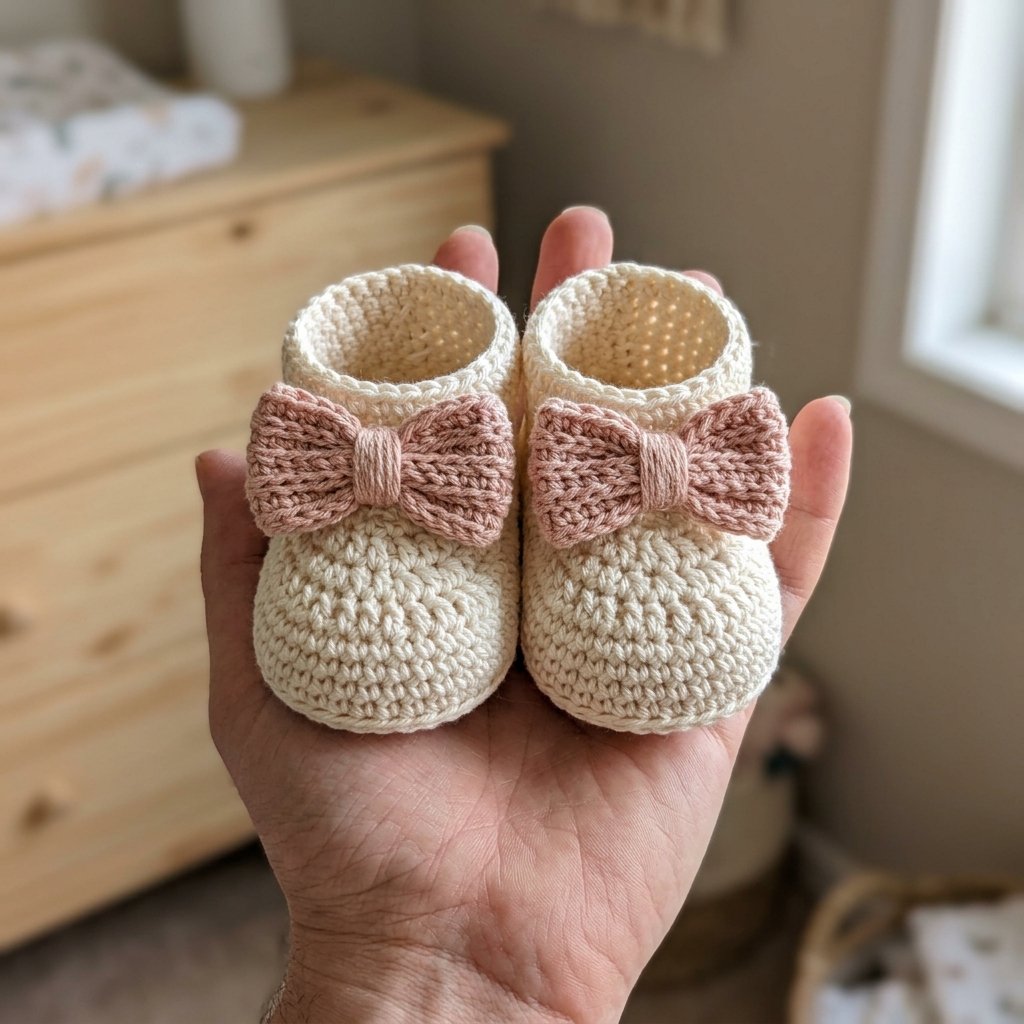
These crochet baby booties with bows pair a soft cream base with a blush pink bow for a sweet handmade finish. Make them for a baby shower gift, a keepsake box, or a supervised photo session.
The booties begin with an oval sole, followed by simple sides and a shaped toe. A short ankle cuff completes each shoe, and a small crocheted rectangle becomes the bow.
This project suits confident beginners who are comfortable counting stitches and ready to practice basic decreases.
Project Details
- Skill Level: Confident beginner
- Estimated Time: Approximately 3–5 hours per pair
- Finished Sole Length: Target approximately 3½–3¾ inches
- Finished Sole Width: Target approximately 1¾–2 inches
- Sizing: One small baby size; choose by foot measurements
- Crochet Terminology: US terms
- Construction: Oval sole, joined rounds for the upper, and a separately crocheted bow
This original pattern has not been physically tested. Finished measurements, fit, and yarn quantities are estimates that should be checked on a sample.
Materials
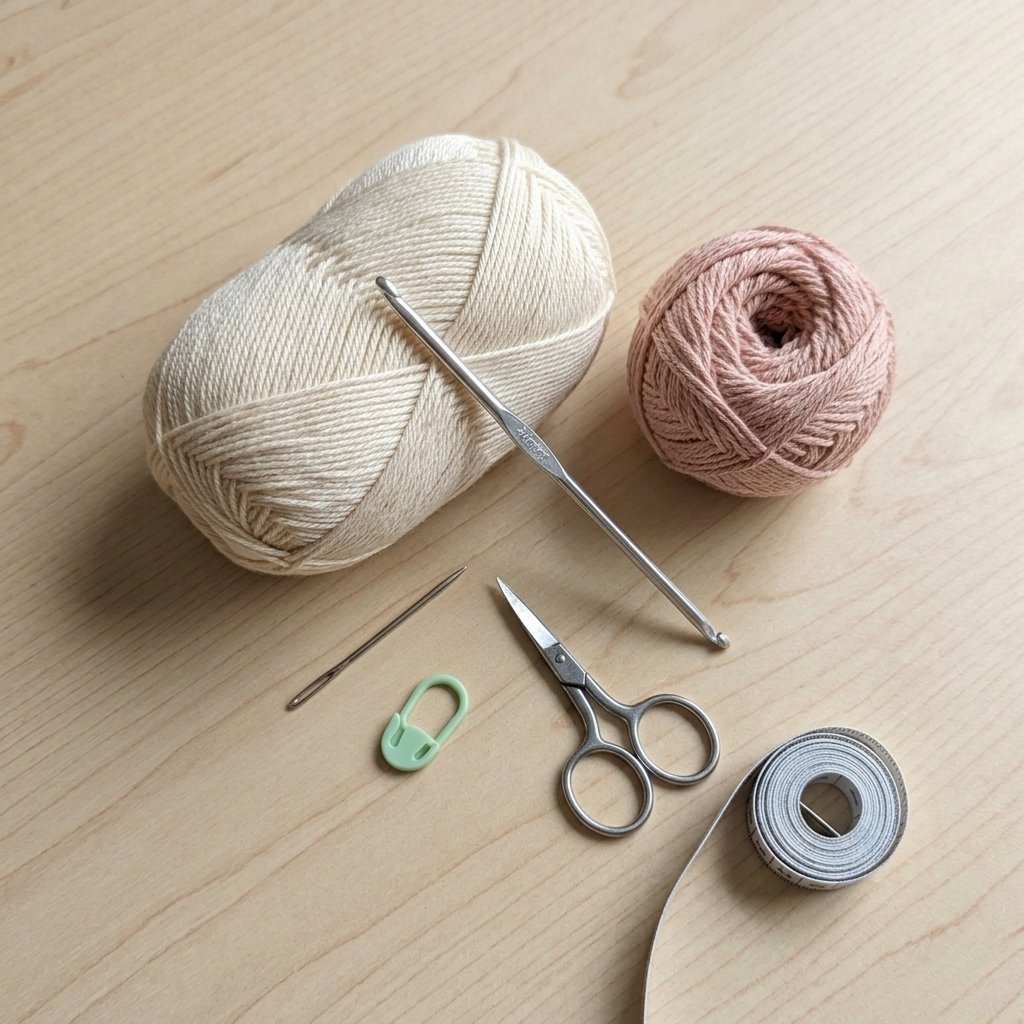
- Light-weight yarn in cream and blush pink
- 3.5 mm crochet hook, or the size needed for gauge
- Yarn needle
- Scissors
- Stitch marker
- Measuring tape
The bows are sewn directly onto the booties. No beads, buttons, elastic, or ties are needed.
Hook Size
Start with a 3.5 mm crochet hook.
The finished fabric should feel soft and flexible, with stitches close enough to hold the shape of the shoe.
Check the sole measurements before continuing with the upper.
Yarn
Use light-weight yarn, category 3, in a smooth, washable acrylic or soft cotton-acrylic blend.
Approximate amounts for one pair:
- Cream: 70–90 yards
- Blush pink: 15–25 yards
Choose a yarn that feels comfortable against the skin and has clear washing instructions.
Avoid very fuzzy yarn for this project; smooth yarn makes the small stitches and shaping easier to see.
Abbreviations
- ch: chain
- sc: single crochet
- hdc: half double crochet
- inc: work 2 single crochet stitches in the same stitch
- hdc2tog: half double crochet 2 stitches together
- BLO: back loop only
- sl st: slip stitch
- st(s): stitch(es)
How to Work hdc2tog
Yarn over, insert your hook into the next stitch, yarn over, and pull up a loop. You now have 3 loops on the hook.
Yarn over, insert your hook into the following stitch, yarn over, and pull up a loop. You now have 5 loops on the hook.
Yarn over and pull through all 5 loops.
This turns two stitches into one stitch.
Before You Start
Gauge
Starting gauge: 20 sc stitches and 22 rows = approximately 4 inches, measured in a relaxed single crochet swatch.
The finished sole is the most useful size check because this pattern is worked around a foundation chain.
If your sole is too small, try a slightly larger hook. If it is too large, try a slightly smaller hook.
Choose the Size by Measurement
Measure the baby’s foot from heel to longest toe. Allow approximately ¼–½ inch beyond the foot length, then check the actual fit.
The target sole length of 3½–3¾ inches is one small baby size. It is not a guaranteed fit for every baby in an age group.
This pattern does not include a graded 3–12 month size range.
Joined Rounds
Join every round with a sl st to the first stitch of that round.
Do not turn between rounds.
The starting ch 1 and joining sl st never count as stitches. Work the first stitch of each new round into the same stitch as the join.
Place a marker in the first stitch to make it easier to find.
Make Two Matching Booties
Both booties use the same instructions. There is no separate left or right version.
Count the stitches after every shaping round and compare both soles before making the uppers.
Crochet Baby Booties with Bows: Step-by-Step Pattern
Part 1 — Crochet the Oval Sole
With cream yarn, ch 14.
You will work along one side of the foundation chain, around its end, and back along the unused side.
Round 1:
- Work 2 sc in the second chain from the hook.
- Sc in each of the next 11 chains.
- Work 4 sc in the last chain.
- Rotate the work so you can crochet along the opposite side of the foundation chain.
- Sc in each of the next 11 unused chain loops.
- Work 2 sc in the same chain that holds the first 2 sc.
Join with a sl st to the first sc. (30 sts)
There are now 4 stitches around each end of the oval, with 11 stitches along each straight side.
Round 2: Ch 1. Inc in each of the first 2 sts, sc in the next 11 sts, inc in each of the next 4 sts, sc in the next 11 sts, and inc in each of the last 2 sts.
Join with a sl st to the first sc. (38 sts)
Round 3: Ch 1. Repeat (sc in the next st, inc) twice, sc in the next 11 sts, repeat (sc in the next st, inc) 4 times, sc in the next 11 sts, and repeat (sc in the next st, inc) twice.
Join with a sl st to the first sc. (46 sts)
Do not fasten off.
The join is at the heel end. The opposite rounded end is the toe.
Part 2 — Check the Sole
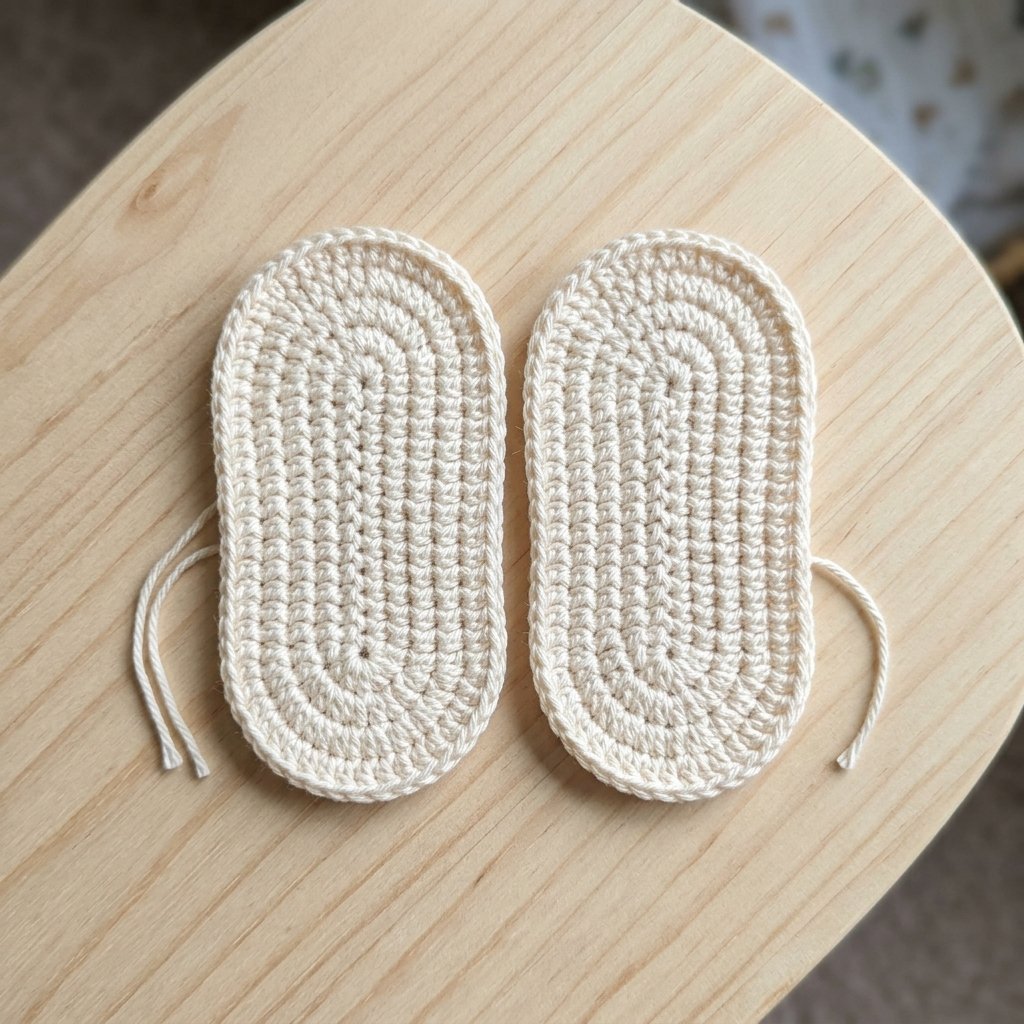
Lay the sole flat without stretching it.
Aim for approximately:
- Length: 3½–3¾ inches
- Width: 1¾–2 inches
Measure through the center, from one rounded end to the other.
If the sole is substantially different from the intended size, adjust your hook and remake it before continuing.
Make and measure the second sole now if you want to compare the pair before working the uppers.
Part 3 — Build the Sides
Continue with cream yarn.
Round 4: Ch 1. Working in BLO, sc in each st around. Join with a sl st to the first sc. (46 sts)
This round creates the fold between the sole and the side of the bootie.
Work through both loops again from this point onward.
Round 5: Ch 1. Sc in each st around. Join. (46 sts)
Round 6: Ch 1. Sc in each st around. Join. (46 sts)
The fabric should now form a shallow oval cup.
Part 4 — Shape the Toe
Keep the beginning of the round at the heel.
The decreases in the middle of each round shape the opposite end into a rounded toe.
Round 7: Ch 1. Sc in the next 17 sts, hdc2tog 6 times, sc in the next 17 sts. Join. (40 sts)
Round 8: Ch 1. Sc in the next 15 sts, hdc2tog 5 times, sc in the next 15 sts. Join. (35 sts)
Round 9: Ch 1. Sc in the next 13 sts, hdc2tog 4 times, sc in the next 14 sts. Join. (31 sts)
Round 10: Ch 1. Sc in the next 12 sts, hdc2tog 3 times, sc in the next 13 sts. Join. (28 sts)
The toe is now closed over the front of the foot, leaving the ankle opening above.
Before continuing, check that all decreases sit at the toe end. If they are drifting toward the side, check the round’s starting stitch and your stitch counts.
Part 5 — Crochet the Ankle Cuff
Round 11: Ch 1. Sc in each st around. Join. (28 sts)
Round 12: Ch 1. Sc in each st around. Join. (28 sts)
Round 13: Ch 1. Sc in each st around. Join. (28 sts)
Fasten off, leaving a 6-inch tail.
At the target stitch gauge, the cuff circumference is approximately 5½ inches, though working tension can change this.
The opening should allow the foot to pass through gently. If it does not, do not force it; the size or upper shaping needs adjustment.
Repeat Parts 1–5 for the second bootie.
Part 6 — Make the Bows
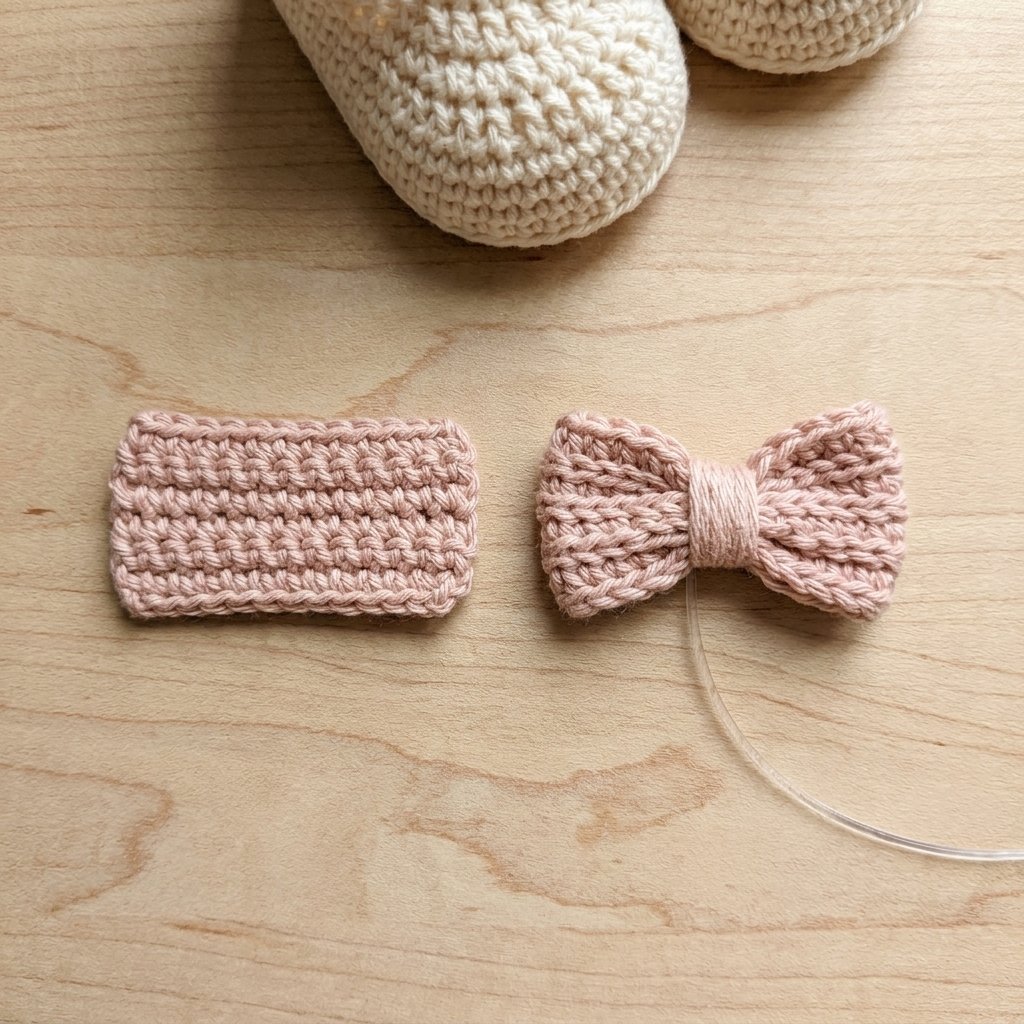
Make two with blush pink yarn.
Ch 11.
Row 1: Sc in the second chain from the hook and in each remaining chain. (10 sts)
Row 2: Ch 1 and turn. Working in BLO, sc in each st across. (10 sts)
Rows 3–6: Repeat Row 2. (10 sts per row)
Fasten off, leaving a tail approximately 24 inches long.
The rectangle should measure approximately 2 inches wide and 1 inch tall.
Shape Each Bow
- Weave in the short starting tail.
- Pinch the center of the rectangle into a small accordion fold.
- Use the long finishing tail to sew through the pinched center two or three times.
- Wrap the yarn around the center approximately six times.
- Pass the needle beneath the wraps at the back to secure them.
Keep the remaining tail for attaching the bow.
The wraps should hold the shape without crushing the center into a hard knot.
Part 7 — Attach the Bows
Place a bow across the front of each bootie, centered above the toe.
Position the bow’s center over the front of the cuff, around Rounds 11–12. Keep the ankle opening clear.
Using the remaining tail:
- Sew through the back of the bow’s center and several stitches of the cuff.
- Repeat several times to secure the center.
- Add a small stitch through the back of each bow wing near the center to help prevent twisting.
- Secure and weave in the tail inside the fabric.
Catch only the front layer of the cuff. Do not sew through the back of the bootie or close the opening.
Repeat for the second bow, checking that both sit at the same height.
Finishing
Weave in the Ends
Turn each bootie gently inside out.
Weave the yarn ends through several stitches, changing direction before trimming. Keep the inside smooth and free of loose loops.
Turn the booties right side out.
Shape the Pair
Use your fingers to round the toes and open the ankle cuffs.
If needed, wash according to the yarn label and gently shape while damp. Let the booties dry completely without stretching them.
Check the Bows and Fit
Check the bow attachments before each use.
These soft booties are intended for non-walking wear and supervised photos. Remove them if they feel tight or the baby pulls at the decoration.
Finished Size
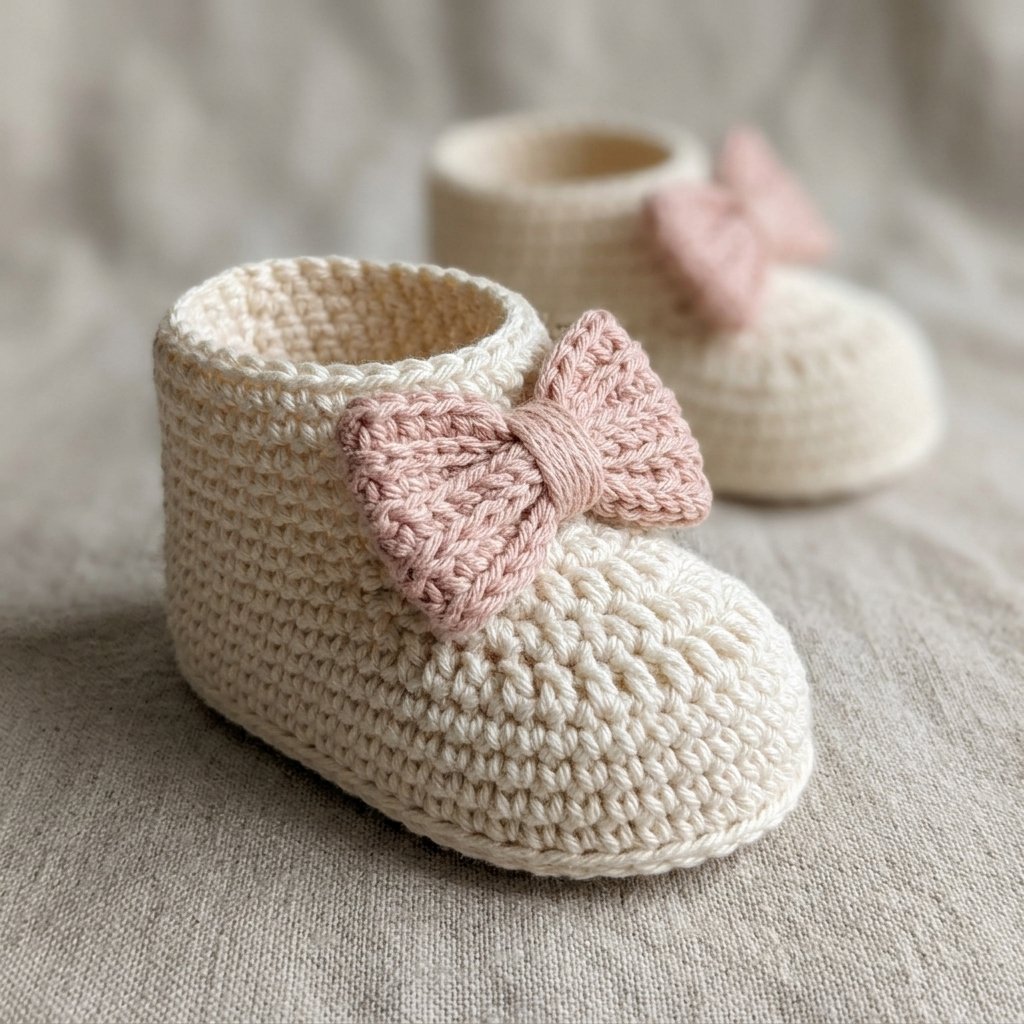
At the intended gauge, each bootie should measure approximately:
- Sole length: 3½–3¾ inches (9–9.5 cm)
- Sole width: 1¾–2 inches (4.5–5 cm)
- Cuff circumference: Approximately 5½ inches (14 cm)
- Bow width: Approximately 2 inches (5 cm)
Measure the finished pair and compare it with the baby’s foot before use. The interior space may be slightly smaller than the outside sole measurement.
Tips & Customization
Try a Different Color Pair
Cream and blush create a soft gift-ready look. You could also try oatmeal and sage, ivory and lavender, or a single color for the entire pair.
Keep Both Booties Consistent
Use the same hook and yarn for both shoes. Compare the soles and cuff openings before sewing on the bows.
Make a Plain Pair
The bows are optional. Leave them off for a simple everyday version without changing the bootie instructions.
Adjust the Cuff Height
For a lower cuff, stop after Round 12. For a slightly taller cuff, add one more round of 28 sc.
Changing the cuff height does not change the sole size.
Plan Larger Sizes Carefully
A different yarn or hook may change the size, but it will also change the fabric and fit.
For a substantially larger foot, use a separately graded pattern rather than adding random stitches to the sole or toe rounds.
Package Them as a Gift
Place the pair in a small box with a yarn-care note and the finished sole measurement.
Add an easy crochet heart to the outside of the gift packaging for an extra handmade touch.
Looking for Your Next Crochet Project?
Love making tiny handmade gifts? Explore Cute Stitch Studio’s premium crochet patterns for more cute baby projects, cozy accessories, and gift-worthy ideas.


