Crochet Mesh Crop Top Pattern with Earthy Stripes
This free crochet mesh crop top pattern combines earthy stripes, an airy stitch repeat, and relaxed wide sleeves. The cropped shape looks lovely with high-waisted jeans, while the boat neckline gives the sweater an easy, casual feel.
Olive green, cream, rust, mustard, and chocolate brown bring warmth to the simple design. Rows of double crochet and single crochet alternate with open mesh, creating texture without complicated stitch combinations.
This confident-beginner project uses four flat rectangles: a front, a back, and two sleeves. There is no shaped sleeve cap or fitted waist to calculate, and the instructions include four sizes plus practical length adjustments.

Table of Contents
Crochet Mesh Crop Top Pattern With Earthy Stripes Instructions
Project Details
- Skill level: Confident beginner.
- Estimated time: Approximately 18–30 hours, depending on size and crochet speed.
- Sizes: A, B, C, and D, selected by finished bust measurement.
- Fit: Relaxed, cropped, with dropped shoulders and straight wide sleeves.
- Crochet terminology: US terms.
- Construction: Four rectangles worked in rows, then seamed.
- Neckline: Boat neck with a simple single crochet edging.
This is an original Cute Stitch Studio design inspired by an earthy striped silhouette. It uses a simplified mesh repeat and has not been physically sample-tested. Measurements and yarn quantities are gauge-based estimates.
Size Chart
Measure around the fullest part of your bust. Choose a finished circumference approximately 4–8 inches (10–20 cm) larger than your body measurement for the intended relaxed fit.
The size letters describe this pattern only. Use the measurements rather than your usual clothing label.
| Measurement | A | B | C | D |
|---|---|---|---|---|
| Suggested body bust | 34–38 in (86.5–96.5 cm) | 42–46 in (106.5–117 cm) | 50–54 in (127–137 cm) | 58–62 in (147.5–157.5 cm) |
| Finished bust | 42 in (106.5 cm) | 50 in (127 cm) | 58 in (147.5 cm) | 66 in (167.5 cm) |
| Each body panel width | 21 in (53.5 cm) | 25 in (63.5 cm) | 29 in (73.5 cm) | 33 in (84 cm) |
| Body length before edging | 14 in (35.5 cm) | 14 in (35.5 cm) | 16 in (40.5 cm) | 16 in (40.5 cm) |
| Sleeve circumference before seaming | 17 in (43 cm) | 19 in (48.5 cm) | 21 in (53.5 cm) | 23 in (58.5 cm) |
| Sleeve length from dropped shoulder | 16 in (40.5 cm) | 14 in (35.5 cm) | 12 in (30.5 cm) | 10 in (25.5 cm) |
If your bust falls between the suggested ranges, compare it directly with the finished measurements. For example, a 40-inch bust has 10 inches of ease in Size B for a more oversized fit.
The sleeves become shorter as the body becomes wider because the shoulder seam sits farther down the arm. Check sleeve reach on your own body before completing both sleeves.
Materials
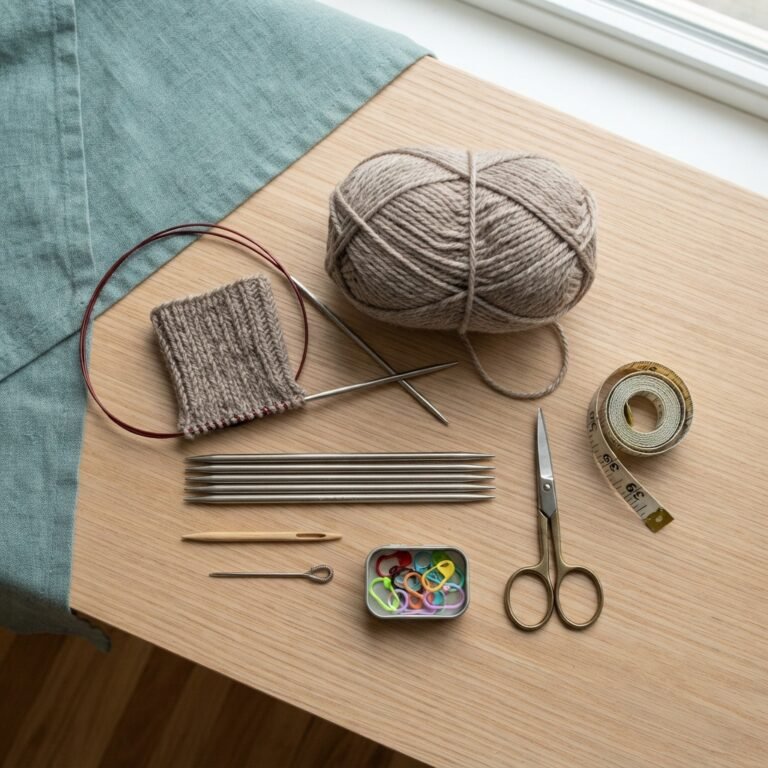
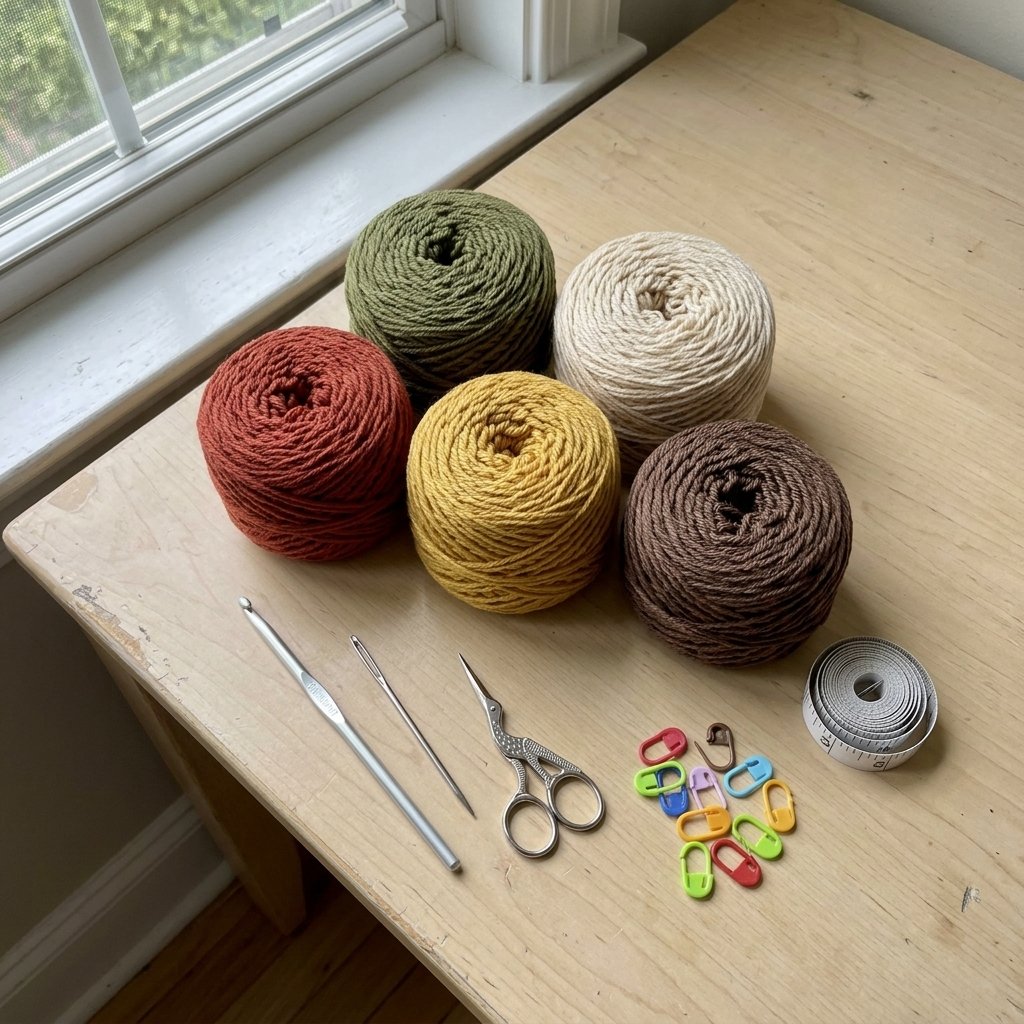
- Category 4 worsted-weight yarn in olive, cream, rust, mustard, and chocolate brown.
- 5.5 mm crochet hook, or the size needed to match gauge.
- Yarn needle.
- Scissors.
- Measuring tape.
- Locking stitch markers for marking the neckline and armholes.
Hook Size
Start with a 5.5 mm crochet hook. The intended fabric is flexible and airy rather than stiff.
If your swatch has too many stitches in 4 inches, try a larger hook. If it has too few, try a smaller hook. Wash and dry the swatch before making your final choice.
Yarn
Use a smooth Category 4 worsted-weight yarn with good stitch definition. A lightweight cotton-acrylic blend is a useful starting point for this relaxed layering piece.
Choose all five colors from yarns with similar thickness and fiber content so the stripes behave consistently.
| Size | Estimated total yarn | Suggested amount per color |
|---|---|---|
| A | 900 yd (825 m) | 180 yd (165 m) |
| B | 1,050 yd (960 m) | 210 yd (192 m) |
| C | 1,200 yd (1,100 m) | 240 yd (220 m) |
| D | 1,350 yd (1,235 m) | 270 yd (247 m) |
These are purchasing estimates, not measured sample usage. Individual colors will not be used in exactly equal amounts. Allow extra cream for the edging and extra yarn if you plan to lengthen the body or sleeves.
Gauge
12 stitch positions and 8 rows = 4 inches (10 cm) in the four-row pattern, after washing and drying flat.
A stitch position means either one worked stitch or one chain space. On a mesh row, count the double crochet stitches and the chain-1 spaces together when checking width.
For a swatch, ch 24 and follow the body stitch instructions over 23 stitches for 12 rows. Measure across the center, away from the edges. The swatch should show three complete four-row repeats.
Check the drape as well as the numbers. Hang the dry swatch for several hours and remeasure it to see whether your yarn grows under its own weight.
Abbreviations
- ch: chain.
- sc: single crochet.
- dc: double crochet.
- sl st: slip stitch.
- st(s): stitch(es).
Before You Start
- Instructions list sizes as A (B, C, D).
- All four panels are worked flat. Turn after every row.
- Beginning ch-1 and ch-2 do not count as stitches.
- Work the first stitch into the first stitch of the previous row.
- Every panel has an odd stitch count so the mesh repeat fits evenly.
- There are no increases or decreases in the panels.
- Use shallow edge seams to avoid losing unnecessary width.
The Four-Row Texture Repeat
The repeating sequence is: one single crochet row, one double crochet row, one mesh row, and one single crochet row.
When you repeat the sequence, two single crochet rows meet between cycles. These denser bands are part of the design.
Stripe Sequence
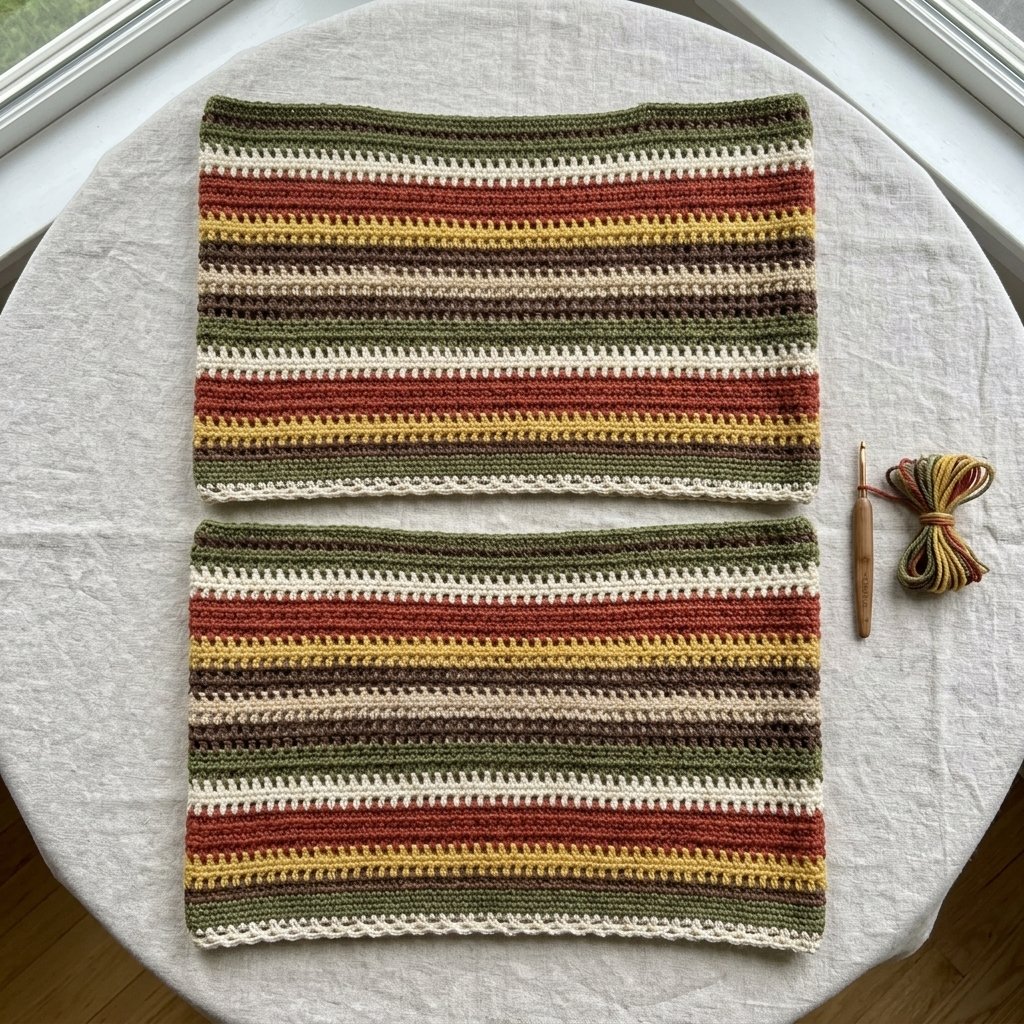
Change color every two rows using this sequence:
- Rows 1–2: Olive.
- Rows 3–4: Cream.
- Rows 5–6: Rust.
- Rows 7–8: Mustard.
- Rows 9–10: Chocolate brown.
Repeat this ten-row color sequence throughout each panel. Begin every panel with olive so the front and back match and both sleeves match each other.
To change color, complete the final yarn-over of the last stitch in the old row with the new color. Cut the old yarn, leaving a tail for weaving in, then turn and begin the next row.
Crochet Mesh Crop Top Pattern: Step-by-Step Instructions
Part 1 — Front Panel
Foundation: With olive, ch 64 (76, 88, 100).
Row 1: Sc in the second chain from the hook and in each remaining chain. Turn. 63 (75, 87, 99) sc.
Row 2: Ch 2. Dc in each stitch across. Turn. 63 (75, 87, 99) dc.
Row 3: Ch 2. Dc in the first stitch. Repeat [ch 1, skip the next stitch, dc in the next stitch] to the end. Turn.
You will have 32 (38, 44, 50) dc and 31 (37, 43, 49) chain-1 spaces. Together these equal 63 (75, 87, 99) stitch positions.
Row 4: Ch 1. Sc in each dc and work 1 sc into each chain-1 space across. Turn. 63 (75, 87, 99) sc.
Row 5: Ch 1. Sc in each stitch across. Turn. 63 (75, 87, 99) sc.
Row 6: Repeat Row 2.
Row 7: Repeat Row 3.
Row 8: Repeat Row 4.
Rows 9–28 for Sizes A and B: Repeat Rows 5–8 five more times.
Rows 9–32 for Sizes C and D: Repeat Rows 5–8 six more times.
Keep following the two-row stripe sequence independently of the four-row stitch sequence. Fasten off after the final row.
Part 2 — Back Panel
Make a second panel exactly like the front, using the same foundation count, row count, and color sequence.
Lay both pieces together before continuing. They should match in width and length, with the stripe edges lining up.

Part 3 — Make Two Sleeves
The sleeve foundation edge will attach to the armhole. Work toward the wrist, ending at the cuff edge.
Foundation: With olive, ch 52 (58, 64, 70).
Sleeve Row 1: Sc in the second chain from the hook and in each remaining chain. Turn. 51 (57, 63, 69) sc.
Sleeve Row 2: Ch 2. Dc in each stitch across. Turn. 51 (57, 63, 69) dc.
Sleeve Row 3: Ch 2. Dc in the first stitch. Repeat [ch 1, skip the next stitch, dc in the next stitch] across. Turn.
You will have 26 (29, 32, 35) dc and 25 (28, 31, 34) chain-1 spaces.
Sleeve Row 4: Ch 1. Sc in each dc and work 1 sc into each chain-1 space across. Turn. 51 (57, 63, 69) sc.
Sleeve Rows 5–8: Work one sc row, one dc row, one mesh row, and one sc row, using the same instructions as Body Rows 5–8.
Continue repeating these four rows until the sleeve has 32 (28, 24, 20) total rows.
Follow the same two-row stripe sequence as the body. Fasten off and make the second sleeve to match.
These sleeves are straight and wide from upper arm to cuff. There is no wrist taper or gathered cuff.
Part 4 — Block the Pieces
Weave in the color-change tails along the matching solid rows. Avoid pulling the ends across open mesh spaces where they would show.
Wash or dampen the four panels according to the yarn label. Lay them flat and gently smooth each piece to the measurements in the size chart.
Do not stretch the mesh aggressively. Let all four pieces dry completely before seaming.
Part 5 — Join the Shoulders
Place the front and back together with your chosen right sides facing inward. Align the top edges and stripe rows.
At each end of the top edge, mark 15 (21, 27, 33) stitches for the shoulder seam.
This leaves the middle 33 stitches of each panel unseamed for the neckline. The opening measures approximately 11 inches (28 cm) across when laid flat.
Using a yarn needle and matching yarn, sew each shoulder section with a small whipstitch through the edge loops. Do not sew across the center opening.
Carefully check that the opening passes over your head before securing and trimming the seam ends. The neckline should rest broadly across the upper chest rather than fit like a crew neck.
Part 6 — Attach the Sleeves
Open the joined body flat with the wrong side facing up. The front and back should extend away from the shoulder seams.
On each outer side edge, count downward from the shoulder and mark 17 (19, 21, 23) row ends on the front and the same number on the back. These marks define the bottom of each armhole.
The full sleeve attachment edge therefore spans 34 (38, 42, 46) body row ends, measuring approximately 17 (19, 21, 23) inches.
Find the midpoint of a sleeve foundation edge. Place that midpoint at the shoulder seam, with the two foundation corners meeting the front and back armhole markers.
Pin or mark the midpoint, ends, and quarter points. Sew the sleeve foundation edge to the body edge, distributing the sleeve stitches evenly. The approximate rate is 3 sleeve stitches for every 2 body row ends.
Do not force a one-to-one match: the sleeve edge is measured in stitches, while the armhole is measured in row ends.
Attach the second sleeve the same way.
Part 7 — Sew the Sleeve and Side Seams
Fold the garment at the shoulders with right sides facing inward. Align the front and back hems, the underarm corners, and each sleeve’s long edges.
Beginning at a sleeve cuff, sew the two long sleeve edges together toward the underarm. Continue from the underarm down the body side to the hem.
Repeat on the other side. Match corresponding stripe rows and keep the seams flexible.
Turn the top right side out and try it on before adding the edging.
Part 8 — Add the Edging
Neckline Round 1: With cream, join yarn at the back neckline near a shoulder seam. Ch 1. Work 1 sc in each of the 33 unseamed back stitches and each of the 33 unseamed front stitches. Join with a sl st to the first sc. 66 sc. Fasten off.
Keep this round relaxed and do not skip the stitches immediately beside the shoulder seams. Check the opening over your head again before weaving in the tails.
Hem Round 1: With cream, join yarn at a side seam. Ch 1. Sc once into each foundation stitch around the front and back. Join with a sl st to the first sc. 126 (150, 174, 198) sc. Fasten off.
Cuff Round 1: With cream, join yarn at the sleeve seam. Ch 1. Sc in each stitch around the cuff. Join with a sl st to the first sc. 51 (57, 63, 69) sc. Fasten off.
Repeat the cuff edging on the other sleeve. Do not add extra stitches into the seams.
Finishing
Weave in the remaining tails on the inside. Check that the shoulder seams, underarms, and color changes are secure without pulling the fabric tight.
Lay the top flat and gently smooth the neckline and edges. If the edging ripples or draws inward, rework that round with a hook size that allows it to lie naturally.
The mesh is intentionally open. Wear the top over a camisole, tank, or another comfortable layer that gives you your preferred coverage.

Finished Size
The finished bust circumference is approximately 42 (50, 58, 66) inches, or 106.5 (127, 147.5, 167.5) cm.
Body length before edging is approximately 14 (14, 16, 16) inches, or 35.5 (35.5, 40.5, 40.5) cm. The narrow edging adds a small amount to the final measurement.
Sleeve length from the dropped shoulder is approximately 16 (14, 12, 10) inches, or 40.5 (35.5, 30.5, 25.5) cm, before cuff edging.
Tips and Customization
Make the Body Longer
Add complete four-row repeats to both body panels. Each repeat adds approximately 2 inches (5 cm) at the stated gauge.
When marking the armholes, still count the specified number of rows down from the shoulder. The extra rows belong below the armhole and increase the side-seam length.
Adjust Sleeve Reach
After joining the shoulders, drape the body over your shoulders and measure from the dropped shoulder edge to your preferred cuff position.
Add or remove complete four-row repeats from both sleeves to approach that measurement. Keep the foundation count unchanged so the sleeves still fit the armholes.
Change the Palette
Try cream, dusty pink, plum, caramel, and cocoa for a softer look. For a simpler version, use one color throughout and let the solid and mesh rows provide the texture.
Keep the Stripes Consistent
Write down your color changes if you use a different sequence. Matching the front to the back and one sleeve to the other makes assembly easier.
Frequently Asked Questions
Is This Crochet Mesh Crop Top Pattern Suitable for Beginners?
Yes, if you can work single crochet, double crochet, and chains, and keep a consistent stitch count. The panels are rectangles, but gauge and careful seaming still matter for the fit.
Does the Pattern Include the Exact Decorative Stitches in the Inspiration Photo?
No. This version uses a straightforward four-row repeat to create its own striped mesh fabric. The cropped shape, earthy palette, wide neckline, and roomy sleeves guide the overall style.
Why Are the Sleeves Shorter in the Larger Sizes?
The wider body creates a deeper dropped shoulder. Shortening the sleeve panel helps balance the total reach from the center of the sweater to the cuff. You can adjust that reach before finishing.
Can I Use DK Yarn?
You can swatch with DK yarn, but the fabric must match the stated gauge and have a drape you like. Using a thinner yarn with unchanged counts and a tighter gauge will make the top smaller.
Why Does My Mesh Row Have Fewer Double Crochet Stitches?
Each chain-1 space replaces a skipped stitch. Count both the double crochet stitches and the chain spaces to confirm the full row width. The following single crochet row restores one stitch in every position.
Save This Pattern for Later
Save this crochet mesh crop top pattern to your crochet clothing board on Pinterest so you can return to the stripe sequence, sizing chart, and assembly steps when you are ready to make it.
Looking for Your Next Crochet Project?
Love this project? Explore Cute Stitch Studio’s premium crochet patterns for more cute, cozy, gift-worthy, and beginner-friendly handmade ideas.