Granny Square Crochet Pillow Pattern
This granny square crochet pillow pattern is a cozy way to turn colorful flower motifs into a handmade home decor piece. The design combines small floral granny squares with a soft neutral joining color for a vintage-inspired cushion that feels warm, cheerful, and slightly boho.
This project is a good choice for confident beginners who already know basic crochet stitches and want to practice making motifs, joining squares, and creating a simple pillow cover. Because each square is worked separately, it is also an easy project to pick up in short crochet sessions.
You can use coordinated colors for a polished look or mix leftover yarn for a more eclectic patchwork effect. The finished cover works beautifully on a sofa, reading chair, bed, or cozy crochet corner.

Table of Contents
Why You’ll Love This Granny Square Crochet Pillow Pattern
- Clear step-by-step sections make the project easier to follow.
- Materials, sizing, finishing, and customization notes are easy to find.
- The pattern includes practical tips for a neat handmade result.
Granny Square Crochet Pillow Pattern Quick Reference
Before you begin, review the materials, hook size, gauge or sizing notes, and construction method for this project. Keeping those details consistent will help the finished crochet piece match the intended shape and size.
Project Details
| Detail | Information |
|---|---|
| Skill Level | Confident Beginner |
| Estimated Time | 8 to 12 hours |
| Finished Size | Approximately 18 x 18 inches (46 x 46 cm) |
| Pillow Insert | 18 x 18 inches (46 x 46 cm) |
| Crochet Terminology | US terms |
| Construction Method | 16 floral granny squares joined into a front panel, with a simple crochet envelope-style back |
Materials
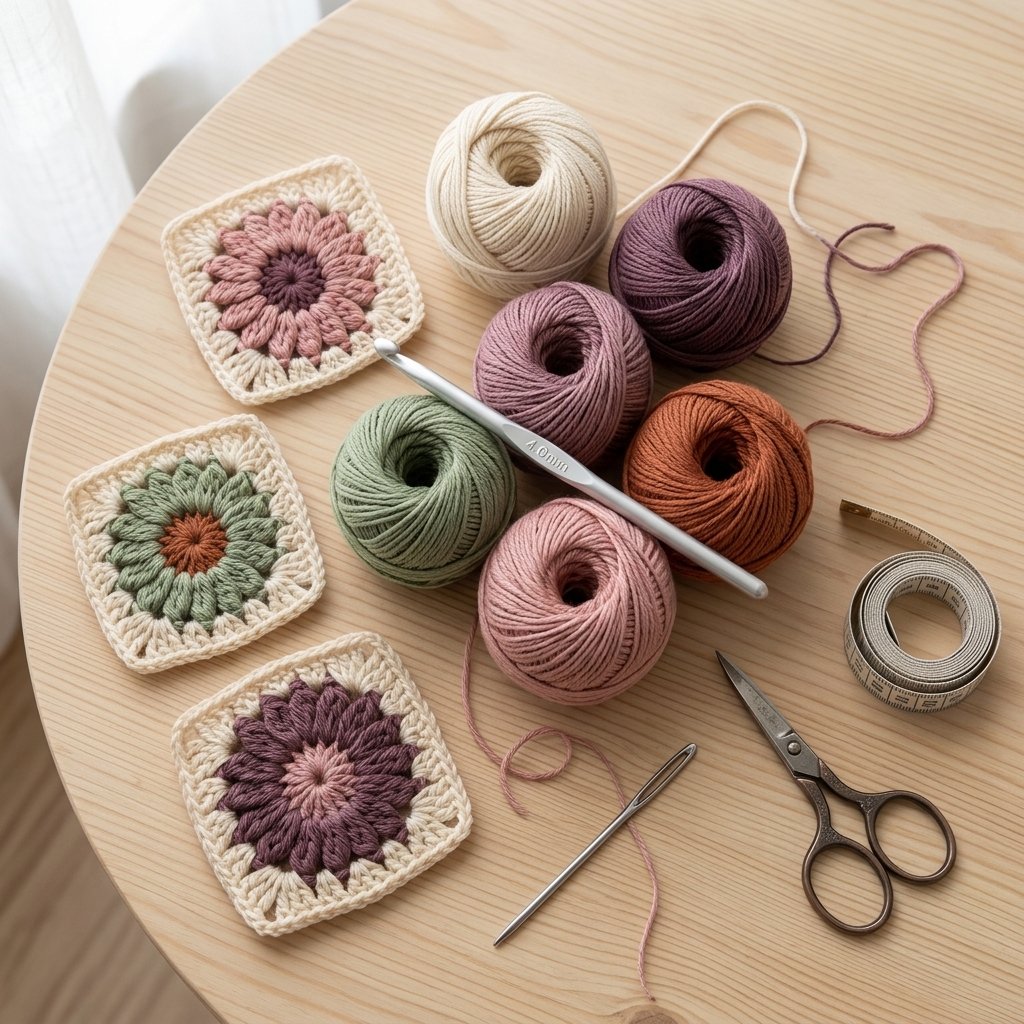
- Worsted weight yarn (#4)
- Main joining/background color: cream, oatmeal, ivory, or beige
- Assorted flower colors: plum, sage, rust, dusty pink, lavender, burgundy, teal, olive, or similar shades
- Approximately 700–900 yards (640–823 m) total yarn
- 4.5 mm crochet hook
- 18 x 18 inch (46 x 46 cm) pillow insert
- Yarn needle
- Scissors
- Stitch markers, optional
- Blocking mats and pins, recommended
Yarn
A soft worsted weight yarn is a practical choice for this cushion cover. Cotton blends give the motifs good stitch definition, while acrylic yarn is easy to care for and available in a wide range of colors.
For a vintage-inspired look, choose a warm neutral shade for the joining color and combine it with muted jewel tones and earthy floral colors.
Hook Size
Use a 4.5 mm crochet hook for the main project. If your squares are too large, move down to a 4.0 mm hook. If they are too small or stiff, move up to a 5.0 mm hook.
Gauge
Gauge is not as critical as it is for a garment, but the finished square size matters because it determines the pillow cover dimensions.
One blocked granny square should measure approximately 4.25 x 4.25 inches (10.8 x 10.8 cm).
Four joined squares across should create a front panel close to 17 to 18 inches wide after joining and edging.
Abbreviations
- MR = magic ring
- ch = chain
- sc = single crochet
- hdc = half double crochet
- dc = double crochet
- sl st = slip stitch
- sp = space
- st(s) = stitch(es)
- rep = repeat
Before You Start
- The front panel is made from 16 individual floral granny squares.
- Arrange the squares in a 4 x 4 layout.
- Use the same neutral color for the final round of every motif for a cohesive look.
- Block all squares before joining.
- The back is made in two overlapping crochet panels for an easy removable envelope-style cover.
- Ch 3 counts as the first dc where stated.
Granny Square Crochet Pillow Pattern Instructions
Part 1 — Crochet the Flower Center
Make 16 squares total.
With your first flower color, make a MR.
Round 1: Ch 1, work 12 sc into the MR. Pull the ring closed. Join with sl st to the first sc. (12 sc)
Part 2 — Crochet the Petal Round
Join a second color in any stitch.
Round 2: Ch 3, work 1 dc in the same st, then 2 dc in each st around. Join with sl st to the top of beginning ch 3. (24 dc)
Fasten off.
Part 3 — Add a Decorative Flower Round
Join a third color in any stitch.
Round 3: Ch 1, (sc in next st, ch 2, skip next st) rep around. Join with sl st. You should have 12 small ch-2 spaces.
In each ch-2 space, work (sc, hdc, 2 dc, hdc, sc). Repeat around to create a soft floral edge.
Fasten off.
Part 4 — Turn the Flower Into a Square
Join the neutral background color in any space between petals.
Round 4: Ch 3, 2 dc in the same space. Work 3 dc in the next space, then (3 dc, ch 2, 3 dc) in the next space to form a corner.
Continue around, placing 3 dc groups in side spaces and a (3 dc, ch 2, 3 dc) group at four evenly spaced corner points.
Join with sl st to the top of beginning ch 3.
Part 5 — Final Square Round
Round 5: Sl st to the nearest space. Ch 3, 2 dc in the same space. Work 3 dc in each side space.
In each corner ch-2 space, work (3 dc, ch 2, 3 dc).
Continue around, join, and fasten off.
Block the square to approximately 4.25 x 4.25 inches (10.8 x 10.8 cm).
Color Planning
For a look similar to the reference style, make every square slightly different while keeping the neutral outer round consistent.
Try combinations such as:
- Rust, cream, and plum
- Sage, burgundy, and teal
- Dusty pink, lavender, and cream
- Olive, plum, and pale blue
- Terracotta, rose, and warm beige
Lay out all 16 squares before joining and move them around until the colors feel balanced.
Part 6 — Join the Front Panel
Arrange the squares in a 4 x 4 grid.
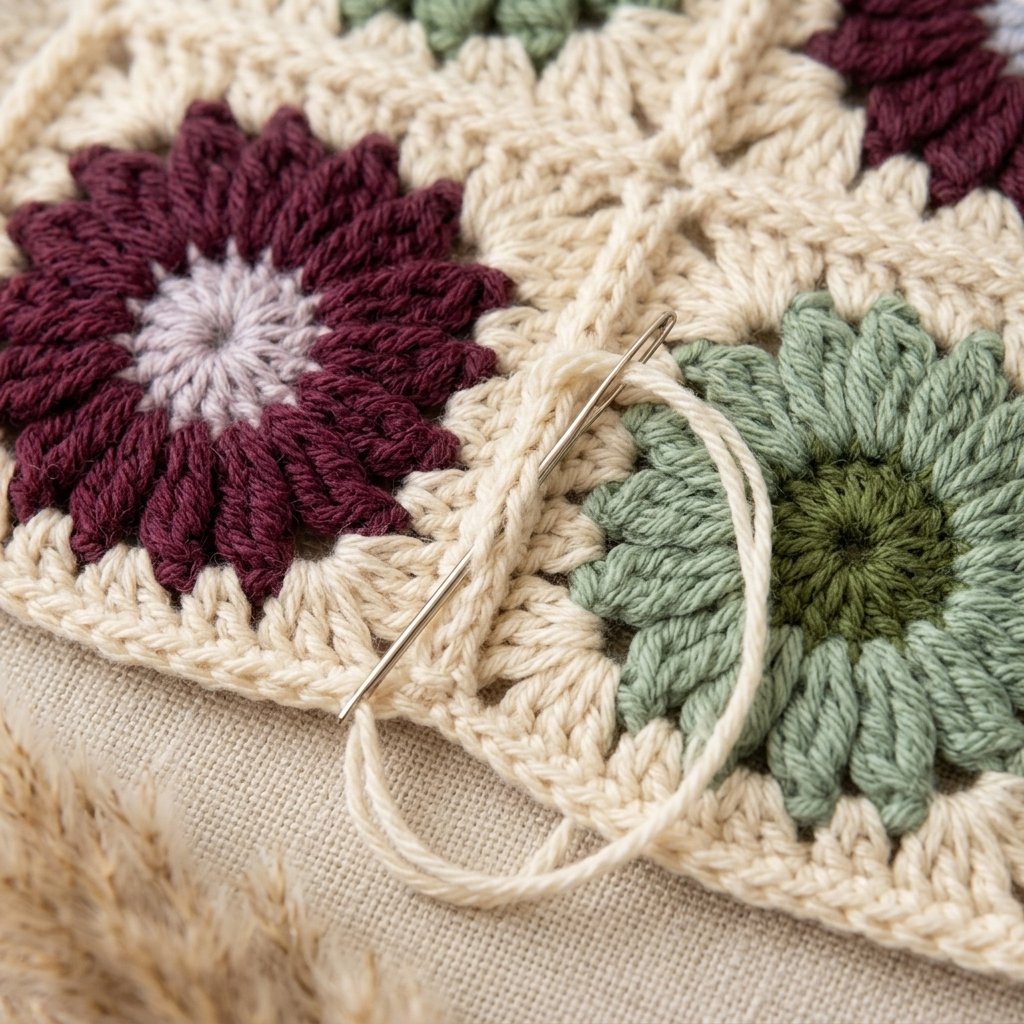
You can use a slip stitch join, single crochet join, or whipstitch seam. For a flatter look, whipstitch or slip stitch through the back loops only.
Join each row of four squares first, then join the four rows together.
Check that the corners line up and that the panel lies flat.
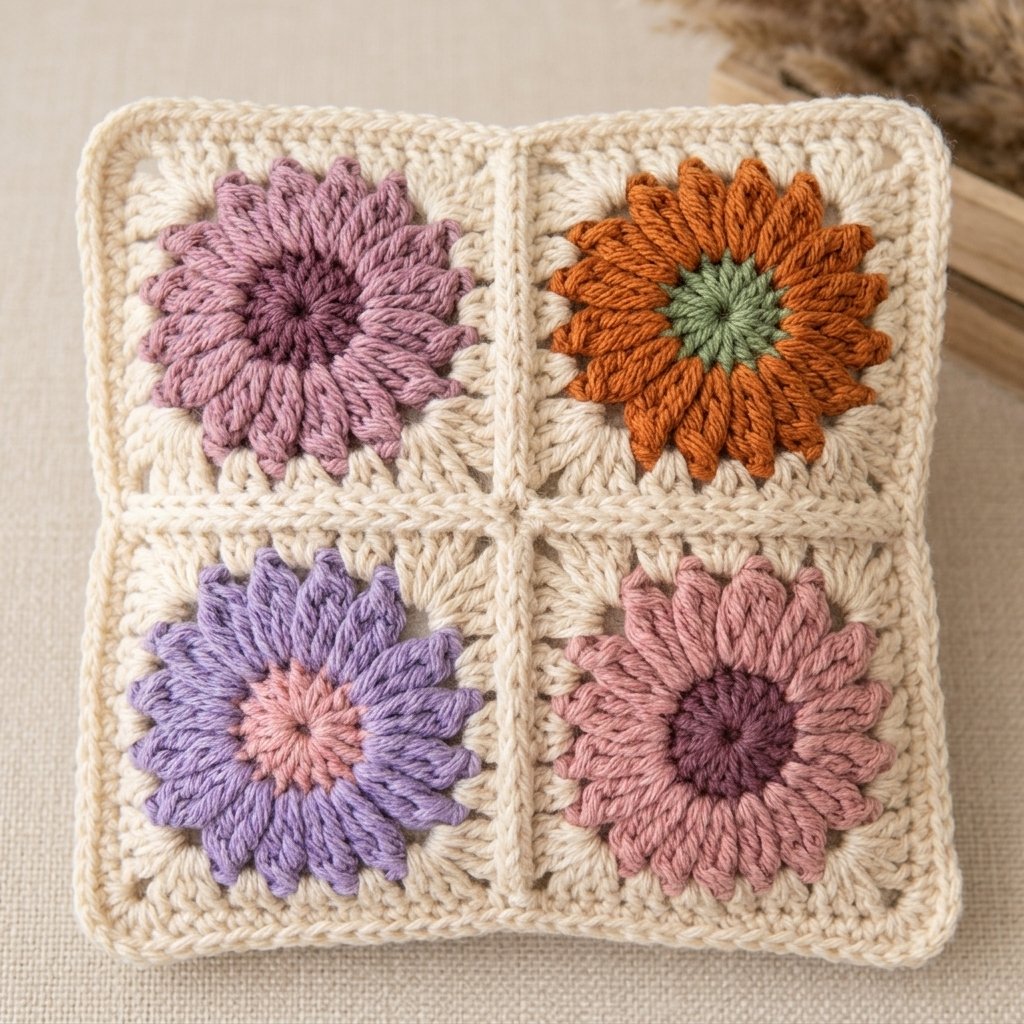
Part 7 — Add the Front Panel Border
Join the neutral yarn in any corner of the completed front panel.
Border Round 1: Ch 1, sc evenly around the entire panel, working 3 sc in each corner. Join.
Border Round 2: Ch 1, hdc in each st around, placing 3 hdc in the center stitch of each corner. Join.
Measure the panel. It should be close to the size of your pillow insert.
Part 8 — Crochet the Back Panels
The back uses two overlapping rectangular panels.
Each panel should be approximately the same width as the front panel and about 11 to 12 inches (28 to 30.5 cm) tall.
With the neutral yarn, ch enough stitches to match the width of the front panel.
Row 1: Hdc in second ch from hook and in each ch across. Turn.
Row 2: Ch 1, hdc in each st across. Turn.
Repeat Row 2 until the panel measures approximately 11 to 12 inches tall.
Fasten off.
Make a second matching panel.
Part 9 — Assemble the Pillow Cover
Lay the front panel right side down.
Place the two back panels on top with their outer edges aligned with the front panel edges. Let the inner edges overlap by approximately 4 to 5 inches (10 to 12.5 cm).
Pin or use stitch markers to hold all layers together.
Join yarn at one corner and sc evenly through both layers around the entire outside edge.
At each corner, work 3 sc to help the cover turn neatly.
Join with sl st and fasten off.
Part 10 — Insert the Cushion
Turn the cover right side out if needed and gently shape all four corners.
Insert the 18 x 18 inch pillow form through the envelope opening.
Adjust the insert until it sits evenly inside the cover.
Tips for the Best Crochet Result
Keep your tension consistent throughout this granny square crochet pillow pattern. Small tension changes can affect the finished size, shaping, and how neatly the pieces line up during assembly.
Pause at the end of important sections to compare your stitch count with the pattern. Correcting a missed increase or decrease early is much easier than adjusting the finished piece later.
When you reach the finishing stage, take a little extra time with seams, shaping, and yarn ends. These small details can make the finished crochet project look cleaner and more polished.
Finishing
- Weave in all remaining ends securely.
- Check all joining seams.
- Gently shape the pillow corners.
- Lightly block the cover if needed before inserting the cushion.
- Follow your yarn care instructions for washing.
Finished Size
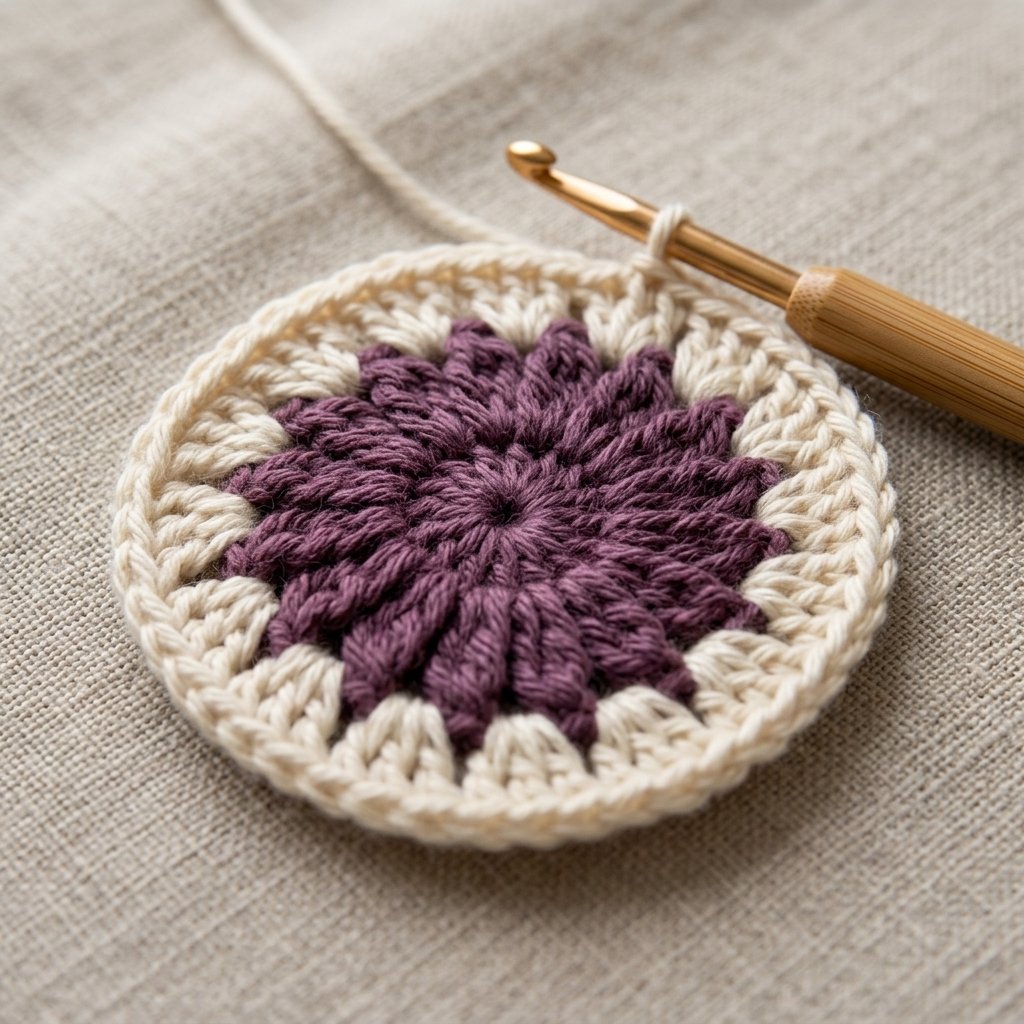
The finished pillow cover measures approximately 18 x 18 inches (46 x 46 cm) and is designed for a standard 18-inch square pillow insert.
Because handmade crochet tension varies, your finished dimensions may differ slightly. Measure the front panel before making the back pieces and adjust the back panel width if necessary.
Tips for a Neat Finish
- Block every square to the same size before joining.
- Keep the final round the same color on all motifs for a more unified look.
- Arrange your colors before sewing so similar motifs are not clustered together.
- Weave in ends as you complete each square.
- Use a pillow insert that fills the cover well for a plump finished cushion.
Customization Ideas
- Vintage floral: use muted plum, rust, sage, cream, and dusty rose.
- Modern neutral: use cream, camel, taupe, gray, and black.
- Spring version: try lavender, blush, mint, pale yellow, and ivory.
- Scrap yarn version: make every flower with leftover yarn from other projects.
- Larger cushion: create a 5 x 5 square front panel.
- Matching set: make two pillows with the same color palette but different motif arrangements.
- Simpler back: use fabric instead of crochet for the back if you want to save yarn and time.
Why Granny Square Pillows Make Great Home Decor
Granny square cushions are an easy way to bring color, texture, and handmade character into a room without making a large blanket. They also give you a chance to experiment with color combinations on a smaller project.
Because the cover is removable, you can change your crochet pillow seasonally or make several covers for the same insert.
Frequently Asked Questions
Is this Granny Square Crochet Pillow Pattern beginner-friendly?
Check the Skill Level and Pattern Notes sections before you begin. Read through the full pattern once, then keep a stitch marker and your materials nearby as you work.
What yarn should I use for this crochet project?
Use the yarn weight and fiber recommendations listed in the Yarn section. Matching the suggested yarn weight will help you stay closer to the intended size and fabric.
Can I change the colors?
Yes. Color changes are one of the easiest ways to personalize this project without changing the core construction. Keep the same yarn weight for the most consistent result.
How can I keep my stitch counts accurate?
Count at the end of each row or round, move your stitch marker as you work, and correct missed increases or decreases before continuing to the next section.
Project Checklist
- Confirm your yarn weight, hook size, and gauge before beginning.
- Read through the full Granny Square Crochet Pillow Pattern instructions once before you start.
- Check stitch counts at the end of each row or round before continuing.
- Review the finishing and sizing notes before weaving in the final ends.
Looking for Your Next Crochet Project?
Love this project? Explore Cute Stitch Studio’s premium crochet patterns for more cute, cozy, gift-worthy, and beginner-friendly handmade ideas.