Crochet Coffee Cup Sleeve Pattern with Cozy Fall Stripes
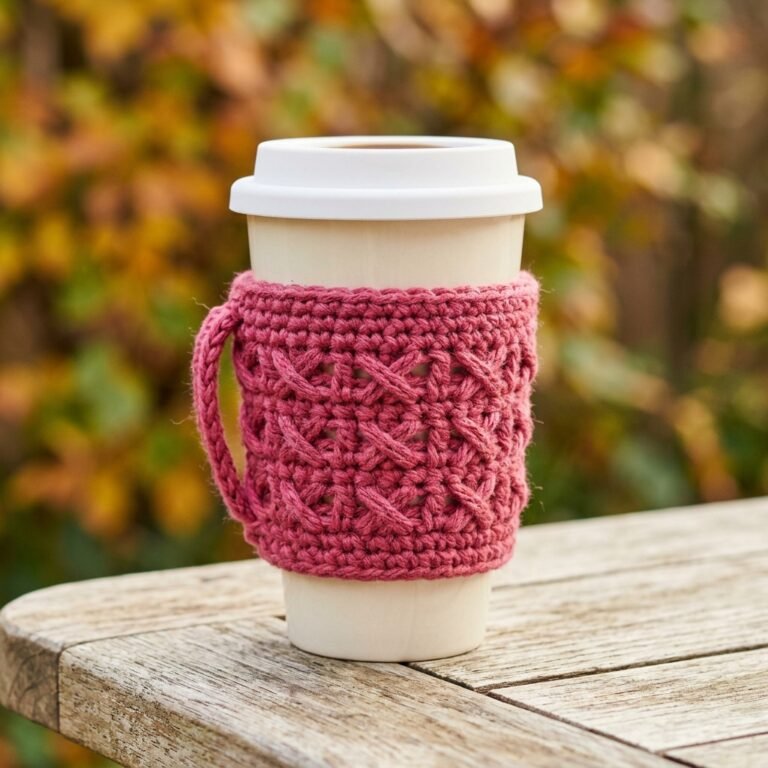
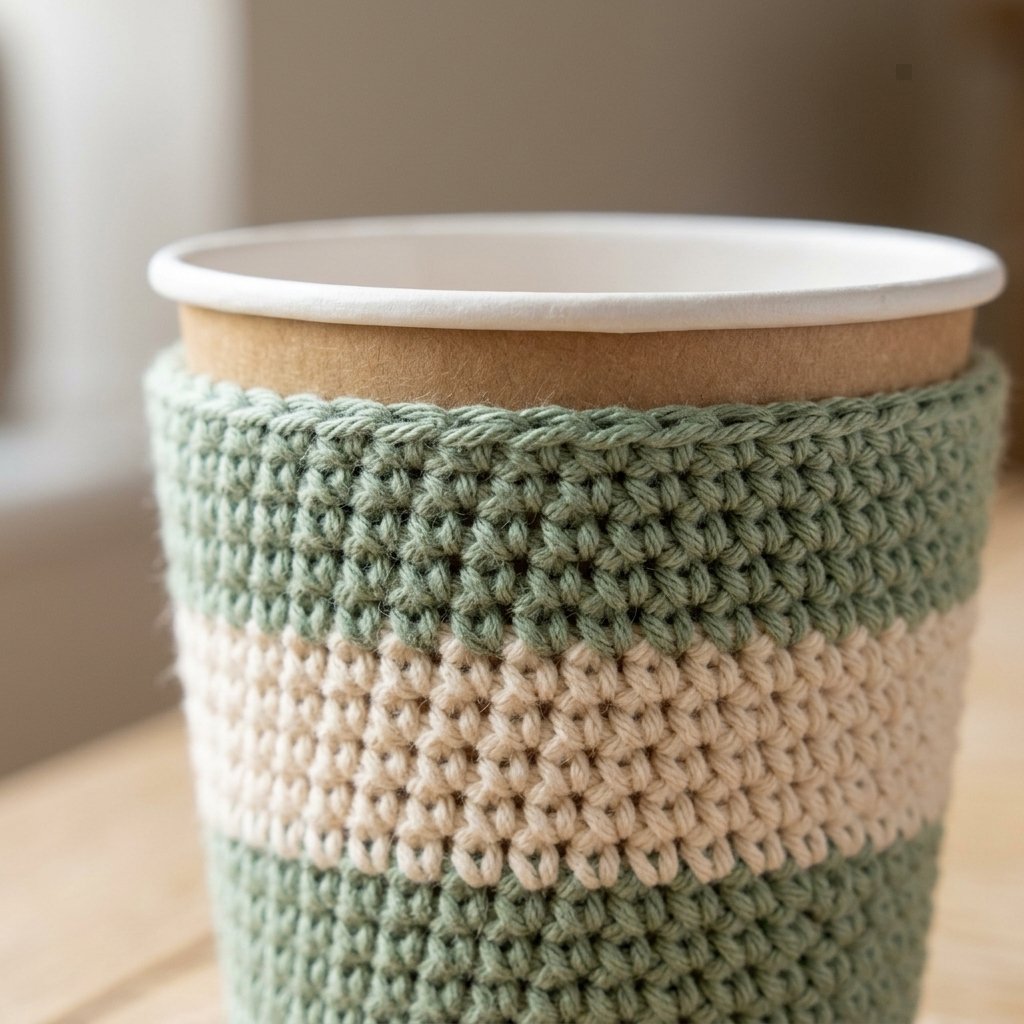
This free crochet coffee cup sleeve pattern turns a small amount of yarn into a useful everyday accessory. Sage green, terracotta, cream, and a touch of peach create warm stripes that look lovely around a favorite coffee cup.
The sleeve has an open bottom and a slightly wider top to follow the shape of a tapered, handleless cup. Slip it on for your morning coffee, or pair it with a reusable cup for a thoughtful handmade gift.
This is a beginner-friendly project using single crochet, simple increases, and joined rounds. The instructions also explain how to check the fit before finishing.

Table of Contents
Crochet Coffee Cup Sleeve Pattern With Cozy Fall Stripes Instructions
Project Details
- Skill level: Beginner.
- Estimated time: Approximately 1–2 hours.
- Finished height: Approximately 3.5 inches (9 cm).
- Finished lower circumference: Approximately 9 inches (23 cm).
- Finished upper circumference: Approximately 10 inches (25.5 cm).
- Crochet terminology: US terms.
- Construction: Bottom-up in joined rounds, with an open top and bottom.
This is an original Cute Stitch Studio pattern draft. It has not been physically sample-tested. Measurements and yarn quantities are estimates based on the stated gauge.
Materials
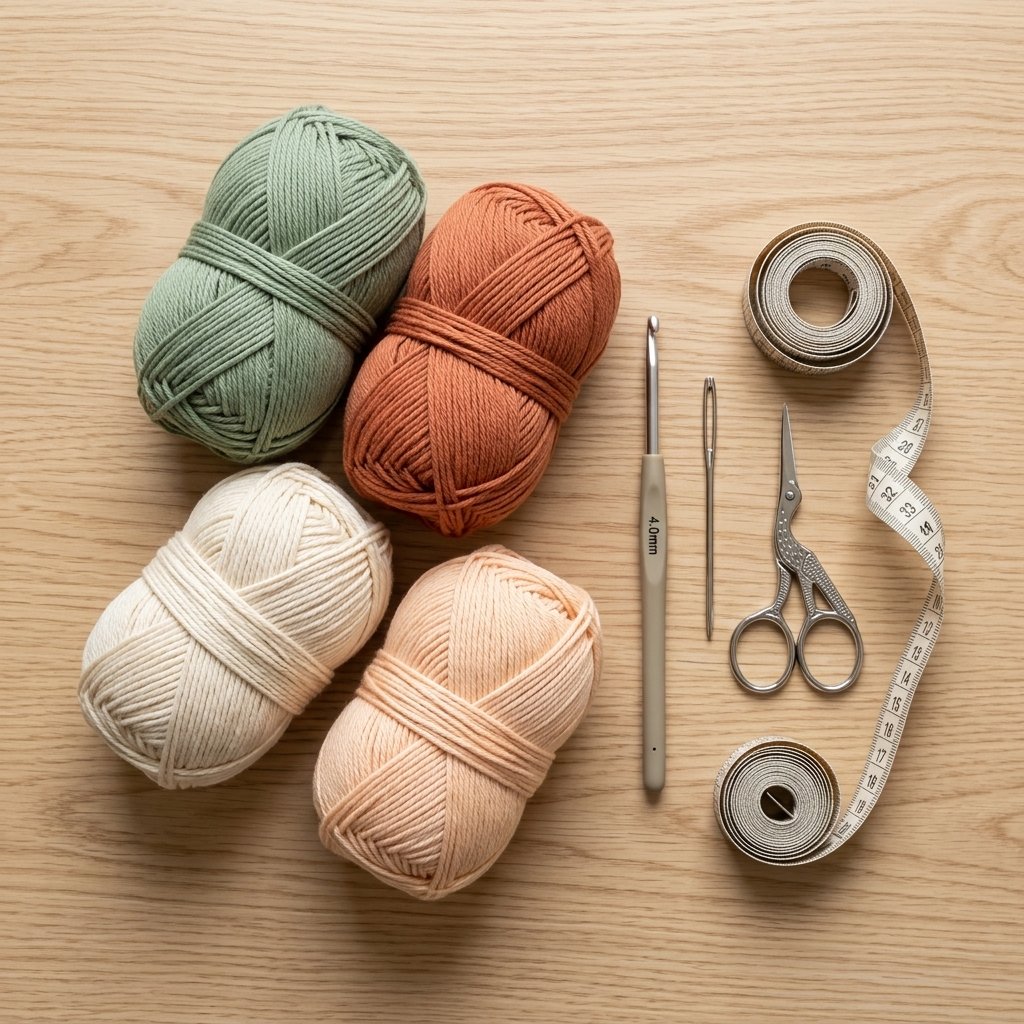
- Approximately 45–60 yards (41–55 m) total of worsted-weight cotton yarn in sage, terracotta, cream, and pale peach.
- 4.5 mm crochet hook, or size needed to match gauge.
- Yarn needle.
- Scissors.
- One locking stitch marker.
- Measuring tape.
- An empty handleless cup for checking the fit.
No buttons, elastic, lining, or decorative label are needed.

Hook Size
Start with a 4.5 mm crochet hook. Aim for a close, flexible fabric with stitches that are easy to see.
If your swatch has more than 16 stitches across 4 inches, try a larger hook. If it has fewer, try a smaller hook.
Yarn
Use Category 4 worsted-weight cotton yarn. Smooth cotton makes the color changes and stitch counts easy to follow, and the finished sleeve can be washed according to the yarn label.
For the pictured palette, allow approximately:
- Sage: 15 yards (14 m).
- Terracotta: 15 yards (14 m).
- Cream: 15 yards (14 m).
- Pale peach: 5 yards (4.5 m).
Keep a little extra available for swatching and weaving in ends. Small leftover balls are useful here, provided they have similar thickness and care requirements.
Gauge and Cup Fit
Gauge: 16 sc and 18 rounds = 4 inches (10 cm), measured without stretching.
For a small gauge sample, ch 21. Sc in the second chain from the hook and across for 20 stitches. Continue in single crochet rows, beginning each row with ch 1, until the sample is large enough to measure its center.
A flat swatch is a starting check; your tension may differ slightly in joined rounds. Check the actual sleeve on your empty cup as you work.
Measure the cup around the lower and upper points where the sleeve will sit. The standard pattern is intended to stretch gently over approximately 9–9.5 inches at the lower edge and 10–10.5 inches at the upper edge.
Cup capacity alone does not determine fit. Two cups holding the same amount can have different shapes and circumferences.
Abbreviations
- ch: chain.
- sc: single crochet.
- sl st: slip stitch.
- st(s): stitch(es).
Increase: Work 2 sc into the same stitch. Each increase adds one stitch.
Before You Start
- Work in joined rounds without turning.
- Beginning ch-1 does not count as a stitch.
- Work the first sc into the same stitch as the join.
- Join each round with a sl st to its first sc.
- Do not work into the joining slip stitch or beginning chain.
- Move the marker into the first sc of each new round.
- Keep the joins together at the back of the sleeve.
The first three rounds contain 36 stitches. Round 4 adds four stitches, and the remaining rounds contain 40 stitches.
Color Sequence
| Rounds | Color |
|---|---|
| 1–2 | Sage |
| 3–6 | Terracotta |
| 7–9 | Cream |
| 10 | Pale peach |
| 11 | Terracotta |
| 12–14 | Sage |
| 15–16 | Cream |
How to Change Colors
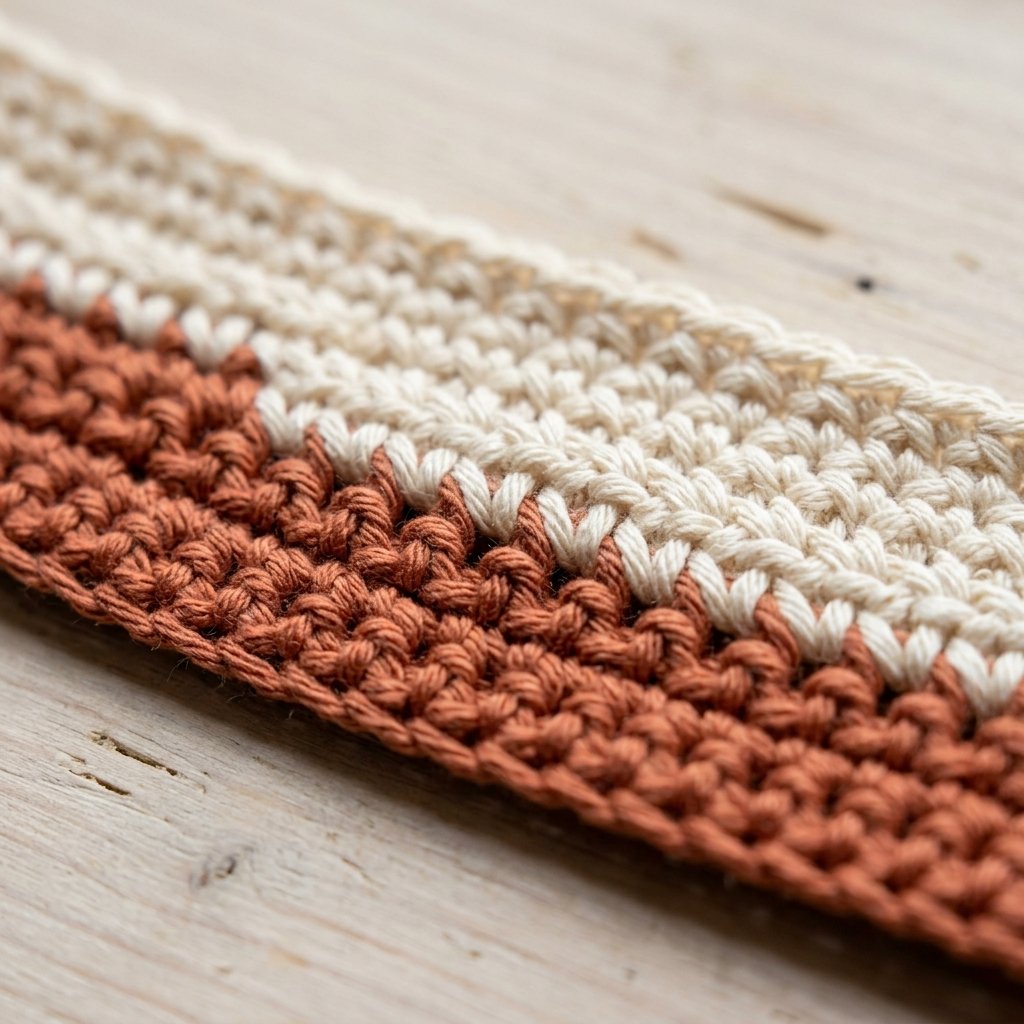
Complete the last sc of the old-color round. Insert the hook into the first sc to join, then pull the new color through the stitch and the loop on your hook to complete the slip stitch.
Begin the next round with ch 1 in the new color. Cut the old yarn, leaving approximately 6 inches (15 cm) to weave in later.
Crochet Coffee Cup Sleeve Pattern: Step-by-Step Instructions
Part 1 — Foundation Ring
With sage, ch 36 loosely.
Lay the chain flat and check that it is not twisted. Join with a sl st to the first chain to form a ring.
The foundation should stretch at least as comfortably as the stitches above it. If your chains are tight, use a slightly larger hook for this step, then return to your main hook.
Part 2 — Lower Edge
Round 1: Ch 1. Sc in each chain around. Join with a sl st to the first sc. 36 sc.
Round 2: Ch 1. Sc in each stitch around. Join, changing to terracotta. 36 sc.
Round 3: With terracotta, ch 1. Sc in each stitch around. Join. 36 sc.
Try the small band on your empty cup by sliding it upward from the cup base. It should feel gently snug at the planned lower edge.
If it is loose or requires force to stretch, adjust the size now using the sizing notes below.
Part 3 — Add the Taper
Round 4: Ch 1. Repeat [sc in the next 8 stitches, 2 sc in the next stitch] 4 times. Join. 40 sc.
Round 5: Ch 1. Sc in each stitch around. Join. 40 sc.
Round 6: Ch 1. Sc in each stitch around. Join, changing to cream. 40 sc.
The four increases give the upper section a little more room. They create a simple stepped taper that softens when the sleeve is fitted around the cup.
Part 4 — Work the Middle Stripes
Round 7: With cream, ch 1. Sc in each stitch around. Join. 40 sc.
Round 8: Ch 1. Sc in each stitch around. Join. 40 sc.
Round 9: Ch 1. Sc in each stitch around. Join, changing to pale peach. 40 sc.
Round 10: With pale peach, ch 1. Sc in each stitch around. Join, changing to terracotta. 40 sc.
Round 11: With terracotta, ch 1. Sc in each stitch around. Join, changing to sage. 40 sc.
Part 5 — Finish the Upper Edge
Round 12: With sage, ch 1. Sc in each stitch around. Join. 40 sc.
Round 13: Ch 1. Sc in each stitch around. Join. 40 sc.
Round 14: Ch 1. Sc in each stitch around. Join, changing to cream. 40 sc.
Round 15: With cream, ch 1. Sc in each stitch around. Join. 40 sc.
Round 16: Ch 1. Sc in each stitch around. Join. 40 sc.
Fasten off, leaving a tail for weaving in. No separate rim or bottom panel is added.
Finishing
Turn the sleeve inside out. Weave each tail through the backs of several stitches in its matching stripe, then change direction before trimming.
Keep the weaving relaxed so it does not reduce the sleeve’s stretch. Avoid carrying long loose strands across the inside.
If needed, wash the sleeve according to the yarn label, reshape gently, and dry completely. Check the fit again after washing.
Slide the finished sleeve onto the empty cup from the bottom. Leave the cup base exposed so it sits flat, and keep the upper edge clear of the lid and drinking area.
Finished Size
The standard sleeve measures approximately:
- Height: 3.5 inches (9 cm).
- Lower circumference: 9 inches (23 cm).
- Upper circumference: 10 inches (25.5 cm).
- Width laid flat: Approximately 4.5 inches at the bottom and 5 inches at the top.
These are unstretched measurements. The finished fit depends on your cup’s taper and the stretch of your washed fabric.
Adjusting the Size
Make It Wider or Narrower
Change the foundation chain in multiples of four. At the stated gauge, four stitches change the circumference by approximately 1 inch (2.5 cm).
| Foundation and Rounds 1–3 | Round 4 repeat, worked 4 times | Rounds 4–16 |
|---|---|---|
| 32 stitches | Sc in next 7, 2 sc in next | 36 stitches |
| 36 stitches | Sc in next 8, 2 sc in next | 40 stitches |
| 40 stitches | Sc in next 9, 2 sc in next | 44 stitches |
| 44 stitches | Sc in next 10, 2 sc in next | 48 stitches |
Keep the color sequence unchanged. Check both edges on the actual cup rather than choosing from the table alone.
Fit a Straight-Sided Tumbler
For a cup with little or no taper, choose a comfortable foundation circumference and omit the Round 4 increases. Work one sc in each stitch for every round instead.
Change the Height
Add or remove plain rounds within a stripe. Each round changes the height by approximately 0.22 inch (0.55 cm) at the stated gauge.
Keep the sleeve away from the lid connection and leave the cup base uncovered.
Tips and Customization
- Make a matching gift: Pair the sleeve with a reusable cup and a small bag of coffee.
- Try a holiday palette: Replace sage and terracotta with forest green and cranberry.
- Use two colors: Alternate cream with one accent color for fewer yarn ends.
- Keep a spare: Make a second sleeve so one can dry while the other is in use.
- Skip embellishments: The striped texture looks finished without labels, buttons, or appliqués.
Using and Caring for Your Sleeve
This sleeve adds a soft fabric layer, but it is not tested heat protection. Check the cup temperature, hold the cup itself securely, and never lift a filled cup by the sleeve alone.
For iced drinks, cotton may become damp from condensation. Remove the sleeve after use and let it dry fully.
Follow the yarn label for washing. Reshape gently after cleaning and check that the sleeve still fits securely before using it again.
Frequently Asked Questions
Is This Crochet Coffee Cup Sleeve Pattern Good for Beginners?
Yes. It uses single crochet, four simple increases, and joined rounds. The color changes are a useful small-project skill, and you can make the whole sleeve in one color if preferred.
Will It Fit Every Takeout Cup?
No. Cup dimensions vary, even within the same drink size. Measure the cup and check the sleeve after the first three rounds.
Can I Use It on a Mug with a Handle?
This closed sleeve is designed for handleless cups. A handled mug needs a different construction with an opening or fastening around the handle.
Can I Use It for Hot and Iced Drinks?
Yes, provided it fits the container securely. For hot drinks, do not rely on the crochet as a burn barrier. For iced drinks, remove and dry it when it becomes damp.
Why Does My Sleeve Have Extra Stitches?
The joining slip stitch or beginning chain may have been worked accidentally. Mark the first sc and count only the actual single crochet stitches.
Save This Pattern for Later
Save this crochet coffee cup sleeve pattern to your crochet gifts or fall crochet board on Pinterest. It is a handy project to revisit when you have a few favorite colors left in your yarn basket.
Looking for Your Next Crochet Project?
Love this project? Explore Cute Stitch Studio’s premium crochet patterns for more cute, cozy, gift-worthy, and beginner-friendly handmade ideas.