Crochet Mermaid Tail Blanket Pattern in 3 Cozy Sizes
This free crochet mermaid tail blanket pattern turns a soft pink blanket into a playful handmade tail. The gently tapered body covers the legs, while two textured fin pieces create the mermaid shape at the bottom.
A back opening makes the blanket easier to get into while seated. Add an embroidered name to one fin for a personal touch, or keep the design simple and let the color speak for itself.
The pattern includes three sizes and uses half double crochet for the body, easy decreases for shaping, and back-loop single crochet for the fin. It is a manageable project for confident beginners who are comfortable counting rows and sewing seams.
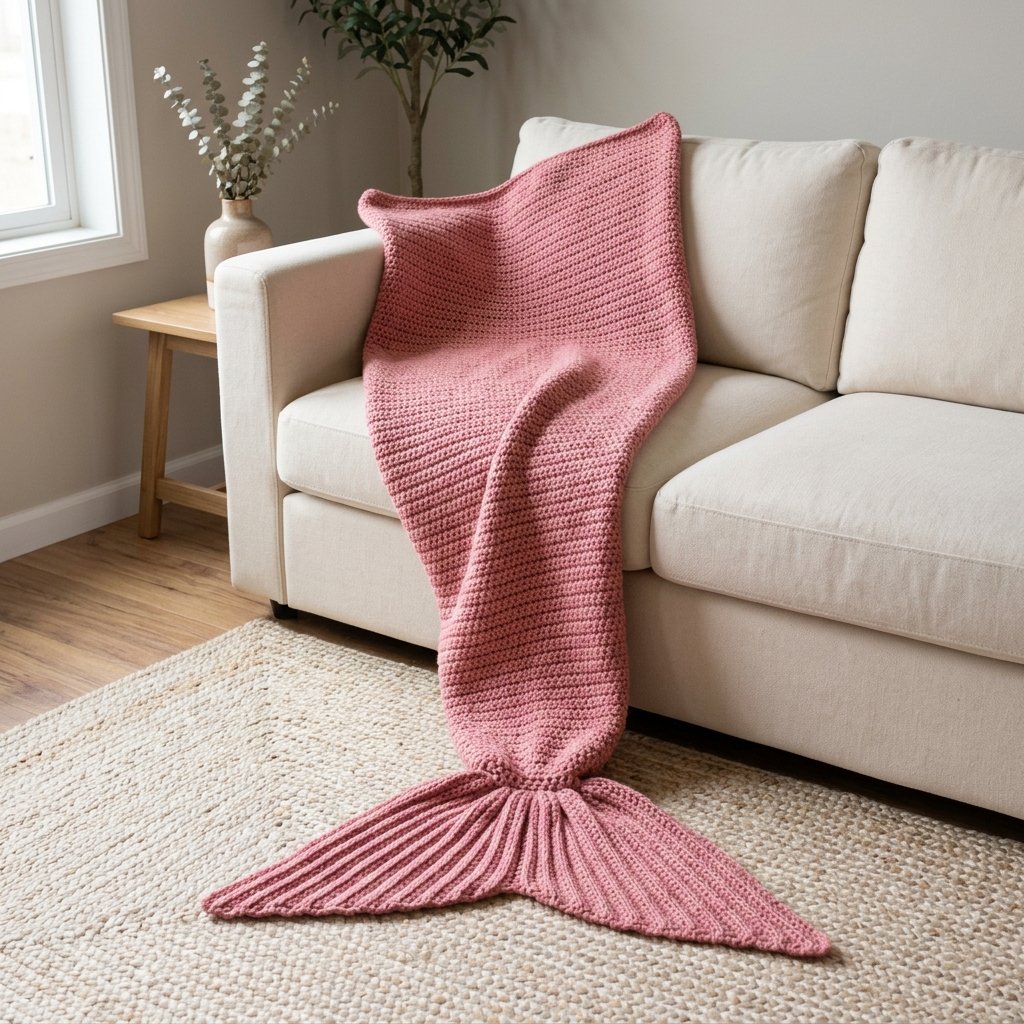
Table of Contents
Crochet Mermaid Tail Blanket Pattern In 3 Cozy Sizes Instructions
Project Details
- Skill level: Confident beginner.
- Sizes: Small, Medium, and Large; choose by measurements.
- Estimated time: Approximately 20–40 hours, depending on size and crochet speed.
- Crochet terminology: US terms.
- Construction: One flat tapered body panel with a partial back seam, a closed foot end, and two separately crocheted fin lobes.
- Personalization: Optional yarn embroidery on the fin.
- Use: A seated lounging blanket for older children and adults.
This is an original Cute Stitch Studio design inspired by a pink mermaid silhouette. It has not been physically sample-tested. Measurements and yarn quantities are gauge-based estimates.
Size Chart
Measure around the fullest part of the hips and measure from the intended top of the blanket to the toes while seated. Choose enough width for comfortable movement and enough body length to cover the feet without stretching the fabric.
The decorative fin extends beyond the closed foot compartment. Do not include the fin length when deciding whether the body is long enough.
| Measurement | Small | Medium | Large |
|---|---|---|---|
| Suggested maximum hip measurement | 26 in (66 cm) | 34 in (86.5 cm) | 42 in (106.5 cm) |
| Body width around upper edge when edges meet | 32 in (81.5 cm) | 40 in (101.5 cm) | 48 in (122 cm) |
| Body length, excluding fin | 30 in (76 cm) | 40 in (101.5 cm) | 48 in (122 cm) |
| Lower body circumference before closing | 24 in (61 cm) | 24 in (61 cm) | 24 in (61 cm) |
| Back opening depth | 10 in (25.5 cm) | 14 in (35.5 cm) | 18 in (45.5 cm) |
| Approximate fin extension | 5.25 in (13.5 cm) | 5.75 in (14.5 cm) | 6.25 in (16 cm) |
Small may suit an older child, Medium may suit a taller child or smaller adult, and Large may suit an adult. These are only general descriptions; the actual measurements determine the fit.
The upper back remains open, but the sewn section still needs enough room around the legs. If you need more width than Large provides, the body requires additional grading rather than simply adding length.
Materials
- Category 4 worsted-weight yarn in pink; see estimated quantities below.
- 5 mm crochet hook, or size needed for gauge.
- Yarn needle with an eye large enough for the yarn.
- Scissors.
- Measuring tape.
- Locking stitch markers.
- Optional: 10–20 yards (9–18 m) of smooth contrasting yarn for an embroidered name.
No stuffing, buttons, beads, elastic, or drawstrings are needed.

Hook Size
Start with a 5 mm crochet hook. The body should feel soft and flexible rather than dense and stiff.
If you have too many stitches across 4 inches, try a larger hook. If you have too few, try a smaller hook. Check the fin swatch separately because its stitch pattern differs from the body.
Yarn
Use Category 4 worsted-weight yarn. A smooth, soft acrylic or acrylic blend is an approachable choice for a blanket with visible stitch definition.
- Small: Allow approximately 1,200 yards (1,100 m).
- Medium: Allow approximately 1,700 yards (1,555 m).
- Large: Allow approximately 2,200 yards (2,010 m).
These are purchasing estimates, not measured sample usage. Allow extra if you plan to lengthen the body or if your yarn produces a heavier fabric.
Rose pink recreates the cheerful color direction of the inspiration. Lavender, seafoam, teal, and ocean blue also work beautifully.
Gauge
Body: 14 half double crochet stitches and 10 rows = 4 inches (10 cm), after washing and drying flat.
Fin: 14 single crochet stitches and 16 rows = 4 inches (10 cm), worked in the back loop only and measured relaxed.
Make generous swatches and measure away from the edges. Adjust the hook for the fin if needed to match its gauge.
For the body swatch, ch 23. Hdc in the third chain from the hook and across for 21 stitches. Continue in hdc rows, beginning each row with ch 2, until the swatch is large enough to measure.
Abbreviations
- ch: chain.
- sc: single crochet.
- hdc: half double crochet.
- hdc2tog: half double crochet two stitches together.
- st(s): stitch(es).
- BLO: back loop only.
How to Work hdc2tog
Yarn over, insert the hook into the next stitch, yarn over and pull up a loop. Yarn over, insert the hook into the following stitch, yarn over and pull up a loop. Yarn over and pull through all five loops on the hook.
This uses two stitches and produces one stitch.
Before You Start
- Counts are written as Small (Medium, Large).
- Work the body from the wide upper edge toward the feet.
- Turn after each row.
- Beginning chains do not count as stitches.
- Each decrease row removes two stitches: one at each side.
- The back seam stops below the upper edge to create an opening.
- The fin is decorative; the feet remain inside the closed body.
The body uses ordinary half double crochet rather than reproducing the exact texture in the reference. The fin uses subtle crochet ridges, with a separate lobe on each side.
Crochet Mermaid Tail Blanket Pattern: Step-by-Step Instructions
Part 1 — Start the Body
Foundation: Ch 114 (142, 170).
Row 1: Hdc in the third chain from the hook and each remaining chain. Turn. 112 (140, 168) hdc.
Plain row: Ch 2. Hdc in each stitch across. Turn. The stitch count stays unchanged.
Decrease row: Ch 2. Hdc2tog over the first 2 stitches. Hdc in each stitch until 2 remain. Hdc2tog over the last 2 stitches. Turn. The stitch count decreases by 2.
Follow the schedule for your chosen size below. Work a plain row on every row not listed as a decrease row.
Part 2 — Small Body
Work until you have 75 total rows.
Decrease on Rows 6, 11, 16, 21, 26, 31, 36, 41, 46, 51, 56, 61, 66, and 71.
There are 14 decrease rows: 112 − 28 = 84 stitches.
Work Rows 72–75 plain, keeping 84 stitches. Fasten off.
Part 3 — Medium Body
Work until you have 100 total rows.
Work Rows 2–16 plain. Begin decreasing on Row 17, then decrease every third row through Row 98.
The decrease rows are: 17, 20, 23, 26, 29, 32, 35, 38, 41, 44, 47, 50, 53, 56, 59, 62, 65, 68, 71, 74, 77, 80, 83, 86, 89, 92, 95, and 98.
There are 28 decrease rows: 140 − 56 = 84 stitches.
Work Rows 99–100 plain. Fasten off.
Part 4 — Large Body
Work until you have 120 total rows.
Work Rows 2–36 plain. Decrease on every odd-numbered row from Row 37 through Row 119. Work all intervening even-numbered rows plain.
There are 42 decrease rows: 168 − 84 = 84 stitches.
Work Row 120 plain. Fasten off.

Part 5 — Crochet Two Fin Lobes
Make two matching pieces. They will be mirrored during assembly.
Foundation: Ch 22 for every size.
Fin Row 1: Sc in the second chain from the hook and every remaining chain. Turn. 21 sc.
Fin Row 2: Ch 1. Working in the BLO, make 2 sc in the first stitch, then sc in every remaining stitch. Turn. 22 sc.
Fin Row 3: Ch 1. Working in the BLO, sc in each stitch until one remains, then work 2 sc in the last stitch. Turn. 23 sc.
Rows 4–21 (23, 25): Repeat Rows 2 and 3, increasing once per row. Even-numbered rows increase in the first stitch; odd-numbered rows increase in the last stitch.
Finish with 41 (43, 45) sc. Fasten off, leaving a long tail for assembly.
Because the work turns, these increases stay on the same physical side of each lobe. One side stays straight while the other flares outward.
Each foundation edge measures approximately 6 inches (15 cm). Each lobe extends approximately 5.25 (5.75, 6.25) inches from its foundation to its outer edge.
Part 6 — Block the Pieces
Wash or dampen the body and fin pieces according to the yarn label. Lay them flat and smooth gently without stretching.
Match the two fin lobes in size. Allow everything to dry fully before sewing.
Part 7 — Sew the Partial Back Seam
Place the body with your chosen right side facing upward. Bring the two long side edges together so the right sides face each other and the future seam sits at the center back.
From the wide upper edge, count down 25 (35, 45) row ends on both sides and mark them. Leave that upper section unseamed.
Starting immediately below the markers, sew matching row ends together down to the narrow foot edge. There are 50 (65, 75) row ends in this seam.
Use a small whipstitch and keep the seam flexible. Reinforce the top of the seam with a few extra stitches, then secure the yarn.
Turn the body right side out. The upper opening is approximately 10 (14, 18) inches deep.
Part 8 — Close the Foot End
Flatten the narrow end with the back seam centered behind the front. Align the front and back layers.
The 84-stitch lower opening folds into two layers of 42 stitches. Sew those layers together across the bottom, pairing one front stitch with one back stitch.
This creates a closed foot compartment approximately 12 inches (30.5 cm) wide when laid flat.
Check the body length and seated fit before permanently securing the seam tails.
Part 9 — Attach the Fin
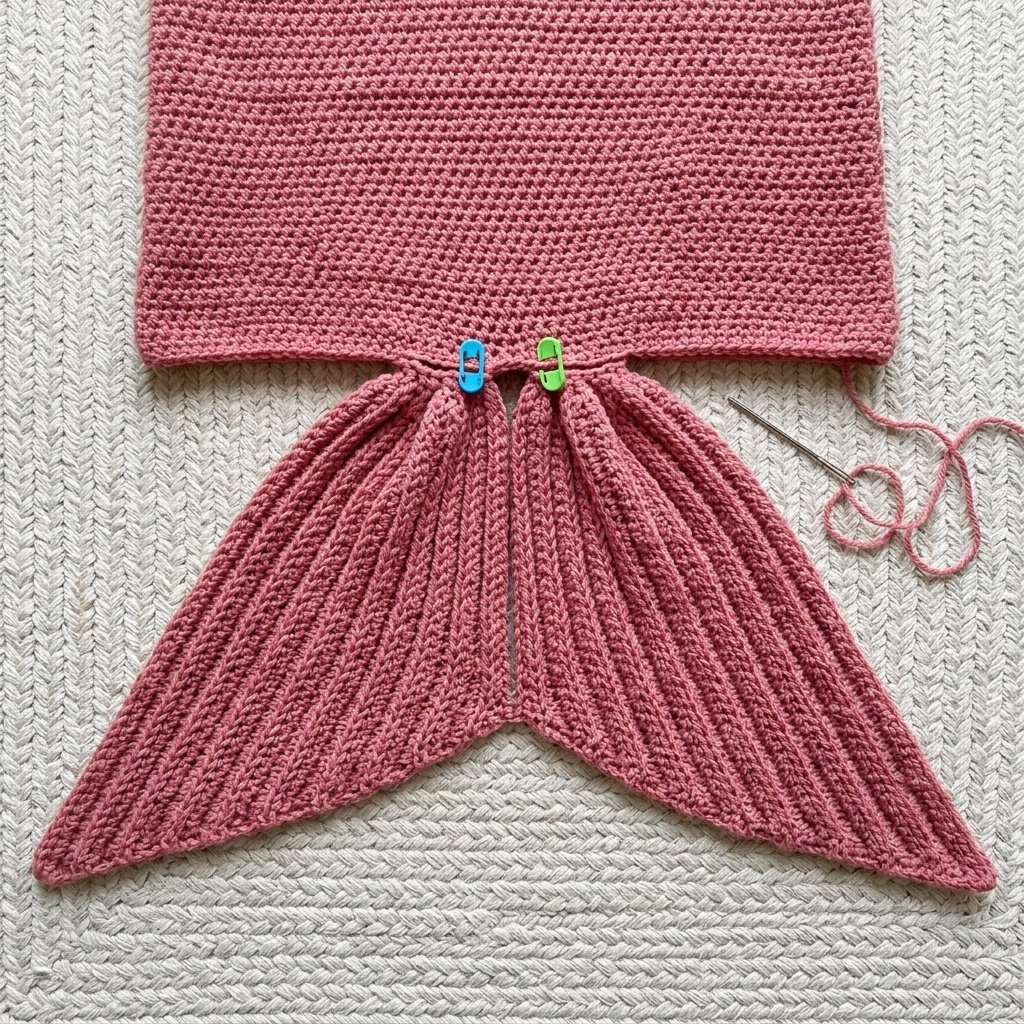
Place the two fin lobes beside each other with their straight sides facing the center and their flared sides pointing outward.
The two 21-stitch foundation edges together contain 42 stitches. Align them side by side across the 42 paired stitch positions of the closed foot seam.
Sew each foundation edge securely to one half of the foot seam. Catch both layers of the body seam as you attach the fin.
At the center, join the straight inner edges of the two lobes for approximately 1 inch (2.5 cm) below the attachment. Leave the rest of those inner edges separate to form the divided fin.
Spread the lobes gently. This construction creates two broad flared sections with a central split, rather than a single solid paddle-shaped fin.
Optional Embroidered Name
Add personalization before attaching the fin if you prefer easier access to the back of the stitches.
Choose one lobe and mark a simple name layout with loose contrasting guide stitches. Keep the name away from the attachment seam and central split.
With a yarn needle and smooth contrasting yarn, use short backstitches to form the letters. Keep the yarn relaxed so the fin stays flat.
For an even line, bring the needle up a short distance ahead, stitch back to the end of the previous stitch, then repeat. Small printed letters are usually easier to control than large cursive lettering.
Secure the ends on the back through several stitches. Remove the guide stitches and avoid leaving long loose strands behind the embroidery.
Navy, plum, or cream can contrast nicely with pink. The blanket also looks complete without a name.
Finishing
Weave in the remaining ends on the inside, changing direction before trimming. Check the top of the back seam, the closed foot seam, and the fin attachment.
The starting edge and back opening are left unbordered in this version. Keep them relaxed so the blanket is easy to put on and remove while seated.
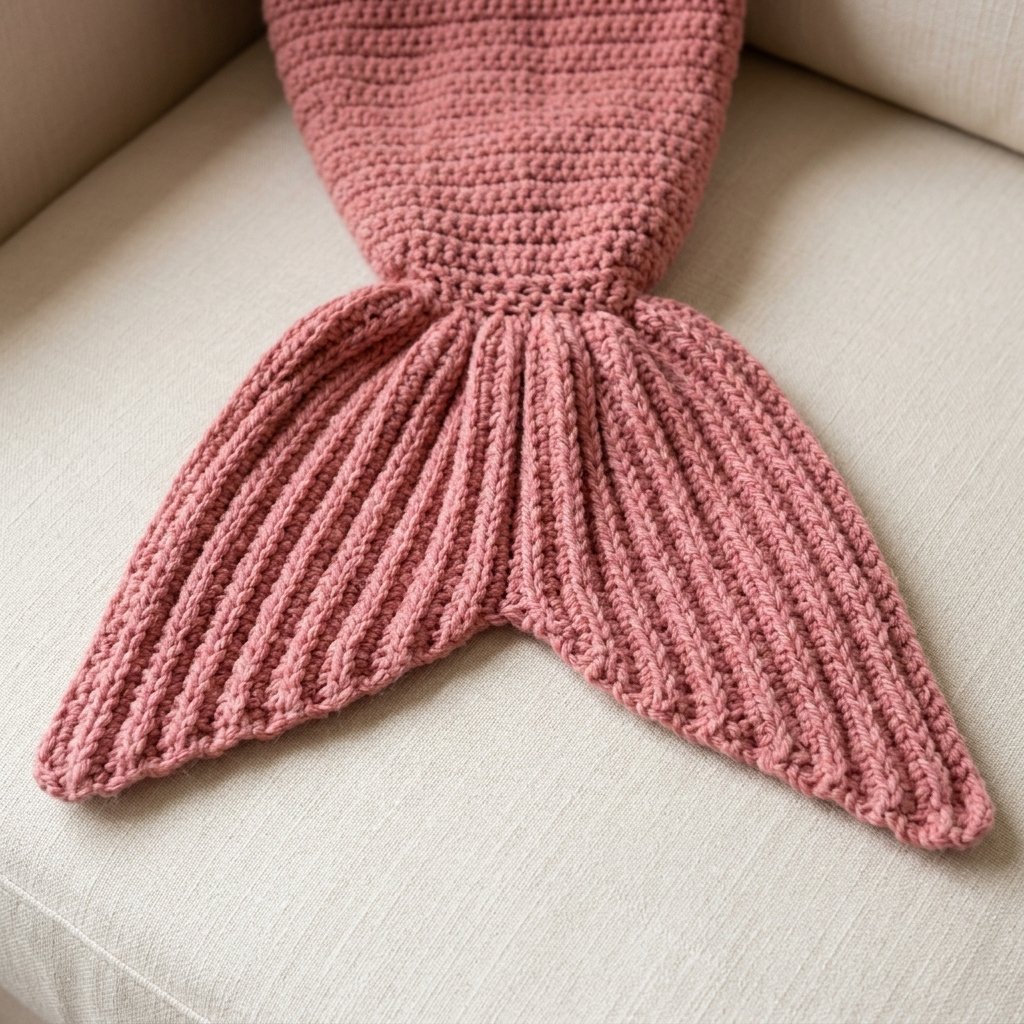
Lay the blanket flat and gently arrange the fin. Do not stretch the lobes sharply or press their ridges flat.
Finished Size
Small: Approximately 30 inches (76 cm) of usable body length, plus a 5.25-inch (13.5 cm) fin extension.
Medium: Approximately 40 inches (101.5 cm) of usable body length, plus a 5.75-inch (14.5 cm) fin extension.
Large: Approximately 48 inches (122 cm) of usable body length, plus a 6.25-inch (16 cm) fin extension.
The upper body measures approximately 32 (40, 48) inches around when its back edges meet. The upper back slit allows the edges to open during use.
Tips and Customization
Adjust the Body Length
To add length, work extra plain rows after completing all the scheduled decreases and before closing the foot end. Each five rows adds approximately 2 inches (5 cm).
For a shorter version, remove rows from the initial plain section where available, then shift the shaping schedule earlier by the same number. Keep the complete number of decrease rows so the foot end still has 84 stitches.
Do not remove decrease rows without recalculating the fin attachment.
Change the Color
Try turquoise for an ocean-inspired version, lavender for a soft pastel gift, or a solid jewel tone for an adult blanket.
Use a Contrast Fin
Make the body and fin in different colors of the same yarn. Keeping the yarn type consistent helps the pieces retain compatible measurements after washing.
Personalize Simply
A small embroidered initial is an approachable first option. Avoid beads, dangling charms, or other detachable decorations.
Use and Care
This is a lounging blanket for seated, awake use. Remove it before standing or walking because the enclosed foot section limits movement.
It is not a baby sleep sack. For children, use it with adult supervision and choose a size they can get out of comfortably.
Follow the yarn label for washing and dry thoroughly before storing. Check seams and embroidered ends regularly, especially after cleaning.
Frequently Asked Questions
Is This Crochet Mermaid Tail Blanket Pattern Beginner-Friendly?
It suits confident beginners. The body uses half double crochet, the shaping uses the same decrease at both ends, and the fin uses one increase per row.
Are the Feet Inside the Fin?
No. The feet stay inside the closed lower body. The fin is sewn beyond that compartment as a decorative extension.
Why Is the Back Left Partly Open?
The opening makes it easier to place the blanket around the legs while seated. It also avoids needing a tight waistband or fastening.
Can I Make It with Chenille Yarn?
Chenille will change the size, weight, stitch definition, and seam behavior. This version is written for smooth worsted yarn; use a swatch and recalculate before making a substantial substitution.
Can I Add a Name After Finishing?
Yes. The fin remains accessible for embroidery after assembly. Work carefully so you do not catch unwanted layers or pull the lobe out of shape.
Save This Pattern for Later
Save this crochet mermaid tail blanket pattern to your crochet gifts board on Pinterest so you can return to the sizing chart, shaping schedule, and personalization instructions.
Looking for Your Next Crochet Project?
Love this project? Explore Cute Stitch Studio’s premium crochet patterns for more cute, cozy, gift-worthy, and beginner-friendly handmade ideas.