Crocodile Stitch Hooded Cape Pattern with Dragon Scales
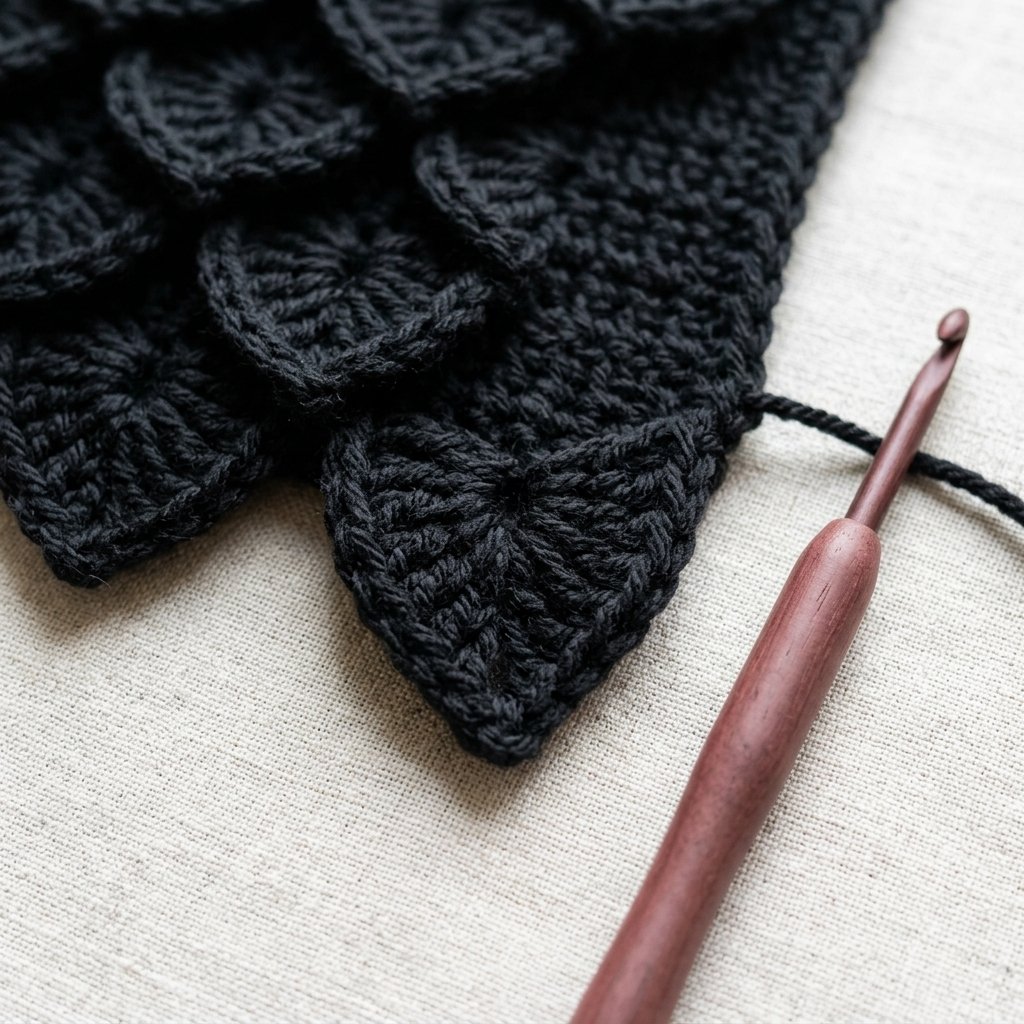
This crocodile stitch hooded cape pattern creates a dramatic shoulder layer with raised scales, a plain hood, and matching front ties. Worked in black, it has a woodland-fantasy look that pairs beautifully with a simple dress or long-sleeve top.
The cape reaches approximately to the elbows, leaving your hands free. Its open front makes it useful for costume styling, Halloween outfits, and anyone who enjoys textured crochet accessories.
This original Cute Stitch Studio version uses a shaped double crochet foundation with crocodile-style scales added around selected posts. That separates the garment shaping from the decorative texture, so you can check the cape’s fit before working all the scales.
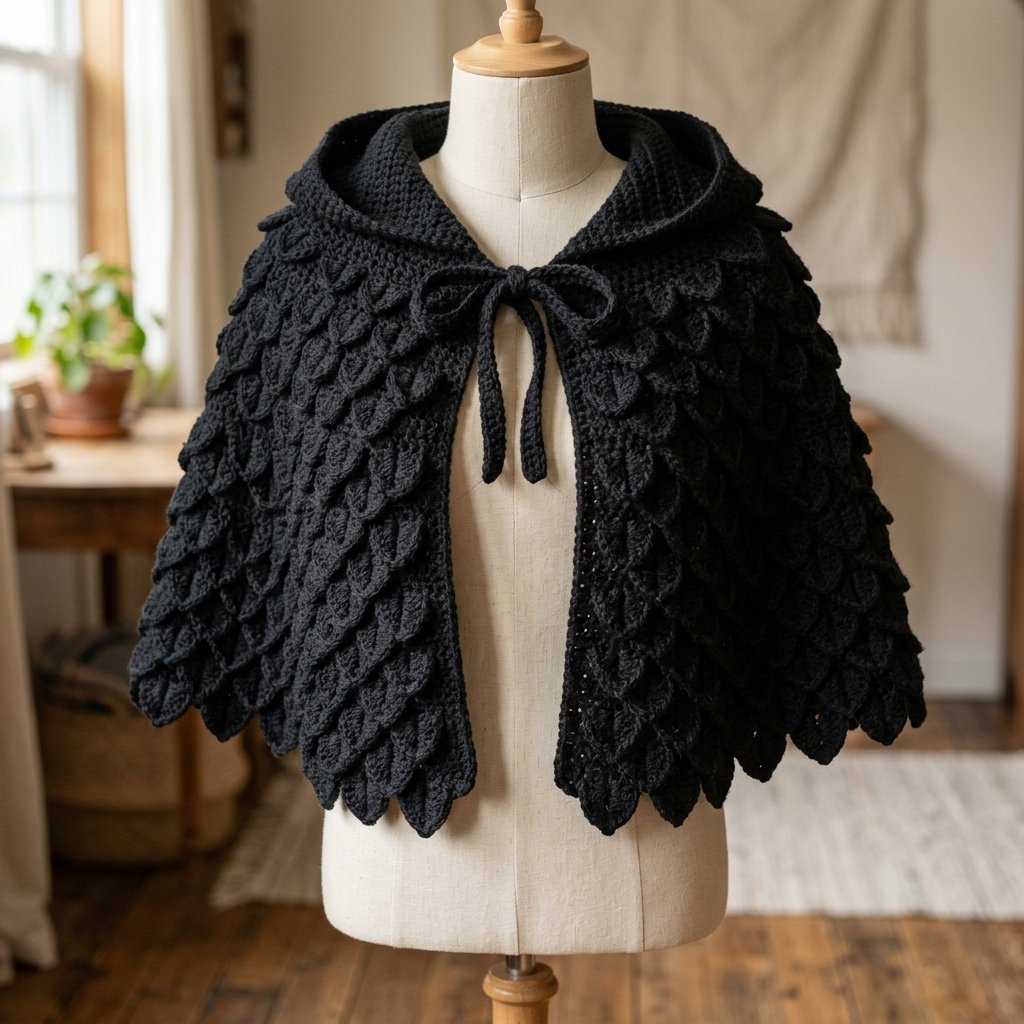
Table of Contents
Crocodile Stitch Hooded Cape Pattern With Dragon Scales Instructions
Project Details
- Skill level: Intermediate.
- Estimated time: Approximately 25–35 hours, depending on experience and size.
- Sizes: Two adult sizes, A and B.
- Cape depth: Approximately 14 inches (35.6 cm), excluding the hood.
- Hood height: Approximately 12 inches (30.5 cm), before edging.
- Crochet terminology: US terms.
- Construction: A bottom-up shaped foundation, decorative post-worked scale rows, and a hood worked directly onto the neckline.
- Closure: Two short crochet ties.
This original design has not been physically tested. Stitch counts have been reviewed, but scale spacing, drape, fit, and yarn quantities need confirmation with a sample. Complete the practice section before starting the garment.
Choose Your Size
This cape has an open front and no armholes. The suggested bust ranges are guides; shoulder breadth and preferred front coverage also affect the fit.
| Measurement | Size A | Size B |
|---|---|---|
| Suggested bust | 30–40 in (76–102 cm) | 42–50 in (107–127 cm) |
| Foundation hem width, measured along the edge | 57 in (145 cm) | 60 in (152 cm) |
| Foundation neckline width, before edging | 18 in (46 cm) | 21 in (53 cm) |
| Cape depth | 14 in (35.6 cm) | 14 in (35.6 cm) |
| Hood depth when folded | 9 in (23 cm) | 10.5 in (27 cm) |
The neckline measurement describes an open edge, not a closed neck circumference. The ties allow a comfortable gap at the front.
Check the plain foundation over your intended clothing before adding the scales. The cape should rest on the shoulders without pulling tightly across the throat.
Materials
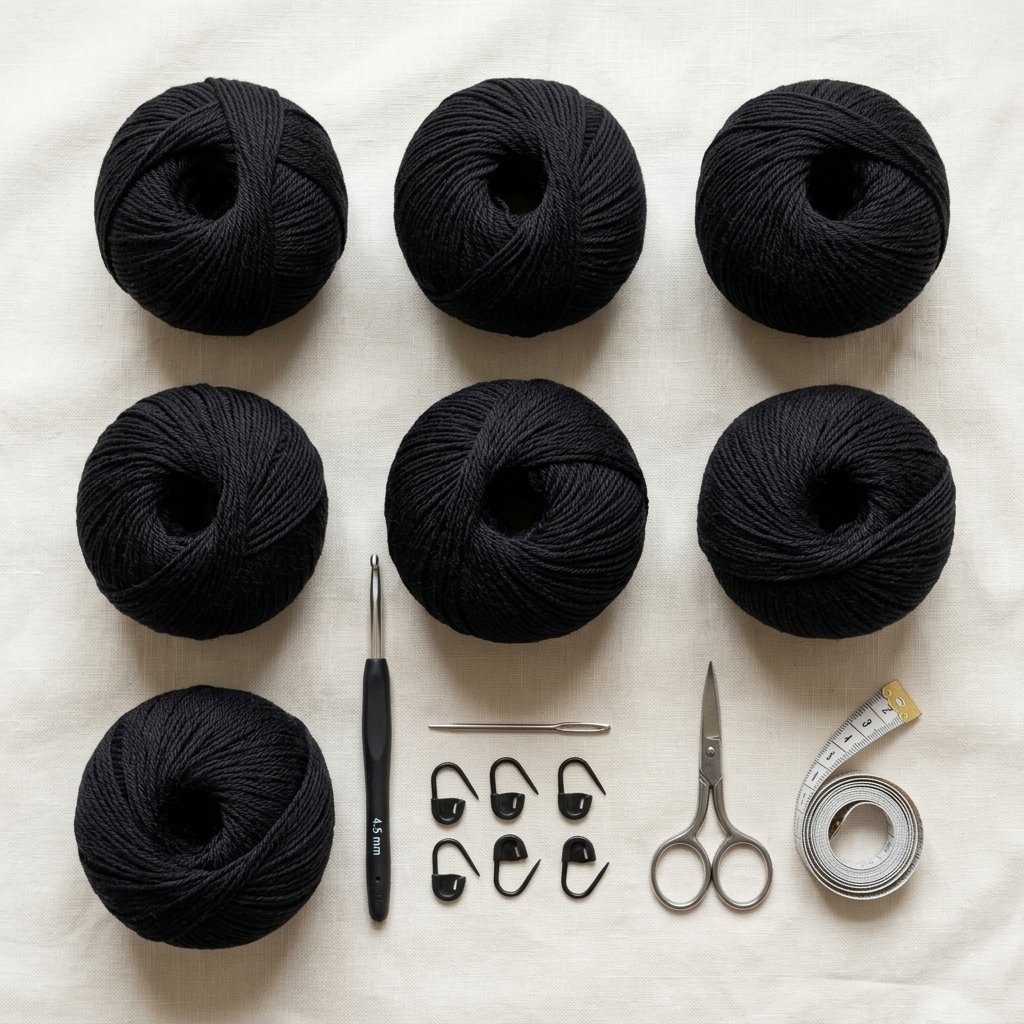
- DK-weight yarn: approximately 1,800–2,100 yards for Size A or 2,000–2,300 yards for Size B.
- 4.5 mm crochet hook, or the size needed to obtain gauge.
- Yarn needle.
- Scissors.
- Six removable stitch markers.
- Measuring tape.
The same yarn is used for the cape, scales, hood, edging, and ties. No buttons, lining, beads, or hardware are needed.
Hook Size
Begin with a 4.5 mm crochet hook.
Adjust the hook to match the foundation gauge. Use the same hook for the scales unless your practice sample shows that a small adjustment is necessary to keep them flexible.
Yarn
Choose DK-weight yarn, category 3, with a smooth surface and enough flexibility to drape. A lightweight acrylic or wool-acrylic blend is a useful starting point.
Black gives the cape a dramatic look, but charcoal, forest green, burgundy, and deep plum also show the scale texture beautifully.
The decorative scales add considerable fabric and weight. Avoid choosing a heavy yarn simply because it looks similar in a photograph. Make a sample and assess its weight first.
Gauge
Foundation gauge: 16 double crochet stitches and 8 rows = 4 inches (10 cm), after washing and drying flat.
A six-stitch scale section spans approximately 1.5 inches (3.8 cm) across the foundation. Decorative scale rows are placed every two foundation rows, approximately 1 inch apart vertically.
The completed texture may slightly change these measurements. Measure the foundation and the decorated sample without stretching either one.
Abbreviations
- ch: chain.
- sc: single crochet.
- dc: double crochet.
- sl st: slip stitch.
- st(s): stitch(es).
- dc2tog: double crochet 2 stitches together.
Before You Start
- Instructions are written for A (B).
- The foundation begins at the hem and narrows toward the neck.
- The beginning ch 2 does not count as a stitch.
- Turn after every foundation and hood row.
- Mark the outside of Foundation Row 1. All scale rows are worked on that same outside surface.
- The scale rows are decorative additions; they do not replace the foundation stitches.
- The scales point toward the starting hem edge.
How to Work dc2tog
Yarn over, insert the hook into the next stitch, pull up a loop, yarn over, and pull through two loops. Leave the remaining loops on the hook.
Repeat those steps in the following stitch. Yarn over and pull through all three loops remaining on the hook. Two stitches become one.
Practice the Scale Texture First
With your chosen yarn, chain 26. Dc in the third chain from the hook and across for 24 stitches.
Work seven more plain dc rows, beginning each with ch 2 and turning. Fasten off.
Add scales to Rows 1, 3, 5, and 7 using the decorative instructions below. Each row contains four six-stitch sections.
Wash and dry the sample. Check that the scales hang downward, the connecting chains do not pull the fabric inward, and the backing remains flexible.
If the scales crowd or distort the foundation, adjust your tension or hook and repeat the sample before committing to the cape.
Crocodile Stitch Hooded Cape Pattern: Foundation
Part 1 — Starting Hem
Chain 230 (242) loosely.
Row 1: Dc in the third chain from the hook and each remaining chain. 228 (240) sts.
Place a marker on the outside surface of this row. Divide the stitches into six equal shaping sections of 38 (40) sts.
Part 2 — Narrow the Cape
Row 2: Ch 2, turn. In each shaping section, work dc2tog over the first two stitches, dc in each middle stitch, and dc2tog over the final two stitches.
Each section loses two stitches, so the full row loses twelve. You now have 216 (228) sts.
Row 3: Ch 2, turn. Dc in every stitch.
Continue decreasing on every even-numbered row through Row 26. Work plain dc on the odd-numbered rows.
| Decrease row | Stitches per shaping section before decreasing: A (B) | Total after row: A (B) |
|---|---|---|
| 2 | 38 (40) | 216 (228) |
| 4 | 36 (38) | 204 (216) |
| 6 | 34 (36) | 192 (204) |
| 8 | 32 (34) | 180 (192) |
| 10 | 30 (32) | 168 (180) |
| 12 | 28 (30) | 156 (168) |
| 14 | 26 (28) | 144 (156) |
| 16 | 24 (26) | 132 (144) |
| 18 | 22 (24) | 120 (132) |
| 20 | 20 (22) | 108 (120) |
| 22 | 18 (20) | 96 (108) |
| 24 | 16 (18) | 84 (96) |
| 26 | 14 (16) | 72 (84) |
For example, a 20-stitch section becomes 18 stitches by working dc2tog, dc in the next 16 stitches, and dc2tog.
Move the section markers as you work, placing them in the first stitch of each newly completed section.
Rows 27–28: Ch 2, turn. Dc in every stitch. 72 (84) sts.
Fasten off. The foundation should measure approximately 14 inches from hem to neckline.

Part 3 — Check the Foundation Fit
Drape the narrow edge around your shoulders and let the wider edge fall over your upper arms.
Check that the neckline rests comfortably and that the front opening gives your arms enough room to move. The decorative scales will make the fabric heavier and somewhat fuller.
Make any foundation corrections now, before adding the surface texture.
Adding the Dragon Scales
Understanding the Two Types of Sections
The foundation used six large shaping sections. The decorative rows use many smaller sections of six stitches each.
Remove the shaping markers before counting decorative sections. Every decorated row has a stitch count divisible by six.
Work the decorative rows in this order: 1, 3, 5, 7, 9, 11, 13, 15, 17, 19, 21, 23, 25, and 27. Begin at the hem and progress toward the neckline.
How to Make One Scale
Each scale wraps around two neighboring double crochet posts in a selected foundation row.
With the outside facing you, identify the first post of the pair as the one nearest your working edge. The foundation chain and hem remain below the work.
Join with a sl st at the top of the first post. Ch 3; this counts as the first decorative dc. Work 4 more dc around that post, progressing from its top toward its base.
Ch 1 at the bottom point. Rotate the fabric as needed and work 5 dc around the second post, progressing from its base back toward its top.
You now have one scale containing 10 decorative dc and one point chain. These stitches wrap around the posts; they are not worked into the tops of the foundation stitches.
Keep the scale on the outside of the cape and its point directed toward the hem.
Decorative Row A
Use this arrangement on Foundation Rows 1, 5, 9, 13, 17, 21, and 25.
Count the foundation row in groups of six stitches, starting at your working edge.
In each group:
- Make one scale around posts 1 and 2.
- Ch 2, then sl st into the top of stitch 4.
- Ch 2, then sl st into the top of stitch 6.
Sl st into the top of stitch 1 of the next group and repeat. After the last group, fasten off and secure the ends on the inside.
Decorative Row B
Use this arrangement on Foundation Rows 3, 7, 11, 15, 19, 23, and 27.
In each six-stitch group:
- Sl st into the top of stitch 1.
- Ch 2, then sl st into the top of stitch 4.
- Make one scale around posts 4 and 5.
- Ch 2, then sl st into the top of stitch 6.
Continue into the next group and repeat. Fasten off after the last group.
The alternating arrangements shift the scales sideways between rows. The upper scales overlap the spaces between the scales below.
Keep the connecting chains relaxed. They should secure the scales without gathering the backing. Check frequently against your practice sample.
| Foundation row | Decorative arrangement | Number of scales: A (B) |
|---|---|---|
| 1 | A | 38 (40) |
| 3 | B | 36 (38) |
| 5 | A | 34 (36) |
| 7 | B | 32 (34) |
| 9 | A | 30 (32) |
| 11 | B | 28 (30) |
| 13 | A | 26 (28) |
| 15 | B | 24 (26) |
| 17 | A | 22 (24) |
| 19 | B | 20 (22) |
| 21 | A | 18 (20) |
| 23 | B | 16 (18) |
| 25 | A | 14 (16) |
| 27 | B | 12 (14) |

Hood
Part 1 — Hood Rectangle
With the outside facing you, join yarn at one end of Foundation Row 28.
Hood Row 1: Ch 2. Dc in every neckline stitch. 72 (84) sts.
Hood Rows 2–24: Ch 2, turn. Dc in every stitch. 72 (84) sts in each row.
Fasten off with a long sewing tail. The hood is approximately 12 inches tall before edging.
Part 2 — Top Seam
Fold the hood vertically in half with its outside surfaces together. Align the first half of the final row with the second half.
Sew 36 (42) pairs of stitches together across the top. Turn the hood right side out.
This simple construction produces a soft corner at the back of the hood. Check the opening around your face before finishing the edges.
Front and Hood Edging
Join yarn at one lower front corner with the outside facing you.
Work sc up the first front edge, around the hood opening, and down the second front edge. Begin with approximately 2 sc per dc row end.
Work into the foundation edge, keeping the free edges of the scales out of the way. Do not sew or crochet through the scale tips.
Ch 1, turn, and work a second row of sc along the same path. Fasten off.
Adjust the first-row pickup count if the edge pulls or waves. Keep the treatment symmetrical on the two fronts.
Leave the lower scale edge free to form the decorative hem.
Front Ties
Make two ties. Chain loosely until the chain measures approximately 10 inches (25 cm).
Sl st in the second chain from the hook and each remaining chain. Fasten off, leaving a long sewing tail.
Sew one tie securely to each front edge approximately 1 inch below the neckline, catching several edging stitches.
Tie a loose bow at the upper chest. Adjust the tie length before fastening permanently if you prefer shorter ends. The closure should not pull against the throat.
Finishing
Weave in all ends on the inside, including those from every decorative scale row. Do not leave long loose strands behind the fabric.
Wash or damp-block according to the yarn label. Support the cape fully while wet, then arrange it flat.
Smooth the backing first, then arrange the scales so they point toward the hem and overlap naturally. Avoid stretching individual scale tips.
Let the cape dry completely before wearing. Check the hood seam and tie attachments with a gentle tug.
Finished Measurements
The cape foundation measures approximately 14 inches (35.6 cm) deep, with a hem width of 57 (60) inches, or 145 (152) cm, measured along the edge.
The hood is approximately 12 inches (30.5 cm) tall, with a folded depth of 9 (10.5) inches, or 23 (27) cm.
The scales add fullness and may slightly change the final hanging dimensions.
Tips and Customization
- Start in a lighter color: Practice the scale technique in gray before working it in black.
- Keep the hood plain: The smooth fabric balances the textured cape and reduces bulk around the head.
- Try tonal scales: Work the foundation in charcoal and the scales in black for subtle contrast.
- Change the fantasy palette: Forest green, dark plum, or smoky blue creates a different character.
- Adjust hood height: Add or remove plain hood rows before sewing the top seam.
- Work scales in short sessions: Stop after a complete decorative row so the next starting point is easy to find.
Changing cape depth also changes shoulder shaping. For a first version, keep the foundation schedule as written rather than removing decrease rows.
Frequently Asked Questions
Is this crocodile stitch hooded cape pattern suitable for beginners?
The foundation uses basic stitches, but the scales require working around posts and rotating the fabric. It is better suited to an intermediate crocheter or a confident beginner willing to practice first.
Are these ordinary scallops?
No. Each scale wraps down one double crochet post and back up the next, creating a raised, two-sided shape. Scallops worked only into stitch tops produce a different texture.
Why is there a solid foundation beneath the scales?
This design separates shaping from decoration. The backing supports the scale rows and allows a fit check before the texture is added.
Will the cape be heavy?
The scales add substantial fabric. Use the suggested lighter yarn category and assess the decorated practice sample before starting the full garment.
Why are my scales curling sideways?
Check that the two halves have equal stitch counts and that you are working down one post and up the other. Tight connecting chains can also pull the scale out of position.
Can I use bulky yarn?
It will produce a much heavier garment and change the dimensions. This pattern is written for DK yarn at the stated gauge.
Save This Dragon-Scale Crochet Project
Save this pattern to your fantasy crochet or Halloween costume board on Pinterest so you can return to it when you are ready for a textured project.
Looking for Your Next Crochet Project?
Love this project? Explore Cute Stitch Studio’s premium crochet patterns for more cute, cozy, gift-worthy, and beginner-friendly handmade ideas.