Crochet Hanging Tissue Holder Pattern: A Floral Bathroom Accessory
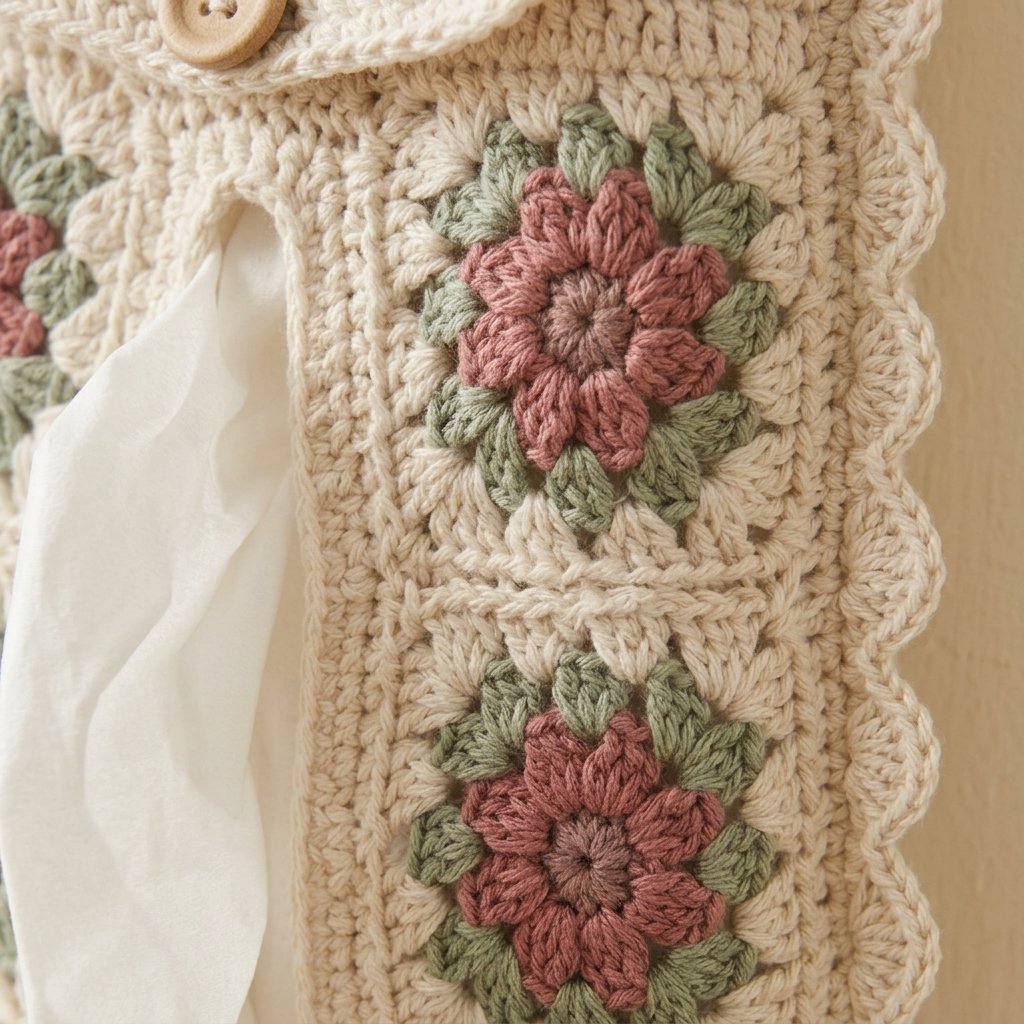
This crochet hanging tissue holder pattern combines cream cotton, dusty rose flowers, and soft sage details. A long opening on the front lets you pull out tissues while the container stays tucked inside its decorative cover.
The holder hangs vertically from a crochet loop and opens at the top for refilling. Small floral squares decorate the front, while a larger matching square forms the flap.
This original Cute Stitch Studio version uses a solid crochet structure beneath the floral details. It is a manageable project for confident beginners who enjoy working small motifs and sewing pieces together.

Table of Contents
Crochet Hanging Tissue Holder Pattern: A Floral Bathroom Accessory Instructions
Project Details
- Skill level: Confident beginner to intermediate.
- Estimated time: Approximately 8–12 hours, plus shaping and drying time.
- Finished body: Target approximately 5 inches wide, 9.75 inches tall, and 2.5 inches deep.
- Front opening: Approximately 2 inches wide by 6.25 inches tall before edging.
- Terminology: US crochet terms.
- Construction: Sewn rectangular panels, a shaped front opening, floral motifs, a hinged flap, and a hanging loop.
This original pattern has not been physically tested. Stitch counts have been reviewed, but container fit, tissue dispensing, gauge, and hanging performance require a sample check.
Choose Your Tissue Container First
Use a lightweight rectangular tissue package or slim box that can dispense through its broad face when positioned vertically.
The sample cover is intended for a container measuring approximately 4.5 inches wide, 9 inches tall, and no more than 2.25 inches deep. These are example container measurements, not a universal tissue-box size.
Check that the container’s dispensing opening will sit behind the crochet opening. Try pulling several tissues while holding the container vertically before making the cover.
Keep tissues inside their original suitable package. The crochet cover provides decoration and support, but it is not a moisture barrier.
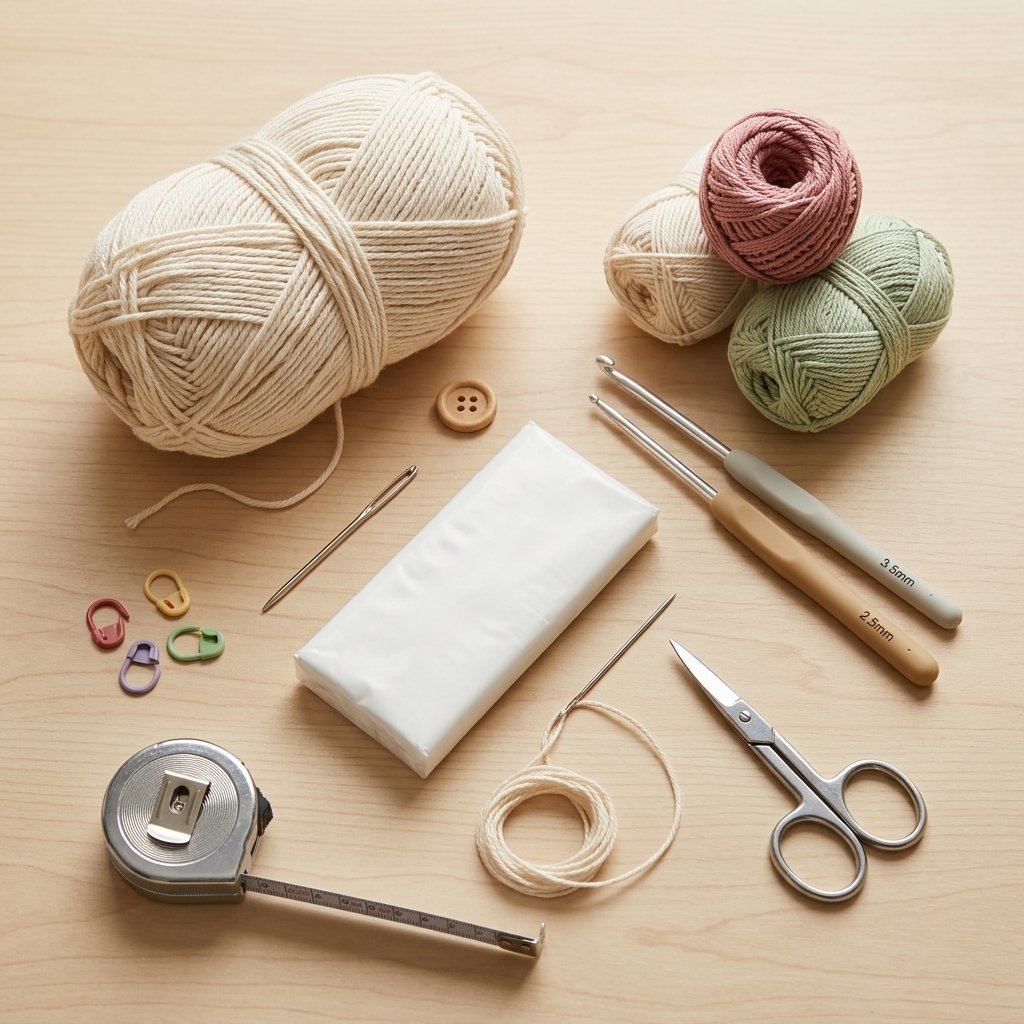
Materials
- DK-weight cotton yarn in cream: approximately 250–320 yards.
- Fingering-weight cotton in dusty rose: approximately 20–30 yards.
- Fingering-weight cotton in sage green: approximately 35–50 yards.
- Fingering-weight cotton in cream: approximately 60–90 yards.
- 4 mm crochet hook for the main panels.
- 2 mm crochet hook for the floral motifs and flap.
- One smooth 0.75-inch sew-through wooden button.
- Matching sewing thread and sewing needle.
- Tapestry needle.
- Scissors and measuring tape.
- Removable stitch markers.
- A suitable wall hook or peg.
The finer yarn keeps the small floral decorations narrow enough to fit beside the dispensing opening.
Hook Size
Use a 4 mm hook for the main cover and a 2 mm hook for the motifs.
The main fabric should be firm but flexible. Adjust the hook to reach the target measurements, especially the width of the front panel and its narrow side sections.
Yarn
Choose smooth cotton in two thicknesses: DK, category 3 for the structure and fingering, category 1 for the floral details.
Cream, dusty rose, and sage create a soft cottage-style palette. Keep the fine cream yarn close in color to the main yarn for a coordinated finish.
Yardage is estimated. A larger container or a longer hanging loop will require additional yarn.
Gauge
Main panels: 16 sc and 18 rows = 4 inches.
Small floral squares: Target approximately 1.5 inches across after shaping.
Make one small motif before crocheting the whole set. It must fit on a front side section approximately 1.5 inches wide.
Wash and dry the samples according to the yarn label before measuring.
Abbreviations
- ch: chain
- sc: single crochet
- hdc: half double crochet
- dc: double crochet
- sl st: slip stitch
- st(s): stitch(es)
Before You Start
- Main panels are worked flat in rows.
- Beginning ch 1 does not count as a stitch.
- Motifs are worked in joined rounds without turning.
- Work through both loops unless instructed otherwise.
- The cover has an open top beneath its flap for replacing the tissue package.
- The hanging loop attaches to the back panel and does not depend on the flap or button for support.
- Check the opening against the actual tissue package before sewing the body together.
Crochet Hanging Tissue Holder Pattern Instructions
Part 1 — Back Panel
With the 4 mm hook and DK cream yarn, ch 21.
Row 1: Sc in the second chain from the hook and each remaining chain. Turn. (20 sc)
Rows 2–44: Ch 1. Sc in every stitch across. Turn. (20 sc)
Fasten off with a long sewing tail.
The panel should measure approximately 5 inches wide by 9.75 inches tall.
Part 2 — Side Panels
Make two with the main yarn and hook.
Foundation: Ch 11.
Row 1: Sc in the second chain from the hook and across. Turn. (10 sc)
Rows 2–44: Ch 1. Sc in each stitch across. Turn. (10 sc)
Fasten off with a sewing tail.
Each side measures approximately 2.5 inches wide by 9.75 inches tall.
Part 3 — Bottom Panel
Ch 21.
Row 1: Sc in the second chain from the hook and across. Turn. (20 sc)
Rows 2–11: Ch 1. Sc in each stitch across. Turn. (20 sc)
Fasten off. The bottom should measure approximately 5 by 2.5 inches.
Part 4 — Front Panel and Dispensing Opening
Foundation: Ch 21.
Rows 1–8: Work 20 sc per row as for the back panel.
This creates the solid section below the opening.
First side, Rows 9–36: Ch 1. Sc in the first 6 stitches only. Turn, leaving the other stitches unworked.
Continue working 6 sc per row until this narrow section has 28 rows. Fasten off.
Second side: Return to the last full-width row. With the same face of the panel toward you as when you began the first side, skip the center 8 stitches and join yarn in stitch 15.
Work across stitches 15–20. Continue for 28 rows with 6 sc in each row. Do not fasten off.
You now have two side sections with an opening between them.
Bridge: From the inner top corner of the second side, ch 8 and sl st into the inner top corner of the first side. Fasten off.
If your final row leaves the working yarn at an outer corner, fasten off first and rejoin at the inner corner before making the bridge.
Row 37: Join yarn at an outer top corner. Ch 1. Sc across the first 6 side stitches, work 1 sc in each of the 8 bridge chains, then sc across the other 6 side stitches. Turn. (20 sc)
Rows 38–44: Ch 1. Sc in every stitch across. Turn. (20 sc)
Fasten off.
The front and back should have matching outer dimensions. The unedged opening is approximately 2 inches wide and 6.25 inches tall.

Part 5 — Edge the Tissue Opening
Join main cream yarn at an inside corner of the opening.
Ch 1. Work sc evenly around the opening: approximately one sc in each row end along the long sides and one sc in each available stitch or chain position across the short ends.
At each inside corner, work only enough stitches to turn smoothly. Do not add the three-stitch corner groups used on an outside border.
Sl st into the first sc. Fasten off.
The edging should soften the corners without pulling the opening closed. Check it against the tissue package before continuing.
Part 6 — Small Floral Squares
Make six using the 2 mm hook and fingering-weight cotton.
Round 1, dusty rose: Ch 4 and sl st into the first chain to form a ring. Ch 1, work 8 sc into the ring, then sl st into the first sc. (8 sc) Fasten off.
Round 2, sage: Join in any sc. Ch 1. Work [hdc, dc, ch 2, dc, hdc] in that same stitch, then sc in the next stitch.
Repeat [work hdc, dc, ch 2, dc, hdc in the next stitch; sc in the next stitch] three more times. Sl st into the first hdc. (4 corners, 20 stitches, and 4 ch-2 spaces) Fasten off.
Round 3, cream: Join in any corner space. Ch 1. Work [2 sc, ch 2, 2 sc] in that space.
Sc in each of the next 5 stitches. Repeat [work 2 sc, ch 2, 2 sc in the next corner space; sc in each of the next 5 stitches] three times. Sl st into the first sc. (36 sc and 4 corner spaces)
Fasten off with a sewing tail.
For a rose-like center, use a short length of dusty rose yarn to embroider a tiny chain-stitch spiral over the pink center, keeping it within the green surround.
To make chain embroidery, bring the needle to the front, reinsert it beside the same point, and bring it out a short distance ahead inside the loop of yarn. Repeat along a small curved line, then anchor the final loop with a short stitch.
Shape the square gently. Aim for approximately 1.5 inches across; use a smaller hook or finer yarn if it is too wide for the front side sections.
Part 7 — Floral Flap
Make one more floral square through Round 3.
Continue with fine cream yarn to enlarge it:
Round 4: Join in a corner space. Ch 1. Work [sc, ch 2, sc] in the corner, then sc in every stitch along the side. Repeat around all four sides and corners. Join. (44 sc and 4 corner spaces)
Following rounds: Repeat Round 4, always working one sc into every existing stitch and [sc, ch 2, sc] into each corner space. Each round adds 8 sc.
Continue until the square measures approximately 4.5–5 inches across. Fasten off with a long sewing tail.
Measure the flap rather than relying on a fixed number of rounds. It should cover the top opening and fold over the upper front without reaching far down the dispensing slot.
After shaping, one edge will attach to the back panel. The opposite edge becomes the front flap edge.
Part 8 — Sew the Floral Motifs to the Front
Arrange three small squares down each narrow side of the front opening. Keep the two columns balanced, leaving small gaps between motifs.
Sew each square around its outside edge using the matching fine cream tail. Keep the sewing on the panel; do not bridge across the dispensing opening.
Secure the embroidery and motif tails on the inside of the front panel, keeping them short and tidy.

Part 9 — Assemble the Cover
Sew a long edge of each side panel to the corresponding edge of the back panel. Match the 44 row ends evenly.
Sew the remaining long edges of the side panels to the front panel. Keep the chosen outer surfaces facing outward and the seams consistent.
Position the bottom panel in the lower opening. Sew its two wide edges to the front and back foundation edges, matching 20 stitches across each.
Sew its two shorter edges to the bottoms of the side panels, distributing the stitches evenly.
Leave the entire top open. Insert the empty tissue container to check the fit, then remove it before finishing.
Part 10 — Attach the Flap and Button
Center one edge of the large floral square along the upper edge of the back panel. Sew that edge securely in place to form a hinge.
Fold the flap over the top and onto the front. Mark where its center front edge reaches the solid upper portion of the front panel.
Sew the wooden button to the front at that point, catching several crochet stitches behind it.
For a button loop, join fine cream yarn at the center of the flap’s free edge. Ch 6 as a starting point, then sl st back into the attachment point.
Check the loop against the actual button. Add or remove chains until the button passes through with gentle pressure. Secure the ends thoroughly.
Part 11 — Hanging Loop
Use the main cream yarn and 4 mm hook.
Foundation: Ch 5.
Row 1: Sc in the second chain from the hook and across. Turn. (4 sc)
Following rows: Ch 1. Sc in each stitch across. Turn.
Continue until the strip measures approximately 12 inches long. Fasten off with a long tail.
Bring the two ends together to form a loop. Overlap each end by approximately 1.5 inches down the outside of the upper back panel, with the ends positioned close to the center.
Sew along both sides and across the bottom of each overlap. Make a second pass through the attachment area.
The loop should carry the holder independently of the flap hinge. Do not attach it only to the floral flap.
Part 12 — Small Scalloped Side Trim
Use the main yarn and hook. Add trim along the two long front-side seams.
Join at the upper end of one seam. Work a foundation line of evenly spaced sc down the seam, aiming for one sc per row end. For the sample, use 44 sc. Turn.
Sl st in the first stitch. Repeat [skip the next stitch, work 5 dc in the next stitch, skip the next stitch, sl st in the next stitch] 10 times.
Sl st in each of the final 3 stitches. Fasten off.
Repeat on the other side, keeping both scalloped trims oriented outward.
This version uses matching side scallops. Keep the lower edge plain so the holder can rest neatly against the wall.
Finishing and Use
Weave in all remaining tails and check the bottom seams, loop attachments, flap hinge, and button.
Follow the yarn’s care instructions for washing and shaping. Let the cover dry completely before inserting tissues.
Insert the tissue package through the top, bring the first tissue through the front opening, and close the flap.
Hang the holder from a suitable smooth peg. Pull several tissues gently to check that the opening lines up and the cover does not twist.
Keep it away from direct shower spray. The holder is intended for a lightweight tissue package, not heavier bathroom supplies.
Finished Size
The body measures approximately 5 inches wide, 9.75 inches tall, and 2.5 inches deep (13 by 25 by 6 cm), before allowing for seam thickness.
The hanging loop adds approximately 4–5 inches above the body, depending on the peg and attachment position.
The usable interior is slightly smaller than the outside dimensions. Confirm the fit with your actual tissue container.
Tips and Customization
Change the Container Size
Use your gauge to calculate the back width, side depth, and body height. Make the front’s outer dimensions match the back exactly.
The two narrow front sections plus the opening width must equal the full panel width. For example, the sample uses 6 + 8 + 6 = 20 stitches.
Move the Opening
Change the number of solid rows below and above the opening to match your tissue package. Keep the total front row count equal to the back row count.
Choose Different Flower Colors
Try lavender with sage, dusty blue with olive, or pale peach with moss green. Keep the motif yarn weight consistent so the squares stay the same size.
Make a Simpler Version
Omit the small floral squares and side scallops. Keep the large floral flap as the main decorative feature.
Frequently Asked Questions
Will this fit every tissue box?
No. Measure your container first and check that it dispenses properly when vertical. The pattern includes example measurements and adjustment guidance.
Can I put loose tissues directly inside?
Keep the tissues inside a suitable package so they stay organized and feed through the opening more reliably.
Why does the opening pull inward?
The edging may be too tight. Undo that round and use a more relaxed tension, checking the opening against the container as you work.
Are the flowers separate appliques?
The small decorations are floral squares with embroidered rose centers. They are sewn onto the solid front panel.
Can the holder be washed?
Remove the tissues and follow the yarn and button care instructions. Reshape the cover and let it dry fully before refilling.
Save This Pattern for Later
Save this crochet hanging tissue holder pattern to your crochet home decor or handmade bathroom board on Pinterest. Choose your tissue package first, then enjoy building the floral details around it.
Looking for Your Next Crochet Project?
Love this project? Explore Cute Stitch Studio’s premium crochet patterns for more cute, cozy, gift-worthy, and beginner-friendly handmade ideas.