

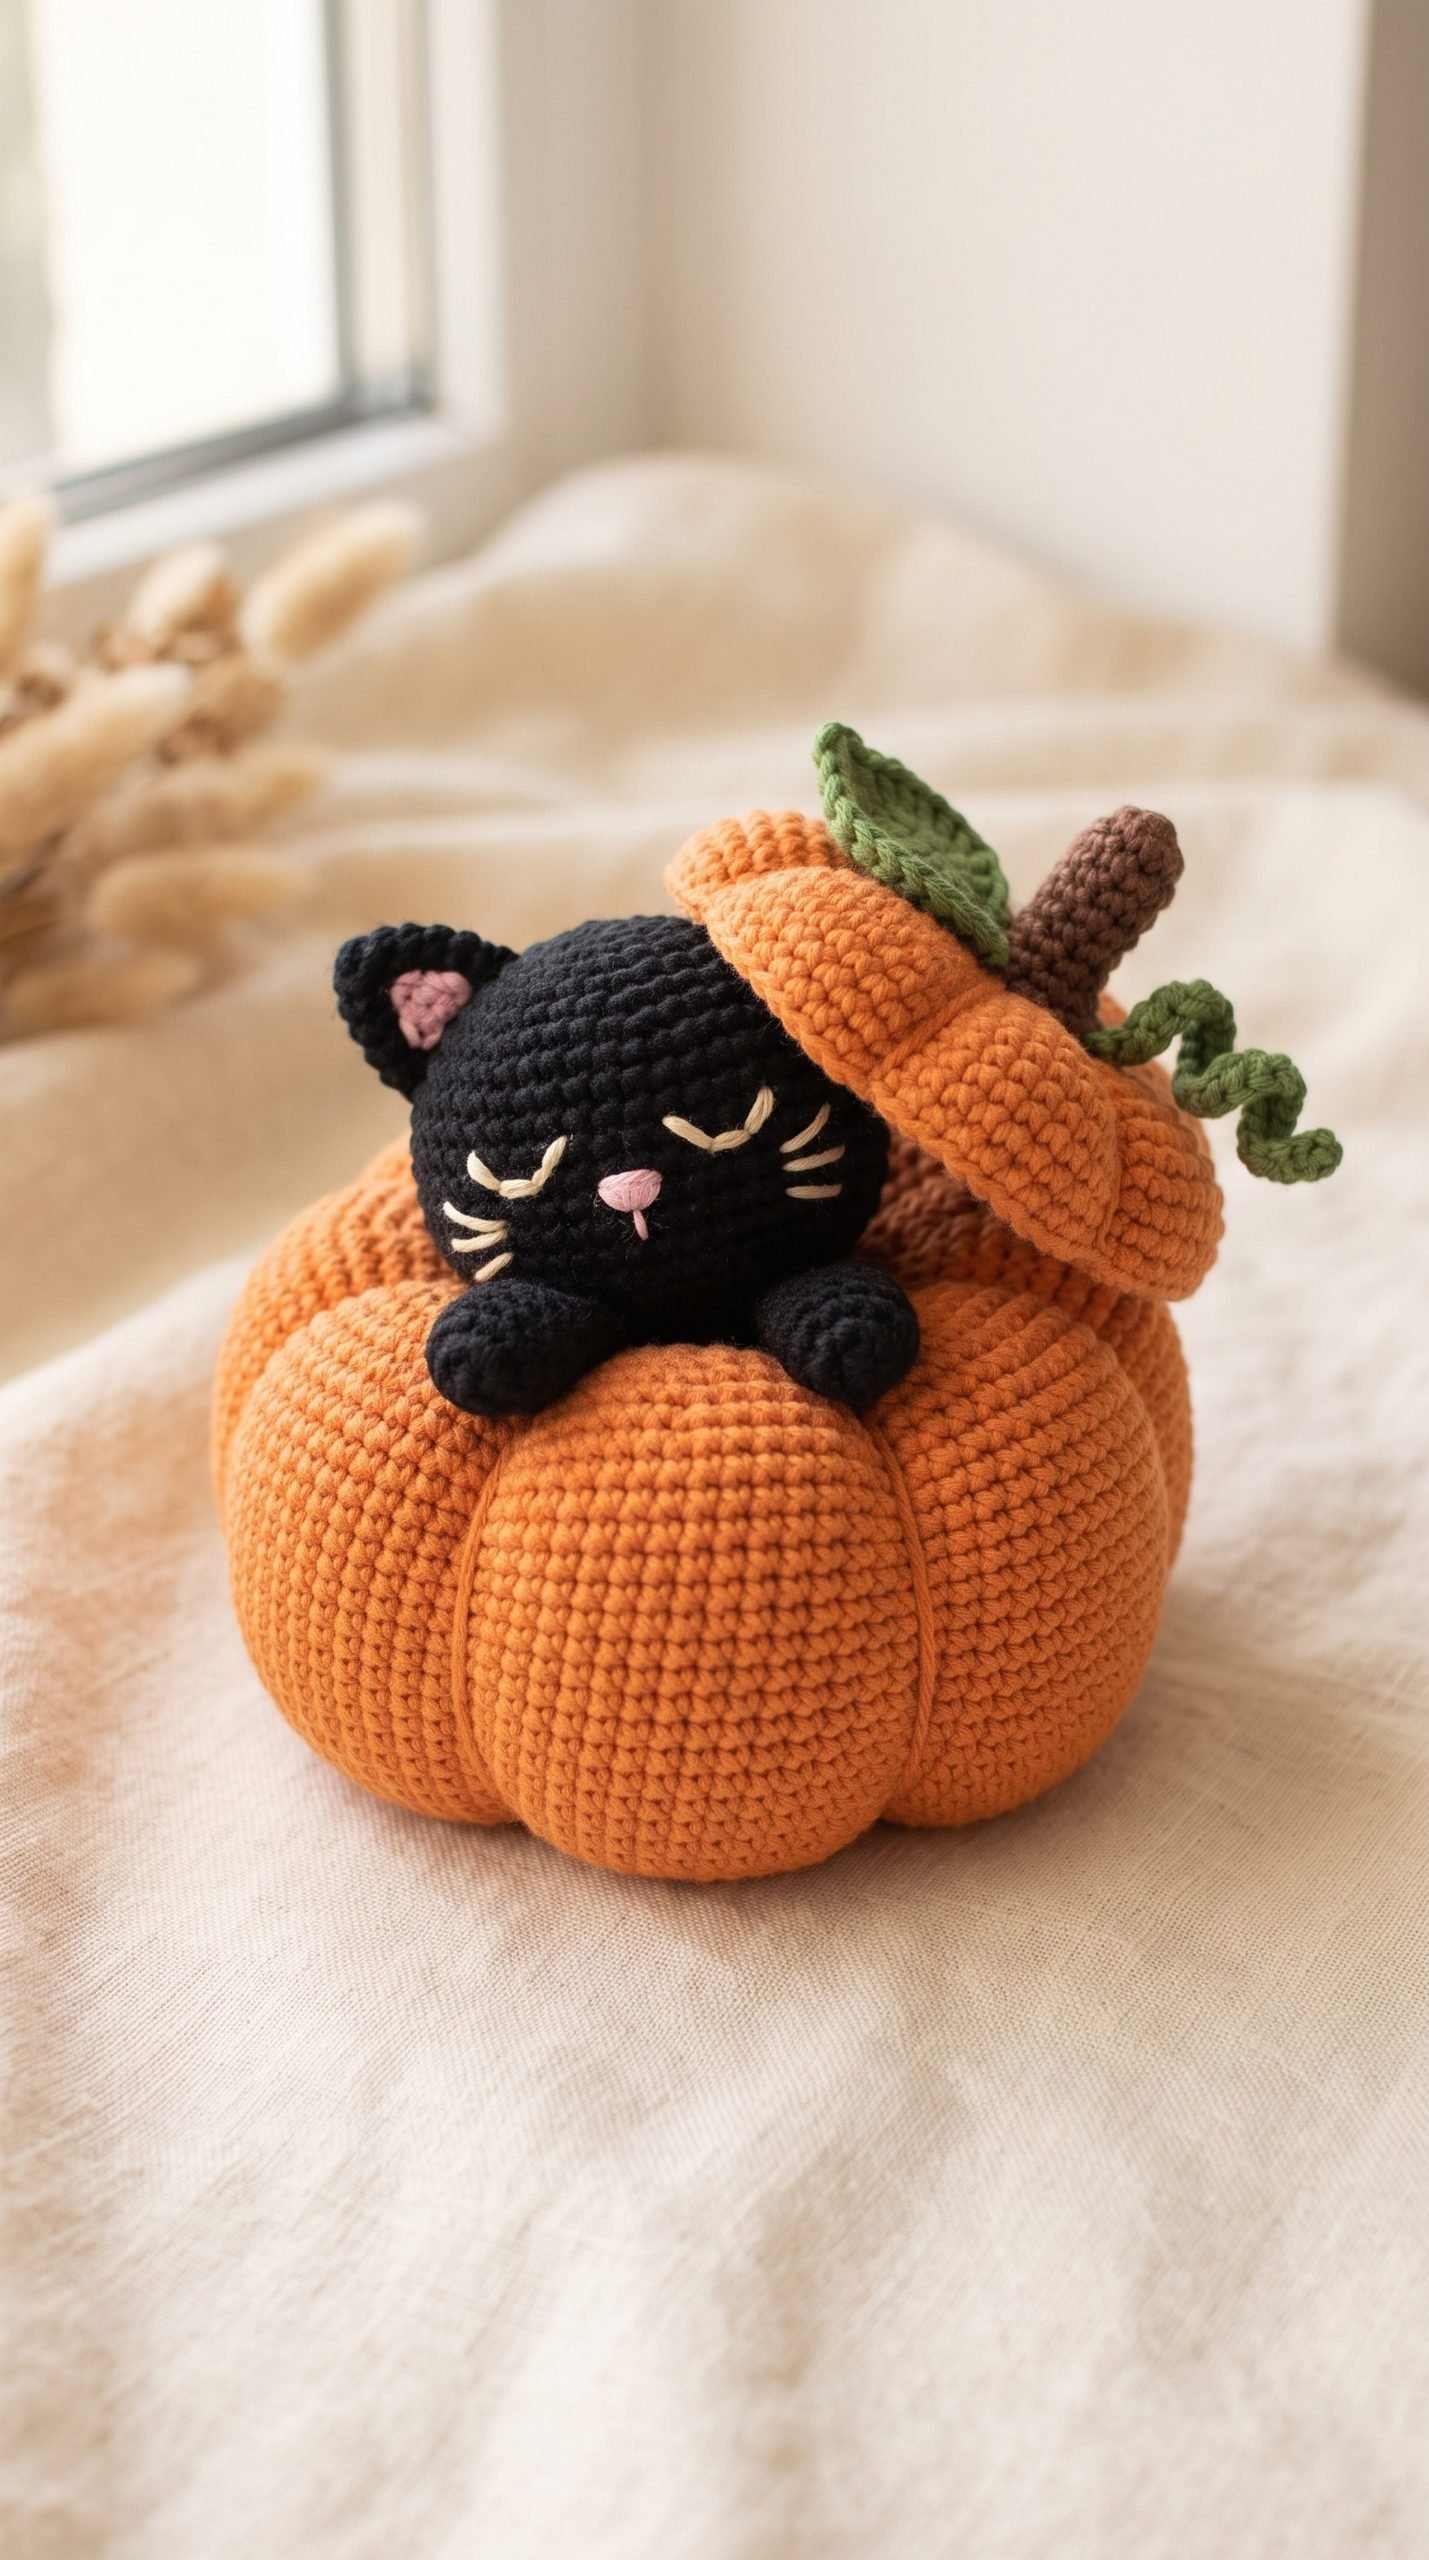
Pumpkin Cat Crochet Pattern: A Sleepy Halloween Friend
This pumpkin cat crochet pattern combines a sleepy black cat with a plump orange pumpkin and a little leafy hat. Embroidered eyes, tiny paws, and a curled green vine give the finished decoration a gentle Halloween personality.
Make it for a fall shelf, a cozy reading corner, or a handmade seasonal gift. The individual pieces use straightforward stitches, but the shaping and assembly make this an intermediate project.
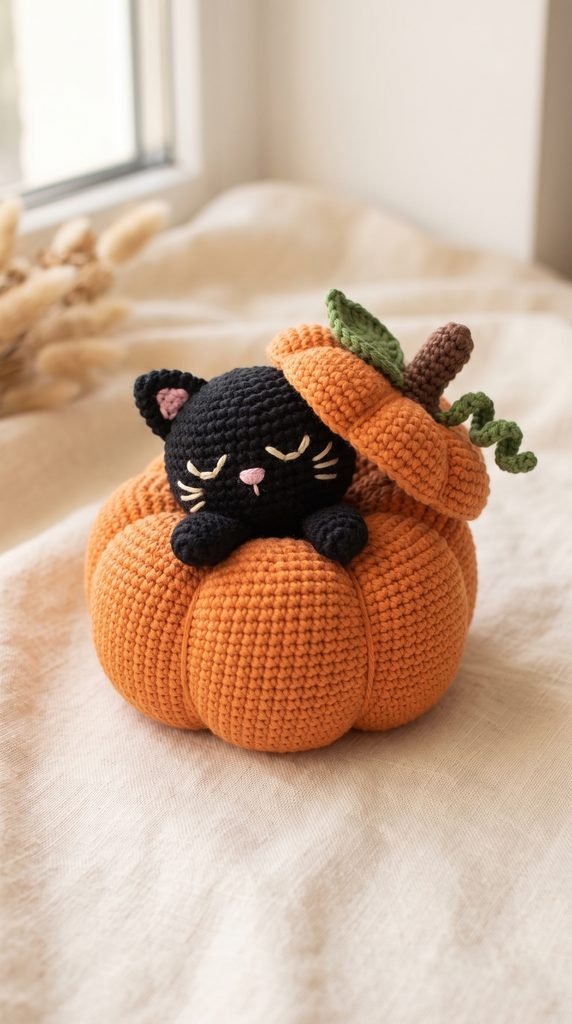
Project Details
- Skill Level: Intermediate
- Estimated Time: Approximately 6–9 hours
- Finished Size: Approximately 6–7 inches tall and 4–5 inches wide
- Crochet Terminology: US terms
- Construction Method: Separate stuffed pumpkin body and cat head, with sewn-on paws, ears, and pumpkin hat
- Design: A decorative cat peeking out of a pumpkin; the pumpkin is not an opening container
All measurements and yarn quantities are estimates. This written pattern has not been physically tested.
Materials
You will need:
- Medium-weight yarn in orange, black, brown, and green
- Small amounts of cream and pink yarn for embroidery
- 3.5 mm (E-4) crochet hook
- Polyester fiberfill
- Removable stitch marker
- Blunt yarn needle long enough to pass through the stuffed pumpkin
- Scissors
- Ruler or measuring tape
The face is embroidered. No plastic eyes, wire, or glue are required.
Hook Size
Use a 3.5 mm (E-4) crochet hook.
Your stitches should form a close fabric that keeps the stuffing inside. If you can easily see through the fabric, try a smaller hook.
Use the same hook and yarn weight for the pumpkin, head, and hat to help their proportions stay consistent.
Yarn
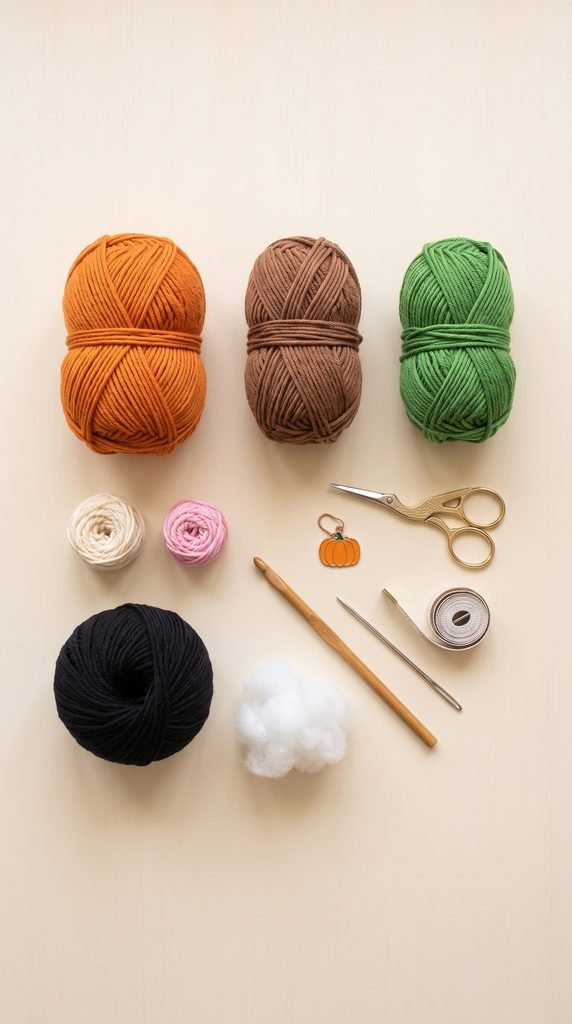
Choose category 4, medium/worsted yarn in smooth acrylic or a cotton blend.
Allow approximately:
- Orange: 140–180 yards
- Black: 75–100 yards
- Green: 10–15 yards
- Brown: 5–8 yards
- Cream: 2–3 yards
- Pink: 2–3 yards
These amounts include sewing and shaping yarn.
Smooth yarn makes the stitches easier to count. Work with black yarn under a bright light, and avoid fuzzy yarn for your first version.
Abbreviations
This pattern uses US crochet terminology:
- ch = chain
- sc = single crochet
- hdc = half double crochet
- dc = double crochet
- sl st = slip stitch
- inc = increase; work 2 sc in the same stitch
- dec = single crochet decrease over 2 stitches
- st(s) = stitch(es)
Before You Start
Work in continuous rounds unless a section specifically says to work in rows. Do not join or turn between continuous rounds.
Place a stitch marker in the first stitch of each round and move it upward as you work.
Instructions inside brackets are repeated the stated number of times. The number at the end of a round is its completed stitch count.
Invisible decrease: Insert your hook under the front loop of the next stitch, then under the front loop of the following stitch. Yarn over and pull through both front loops. Yarn over and pull through the two remaining loops on the hook.
Gauge: Exact gauge is not essential for this decoration. The fabric should be dense and flexible. Yarn thickness and tension will affect the finished dimensions and hat fit.
For each chain-2 start, leave a 6-inch tail. If a small center opening remains, use that tail to draw the surrounding stitches together and secure it before stuffing.
Pumpkin Cat Crochet Pattern Instructions
Part 1 — Crochet the Pumpkin Body
Using orange yarn, ch 2.
Round 1: Work 6 sc into the second ch from the hook. 6 sts.
Round 2: Inc in each stitch around. 12 sts.
Round 3: Repeat [sc in the next stitch, inc] 6 times. 18 sts.
Round 4: Repeat [sc in the next 2 stitches, inc] 6 times. 24 sts.
Round 5: Repeat [sc in the next 3 stitches, inc] 6 times. 30 sts.
Round 6: Repeat [sc in the next 4 stitches, inc] 6 times. 36 sts.
Round 7: Repeat [sc in the next 5 stitches, inc] 6 times. 42 sts.
Round 8: Repeat [sc in the next 6 stitches, inc] 6 times. 48 sts.
Round 9: Repeat [sc in the next 7 stitches, inc] 6 times. 54 sts.
Round 10: Repeat [sc in the next 8 stitches, inc] 6 times. 60 sts.
Rounds 11–18: Sc in every stitch around. 60 sts per round.
Round 19: Repeat [sc in the next 8 stitches, dec] 6 times. 54 sts.
Round 20: Repeat [sc in the next 7 stitches, dec] 6 times. 48 sts.
Round 21: Repeat [sc in the next 6 stitches, dec] 6 times. 42 sts.
Round 22: Repeat [sc in the next 5 stitches, dec] 6 times. 36 sts.
Begin stuffing. Add small pieces and distribute them evenly.
Round 23: Repeat [sc in the next 4 stitches, dec] 6 times. 30 sts.
Round 24: Repeat [sc in the next 3 stitches, dec] 6 times. 24 sts.
Add more stuffing, keeping the body firm enough to hold its shape but still easy to compress.
Round 25: Repeat [sc in the next 2 stitches, dec] 6 times. 18 sts.
Round 26: Repeat [sc in the next stitch, dec] 6 times. 12 sts.
Round 27: Dec 6 times. 6 sts.
Fasten off, leaving an 8-inch tail. Thread it through the front loops of the remaining six stitches, pull closed, secure, and bury the tail.
The starting end is the bottom. The final closure is the top.
Part 2 — Shape the Pumpkin Segments
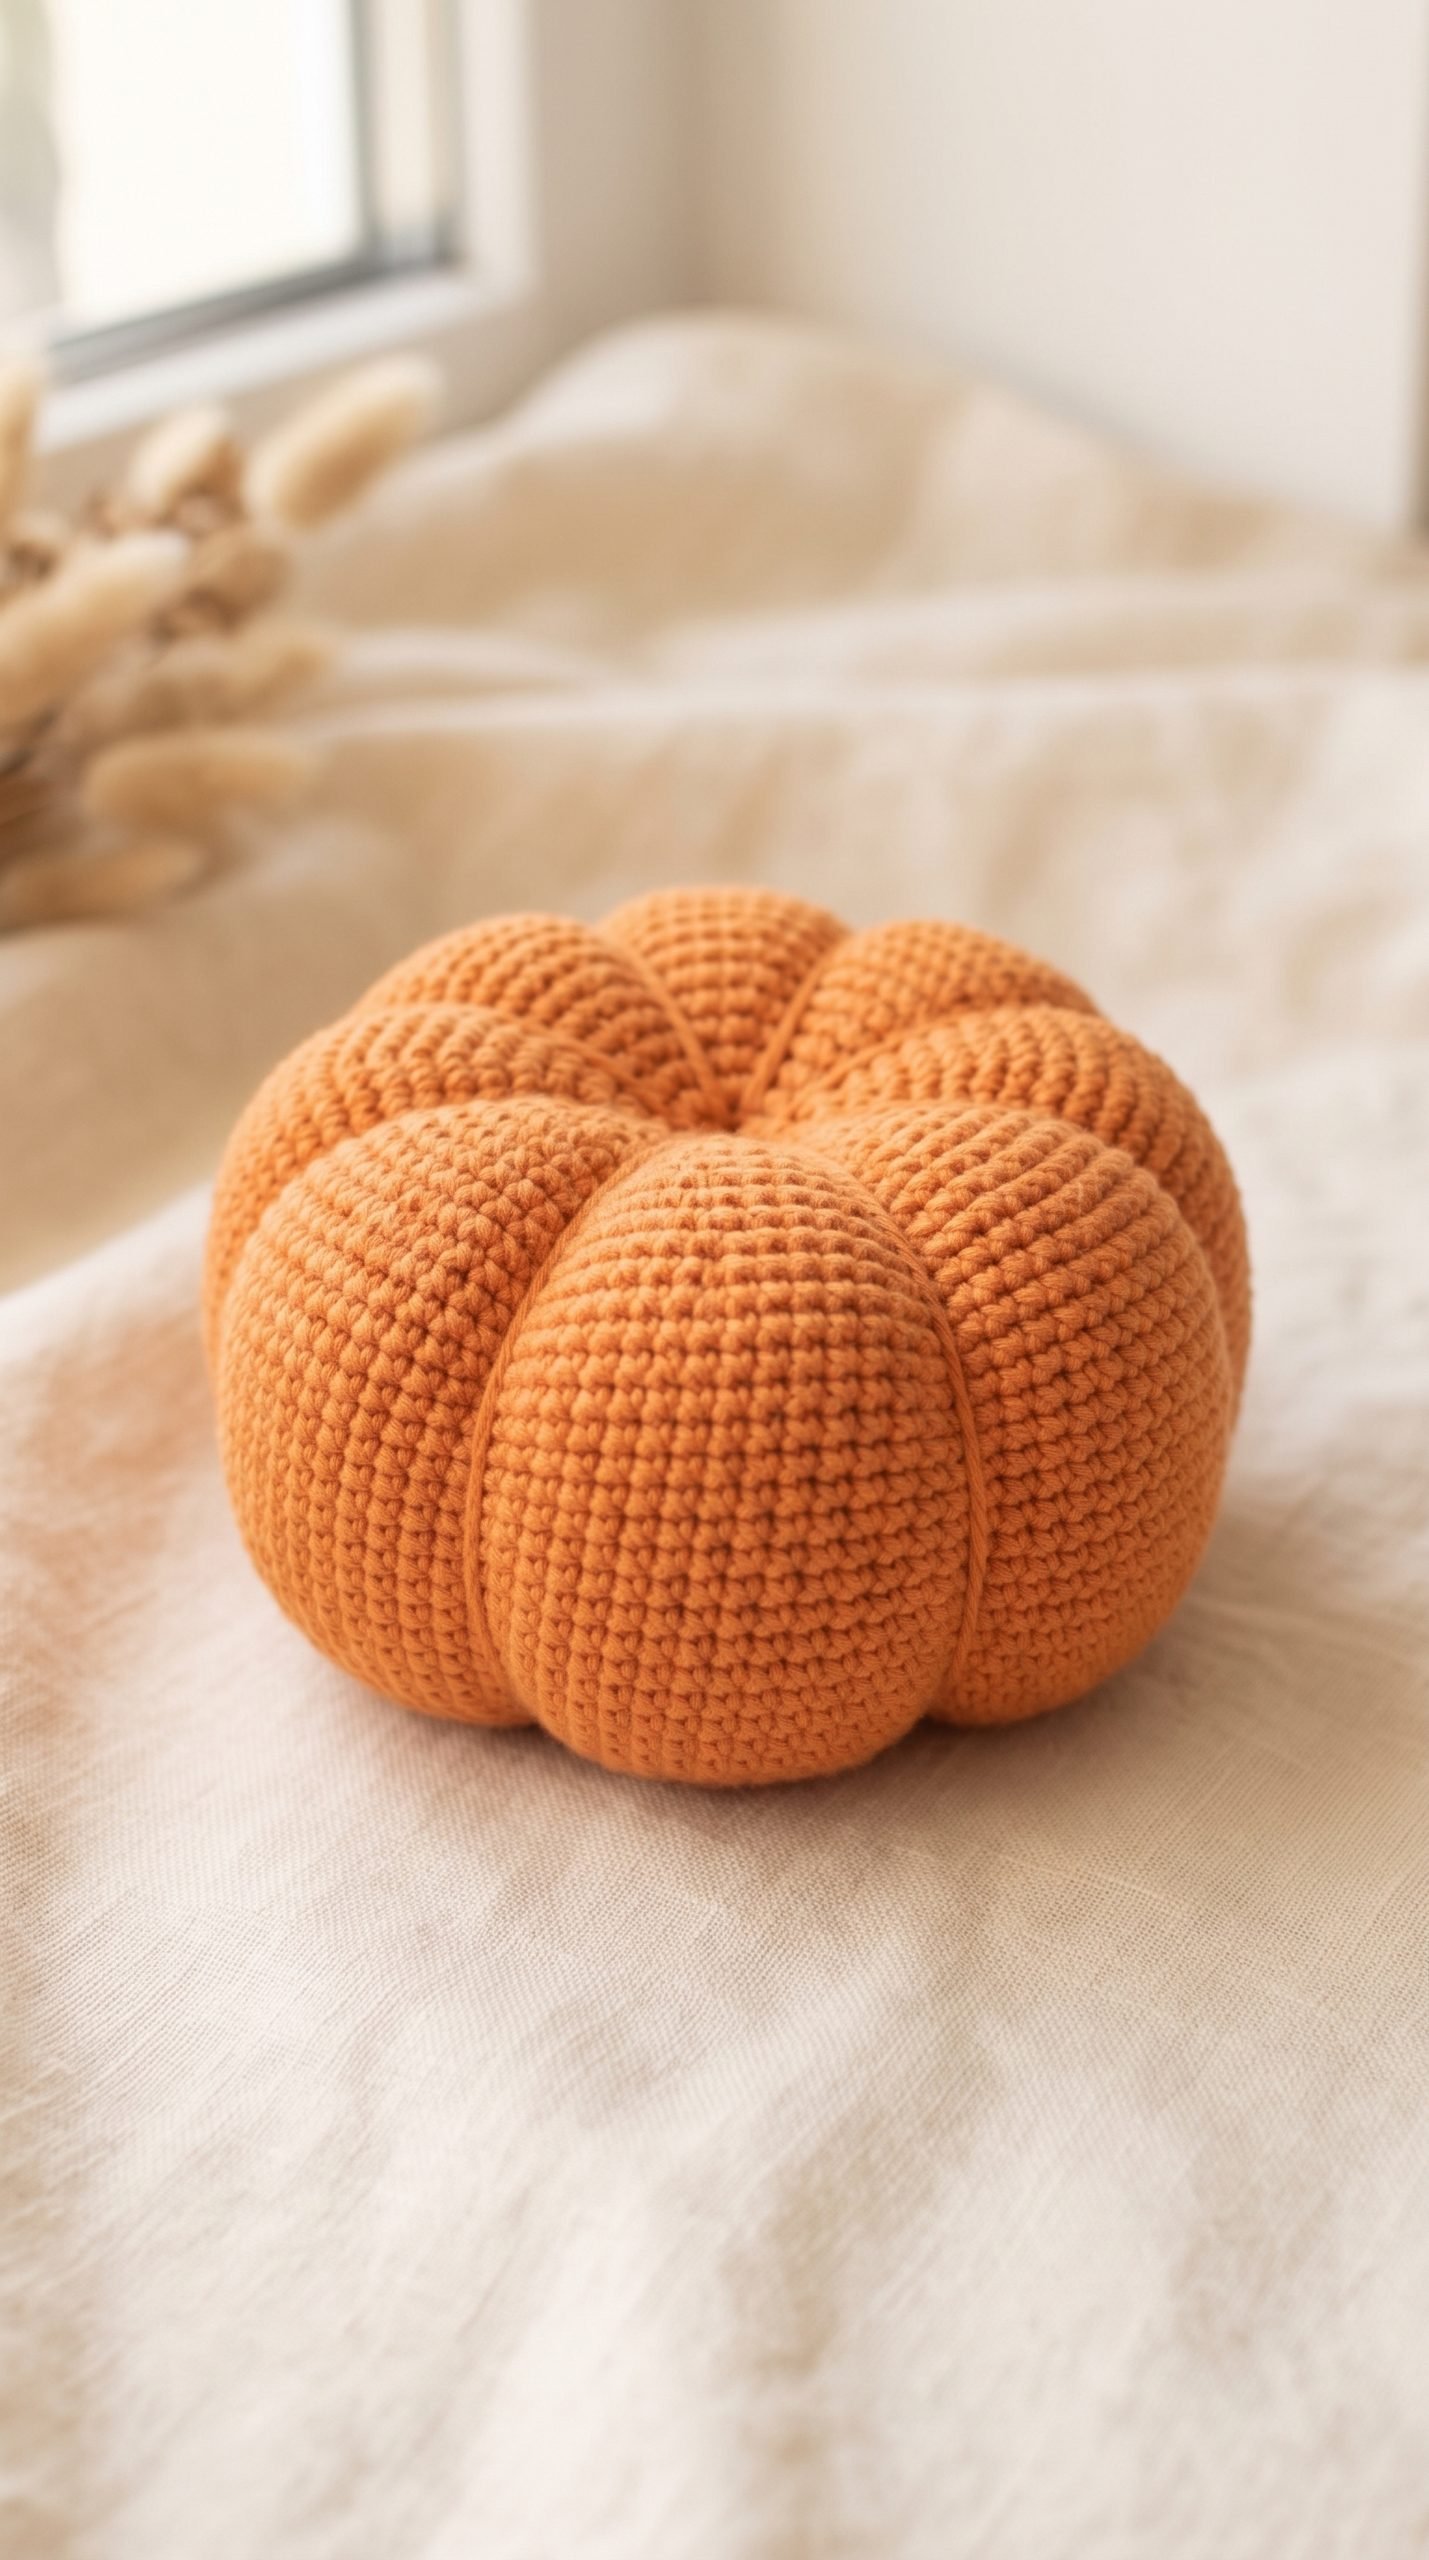
Cut approximately 90 inches of orange yarn.
- Anchor the yarn at the bottom center, leaving a 6-inch tail.
- Pass the needle through the body and out at the top center.
- Bring the yarn down the outside to the bottom center.
- Pass through the body from bottom to top again.
- Pull gently until the outside strand makes a shallow groove.
Repeat the outside wrap and bottom-to-top pass five more times, spacing the strands evenly.
You should have six shaping strands around the pumpkin.
After the final pass, send the needle from top to bottom through the center. Tie the working yarn to the starting tail, then bury both ends.
Press the top and bottom inward slightly. The pumpkin should become wider and flatter without the yarn cutting deeply into the fabric.
Part 3 — Crochet the Cat Head
Using black yarn, ch 2.
Round 1: Work 6 sc into the second ch from the hook. 6 sts.
Round 2: Inc in each stitch around. 12 sts.
Round 3: Repeat [sc in the next stitch, inc] 6 times. 18 sts.
Round 4: Repeat [sc in the next 2 stitches, inc] 6 times. 24 sts.
Round 5: Repeat [sc in the next 3 stitches, inc] 6 times. 30 sts.
Round 6: Repeat [sc in the next 4 stitches, inc] 6 times. 36 sts.
Round 7: Repeat [sc in the next 5 stitches, inc] 6 times. 42 sts.
Rounds 8–13: Sc in every stitch around. 42 sts per round.
Round 14: Repeat [sc in the next 5 stitches, dec] 6 times. 36 sts.
Round 15: Repeat [sc in the next 4 stitches, dec] 6 times. 30 sts.
Round 16: Repeat [sc in the next 3 stitches, dec] 6 times. 24 sts.
Round 17: Repeat [sc in the next 2 stitches, dec] 6 times. 18 sts.
Fasten off, leaving a 24-inch sewing tail.
Keep the lower opening unclosed. Embroider the face before filling the head.
Part 4 — Embroider the Sleeping Face
Choose the front of the head. Keep the starting rounds at the top and the open edge at the bottom.
Eyes: With cream yarn, embroider two shallow curved lines around Rounds 9–10. Make each eye approximately four stitches wide, leaving about four stitches between them.
Use three short backstitches per eye to form a gentle curve. Avoid one long loose strand.
Nose: With pink yarn, make a small triangle centered between and slightly below the eyes, around Round 11. Outline the triangle with three short stitches, then fill it with one or two stitches.
Mouth: Add one short vertical pink stitch beneath the nose.
Whiskers: Make two short cream stitches on each side of the nose. Keep them within the face rather than carrying long strands across the entire head.
Secure the embroidery ends inside without pulling the fabric tight.
Part 5 — Make the Ears
Make two flat ears using black yarn.
Foundation: Ch 3.
Row 1: Sc in the second ch from the hook and the next ch. Turn. 2 sts.
Row 2: Ch 1. Inc in each stitch. Turn. 4 sts.
Row 3: Ch 1. Inc in the first stitch, sc in the next 2 stitches, inc in the last stitch. Turn. 6 sts.
Row 4: Ch 1. Inc in the first stitch, sc in the next 4 stitches, inc in the last stitch. Turn. 8 sts.
Row 5: Ch 1. Inc in the first stitch, sc in the next 6 stitches, inc in the last stitch. 10 sts.
Fasten off, leaving a 12-inch sewing tail.
The narrow starting edge is the ear tip. The final ten-stitch edge is the base.
Use a few short pink stitches to embroider a small inner triangle on the front of each ear, leaving a black border visible.
Do not stuff the ears.
Part 6 — Make the Front Paws
Make two using black yarn.
Foundation: Ch 2.
Round 1: Work 6 sc into the second ch from the hook. 6 sts.
Round 2: Inc in each stitch around. 12 sts.
Rounds 3–5: Sc in each stitch around. 12 sts per round.
Add a small pinch of stuffing to the rounded end.
Round 6: Dec 6 times. 6 sts.
Fasten off, leaving a 14-inch tail.
Flatten the opening so three stitches sit against three stitches. Sew through the three matched pairs to close it.
Keep the remaining tail for attachment.
Part 7 — Crochet the Pumpkin Hat
Using orange yarn, ch 2.
Round 1: Work 6 sc into the second ch from the hook. 6 sts.
Round 2: Inc in each stitch around. 12 sts.
Round 3: Repeat [sc in the next stitch, inc] 6 times. 18 sts.
Round 4: Repeat [sc in the next 2 stitches, inc] 6 times. 24 sts.
Round 5: Repeat [sc in the next 3 stitches, inc] 6 times. 30 sts.
Round 6: Repeat [sc in the next 4 stitches, inc] 6 times. 36 sts.
Round 7: Repeat [sc in the next 5 stitches, inc] 6 times. 42 sts.
Round 8: Repeat [sc in the next 6 stitches, inc] 6 times. 48 sts.
Rounds 9–10: Sc in each stitch around. 48 sts per round.
Sl st into the next stitch. Fasten off, leaving a 24-inch sewing tail.
The hat is an open cap. Do not stuff it.
Part 8 — Make the Stem
Using brown yarn, ch 2.
Round 1: Work 6 sc into the second ch from the hook. 6 sts.
Rounds 2–5: Sc in each stitch around. 6 sts per round.
Sl st into the next stitch and fasten off, leaving a 12-inch tail.
Keep the stem unstuffed. The starting end forms the tip, and the open final round is sewn to the hat.
Part 9 — Make the Leaf
Using green yarn, ch 7.
Work along the chain:
- Sc in the second ch from the hook.
- Hdc in the next ch.
- Dc in each of the next 2 chains.
- Hdc in the next ch.
- Sc in the final ch.
You have worked six stitches along the first side.
Ch 1. Rotate the piece to work along the unused loops on the opposite side of the foundation chain.
Beginning in the opposite side of the same end chain, work:
- Sc in the first chain.
- Hdc in the next chain.
- Dc in each of the next 2 chains.
- Hdc in the next chain.
- Sc in the final chain.
Sl st into the first sc of the leaf.
Fasten off, leaving a 12-inch tail. The leaf has 12 worked stitches plus the turning chain.
Part 10 — Make the Curled Vine

Using green yarn, ch 12.
Work 2 sc into the second ch from the hook and into each remaining chain. 22 sts.
Fasten off, leaving a 12-inch tail.
The extra stitches encourage the strip to curl. Wrap it gently around a finger, then release it.
Part 11 — Assemble the Cat and Pumpkin
Attach the head: Stuff the head until rounded but still slightly compressible. Center its open edge on top of the pumpkin with the face pointing forward.
Use the black sewing tail to stitch all 18 opening stitches to a small circle of pumpkin fabric. Catch sturdy crochet loops without pulling the head down unevenly.
Before the final few stitches, adjust the stuffing if needed. Finish sewing, secure the yarn, and bury the tail.
Position the hat and ears: Place the hat on the head with its front edge above the eyes. Hold the ears against the upper left and right sides, with their tips showing outside the hat.
Remove the hat while keeping the ear positions. Sew each ear’s wide base to the head. Add a small securing stitch near each lower corner if the ear flops forward.
Attach the paws: Place one paw on each side of the head-to-pumpkin seam. The rounded ends should rest on the front of the pumpkin.
Sew each closed end securely near the seam, then add a small stitch underneath the rounded portion to keep it resting in place.
Part 12 — Finish the Pumpkin Hat
Sew the stem’s open end around the hat’s center.
Attach one end of the leaf beside the stem. Leave most of the leaf free so it drapes naturally.
Sew one end of the vine beside the stem, securing it with several small stitches.
Place the decorated hat back on the head. Check that both ears remain visible and that the eyes are uncovered.
Sew around the hat’s edge, catching the black head fabric. Keep the orange stitches as close to the cap edge as possible.
Secure and bury all remaining tails.
Finishing
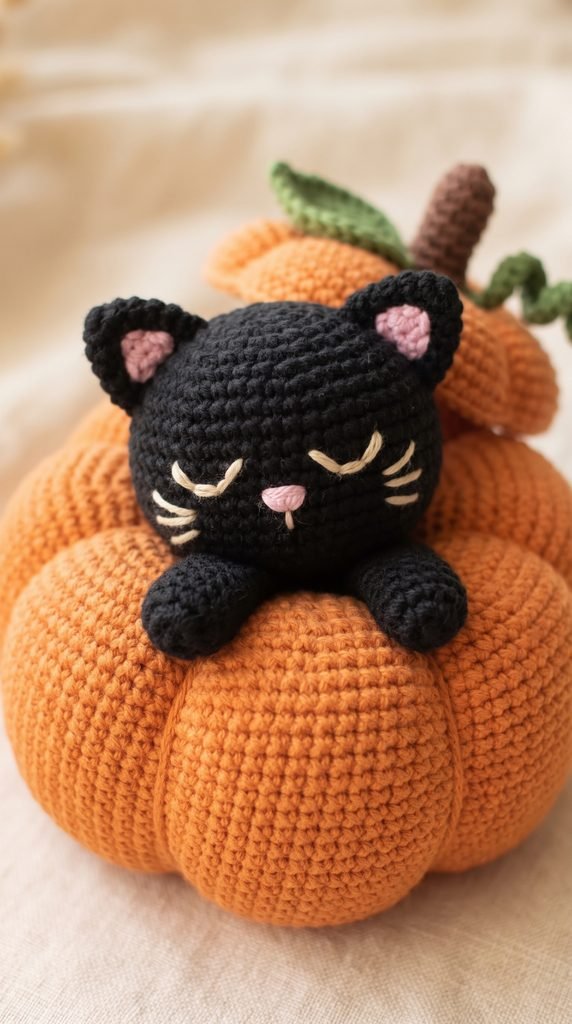
Gently redistribute the stuffing with your fingers.
Flatten the pumpkin’s base slightly so the decoration sits upright. If it tips, adjust the stuffing and the head position before adding more stitches.
Arrange the paws, ears, leaf, and vine. Check that every attached piece is secure.
Blocking is unnecessary for the stuffed sections. Follow the yarn’s care instructions and reshape gently by hand.
Finished Size
The finished pumpkin cat is estimated to measure:
- Height: Approximately 6–7 inches (15–18 cm), including the stem
- Pumpkin width: Approximately 4–5 inches (10–13 cm)
Your yarn, tension, stuffing, and assembly will affect the final size.
Tips and Customization
- Use rust orange for a softer autumn look.
- Try a gray or cream cat while keeping the same stitch counts.
- Use sage green for the leaf and vine.
- Leave off the whiskers for a simpler embroidered face.
- Keep the pumpkin softly filled so its shaping strands can create visible grooves.
- Check the hat on the stuffed head before sewing. Small fit differences can be adjusted by placing the cap slightly higher or lower.
- For a smaller version, use finer yarn and a matching smaller hook consistently for every piece.
Display the finished cat on a shelf or tabletop. It is intended as a decoration, not as a baby toy.
Looking for Your Next Crochet Project?
Love this sleepy little cat? Explore Cute Stitch Studio’s premium crochet patterns for more cute seasonal decorations, cozy projects, and thoughtful handmade gifts.
Shop Crochet Patterns
Related Articles
For a smaller project between amigurumi makes, try our easy crochet heart pattern for beginners.


