Crochet Hanging Wall Basket Pattern: A Three-Tier Organizer
This crochet hanging wall basket pattern creates three coordinated baskets suspended beneath a wooden dowel. Cream cotton, olive-green accents, and a stitched diamond design give the organizer a warm, natural look.
The taller top basket holds lightweight decorative items, while the two shorter baskets are useful for washcloths, yarn scraps, and other small essentials. A separate cord framework supports the baskets from underneath.
You will crochet three round baskets, embroider the top one, and assemble the hanging structure. The basket stitches are beginner-friendly; measuring and balancing the suspension make the complete project best for confident beginners.
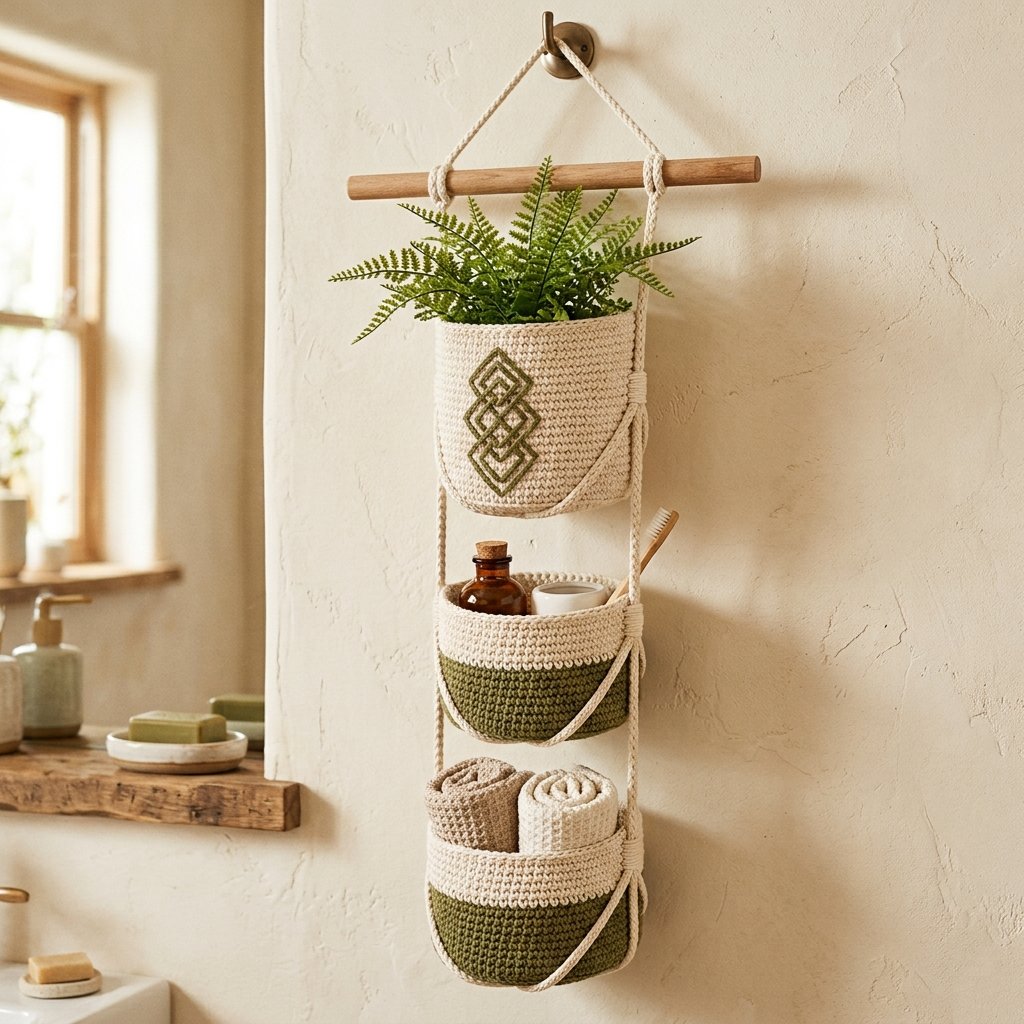
Table of Contents
Crochet Hanging Wall Basket Pattern: A Three-tier Organizer Instructions
Project Details
- Skill level: Confident beginner; careful assembly required.
- Estimated time: Approximately 10–16 hours, plus shaping and drying time.
- Basket diameter: Target approximately 7–8 inches.
- Top basket wall height: Approximately 6 inches.
- Lower basket wall height: Approximately 4 inches each.
- Overall hanging height: Approximately 39–42 inches, depending on knots and spacing.
- Terminology: US crochet terms.
- Construction: Three circular baskets, embroidered decoration, two vertical support cords, and cord cradles beneath each basket.
This original Cute Stitch Studio pattern has not been physically tested. Stitch counts have been reviewed, but dimensions, cord quantities, balance, and carrying capacity require a physical sample.
Materials
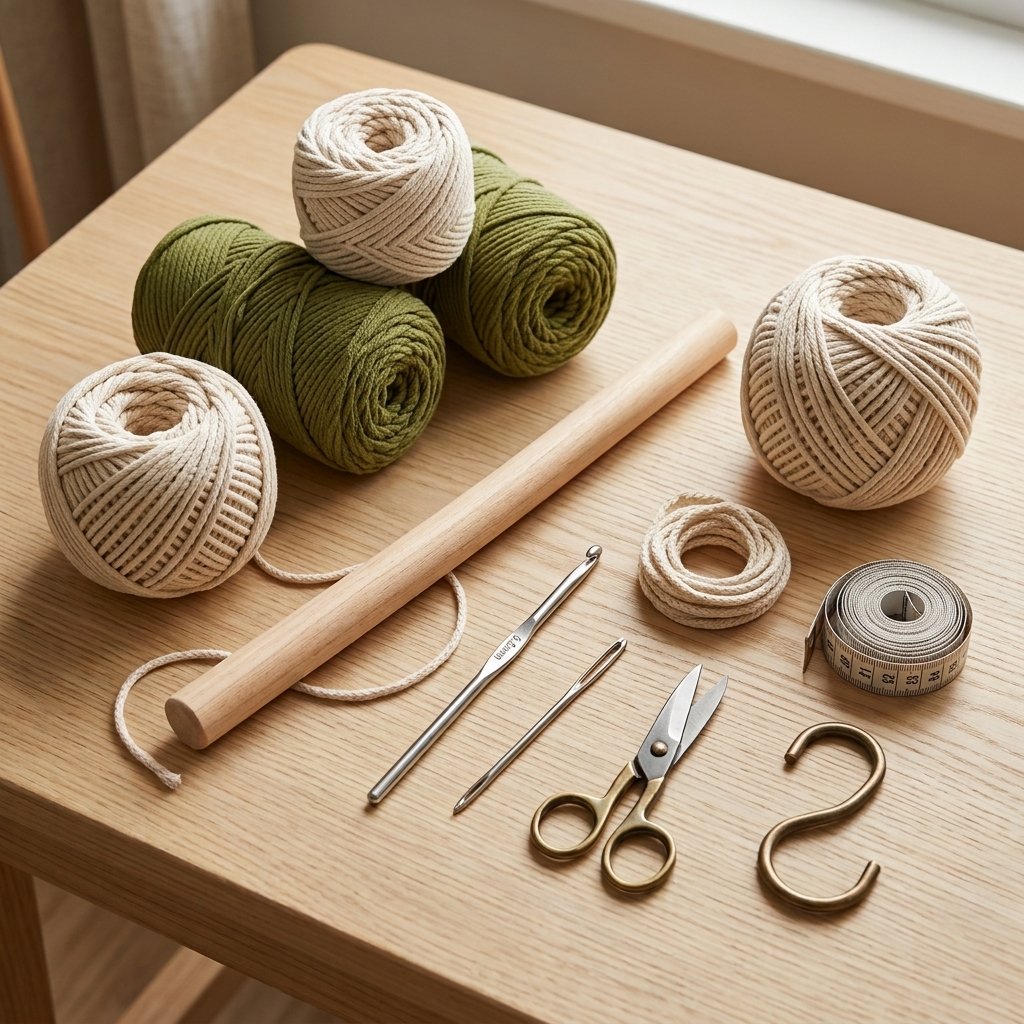
- Approximately 300–380 yards of cream 3 mm cotton crochet cord.
- Approximately 140–180 yards of olive-green cord in the same thickness.
- 5 mm crochet hook, or size needed for a firm fabric.
- Smooth wooden dowel, approximately 14 inches long and 0.75 inch in diameter.
- Approximately 12 yards of separate 4 mm braided cotton cord for the hanging framework.
- Large-eye tapestry needle that accepts the crochet cord.
- Scissors.
- Measuring tape.
- Removable stitch markers.
- Wall hook and fixing suitable for the wall and the finished loaded organizer.
The framework cord is separate from the crochet cord. Choose a firm braided cord that holds knots well.
The basic version does not require beads, labels, liners, or stiffener.
Hook Size
Start with a 5 mm crochet hook.
The stitches should be firm enough for the walls to hold their outline, but comfortable enough to work without forcing the hook through the fabric.
If your basket walls feel loose, try a smaller hook. If the fabric is excessively stiff or difficult to work, try a slightly larger hook and recheck the dimensions.
Yarn and Cord
Use approximately 3 mm cotton crochet cord for the baskets. Cord thickness and construction vary between manufacturers, so diameter alone does not guarantee a matching result.
Choose cream and olive cords from the same range when possible. Matching thickness helps the striped baskets keep a consistent shape.
The top basket is cream with olive embroidery. The two lower baskets have olive bases and lower walls, followed by cream upper walls.
Gauge
Target wall gauge: Approximately 10 sc and 12 rounds = 4 inches.
A completed 60-stitch base should measure approximately 7–8 inches across. Check the actual base before continuing into the walls.
Exact gauge is less critical than consistent basket sizes and a firm fabric. However, different cord or tension will change the yarn quantity, suspension spacing, and finished proportions.
Finished Measurements
| Piece | Target Size |
|---|---|
| All three bases | Approximately 7–8 inches across |
| Top basket walls | Approximately 6 inches tall |
| Middle basket walls | Approximately 4 inches tall |
| Bottom basket walls | Approximately 4 inches tall |
| Dowel | 14 inches long |
| Distance from dowel to lowest basket base | Approximately 32 inches |
Wall heights exclude the thickness of the base and final slip-stitch edging.
Abbreviations
- ch: chain
- sc: single crochet
- sl st: slip stitch
- st(s): stitch(es)
- inc: work 2 sc in the same stitch
- BLO: back loop only
Before You Start
- Work the bases and walls in continuous rounds.
- Place a marker in the first stitch of each round and move it upward as you work.
- Do not join or turn unless instructed.
- The wall rounds are numbered separately from the base rounds.
- The first wall round is worked in back loops only to define the bottom edge.
- Work the remaining wall rounds through both loops.
- The baskets are supported by cord cradles beneath their bases, not by decorative stitches at the rims.
Crochet Hanging Wall Basket Pattern Instructions
Part 1 — Circular Base
Make three bases: one in cream and two in olive.
Foundation: Ch 2.
Round 1: Work 6 sc in the second chain from the hook. Mark the first stitch. (6 sts)
Round 2: Inc in every stitch. (12 sts)
Round 3: Repeat [sc, inc] 6 times. (18 sts)
Round 4: Repeat [sc in the next 2 stitches, inc] 6 times. (24 sts)
Round 5: Repeat [sc in the next 3 stitches, inc] 6 times. (30 sts)
Round 6: Repeat [sc in the next 4 stitches, inc] 6 times. (36 sts)
Round 7: Repeat [sc in the next 5 stitches, inc] 6 times. (42 sts)
Round 8: Repeat [sc in the next 6 stitches, inc] 6 times. (48 sts)
Round 9: Repeat [sc in the next 7 stitches, inc] 6 times. (54 sts)
Round 10: Repeat [sc in the next 8 stitches, inc] 6 times. (60 sts)
Do not fasten off. Check that the base lies reasonably flat and measures approximately 7–8 inches across.
A gently six-sided outline is normal with aligned increases. If the base cups strongly or ruffles, recheck the counts and tension before continuing.
Part 2 — Tall Cream Basket
Continue from the cream base.
Wall Round 1: Sc in BLO of every stitch around. (60 sts)
Wall Rounds 2–18: Sc through both loops of every stitch. (60 sts each round)
Rim Round: Sl st loosely in every stitch around. Keep these slip stitches relaxed so they do not pull the opening inward.
Fasten off and weave in the ends.
The walls should measure approximately 6 inches from the base crease to the rim.
Part 3 — Two Short Striped Baskets
Continue from an olive base.
Wall Round 1: Sc in BLO of every stitch around. (60 sts)
Wall Rounds 2–5: Sc through both loops of every stitch with olive. (60 sts each round)
On the final stitch of Wall Round 5, complete the last yarn-over with cream.
Wall Rounds 6–12: Sc in every stitch with cream. (60 sts each round)
Rim Round: Sl st loosely in every stitch around.
Fasten off and weave in all ends.
Repeat for the second short basket. Both should have approximately 4-inch walls, with an olive lower section and a cream upper section.
Position the small step at the spiral color change toward the back when assembling the organizer.
Part 4 — Diamond Decoration
The top basket’s diamond design is embroidered after crocheting. This creates the geometric look without carrying a second color through the basket fabric.
Choose the front of the tall basket, with the beginning-of-round area at the back.
Mark a front section 20 stitch spaces wide. Its left boundary is column 0, its midpoint is column 10, and its right boundary is column 20.
Count the wall rounds upward from the base crease, where Wall Round 1 is the lowest round.
Use removable markers to position three nested diamonds:
| Diamond | Left Point | Top Point | Right Point | Bottom Point |
|---|---|---|---|---|
| Outer | Column 0, Round 9 | Column 10, Round 16 | Column 20, Round 9 | Column 10, Round 2 |
| Middle | Column 5, Round 9 | Column 10, Round 13 | Column 15, Round 9 | Column 10, Round 5 |
| Inner | Column 8, Round 9 | Column 10, Round 11 | Column 12, Round 9 | Column 10, Round 7 |
These are placement guides on the curved basket surface. Adjust a marker by one stitch if needed to make the design visually balanced.
Thread olive cord onto the tapestry needle. Beginning at one marked point, work a line of small chain embroidery stitches toward the next point.
To make a chain embroidery stitch, bring the needle from inside the basket to the outside. Reinsert it beside the exit point, leaving a small loop. Bring the needle out a short distance farther along the intended line, inside that loop. Pull gently until the loop lies flat.
Repeat along the line. At the final point, make a small stitch over the last loop to anchor it.
Join the four points of each diamond. Keep the stitches short and the tension relaxed so the basket wall does not pucker.
Secure the ends inside the basket and weave them through several stitches. Do not leave long loose strands across the interior.
Part 5 — Shape the Baskets
Follow the crochet cord’s care instructions. If appropriate, lightly dampen the baskets and smooth the bases flat.
Shape the walls by hand and arrange the rims evenly. Let all three baskets dry completely before hanging.
Do not force an uneven basket into shape by pulling hard on one side. Correct any stitch-count problems first.
Part 6 — Prepare the Hanging Framework
Cut the separate braided cord into:
- Two vertical side cords, approximately 84 inches each.
- Six cradle cords, approximately 30 inches each.
- One upper hanging cord, approximately 40 inches long.
These cuts use approximately 11 yards. The material allowance includes extra cord for knot adjustments.
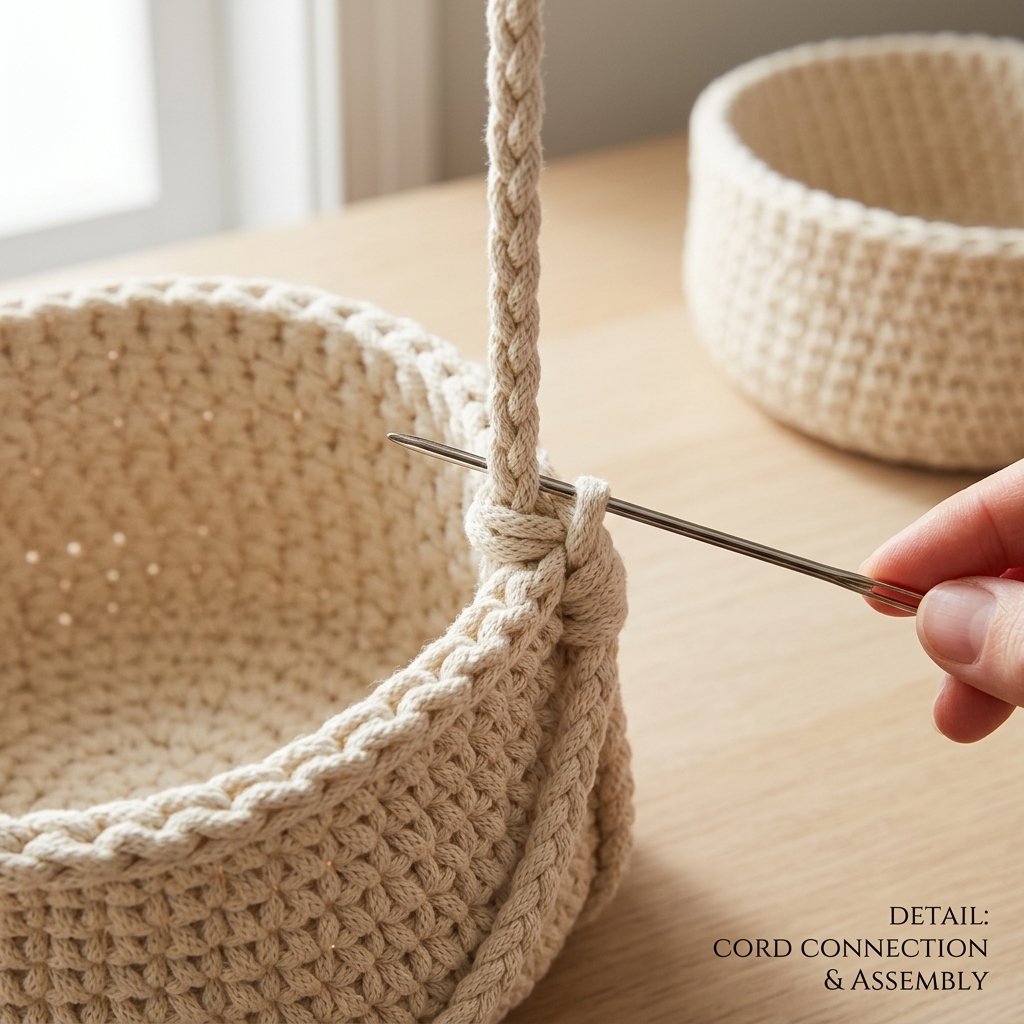
Tie one vertical cord around the dowel approximately 1 inch from each end. Use a round turn around the dowel followed by two half hitches around the cord’s standing section.
To make a half hitch, wrap the short end around the standing cord and pass it through the loop just formed. Tighten, then repeat for the second hitch.
Leave approximately 3 inches of tail beyond each finished knot. Adjust the cords so they hang the same distance below the dowel.
Tie the separate upper hanging cord securely around the dowel near those two attachment points, using the same knot arrangement. Its center forms the loop that hangs from the wall hook.
Keep the upper loop centered and the dowel horizontal.
Part 7 — Mark the Three Basket Levels
Hang the empty framework temporarily from a suitable support.
On both vertical cords, mark the intended basket-base levels approximately 12, 22, and 32 inches below the dowel.
At each marked level, tie a figure-eight stopper knot in the vertical cord. Check that the left and right knots sit at matching heights.
To form a figure-eight knot, make a loop in the cord, bring the free end around the standing section, then pass it back through the loop to create the figure-eight shape. Tighten evenly.
These stopper knots keep the cradle attachments from sliding down the vertical cords. Recheck their positions after tightening, because knots consume cord length.
Part 8 — Support Each Basket with Two Cradles
Use two cradle cords for each basket.
Position the tall basket at the upper level. Run the first cradle cord beneath the forward half of its base, bringing its ends upward to the left and right vertical cords.
Run the second cradle cord beneath the rear half of the base. Its ends also meet the left and right vertical cords.
The two cords should support separate areas of the bottom rather than lie together along one line.
Attach each cradle end to its vertical cord with two half hitches immediately above the corresponding stopper knot. Adjust the cradle lengths until the basket sits level.
Using short lengths of matching crochet cord, sew several retaining stitches around each cradle and through the outer stitches of the basket base. These stitches keep the cradles from shifting sideways; the braided cords beneath the base provide the support.
At each side of the basket, make two loose retaining stitches around the vertical support cord near the rim. These help keep the basket upright without gathering its opening.
Repeat for the middle and bottom baskets, using the remaining four cradle cords.
Keep all three fronts facing the same direction. The diamond basket goes at the top, with the two striped baskets below.

Finishing and Hanging
Check the dowel attachments, stopper knots, cradle knots, and retaining stitches before adding anything to the baskets.
With the organizer hanging low over a soft surface, add a few lightweight items gradually. Adjust any basket that tilts, and stop if knots move or the fabric distorts.
This design has no established load rating. Use it for lightweight storage, and choose the wall hook and fixing for the wall type and the total loaded weight.
For the plant styling, use a lightweight faux plant. Crochet does not contain water, and a heavy watered planter is not suitable for the intended use.
Once the arrangement is balanced, trim excess cord tails while leaving approximately 3 inches beyond the knots. Tuck or sew those tails neatly along nearby cord sections.

Finished Size
Each basket measures approximately 7–8 inches across (18–20 cm).
The tall basket has approximately 6-inch walls (15 cm), and each lower basket has approximately 4-inch walls (10 cm).
The complete organizer is approximately 39–42 inches tall (99–107 cm), including the upper hanging loop, with a 14-inch dowel (36 cm).
Tips and Customization
Make a Single Hanging Basket
Use one basket with two vertical cords and two supporting cradles. Shorten the vertical cords to suit the intended position, allowing extra length for knots.
Change the Basket Height
Add or remove plain wall rounds while keeping 60 stitches around. At the target gauge, three rounds change the wall height by approximately 1 inch.
Recheck the spacing and suspension lengths when changing basket height.
Try Another Color Palette
Cream and terracotta create a warmer look. Oatmeal and charcoal work well for a simple neutral organizer. Keep both cords the same thickness.
Keep the Background Plain
Omit the diamond embroidery for a simpler top basket. The base, wall, and suspension instructions remain unchanged.
Choose Lightweight Contents
Use rolled washcloths, cotton pads in a light container, small yarn balls, or similar items. Keep heavier objects on a shelf rather than using them to test the organizer’s limits.
Frequently Asked Questions
Can a beginner make these hanging baskets?
The crochet uses single crochet, increases, and slip stitches. The suspension requires more care, so work through the assembly slowly and check each level before continuing.
Is the diamond pattern tapestry crochet?
No. This version uses chain embroidery on a plain cream basket. The green design is added after the basket is complete.
Can I substitute regular yarn for cotton cord?
Regular yarn may produce a much softer basket. Make a sample and check its firmness before committing to three baskets. The stated measurements and yardage will change.
Why does a basket lean forward?
Check that the front and rear cradles are separated beneath the base and that their lengths are balanced. Also check the rim retaining stitches and the placement of the contents.
Can I hang a real plant in the top basket?
This design is intended for lightweight dry storage and decoration. A faux plant gives the same visual effect without wet soil, drainage, or the weight of a watered pot.
How do I clean the organizer?
Remove the contents and follow the cord manufacturer’s care instructions. If washing the baskets, detach them from the wooden dowel and reshape them flat to dry completely before reassembly.
Save This Pattern for Later
Save this crochet hanging wall basket pattern to your crochet home decor or handmade storage board on Pinterest. Start with one basket to check the size, then build the coordinated set.
Looking for Your Next Crochet Project?
Love this project? Explore Cute Stitch Studio’s premium crochet patterns for more cute, cozy, gift-worthy, and beginner-friendly handmade ideas.