Easy Sweater Vest Knitting Pattern in 5 Cozy Sizes
This easy sweater vest knitting pattern creates a soft everyday layer with a round neckline, smooth stockinette fabric, and neat ribbed edges. Wear it over a button-down shirt, a lightweight turtleneck, or a simple long-sleeve tee.
A cream alpaca-blend yarn gives the vest a gentle halo and an understated look. The relaxed body leaves room for layering, while the shaped armholes keep the shoulders from feeling too bulky.
This is a knitting project for adventurous beginners who are comfortable knitting and purling. You will make the front and back separately, sew them together, and pick up stitches for the neckband and armhole bands.
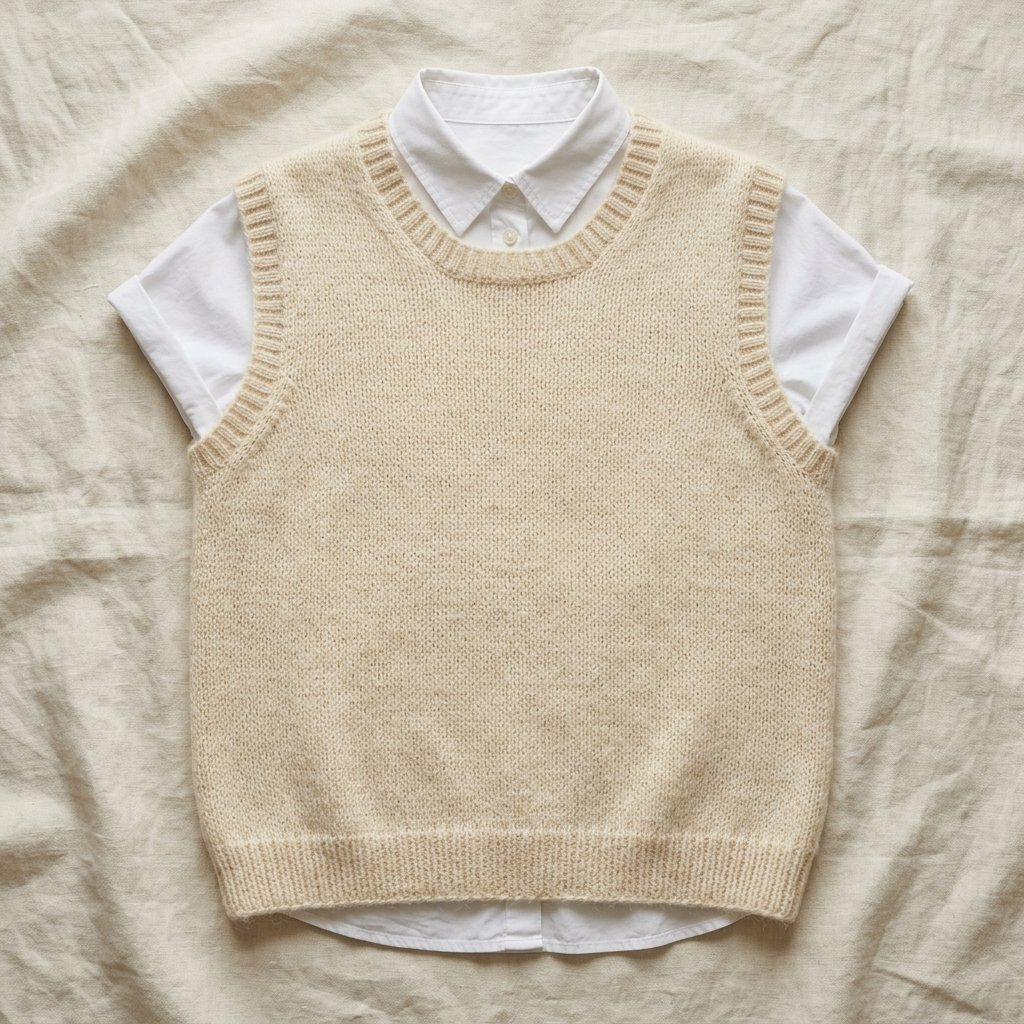
Table of Contents
Easy Sweater Vest Knitting Pattern In 5 Cozy Sizes Instructions
Project Details
- Skill level: Adventurous beginner.
- Estimated time: Approximately 15–25 hours, depending on size and experience.
- Sizes: Five sizes, labeled A through E and selected by measurements.
- Fit: Relaxed, with approximately 4–6 inches of positive ease.
- Terminology: US knitting terms.
- Construction: Two flat panels worked from the bottom up, with shaped armholes and necklines. Bands are worked in the round after assembly.
This original Cute Stitch Studio pattern has not been physically tested. The stitch counts have been reviewed, but finished fit, yarn usage, and proportions need confirmation with a knitted sample.
Choose Your Size
Measure around the fullest part of your bust over a light layer. Choose a finished vest circumference approximately 4–6 inches larger than that measurement.
Follow the finished measurements rather than your usual clothing size. The table allows for side seams worked approximately one stitch in from each edge.
| Size | Suggested bust | Finished chest | Length to shoulder | Armhole depth before band |
|---|---|---|---|---|
| A | 34–36 in (86–91 cm) | 40 in (102 cm) | 21 in (53 cm) | 8 in (20 cm) |
| B | 38–40 in (97–102 cm) | 44.5 in (113 cm) | 21.25 in (54 cm) | 8.25 in (21 cm) |
| C | 42–44 in (107–112 cm) | 48 in (122 cm) | 22.75 in (58 cm) | 8.75 in (22 cm) |
| D | 46–48 in (117–122 cm) | 52.5 in (133 cm) | 23 in (58 cm) | 9 in (23 cm) |
| E | 50–52 in (127–132 cm) | 56 in (142 cm) | 24.25 in (62 cm) | 9.25 in (23 cm) |
Measurements are approximate and depend on your washed gauge. The armhole bands slightly reduce the finished openings.
Materials
- Worsted-weight alpaca-blend yarn in the approximate quantity listed below.
- US 8 / 5 mm knitting needles for the main fabric.
- US 6 / 4 mm knitting needles for the hem ribbing.
- US 6 / 4 mm circular needle, approximately 16 inches long, for the neckline and armholes; a longer cable may be used with the magic-loop method.
- Two stitch holders or lengths of smooth waste yarn.
- Stitch markers, including one for the beginning of a round.
- Yarn needle.
- Scissors.
- Measuring tape.
A circular needle can also be used to work the flat panels. Simply turn the work at the end of every row instead of joining.
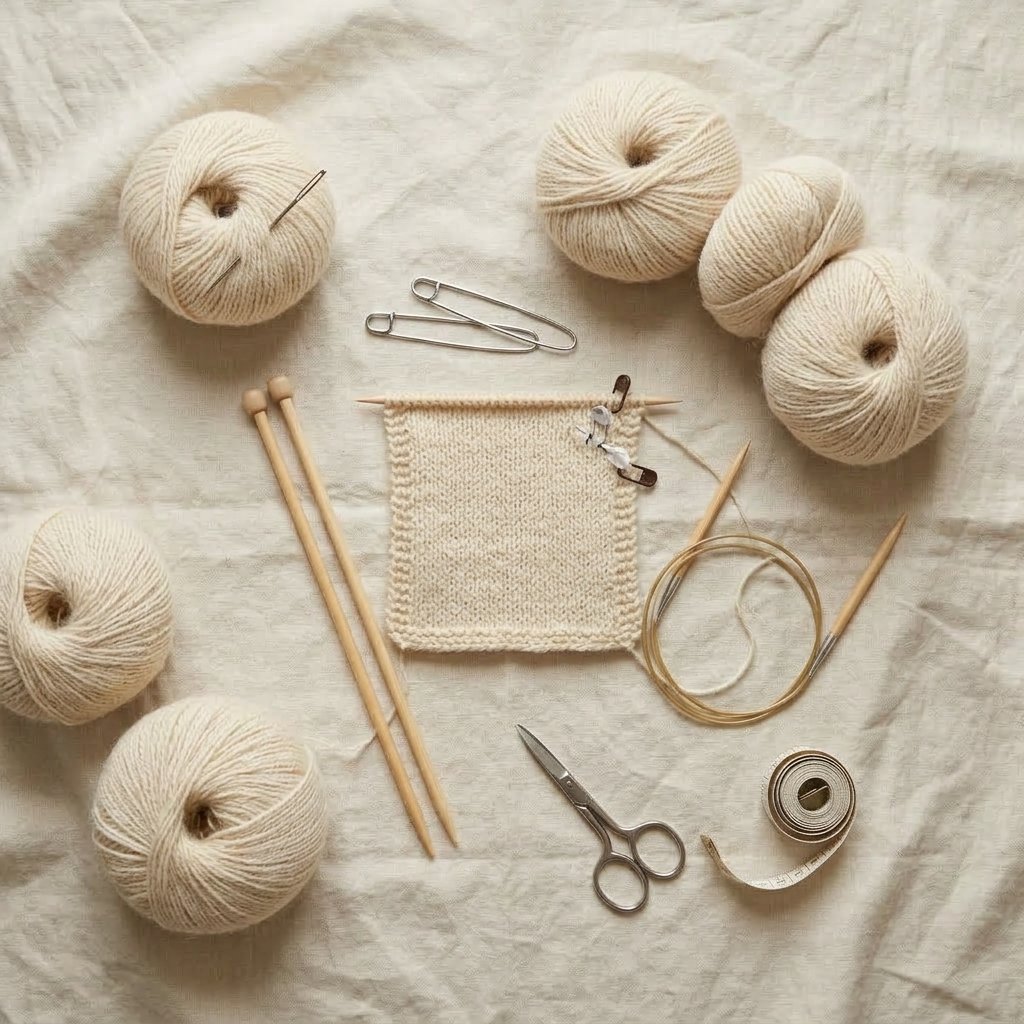
Needle Sizes
Start with US 8 / 5 mm needles for stockinette and US 6 / 4 mm needles for ribbing.
If you have too many stitches in 4 inches, try a larger main needle. If you have too few, try a smaller one. Once you find the main needle size that meets gauge, use a needle approximately 1 mm smaller for the ribbing.
Yarn
Choose a worsted-weight yarn, category 4, that produces the required gauge with a soft but stable fabric. An alpaca-wool blend is a good starting point for the look of this vest.
Suggested quantities include an allowance for swatching and finishing, but individual yarns vary.
| Size | Estimated yarn |
|---|---|
| A | 700 yards (640 m) |
| B | 800 yards (732 m) |
| C | 900 yards (823 m) |
| D | 1,000 yards (914 m) |
| E | 1,100 yards (1,006 m) |
Warm ivory, oatmeal, pale gray, and soft camel all suit this simple design. Choose a lighter shade for your first version so the shaping stitches are easier to see.
If substituting pure alpaca or another fiber, check how the washed swatch stretches and hangs before committing to the garment.
Gauge
18 stitches and 24 rows = 4 inches (10 cm) in stockinette stitch, using the larger needles, after washing and drying flat.
Cast on 30 stitches and work a swatch at least 6 inches tall. Wash it according to the yarn label, dry it flat without stretching, and measure the center.
Both stitch and row gauge matter. Stitch gauge controls the width; row gauge controls the armholes and neckline depth because those sections use specific row counts.
Abbreviations
- k: knit.
- p: purl.
- st(s): stitch(es).
- RS: right side, the outside of the garment.
- WS: wrong side, the inside of the garment.
- k2tog: knit 2 stitches together; decreases 1 stitch.
- ssk: slip 2 stitches individually knitwise, return them to the left needle in their slipped orientation, and knit them together through the back loops; decreases 1 stitch.
Before You Start
- Instructions are written for A (B, C, D, E). Circle your size before starting.
- Stockinette worked flat means knit on RS rows and purl on WS rows.
- All cast-on counts are even, allowing the hem to use a simple k1, p1 rib.
- Bind off stitches without pulling them tightly.
- When shaping the neckline, work the two shoulders separately.
- Keep a separate row count for the lower body, armhole section, and shoulder sections.
- No crochet stitches are used in this pattern.
Easy Sweater Vest Knitting Pattern: Step-by-Step
Part 1 — Back Hem
With the smaller needles, cast on 92 (102, 110, 120, 128) sts using a stretchy cast-on such as the long-tail method.
Rows 1–12: Repeat k1, p1 across every row.
The hem should measure approximately 2 inches. If your ribbing row gauge differs, prioritize the 2-inch measurement and finish after an even-numbered row.
Part 2 — Back Lower Body
Change to the larger needles. Restart the row count for this section.
Row 1, RS: Knit every stitch.
Row 2, WS: Purl every stitch.
Repeat Rows 1–2 until you have completed 66 (66, 72, 72, 78) stockinette rows.
The piece should measure approximately 13 (13, 14, 14, 15) inches from the cast-on edge, including the hem. Finish with a WS row.
Part 3 — Back Armhole Shaping
Restart the row count at Armhole Row 1.
Row 1, RS: Bind off 4 sts, then knit to the end. 88 (98, 106, 116, 124) sts.
Row 2, WS: Bind off 4 sts, then purl to the end. 84 (94, 102, 112, 120) sts.
Row 3, RS: K1, ssk, knit to the last 3 sts, k2tog, k1. 82 (92, 100, 110, 118) sts.
Row 4: Purl across.
Row 5: Repeat Row 3. 80 (90, 98, 108, 116) sts.
Row 6: Purl across.
Row 7: Repeat Row 3. 78 (88, 96, 106, 114) sts.
Rows 8–42 (44, 46, 48, 50): Continue in stockinette without further armhole decreases. Finish with a WS row.
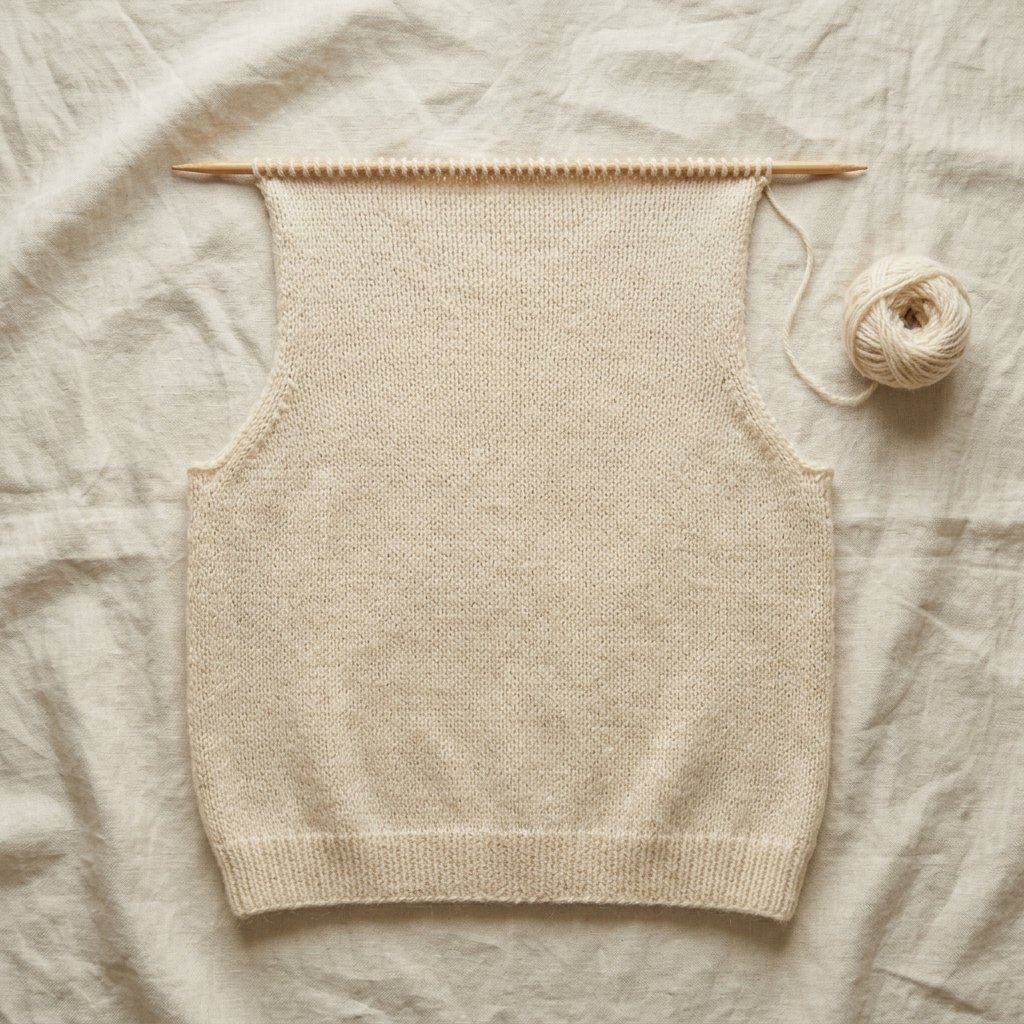
Part 4 — Back Neck and Shoulders
On the next RS row, divide the back as follows:
Knit 23 (27, 30, 34, 37) sts. Slip the next 32 (34, 36, 38, 40) sts onto waste yarn without working them. Join a second ball of yarn and knit the remaining 23 (27, 30, 34, 37) sts.
This dividing row is Shoulder Row 1. Work each shoulder separately over six rows in total, including that row.
Shoulder Row 2, WS: Purl across the shoulder stitches.
Shoulder Row 3, RS: Decrease 1 stitch at the neck edge, keeping one stitch between the decrease and the edge. Knit the remaining stitches.
If the neck edge is at the beginning of the row, work k1, ssk, then knit to the end. If it is at the end, knit to the last 3 sts, then k2tog, k1.
Shoulder Row 4: Purl across.
Shoulder Row 5: Repeat Shoulder Row 3.
Shoulder Row 6: Purl across.
You now have 21 (25, 28, 32, 35) sts on each shoulder. Bind off each shoulder knitwise on its next RS row.
The center back-neck stitches remain on waste yarn for the neckband.
Part 5 — Front Hem, Body, and Armholes
Work the front exactly as the back through Armhole Row 7. You will have 78 (88, 96, 106, 114) sts.
Continue in stockinette through Armhole Row 26 (28, 30, 32, 34), ending with a WS row.
The front neckline begins earlier than the back neckline to create a rounded opening.
Part 6 — Front Neck and Shoulders
On the next RS row, knit 29 (33, 36, 40, 43) sts. Slip the next 20 (22, 24, 26, 28) sts onto waste yarn without working them. Join a second ball of yarn and knit the remaining 29 (33, 36, 40, 43) sts.
This dividing row is Front Shoulder Row 1. Work each shoulder separately.
Row 2, WS: Purl across.
Row 3, RS: Decrease 1 stitch at the neck edge, keeping one stitch between the decrease and the edge. Use k1, ssk at a beginning neck edge, or k2tog, k1 at an ending neck edge.
Row 4: Purl across.
Rows 5–17: Continue in stockinette, decreasing 1 stitch at the neck edge on every RS row: Rows 5, 7, 9, 11, 13, 15, and 17.
You have worked eight neck decreases in total on each shoulder. There are now 21 (25, 28, 32, 35) sts on each side.
Rows 18–22: Continue in stockinette without decreasing, ending with a WS row.
Bind off each shoulder knitwise on its next RS row.
The front and back have the same total armhole row count: 48 (50, 52, 54, 56) rows, before the shoulder bind-off rows.
Assembly
Block the Panels
Before sewing, wash the panels according to the yarn label. Support the wet fabric as you lift it, gently remove excess water, and lay the pieces flat.
Arrange the front and back to matching widths and lengths without stretching. Let them dry completely.
Check that the corresponding shoulder edges have the same stitch count and that the lower-body side edges match.
Sew the Shoulders
Place the front and back with their right sides facing outward and shoulder edges aligned. Sew corresponding bound-off stitches together with a flat, flexible seam.
Join all 21 (25, 28, 32, 35) shoulder stitches on each side. Leave the neckline completely open.
Sew the Side Seams
Use mattress stitch to join each side from the bottom hem to the beginning of the armhole shaping.
Work approximately one stitch in from each edge. Pick up the horizontal bar between stitches on one panel, then the matching bar on the other, alternating sides.
Tighten the seam gradually after several stitches. Stop at the underarm bind-off so the armhole remains open.

Neckband
Use the smaller circular needle. With the RS facing, begin at one shoulder seam and work around the neck opening.
- Pick up and knit 16 sts down the first front-neck edge.
- Knit the 20 (22, 24, 26, 28) held center-front sts.
- Pick up and knit 16 sts up the second front-neck edge.
- Pick up and knit 4 sts down the first short back-neck edge.
- Knit the 32 (34, 36, 38, 40) held center-back sts.
- Pick up and knit 4 sts up the remaining short back-neck edge.
Total: 92 (96, 100, 104, 108) sts.
Distribute the picked-up stitches evenly along each shaped edge. Avoid picking up an additional stitch at a shoulder seam unless you need to close a visible gap.
Place a beginning-of-round marker and join to work in the round.
Rounds 1–6: Repeat k1, p1 around.
Before binding off, spread the stitches along the cable and check the opening. The band should lie flat and stretch comfortably over the head.
Bind off loosely in pattern: knit the knit stitches, purl the purl stitches, and pass each previous stitch over the newly worked stitch.
If the opening is tight, undo the bind-off and use a stretchier bind-off or a larger needle for that step. If the entire band pulls inward excessively, revisit the pickup tension and count before finishing.
Armhole Bands
Use the smaller circular needle. Begin at the underarm seam with the RS facing.
Pick up and knit approximately 80 (84, 86, 88, 92) sts evenly around the opening.
Use approximately one stitch per bound-off underarm stitch and three stitches for every four rows along the upright edges. Spread the pickups smoothly across the short sloping sections.
The listed totals are starting targets. If your blocked edge needs a small adjustment to lie flat, keep the final count even and use the same count on both armholes.
Rounds 1–4: Repeat k1, p1 around.
Bind off loosely in pattern. Repeat for the second armhole.
Finishing
Weave yarn ends into the inside of the fabric or along seam allowances. Change direction once or twice so the ends stay secure without creating bulky knots.
Give the finished vest a gentle wash or damp finishing treatment appropriate for the yarn. Lay it flat, smooth the bands, and let it dry fully.
Check the neckline, underarms, and shoulder seams. The bands should rest against the fabric without ruffling, and the seams should stretch gently with the garment.
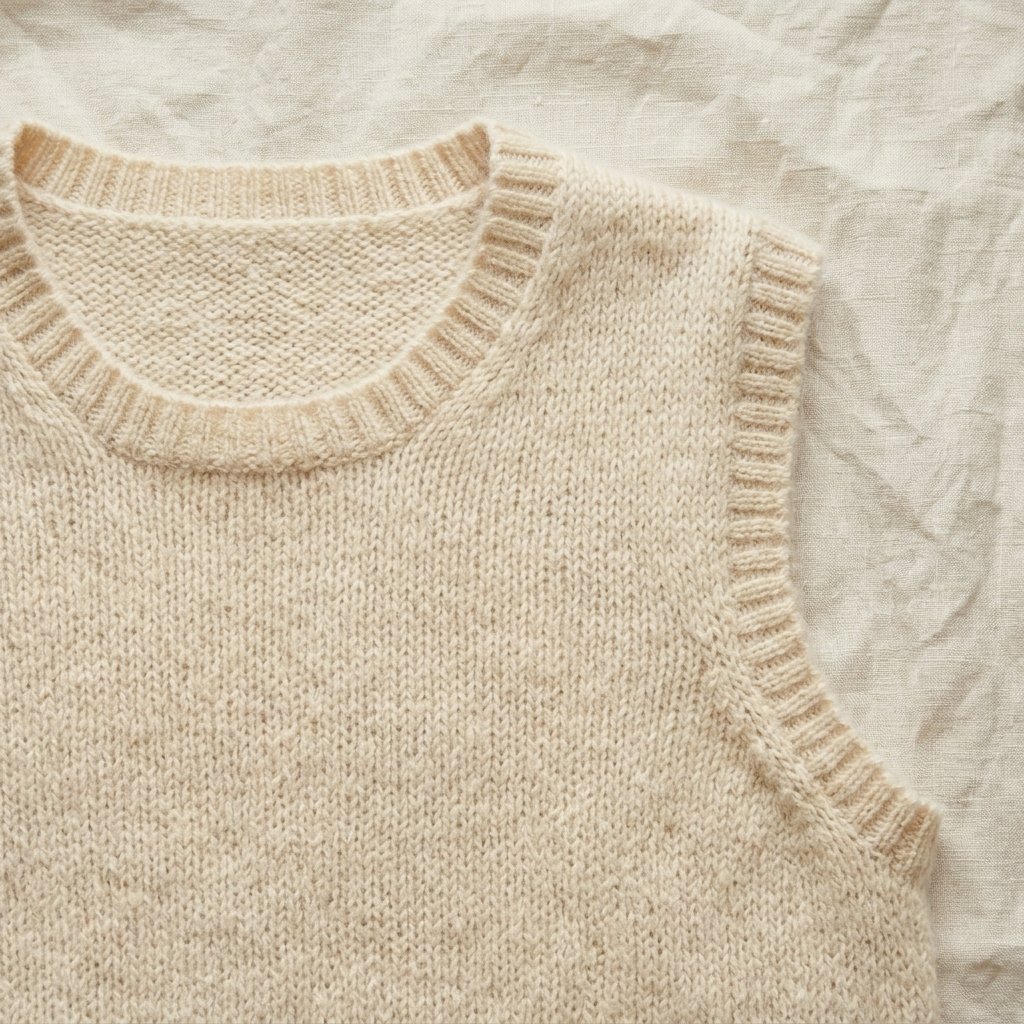
Finished Measurements
The finished chest measures approximately 40 (44.5, 48, 52.5, 56) inches, or 102 (113, 122, 133, 142) cm.
Length from the lower hem to the shoulder is approximately 21 (21.25, 22.75, 23, 24.25) inches, or 53 (54, 58, 58, 62) cm, excluding any neckband height above the shoulder line.
Tips and Customization
- Make it longer: Add 6 stockinette rows to both lower-body panels for approximately 1 extra inch. Keep the armhole and neckline instructions unchanged.
- Create a shorter version: Remove an even number of lower-body rows from both panels. Measure your preferred hem position first.
- Try a contrast hem: Work the ribbing in a second color, then switch to the main color for the body.
- Choose a smoother finish: A smooth wool blend gives clearer stitch definition and less halo than a fluffy alpaca blend.
- Check pickups early: After two band rounds, lay the edge flat. It is easier to correct a tight or ruffled band before binding off.
Changing the body length also changes yarn usage. Keep extra yarn available for a longer version.
Frequently Asked Questions
Is this easy sweater vest knitting pattern suitable for a first garment?
It can be, if you already know knit and purl stitches and are ready to practice decreases, seaming, and picking up stitches. The separate panels make it easier to check measurements as you go.
Is this a crochet pattern?
No. This vest uses knitting needles, stockinette stitch, and knitted ribbing. A crochet version would need a different stitch structure and gauge.
Can I use straight needles?
Yes, for the front and back if the stitches fit comfortably. The neckline and armhole bands are written for circular needles.
Why do the panel edges curl?
Unfinished stockinette edges naturally curl. Blocking helps you handle the panels, and the seams and ribbed bands stabilize the finished edges.
Can I knit this with a different yarn weight?
Only if the yarn produces the stated gauge and a suitable fabric. Otherwise, the stitch counts will create a different size. Swatch before substituting.
How do I avoid a tight neckband?
Keep the pickup tension relaxed, check the opening before finishing, and bind off with enough stretch. Do not force the neckline over your head if it feels restrictive.
Save This Pattern for Your Next Cozy Project
Save this vest to your knitting or handmade wardrobe board on Pinterest so you can return to the instructions when you are ready to cast on.
Looking for Your Next Crochet Project?
Love this project? Explore Cute Stitch Studio’s premium crochet patterns for more cute, cozy, gift-worthy, and beginner-friendly handmade ideas.